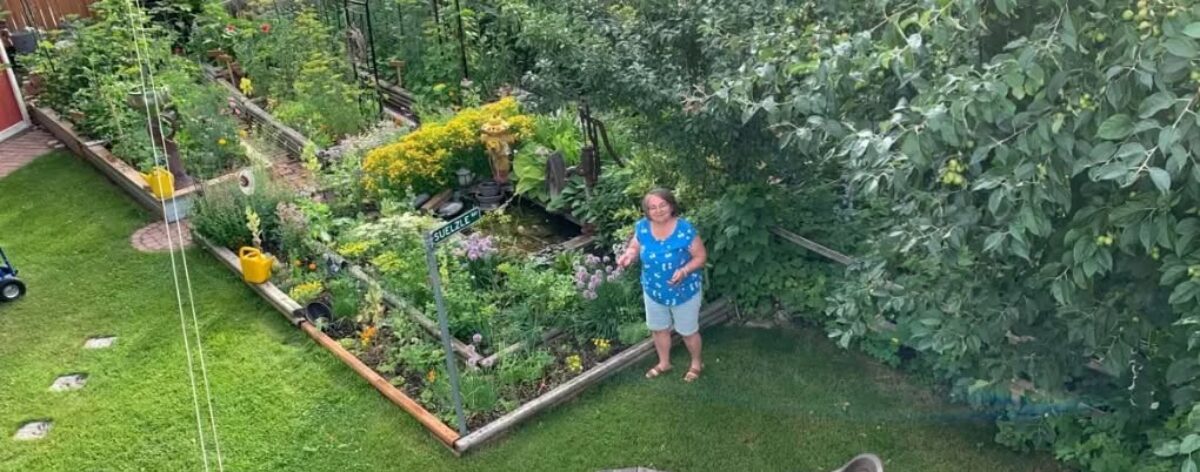
Home Grown Tomatoes

For years this quote was over my kitchen door leading out to the garden. Sadly I had to take it down a couple of years ago to repaint the wall, but its in the plan to replace it. It is an essential life truth.

Is there a difference between home grown tomatoes and store bought tomatoes?
Oh My! YES! The taste of a homegrown tomato is UNlike anything else this world has to offer. And a store bought tomato tastes nothing like it, even when grocers say they are “vine ripened” . . . . So, speaking of ‘vine ripened, let’s talk about that for a minute: what it is and what it is not. Ostensibly, that term should be clear right? It means ripened-on-the-vine. . . . Right? Allowing fruits to ripen on the plant before harvesting ensures the completion of its growing cycle, implying that all of nature’s nutrition is intact. But don’t be fooled when you see a sign that says “vine ripened” with tomatoes that are together on a small branch. The whole truth is that those tomatoes ripened while still attached to that little branch. No one says that branch was on the plant or that the plant was still in the ground at the time they ripened, so yesssss, okay – by definition I guess we cannot dispute it, but by its truest definition – NO! They are NOT necessarily ripened on the plant. I hate when I see that term, because if we believe everything we read we’ll fall for the implication that THESE tomatoes are somehow better than other tomatoes we see on the store shelf without the ‘vine ripened’ sign. I seriously doubt it. In most cases, the only difference is that little branch – those 4 or 5 tomatoes that are clustered together. And No, in most circumstances they were not ripened ON a plant which was still living.

In central Alberta even in our home gardens, it is not possible for all of our tomatoes (specifically Indeterminate), to ripen on the plant before the season is over, so we pick the last of them green, allowing them to ripen in their own time. It’s the best we can do with approaching winter. Tomatoes naturally produce their own ethylene gas which causes them to slowly redden as they ripen at their own pace – even once they’re picked. This of course takes time. To speed up the process of ripening, many companies lock immature green tomatoes in an ethylene-filled chamber. This seems like a good solution on the surface, but it merely forces them to turn red, not affecting the “ripening” process enough. The result is that yes, they may be red, but they never had the chance to develop flavour – which is usually a natural companion to ripening AND an indicator of nutritional value. If like me, you have to pick some of your tomatoes not quite red or still green, allow them to ripen in their own time, the way nature designed. You will be richly rewarded by the homegrown tomato-taste, and its associated nutritional value.

Okay, thank you for the chance to rant a little – on one of my pet peeves. I’ll set that aside for now.

“A tomato may be a fruit, but it is a singular fruit. A savoury fruit. A fruit that has ambitions far beyond the ambitions of other fruits.” – E. Lockhart

Several years ago I decided to put more effort into eating IN THE SEASON. The concept is encouraged by a directive in what I consider ‘scripture’. “All wholesome herbs God hath ordained for the constitution, nature and use of man – Every herb in the season thereof, and every fruit in the season thereof . . . .” 1 This is good counsel indeed, especially since we understand now that nutritional value begins to dissipate within the hour after harvest. The fresher the produce, the more nutrition it contains, so eating it in the season we are guaranteed to have the best that nature can offer. Keeping that tomato for months in it’s “fresh” state, gives us the outward impression that it is nutritional, but in actual fact it is impossible. In my opinion, we use the word “fresh” too loosely in this context.

Based on tomato retail sales, the average North American eats almost 30 pounds of tomatoes a year. If you like pizza or spaghetti, you probably eat more. If you like salsa, you probably eat even more. If you don’t like tomatoes, then I’m pretty sure I ate enough to make up for you. But what about those of us who grow and preserve our own? How would stats ever reflect that? I’m pretty sure no statistician keeps track of how many plants I grow (this year, 28 plants), or the fact that we eat FRESH tomatoes every single day from mid July through till the last one gets eaten in late November. I do not ever buy tomatoes from my grocery store or anywhere else off season, because they are almost always supremely disappointing. So based on sales of ‘fresh’ tomatoes, I wouldn’t even be counted, but make no mistake – our household consumes a LOT of tomatoes.

Let’s get it over with and off the table. Yes tomatoes are really ‘fruits’, and yes we eat them as vegetables. Why? Simply because their natural ‘sugar’ content is much less than other fruits, making it more suitable to be used in a salad or main dish rather than a dessert. In fact, because the seeds are inside (like a blueberry, gooseberry, currant or grape) the tomato is actually a ‘berry’. It doesn’t make any difference, we’re still gonna eat tomatoes as vegetables – but it is interesting.

where do tomatoes come from?

Tomatoes originated in South America where the indigenous people cultivated them to use in their cooking. Not surprisingly, it was the Spanish who brought them to Europe and ultimately to the rest of the world. Within a short time, they became very popular in Spain, and were distributed throughout the Spanish colonies in the New World, including the Caribbean, and Central America, even as far away as the Philippines. They grow easily in warm climates so it was an easy fruit to adopt, and it literally changed the way the world ate.

In Europe it took a little longer, as they were regarded with suspicion for a number of reasons. They were identified as part of the nightshade family, and though the fruit was edible, it was well understood that the plant itself was dangerous; that was hard for many to get over. As well, wealthy Europeans often ate off pewter plates. Pewter being a metal alloy includes tin, copper, sometimes lead, and sometimes silver. The acid in tomatoes reacts with many metals and lead poisoning could result when lead is present. It’s not the tomato’s fault, but the chemical reaction with tomato acid and the pewter dishware would definitely come to everyone’s attention. Consequently, in England and her colonies tomatoes were considered ‘unfit’ to eat. In fact in most of Europe (even Italy) for almost a century, tomatoes were grown primarily as an exotic ornamental plant in flower gardens. Ironically, the poorer people ate off wooden plates or pottery, so that chemical reaction would never have been an issue for the more common folk. Who could have guessed, that simply using clay dishes would make tomatoes wonderful, while using pewter dishes could make them deadly?

The plant’s ability to adapt and even to mutate, creating new and different varieties contributed to its spread throughout the warmer European countries. Still, it took a very long time for the fruit as a ‘food’, to gain favour among the general European population. Even in areas where the climate was perfect for growing them, the fact that they grew naturally along the ground suggested ‘low status’. Funny how people can be that way. Still it was a beautiful fruit, and for the rich, it became a tabletop decoration – not eaten, just ‘for looking’. Although tomatoes were embraced sooner in Spain and Portugal, it took nearly two hundred years before they were incorporated solidly into the bigger Mediterranean cuisine. It was the invention of pizza in Naples, Italy in the late 19th century, that endeared tomatoes to Italians. By then, fears surrounding them had begun to fade, and tomatoes had grown immensely popular in America.

In the east, it was a very different story entirely. From the Philippines (under Spanish colonialism), tomatoes spread to southeast Asian and then to the entire Asian continent. It was brought to India by Portuguese explorers and exploded in popularity as it was perfectly suited to the climate. Today, China is the highest consumer of tomatoes in the world, and India is second, but the sheer population of those two countries (being the most populace in the world) would account for that. Per capita, one might expect Italy to score the highest for consumption because we all have pizza, spaghetti, lasagna in mind, but in actual fact – Egypt, Turkey, Iran and Uzbekistan are all ahead of Italy. Yes, tomatoes play a big role in Mediterranean cuisine, but evidently they are pretty crucial in the cuisine of the Middle East as well. But the big surprise (to me at least) is the third highest consumer – the United States. I suspect ketchup has something to do with that.

Highest Consumption of Tomatoes in the World:
1. China
2. India
3. United States

and Now?

Tomatoes are the king of ‘versatility’, present in almost all cuisines. They can be used in soups and noodle dishes – like in China; curries – like in India; pasta dishes like in Italy; salads, grilled, gazpacho, and various stews in Europe and the Mediterranean; stewed – like in the Middle East; salsas – like in South and Central America; goulash in Eastern Europe – and an amazing cross over of all the above in our global adaptation to different cuisines. EVERYONE eats tomatoes.

Highly cultivated the world over – even in Russia and Scandinavia, tomatoes are one of the most popular backyard garden vegetables in North America. In northern climates like our own, they must be started indoors to extend the season long enough to make them viable, but that is not a problem when every commercial greenhouse grows thousands of them.

Most gardeners would benefit from growing both types of tomatoes, but they really should know exactly what they are getting in order to accommodate its growing preferences best.

The varieties are endless, but there are essentially two distinct types of tomatoes: determinate and indeterminate. It’s easy to remember which is which because a ‘determinate‘ tomato is one that has a finite or ‘determined‘ size, and amount of fruit. It is a smaller plant, ‘determined‘ to grow to a ‘pre-determined’ height, with all its fruit coming on in a short amount of time – perfect for a climate like ours with a short growing season. It grows easily in a pot, or within the confines of a tomato cage, so for those who need something easily contained, it’s your best option.

An INdeterminate tomato on the other hand, will grow and grow and grow, continuing to produce new fruit until the winter kills it. In its native land or in warmer climates, it could grow for years, and left to its own it will be a trailing plant, continuing to grow along the ground. Everywhere the stem touches the ground is a potential spot for the plant to grow new roots, conceivably having innumerable new independent plants all along the trail. I have no idea how long it could grow, or how it would eventually die in its native Central and South America. In a temperate climate (with distinct seasonal changes) like our own, it is the winter that kills it, but during the growing season it never stops reaching to new heights.

are tomatoes good for you?

almost 2 1/2 pounds this tomato will be dinner with a loaf of sourdough bread. It deserves a thick slice of toasted sourdough and some fresh pesto mayo. A late summer treat. One slice makes a whole sandwich.
These Romanian Giants are the best tasting tomatoes I’ve every grown.

YES! In a word, they sure are! Tomatoes are nutrient-rich powerhouses, packed with vitamins, minerals, and antioxidants. Their secret ingredient is the antioxidant LYCOPENE, to which we owe the beautiful strong red colour. They reduce the risk of heart disease and cancer, improve eye health, digestive health, and the risk of osteoporosis. In the kitchen in they offer immense versatility and flavour.

* Fresh (as in uncooked) tomatoes are rich in vitamin C – a powerful antioxidant which is important for skin, bones, and connective tissue. It also promotes healing and helps the body absorb iron.
* Fresh tomatoes are rich in Potassium – needed to build proteins in the body, including muscle.
* Fresh tomatoes are rich in Vitamin K – required for blood to clot.

Like most fruits and vegetables, it is preferable to eat tomatoes FRESH, straight out of the garden to get the best nutrition and benefit. But that doesn’t mean that eating tomatoes grilled, fried, roasted, sauced, dried or juiced aren’t wonderfully good for us too. One of the best things about tomatoes is their versatility in adapting easily to an infinite number of different cooking styles, and using them in their many forms and styles opens up their full range of nutritional benefits.

There’s a very good reason they’re so popular in dishes ranging from Greek Salad to Thai Curry to Italian pasta to Mexican Pico de Gallo to toasted tomato sandwiches. Tomatoes have a unique flavour that isn’t found in any other vegetable. They are acidic, but less sour than other acidic fruits. That acid causes the colour to remain bright, and contributes to the texture of the dish it is in, including acting as a tenderizer.

That’s at least — in part — why so many cultural cuisines such as Italian, Mexican, Middle Eastern etc rely on tomatoes in such a wide array of dishes.   Foods like pasta and pizza sauces, stews, and casseroles rely on tomatoes. Because North American cuisine is made up of dishes and flavours from numerous cultures, it is no wonder we find ourselves reaching for tomatoes so often in the kitchen. 

Growing

In Canada, we generally plant tomato plants outside after all danger of frost is over. Starting seedlings indoors months in advance, is a must in Alberta, and if we cannot personally do so, not to worry – every greenhouse has a huge assortment to pick from. In Alberta, plan to plant them indoors by mid to late March at the latest. If you plant in February, they’ll be bigger, but sometimes that gets difficult to handle in the house.
Expect to put them outside mid to late May, after all danger of frost has passed. You can grow them well into September in a typical year, but be prepared to cover up on cold nights, or to pick in a hurry if a cold front settles in.

Tomatoes love the sun so pick the sunniest spot in your garden for them. Conventional wisdom suggests that crops be rotated every year, and for most vegetables I do that, but for my tomatoes I’m a little more lax. In most backyard gardens its not always practical to change locations as the “sunniest” are limited by the house, garage, trees or neighbours house, garage, and trees. In mine (as in most), if they’re to have the sunniest spot, I am limited in my options. I pacify myself a little by remembering that in their native habitat tomatoes are perennial – every growing. They extend their vines along the ground, growing new roots where their stem touches the soil – literally growing into a new plant. Talk about nepotism eh? LOL. They aren’t physically moved, they physically move themselves – but they don’t move very far. At the end of the day, we can only do the best we can do. So let’s keep the idea of changing garden spots in our heads, and do our best to accommodate it BUT acknowledge our limitations and work within them.

Growing in the same SPOT is not necessarily the same as growing in the same SOIL. My garden is set up for tomatoes to be in one or two spots, each with semi permanent trellises to tie them to. For this reason, my attention to soil amendment is important as they are heavy eaters. Rotating faithfully without taking proper care of your soil is only half the job. Adding new compost and other organic matter every spring replenishes the soil’s fertility, and is my best line of defense against pests and disease.  So far, I have been able to avoid any diseases by proper care and continual amendment and I do move them when I can,

Planting

When I plant a new tomato plant, I dig a DEEP hole – deep enough to bury all but the top 6 – 8 inches of the plant if possible. I put a raw egg in the bottom of the hole, crack it with my trowel and place the plant in the hole, laying it slightly if necessary to get as much of the stem below the surface as I can. This gives the plant a stronger base especially if your stem has gotten a little spindly before transplanting outdoors. If you look closely at the stem of a tomato plant, you’ll notice thousands of little ‘hairs’ called “trichomes’. These have a distinctive ‘smell’ which is repugnant to pests, and their texture makes it difficult for ants and other insects to climb. You’ll also notice numerous small bumps or nodules along the lower stem – among the trichomes. These are potential root starts which will grow roots if that part of the plant touches soil. Burying the stem will allow all these little nodules to develop into roots, strengthening the base of plant. The broken egg adds protein to nourish the new plant as it grows, and calcium as the shell breaks down – which is an important nutrient for tomatoes.

Throughout the growing season, adding crushed egg shells to the base of your tomatoes adds the “promise of continual calcium”, and a place that soft bodied cutworms or slugs are deterred from gliding across easily. Calcium is important and egg shells take an entire season to break down, so its a long term investment, so plan to add them often and throughout the growing time. Mulching with dry grass or compost around the base of your plants will keep water from evaporating quickly and will add nutrients as it breaks down.

Tomatoes are a vine, but unlike other vines they don’t naturally climb up. They want to trail. Gardeners want them growing UP to keep free air flow and to make best use of ground space. Stake them and tie frequently as they grow, securing them continually with cloth strips or clips. I trim all lower leaves as the plant grows, at least for the lower 6-8 inches. As the plant grows and I can spare the room, I prune the lower leaves higher – as high as 12 inches. This prevents water from splashing up onto the leaves (which may cause decay and introduce disease), and allows light penetration and free air flow making for a healthier environment.

The tomato usually has a single main stem, but every branch has the potential of having a new stem grow out of its ‘elbow’, creating many other stems and directions for the plant to take. These additional stems are rarely suitable for staking purposes, so clip them out when you can. Sometimes I keep only one stem, but often I will allow two or three stems to thrive, tying them securely as they grow. If your plant was allowed to grow for years and take over your garden, you might want to leave many of those sub stems on, but because of our shortened season, it is advisable to reduce them – encouraging the plant to put more energy into fruiting rather than building an empire.

Indeterminate tomato plants can easily grow 8-10 feet high, even in an Alberta summer. About the beginning of August, I begin topping mine off – pruning the growth that comes from the top, encouraging growth on the existing plant. By mid August I begin pruning all branches without fruit and the ends of the branches with fruit – reducing the energy going to green growth and redirecting it to existing fruit.

I plant a few cherry type tomatoes that will start producing early, ripening by mid July for early eating, and then bigger tomatoes for later eating and eventual harvest. That way I stretch the season of eating tomatoes out as long as I can.

Trouble Shooting

Probably the most common problem seen in tomatoes is Blossom End Rot. For many years it was believed that the cause was a lack of calcium, but this is only partially true. In actual fact, most of the time, good quality soil in our area of central Alberta, has a sufficient amount of calcium in it. The plant however, has been stunted in its ability to absorb that calcium due to inconsistent watering.

Another problem, especially in larger tomatoes, can be cracks along the top – stem end of the fruit. This is caused by inconsistent watering – especially when the fruit is forming. The only thing you can do is try to avoid the floods and droughts. Mulching will help maintain a good moisture level.

blossom end rot appears as a dark sunken spot on the blossom end (bottom) of the tomato. It is not a disease, but rather a physiological disorder caused by calcium deficiency due to inconsistent watering or rapid growth. It is not reversible, but it can be prevented. Remove the affected fruit, and commit to watering more consistently.

What should you do? Remove the affected fruit, its ugly anyway. And commit to a more healthy soil environment.

Causes and Symptoms:
Calcium deficiency in developing fruit.
Inconsistent watering, usually in the form of fluctuations in watering: over watering the drought can disrupt calcium uptake.
Over stimulating growth with over fertilizing may cause rapid growth in plants, and leading to an inability to absorb calcium.
It will start as a dark spot at the blossom end of the tomato, and progresses to a sunken, brown or or black area disfiguring the plant.

Prevention and Management:
Maintain consistent moisture levels, especially during fruit development. 
Keep your soil healthy with consistent additions of compost and mulch. Make egg shells and bone meal a regular addition to your compost or directly add CRUSHED egg shells frequently.
Avoid over fertilization.

Harvesting when they’re ripe

almost, but not quite ready. Give it another few days. These tomatoes are about 2 pounds each. Romanian Giants. As most heritage types, they’re not the prettiest tomatoes on the block, but definitely the most delicious I’ve ever grown. I’m committed to them.

Most of my earlier tomatoes are picked purely for eating out of hand or to add to garden salads. When the bigger ones start ripening and you’re picking to slice for a sandwich, look for firm texture and that beautiful red colour we all love. When the numbers increase and you can harvest more, then roast, grill or fry them to use as building blocks for pasta, soup, pizza, or to use as simple sides next to your favorite entrees. Two of our favourite ways to eat fresh tomatoes are on a toasted sandwich with pesto mayo, and in a fresh tomato bruschetta on focaccia or sour dough bread. Fresh tomato soup is a dish I wait all year for. For months not a single day goes by that tomatoes are not a major part of our meals. We’ve waited all year long for this season and I do not waste it.

When your tomatoes are ripening faster than you can use them – happy day. That’s when you look for ways to preserve the excess:
* can them in quarts or pints,
* make salsa to eat fresh or can,
* make roasted tomato sauce,
* freeze them whole for short term storage,
* freeze your roasted tomatoes,
* dry roast them in your oven with garlic, oil and a few herbs (my version of ‘sundried tomatoes‘),
* or if you have an excessive amount, dehydrate them in slices to use for tomato powder.

Store at room temperature – in the kitchen – where you can see them and constantly pick out the ripe ones to use. They retain they’re distinctive acid-base flavour at room temperature. Never ever, ever store them in the refrigerator unless they’re ripening too fast and you intend to cook them right away anyway. Refrigerating them wrecks the taste of tomatoes and softens the texture. Once they’ve been refrigerated they’re only good for cooking.

On the other hand, a cut tomato must be refrigerated. Some say that storing it cut side down and wrapped in plastic is the best way, but time if of the essence. A day or two at most is all you can expect it to stay good.

Harvesting when they’re green

At the end of the season, covering your tomatoes with a big sheet for the night, is good protection for a short term frost. And its worth it, if there’s promise of another week or two of warm September weather. But if you have to do that every night, its time to give up and concede that summer is over. Get some big boxes out there and pick your tomatoes. Pull the plants out and turn upside down to see all the potential harvestable tomatoes. Twist and pull them off the stem and gently lay in the box. I separate the partially ripe ones so that I can keep a closer eye on them. Store them at room temperature.

Don’t waste anything: I prune the smaller branches off the main woody stalks and mow them up to add to our end-of-season compost. The big stalks I put in the city compost as they’ll take too long to decay in my little garden set up.

Saving seed

When you have a heritage tomato you’re in love with, do yourself a favour and save its seed for planting next late winter or early spring. Easy to do in a fully ripe tomato: simply use a spoon to scoop out some seed. Rinse in a fine sieve to get rid of additional pulp and lay the seed on a piece of paper towel in a single layer. Allow seeds to fully dry out on the paper towel, then roll it up, label the type and year with a black felt pen and store in in plastic or paper bag with your other seeds. That’s it. It really is that simple.
When you’re ready to plant, gently remove the seed from the paper towel. If it doesn’t want to come off, no problem – just bury the piece of paper with the seed. It will germinate just fine.

our community garden anthem lol

Preserving tomatoes

CANNING: See my post Stocking Up: Food Preserving – Canning 101 for suggestions on canning tomatoes. Specifics: Blanching is important to help you peel them.

The time table for canning tomatoes in a hot water bath is 35 minutes for a pint, 45 minutes for a quart.
Use 1 teaspoon salt in a quart and 1/2 teaspoon in a pint.
I also use 1 tablespoon lemon juice for quarts and 1/2 tablespoon for pints to up the acid level just a little. A friend recently told me that she adds coarsely ground peppercorns to her canned tomatoes which I thought was a wonderful idea. I’ve done it ever since. I love pepper, it adds additional flavour without dominating the dish. Might be my new thing.

FREEZING: When I freeze tomatoes I’m usually in a hurry – so I don’t prep them at all. I just put them whole in a freezer bag and try to lay them flat in the freezer till they freeze. I label them with a date of course, and I try to use them that first winter to free up freezer space and because freezing has a shorter shelf life than we might imagine.

tomato slices on a dehydrator rack

DEHYDRATING: is not my first choice for preserving tomatoes, and I would only use it as a method if I had lots to spare. Slice fresh ripe tomatoes, remove excess water and seeds, lay slices flat on your dehydrator racks. I try to keep the temperature around 110 degrees. It will take a good 24 hours+ to dry fully. When they’re crisp enough that you can break in half, they’re done. Store in a glass container out of the light. Use in soups or chilies. Or put them into the blender to powder them. Use the powder in place of tomato paste in any recipe.

For years I purchased tomato powder from Thrive Life. Thanks for the introduction.
But with a dehydrator and an excess of fresh tomatoes, make your own!

This post is too long to add tomato recipes, so I’ll create another post for my favourite recipes. I’d love to hear some of yours too.

Homegrown tomatoes are my favourite garden crop. I hope you’ll grow them and discover the value of them and how easy it is to add them to your life. I’d love to hear your comments and your experiences with tomatoes. Below, for your convenience I have inserted screenshots from a workshop I teach in communities on
Growing Tomatoes. You’re welcome to use them as a guideline for your own use in teaching similar workshops.

Warmly,

Cindy Suelzle

footnotes

  1. Doctrine and Covenants 89:10,11 ↩︎

the case for INCLUSION: wheelchair beds in Community Gardens 

At first glance you might think that a simple garden can do little to improve a community, but you’d be wrong. Sometimes, “By small and simple things great things are brought to pass“(1) Through community gardens, neighbourhoods come together, friendships are established, individuals become part of a thing bigger than themselves, and local governments forge new partnerships and connect with their residents.  While it isn’t everyone’s cuppa tea, you don’t have to actually ‘garden’ to see the value in it, or to support one. Community gardens are a low cost way to repurpose wasted, unsightly space. What town or city in their right mind would turn down a well thought out plan to create one?

Take Sakaw Gardens for instance, in the heart of Mill Woods. At summer’s end of 2020, community member Myrna Peters pitched her idea of a community garden to those attending an Annual General meeting. Her idea was to use the space of a former ice rink in the nearby school field. It was enthusiastically embraced by the Millhurst Community League. In fact, a garden had been on their radar since a Needs Assessment Survey in 2015 determined that it was the number one choice for using that space. A volunteer willing to head up the project just hadn’t been found.

I was in that meeting – with other masked strangers sitting six feet apart. It was my first AGM for the community league. My interest was piqued – I was intrigued – I was allured – and I was excited about the possibilities – all at the same time. Like others in 2020, I had been feeling some compulsion toward community service, and had reached out – which is why I was in that meeting. But gardening! Gardening was a personal passion.

The stars aligned that day for a lot of people. For Myrna – her idea landed in fertile ground. For the community executive – they finally found a willing volunteer to head up a project they already supported. For me – this was something I already loved. I followed Myrna out to the parking lot, introduced myself, and gave her my phone number. I promised to do what I could to help her.

To say it all fell together would undermine the hundreds of hours of preparatory work that went into getting it off the ground. But there were a lot of things that did come together. First of all, we didn’t have to invent the wheel, we reached out to other community gardens and asked for help. Nearby Ridgewood Gardens freely shared their experience in getting their community garden up and functional. Coordinator Danna Schumann gave us a tour, highlighting their strengths and pitfalls and shared information that assisted us with our application to the city. They were two years ahead of us, so their experience was fresh and helpful. A handful of community members responded to the call, coming forward with skills necessary to get a project like this put together. We established a team, met regularly, applied for grants, coordinated volunteer efforts, jumped through hoops to comply with city requirements, and established friendships.

Two and a half years into our project, we have not only completed our Phase 1 and Phase 2, but are on track to complete Phase 3 by this spring. What are the different Phases? Well, funny you should ask, as I was just about to tell you.

Phase 1 was the garden itself: complete with 35 plots, some inground, some raised beds. Included were two public gardens, a school plot and a Food Bank plot.

Phase 2 began with an orchard including all things “Fruit”.
Trees: apple, plum and cherry
Bushes: saskatoon, raspberry, currant and gooseberry
Plants: rhubarb and strawberry
It also included a rabbit fence, a rain roof, a dry creek for runoff, picnic tables and benches, as well as a hardpack crushed limestone path connecting 11a avenue to the garden. We call this PAT’S PATH.
And the jewel on Phase 2: six wheelchair garden boxes. We call these PAT’S PLANTERS.

Pat Whaley

Pat Whaley was a long time community volunteer who was a double amputee confined to a wheelchair. She wouldn’t want to defined this way, but it was a fact of her life and it affected every part of it. Pat was present in those early weeks while Myrna’s vision was unveiled, but she stopped Myrna in her tracks when she said “This is so awesome, but I’ll never be able to see it because I’ll never be able to get there.” Funny how one simple statement can stand out and haunt you. It changed everything for Myrna. It changed ‘the vision’. Before that year was over, Pat Whaley left this world for a better one. She left her wheelchair behind, but she’d made her point. It was agreed that a community garden should be INCLUSIVE, and that meant those in wheelchairs or walkers or with other mobility issues should be able to not only “get there“, but should be able to garden. Such is the legacy Pat Whaley left behind.

No doubt Pat looks on from her vantage point and is happy with what she sees. Her wistful comment back in the fall of 2020 inspired changes to the original plan that included six wheelchair accessible garden beds, a hard pack, crushed limestone path connecting the main sidewalk to the garden and winding through the orchard area, wheelchair accessible picnic tables, and swinging gates on our fence. Pat would also be happy to know that our Gazebo (Phase 3 and on schedule to be completed this spring) is at ground level, making it fully accessible by wheelchair.

In honour of Pat Whaley, at of the end of our 2022 season, six wheelchair beds were built, installed and filled.

They are reserved for wheelchair gardeners, and able bodied gardening volunteers stand ready to assist as needed, to make gardening at Sakaw accessible to all – even those in wheelchairs. Thank you Pat.
You are remembered. And in response to your desire to partake, we hope to be accessible to others like you.

If you, or someone you know in a wheelchair, thought that eating vegetables you grew yourself was not possible, you were wrong. If you’re in the area, Sakaw Gardens welcomes you. Plots are available now to reserve on a first come basis.

warmly,

Cindy Suelzle

footnotes:
1. Alma 37:6

“a garden can be the salve that heals our hurting communities”

6 easy steps for putting your garden to bed + 2 bonus tips

Face it – by the end of August, we cannot deny the inevitable any longer. Growth has slowed down, fruit and vegetables are ripening, plants are drying out and going to seed. They’re all doing what nature intends for us all to do at certain times – get ready for bed.

In the spring, we’re all excited about our gardens, but tucking our gardens in for the winter is an important step that is often missed entirely. When the weather gets colder and things stop growing, we lose interest in being in the garden, but missing this final seasonal detail is a mistake. It’s tempting to be a bit lazy, and I get it. Its dark earlier, weather isn’t great, dead and dying perennials are kinda hard to get excited about. But don’t fall for it. Your garden NEEDS you. Putting your garden to bed is an important step in it’s health next spring. Come on, give yourself one more final push, then you can both rest in the winter – guilt free.

There have been years I’ve tried extending the season by planting things like spinach at the end of August hoping for a late crop. There have been years I’ve tried to extend the season by heating the greenhouse into the fall. But the simple truth is, we don’t have the sun for it in Alberta. In September, we have the same amount of sun as we do in March. No matter how many nights you heat the greenhouse in September, you cannot fake the sun during the day, and plants need sun. HOWEVER, you can plant some things in the fall that will come up all the earlier next spring, taking advantage of the early sun that starts to bring new life to the world.

Winter has its purpose, it isn’t the great enemy of gardeners that we sometimes make it out to be. My opinion? Let fall be fall. And get on with your life. BUT. Put your garden to bed first! So you can both rest comfortably.

Sneak peak at the 6
1. Clean it up but keep a balance
2. Fall planting
3. Bring them in
4. Gleaning – the final harvest
5. Mulch and other protection
6. Watering trees in late autumn keeps them healthy and strong

late summer bouquet

What to get rid of and what not to get rid of? That is the question.

By September, there are always a bunch of dead and dying plants, some that seem to finally be coming into their own, and of course lots of weeds going to seed. Some gardeners follow the philosophy of clearing everything out and leaving a nice tidy garden bed. I don’t have anything quite so tidy as “a” garden bed in my yard. I have lots of planted space but its not all together. I have perennial flower beds on all four sides of the house, sunny flower beds, shady flower beds, some flower beds under trees, some tucked into corners. I have repurposed horse troughs, a currant patch, rhubarb patch, raspberry patch, grapes, fruit trees dispersed throughout, a dedicated herb garden and three raised beds for edibles, with edibles planted here and there among flowers and herbs. There are still tomatoes trying to ripen and root vegetables that are doing just fine where they are for now.
Every garden has its own needs. But there are some rules of thumb that I apply to all.

1. Clean up but keep a balance

There is plenty of debate in this area ranging all the way from getting rid of everything to leaving it all for spring clean up, and everywhere in between. I’ve listened to much of it, applied the counsel that made sense to me at various times, and in the end, I’ve come up with my own pattern that I’m happy with. Truth is however, that sometimes life gets in the way, and you simply don’t ‘get to it‘ in time. Don’t beat yourself up when that happens; there will be other years to do it better. But for now, here’s the ‘general’ plan. Keep in mind that life is all about compromise and there are exceptions to every rule.

It used to be that gardeners got rid of the dead stuff. ALL dead stuff. If it was dead – pull it out. The worry was that that dry mulch would harbour disease or pesky insects.

While it might be true that some pests take advantage of the shelter, that same dry mulch offers shelter for important insects and helpful microbial communities. Leaving dry mulch on your garden over the winter protects plant roots from extreme cold, prevents destructive freeze-that cycles and preserves essential soil moisture and microbes1.

Beneficial Insects that will appreciate the winter mulch

  • Solitary bees such as mason bees and leafcutter bees: These gentle, non-aggressive pollinators need protection for their eggs and larvae developing inside plant stems.
  • Bumblebee queens: only the mated queens survive the winter by hibernating underground or in loose soil.
  • Ladybugs: These natural predators consume thousands of destructive aphids and scale insects.
  • Green Lacewings: adults overwinter in a dormant state. Their larvae actively hunt soft-bodied pests.
  • Ground beetles: These nocturnal hunters hide beneath rocks, wood and thick leaf litter to prey on slugs and grubs. They may creep-you-out, but get over it, you would not want to garden without them.
  • Parasitoid wasps: these tiny beneficial wasps rest in hollow plant stalks or under debris to keep garden-destroying caterpillars and grubs in check.

    Perennials that have died back, are perfect winter residences for little microscopic communities and hibernating good-guys. And they trap snow, keeping it from blowing away. Melting snow adds important moisture in the spring.

    Of course there are ALWAYS Exceptions:

    If the weeds have roots or seeds or perhaps a plant has a disease or was infested with aphids – you don’t want to risk taking that into next year by leaving them there or putting them into your backyard compost, so either get rid of them in the garbage or Burn them!
    Otherwise, into the compost they go.
    (for more information on backyard composting click here)

      If you have a lot of annuals in pots, you can pull them out and throw them into the compost, or dump them soil and all into the compost. Most of the time, I throw big piles of compostables onto the lawn. We mow them up and throw them into the compost, or into some of the beds that could use the extra mulch. When I say ‘we’, I mean of course ‘Dan’.

      to leave or not to leave? (or to compost or not to compost)
      *Healthy plants – even weeds. There are good weeds and bad weeds. Good weeds to me, are weeds that we eat and that I don’t mind propagating next year, like chickweed and lambs quarters. (see Making Friends with your Weeds)
      Bad weeds are stupid weeds like Trailing Bellflower (devil-weed), or rooty weeds like dandelions, horse radish, and thistle – those I do not compost. Or other weeds that make a lotta seeds. They have their place of course – but it’s not in my compost. And yes I know that the compost may take care of most of these problems . . . but I usually don’t risk it. There are very few plants I feel the need to eradicate in my garden, so I’m not gonna waste time feeling guilty about them. They should feel guilty for disappointing me so much.
      *Unhealthy plants – get rid of them. No exceptions.
      And not into your compost.

      But what about the plants that are not dead?
      I cannot bear to kill things that want to live so much that they thrive in the inhospitable dryness, reduced light and chilly nights of early fall. Those are the things I don’t get rid of. I still water them when needed and in return, they do what they do best – gladden my heart. They will die on their own when the cold of late October makes it impossible for them to do otherwise. I leave them where they are because they will trap snow which will protect all around them, and help with needed moisture when the snow melts in the spring.

      RULE of thumb:
      Getrid of the uglies – keep the beautiful; get rid of the sick and dead – keep the healthy and strong.
      But find a balance – Ladybugs and their friends need a winter home, and you’ll be happy to see them next spring.

      2. Fall Planting

      Fall planting is a way of taking advantage of the earliest that spring has to offer.
      Yes, I know that sounds kinda backward.
      SPINACH: Planting spinach in the fall before the snow flies, should give you an early yield. Select a spot that is protected, but that will get good sun in April and May. Lightly sow a patch of spinach. Throughout the winter, ensure it has a good covering of snow. When the warmth of April days melts the snow in some nice sunny spots, your spinach seed will sprout. They are not afraid of cold. They’ll just patiently wait till conditions are better and then start growing again.

      DILL, POPPIES, CALENDULA and other herb and flower seeds can be sown at the time of harvest to pop up in the earliest days of May. Simply broadcast them in your desire spots and let nature do what she does best. The seeds need a winter, and protective snow.

      Some plants that inadvertently get left in the garden, may resurrect in the spring. My rule of thumb is to let most things that want to grow – grow. You may have a sage plant that comes back, lemon balm, parsley, even kale. You may have volunteer lettuce plants start to grow because something went to seed last fall.

      GARLIC: Plant your garlic before the ground freezes to harvest at the end of next summer.

      3. Bring them in
      (but be careful to clean them well first)

      Some plants might be healthy enough to bring indoors. I always bring in some geraniums (see below), and often bring in a rosemary plant and a thyme plant or even some parsley (see below). If you have a beautiful sunny window, I strongly encourage giving them a try indoor. Prune down to about 1/3 its original size, trimming off everything brown. Shake all the old soil off and give the plant, stems and roots a good bath to get rid of any unwelcome hitch hikers. Then replant in fresh soil, water well and set in your sunniest window.

      GERANIUMS. I love geraniums, and they love me back. Red ones. Only red ones. I’ve tried other colours, but I kept coming back to red, and now I don’t bother with any other colour when I know that it’s red I really want. Their bright vibrant flowers cheer me all spring and summer long. At the end of it, I cannot bear to kill them, or let them them die while they’re still trying so hard to make the world a better place. So I bring them inside. In actual fact, though we think of them as annuals, geraniums are actually ‘tender’ perennials, and will tolerate temperatures down to about 7°C while still actively growing.  That is truly heroic. Another reason I love them.

      I’ll often bring two or three into the house and let them live in a sunny window all winter long. Their favourite temperature is between 12°- 18°C, which is ideal for in-house if you’ve got enough light. However, I find that in the winter even though I have a south facing bay window, winter sun is just not very impressive and they stop flowering shortly after they get moved inside.  By about January they start to get quite ‘leggy’, so I trim them as needed to keep them content. Its the least I could do for all the joy they bring me outside for five months.

      But I cannot invite all my geraniums into the living room, so I do something else.
      I put my three wooden window boxes in the garage. Ours is a heated garage though its usually pretty chilly out there. We only turn the furnace on when Dan’s working on a project, but apparently it fine for geraniums. Before a killer frost I will hard prune the plants by about one half, removing any dead, damaged or unhealthy parts. I check for stupid aphids (I hate aphids) or other problem critters or disease. I water deeply, then I put them up on a shelf in the garage, kinda out of the way but not so much out of the way that I forget they’re there.

      I give them a drink of water a few times – maybe every 6-8 weeks. If they’re too outta sight, I’ll forget to water them, and even though they’re mostly dormant, they still need a little moisture now and again. By about March they start responding to the little bit of light they get from a frosted window and miraculously they start to green up. I am always amazed that they do this, and I regard it as one of nature’s miracles. It’s still cold outside, with snow and ice, but they start being true to their calling in life. March has about the same amount of sun as September. I take this new growth as a sign to give them more to drink. By mid April, I can start letting them sit outside on nice days, giving them more water. This gradually gets them used to outdoor light and regular watering. I don’t put them outside permanently till after May 1, and even after that I put a cloth over top if I expect freezing night time temperatures. I can’t risk losing them that late in the game.

      geraniums at season’s end, still being beautiful

      I trim them back as needed, give them some healthy mulch and all purpose fertilizer, and we go right back to being old friends. They’re grateful to be back in their rightful place, and I’m grateful to have them. They resume bringing me joy, and I resume my supportive role as their care-giver.

      Some garden herbs:
      I’ve tried pretty much all herbs in the house for winter and I just don’t have enough light, even with my south facing bay window. Yes, I know I can use grow lights, but most of my plants are in the living room, and I don’t want grow lights in there all winter long. There are some though, that seem to do better than others.

      • ROSEMARY: I often bring a rosemary plant indoors. In fact for several years I’ve kept one in a pot that I moved in and out. It’s surprising how much water herbs require in the dry climate of a house in winter. If you have a particularly happy healthy rosemary plant, go ahead and dig it up. Trim it down by about half, remove the soil and gently rinse off the plant and roots. Be sure the pot is clean, and you’re using fresh, clean potting soil, then transplant into its new home and bring it inside. Keep it in the sunniest spot and water when the soil surface feels dry to the touch. 
      • BAY LAUREL: I have a bay laurel plant I bring in and out and in and out, for about 8 years now. I am very invested in keeping this plant safe. I had a couple near misses this last year with it, but we weathered the storm together. I keep it in the same pot, so I’m not digging it up, but this year I was particularly careful about cleaning it. I trimmed all the ‘iffy’ branches or leaves (anything that wasn’t pristine), removed it from its pot, removed all the soil, gently rinsed the roots of all old soil and washed the pot. Then I transplanted it back into its original but cleaned up pot, and brought it back inside. It’s very happy.
      • CUBAN OREGANO: Unlike regular oregano cuban oregano won’t survive our winter, so its best suited in a pot where it can come inside for the winter. Give it a sunny spot and it’s an easy-to-grow house plant that will be your friend for years with just a little care and attention. A member of the mint family, and often referred to as Mexican mint, it has characteristic thick, fuzzy leaves with a strong pleasing odor. Water when the soil surface feels dry to the touch. 
      • Thyme
      • Parsley

      4. gleaning – the final harvest

      It’s true that in Sept and October, late fruits and vegetables are ready to harvest. Root crops like carrots, beets and potatoes; fruits like apples, plums and grapes. Some apples and plums may be ready in August, others in September or October. Generally, the grapes we grow in the Edmonton area are ready in September after the weather cools a little.

      *BUT – There are hidden harvests that often get missed. Just open your eyes.

      Gardens don’t cease to bless your lives just because its autumn.

      dill seed ready to harvest

      If you grew DILL this year, you probably have some that has gone to seed. Go get it. Pull the plant out of the ground, cut the head off and put it in a bowl. Shake or brush the seeds off the plant into the bowl. Broadcast a handful where you want dill next year, and gather the rest to save for more deliberate planting in the spring. Yes, there are many ways to use it in the kitchen if you have enough.
      I’ll admit it, I rarely allow my dill to go to seed, except for a few delegated plants off to the side. I do this because aphids usually accompany dill when it goes to seed, and I hate aphids. But this year, I had a ton of dill – way way way over planted. I picked all the green ferny dill weed that I could use, gave plenty away, and still had too many dill plants all going to seed at the same time. I watched for aphids but didn’t see anything excessive. I let them ripen, ever watchful, but I never saw a problem, so I proceeded. Lucky me, I got lots of dill seed to grow next year, and lots to bring into the house.
      Store your seed in a paper envelop, labelled and dated.

      POPPIES. If you’re not growing poppies you’re missing out on one of nature’s loveliest offerings. Beautiful before they flower. Gorgeous iconic papery flowers. And just as beautiful in the late summer after they’ve gone to seed. You’ll know the seed is ripe when you can hear it rattle inside the seed pod. At that point, pull the plant out of the ground and turn upside down into a bowl. Shake the seeds out. Broadcast the seed from two or three heads at most (that’s a LOT of poppies) where you want them to grow next year, and save the rest for poppy seed bread, muffins, cake, cookies and salad dressing.
      BEANS and peas that didn’t get picked in time, are ripening and drying. When they’re fully developed, pick them and store them for seed next year, in a marked and dated paper envelop or lunch bag.
      CHIVES and GARLIC CHIVES have gone to seed, producing thousands of little black seeds. You can let them fall and have a million little chive plants growing everywhere next year, or you can harvest the seed to sprinkle on bread or over top other dishes. *hint: they’re entirely edible, but don’t expect too much in the way of flavour.
      GARLIC. Mid September is the time to harvest garlic, and to plant more.
      KALE is planted in various places throughout my yard. In the vegetable garden, in the rhubarb patch, the asparagus patch, and interspersed among perineal flowers and herbs. A few here and a few there. One or two act as a trap crop for annoying pests – thank you for your sacrifice. They’ll get eaten by chickens (who bytheway enjoy annoying pests).
      Don’t worry, I’ve got others. Kale is hardy, and even in September, it’s on stage doing a full encore. Beautiful. How can you not love kale? I pick it every few days to add to dinner, and if I pick more than we need, I dehydrate it. Super simple. Just strip leaves off the stems, wash and chop to put in the dehydrator. When dry, store in a jar to use all winter long.
      This spring I had an unexpected surprise. A kale plant over wintered and started producing harvestable kale by mid May. I let it do its own thing and as time when on, it began to flower and go to seed. So by September I have a lot of beautiful ripe kale seed in pods. A gift.
      NASTURTIUMS have been giving all season long. But as much as I used their greens and flowers, some flowers always get left behind to go to seed. This is good, as I am all about collecting seed right now.
      SWEET PEAS are annual climbing flowers, that are so bright and cheerful, and hardy that they can be friends with everyone. I’ve always thought they should be spring or at least early summer flowers, but they do best, as summer progresses into August. They’ll go to seed if you let the last few flowers ripen. Easy to collect. I highly recommend starting them in-doors well ahead of growing season. This year (2022) is the first year I’ve let mine go to seed so that I can plant inside next April. The pods look very similar to pea pods (who’d suspected right? lol), and as they ripen the seeds are so perfect that it would have been a shame not to collect them. Having said that, if you wait to long, they’ll open and drop their seeds, but I have yet to have had one survive the winter and volunteer in the spring.
      SUNFLOWERS are ripening. Cut the smaller flowers for kitchen bouquets, but let the bigger ones ripen. If the seeds are still immature (white), but a nice size, bring them in, they’re delicious in salads and stir fries as a vegetable. If they’re big heads, share some with the birds over the winter. I leave them face up in several different places throughout the yard where wild birds like to hang out when its cold. Our favourite place is just outside our kitchen window where we can enjoy watching them all winter long. Its a win-win.

      Lots of herbs are still doing beautifully, but its time to cut them down for the last time and bring them in for winter use. Sage, rosemary, tarragon, stevia, mint of course, lemon balm, oregano, thyme, parsley, lemon verbena, . . .
      My lavender gave me some late sprigs to add to what has already been harvested. Thank you Lavender.

      Look around you – there is more bounty than you may have expected.

      5. Mulch and other ‘protection‘

      Everybody likes a comfy blanket. In gardens we call it ‘mulch’.

      homemade patchwork quilt

      My mom, throwing an additional blanket over top of me in bed on a cold winter’s night, is a comforting childhood memory. It provided a little weight, and that weight provided warmth.

      Our gardens would appreciate an additional insulating blanket against the harshness of winter too. Some plants might be a little sensitive to the bitter cold of some winters that we have no control over and cannot always predict, but sometimes its simply a matter of protecting the bare soil and friendly critters in it. What kind of blanket? Nice clean fallen leaves that are so plentiful in the fall, is a perfect mulch. Between one to three inches is recommended. In the absence of leaves, the final mowing of dried grass would be good, or chopped/mowed up straw. I don’t use wood chips in the garden unless for the paths.

      Other benefits of winter mulch:
      Moisture Retention & Erosion Control: Winter winds and dry spells can strip moisture directly from the ground. Dry mulch stops evaporation while also breaking the impact of heavy rain or melting snow, preventing soil structure and fertility from washing away.

      Soil Microbes: Preserving a steady microclimate in the upper soil layer safeguards beneficial bacteria, earthworms, and active soil biology that your garden needs to bounce back in the spring

      Humus: In addition to protecting the soil and plants in it, mulch slowly adds nutrients and humus. Humus is the Latin world for ‘earth’ or ‘ground. It refers to that dark organic matter in soil which comes from the decomposition of plants and animal matter. That is an important key to improving soil structure, aeration, and water holding capabilities. Aeration reduces the compaction of soil, allowing roots to take up nutrients and spread out healthily.

      Leaves or straw won’t magically disappear over the winter, miraculously becoming humus. Some of it will still be quite identifiable as leaves and straw in the spring, but some (the bottom layer) has already begun to decompose. You can rake off the excess in the spring to mow with the first mowing, but don’t be in a hurry to do this, as some of your friendly insect guests might not have woken up yet. You can use that first mowing as a top layer in any area you want to amend, as mulch between plants, or the beginning of this year’s compost. A good winter’s mulch is a beautiful start in prepping your soil for spring. Just sayin’ . . . . .

      winter protection from foraging animals

      Most urban yards don’t suffer too much from animals like deer foraging over the winter, but rabbits can be a problem. They ate the bark from my daughter’s lilac tree a few winters ago, and killed it, and they’re a constant threat to the orchard in our community garden. If you live in an area where rabbits might be an issue, wrap the bottom three or four feet loosely with chicken wire. Why so high? When the snow is deep and the rabbit is sitting on top of the snow, that is where they’ll be nibbling.

      tips to remember
      1. Disease is not something you want to add to your compost. Get rid of those plants. Either burn them or garbage them.
      2. Roots like trailing bell flower, horse radish and dandelion, and seeds like thistle are not things you want in your compost. Get rid of them.

      Either burn them or garbage them.
      3. Its helpful to mow up your bigger pieces before putting them into your compost. This speeds up the process of breaking down, a good thing.

      6. Watering trees in late autumn keeps them healthy and strong

      clockwise from upper left: Red Elderberry, Spruce, Honeycrisp Apple, Evans Sour Cherry

      While your trees are dropping their leaves, or just after, they would appreciate a good long drink. Give both evergreen and deciduous trees a long, slow, deep watering. This is important, but the timing is particular. Too early might signal the tree toward new growth and may slow the onset of dormancy. Dormancy is not a light switch, it is a progressive stage allowing trees to prepare for colder weather and eventual freeze up. Too late (after the ground freezes) prevents the water from seeping into the soil and reaching the feeder roots. How will you know when the time is right? Look to your trees. Deciduous (leafy) trees will tell you the time is right when their leaves have fallen. This will also be your hint to water their neighbours, the evergreen trees. Because evergreens don’t go into full dormancy, they will actively use water throughout the year, except for when its really cold, so its even more important that they get a good watering in the fall.

      Don’t water mature trees right up near the trunk, as the roots that need water will be further out – closer to where the canopy of the tree extends. The exception to this rule is newly planted trees who’s roots might still be close to the initial root ball.

      Put your hose on the ground and water slowly so that the water doesn’t puddle on the surface. You’re looking to moisten the top foot of soil around the perimeter of the ‘drip line’ (distance from the trunk to as far as the outside branches reach). “Moisten” does not mean “soggy”. Testing the moisture level is easy – insert a wooden stick or a metal rod into the soil. Where the soil is moist, the stake should slide in easily. When it meets with resistance, that signifies to you that the soil is dry. You’re looking for about a foot of moistened soil. Anything deeper is of no value and is wasted.

      Watering earlier in the day gives the roots time to absorb the moisture before the temperature drops at night.

      Bonus tip 1. Protect your garden tools and equipment

      Hold on! You’re not done yet. I know its tempting to just go inside when the cold hits and shut the door, but pay attention to your tools. They deserve it. Whether you have a garden shed or space in the garage, or box in the basement – use it. Don’t leave your clippers or spade outside to rust.

      Tools: Clean them and put them in a box.
      Seed trays and pots: Wash them and store them where they’ll be easy to retrieve in the late winter or early spring when you’ll need them.
      Maintenance: Now is the time to fix those annoying little things that have needed patching all summer long.

      Bonus tip 2. Garden journal

      Hopefully you’ve been keeping a garden journal all along, but if you haven’t right now would be a good time to start one. Record the dates you harvested this or that, and the general yield. Record the temperatures in these close out days for reference next year. Record the seeds you harvested. Make sure you store them in paper envelopes, labelled and dated. Record your successes and failures and your ideas for fixing them next year – while they’re still fresh in your mind. I promise you will not remember them otherwise. Record what varieties did well, and what did not, what you’ll be sure to repeat and what you will not. Maybe you are an avid journaler, maybe you’re more of a casual note taker, but whatever you are – DO SOMETHING. I promise you’ll be happy you did when you go to reference it next spring.

      stand back and enjoy the immense satisfaction of a “job well done” . . .

      In my case its a challenge to even know where to begin when its time to wrap things up for the season. I rarely have two or three days that I can devote to the work of putting my garden to bed, and my ‘gardens’ are all over the yard, full of perennials. I catch a few hours here and there to go out and work, but the job is pretty overwhelming when you’re doing it in pieces. I find the only way I can proceed with any feeling of accomplishment is if I start in one corner and proceed in a single direction. ‘Finishing a piece’ with no intention of coming back to it till spring, helps me systematically make it through the whole yard.

      Standing back to admire what you’ve done once in awhile is satisfying.
      Standing back when you’re ALL done, is immensely satisfying, but the truth is, there are seasons, that I never completely make it through the whole yard. Yes, I wish I had, but life simply gets busy and sometimes the snow comes before I am ready for it. Nothing to do in that case, but get on with my life, and try to do better next year.

      *hint: don’t wait till its COLD and the job is horrible. On September 1, you KNOW cold days are coming. Start the job of putting your garden to bed while the weather is still pleasant – removing (or pruning back) those plants that have already given you everything they have to give, and deserve their rest.

      Good Night Garden. Enjoy your rest. I’ll enjoy mine.

      I’d love to hear your thoughts and experiences about getting your garden ready for bed and tucking it in for the winter, as well as your comments on some of the things discussed here.

      Warmly,

      Cindy Suelzle

      footnotes:
      1. microbes – microorganisms: are tiny, living entities that are too small to be seen with the naked eye. They are found everywhere on the earth – in soil, water, air, and insides or on the bodies of all living beings. Among them are bacteria and fungi, most of which are harmless or helpful. Why are they important? Because they recycle vital nutrients like carbon and nitrogen, decompose organic matter, and form the base of many food webs. ↩︎

      Homemade Jam: Rhubarb Jam or Rhubarb Raspberry

      at the time of writing this, I am in the middle of RHUBARB Season – first part of July

      Rhubarb is my best friend in the early part of the season. And stays my long suffering, generous, faithful friend right through till the cold puts it to bed at the end of the season. I try not to pick too much at the beginning of May when its first coming on, or in September when it’s getting tired, but other than that, the bounty is profuse!

      Jam is one of rhubarb’s strengths. It can stand on its own – plain rhubarb jam – and be wonderful. Or when you pair it with strawberries, raspberries, honey berries, saskatoons or plums (or other summer fruits), something magic happens. Rhubarb, that ever generous friend – moves into the background and acts as a flavour ‘enhancer’. The taste of strawberries will prevail. Or raspberries. Or whatever. So why bother using rhubarb, if you can only identify the taste of raspberries?

      I hardly ever make pure raspberry jam unless I have such a bumper crop that I don’t know what else to do with them. We use them ‘fresh’ every single day. Out of hand of course, on cereal in the morning, on salads, in desserts, in smoothies, . . . . I love to make a couple beautiful raspberry pies in the summer. I fill my freezer with raspberries to use all winter long. We wait a whole year for raspberries to come on, and there’s nothing quite as wonderful as ‘garden fresh’ raspberries, but their season is only a few weeks long and then they’re done. I am highly motivated to not miss them. Rhubarb on the other hand, just keeps on giving and giving. Rhubarb extends the raspberries. It’s like that. The quiet, subtle friend who stands in the background, making you look good and getting all it’s satisfaction from doing so. How can you not love rhubarb?

      The other thing I love about rhubarb jam is that it doesn’t need a lot of sugar, and though it doesn’t have natural pectin, it sets up beautifully, in the consistency you’d want to spread on your morning toast. If you’ve made the typical pectin recipe for any kind of jam, you know there’s more sugar than fruit in it; sometimes double the amount. yikes! That kept me from loving jam, and certainly from making a lot of jam most of my adult life. In fact, the current pectin recipe for rhubarb jam calls for 3 cups chopped rhubarb with 5 cups sugar, a pouch of pectin and even a few drops of red food colouring. yikes again! That’s a LOTTA sugar! And I hate using food colouring. That’s another reason I often pair rhubarb with other fruit for jam. Rhubarb isn’t all red, and when you cook the jam, it can sometimes be a little ‘brownish’ (hence the food colouring in some recipes). Adding other fruits half way through the process adds COLOUR!
      Compare the typical ‘certo pectin’ ratio above (3:5 / 3 parts rhubarb to 5 parts sugar) to the amount of sugar used in my recipe below (3:1 / 3 parts rhubarb to 1 part sugar).

      🌸 Truth is, as sour as rhubarb is, it doesn’t need nearly as much sugar as we usually add.

      I know—that sounds completely counterintuitive. But stay with me… and be open to trying something that might not make sense at first.

      Trust the process. Give it a taste before you reach for more sugar. You might be surprised.

      And if you still feel it needs more sweetness? No problem—you can always add another cup later.

      Here is my basic rhubarb jam ‘recipe’. Keep in mind that when preparing it, these amounts are my ‘suggestions’. I am not precise in my measurements, I use them as guidelines. I taste along the way to reach the level of sweetness I desire.

      🍓 Rhubarb Raspberry Jam

      This recipe yields about 5 pints.
      I typically can 4 pints for the pantry and keep the remaining jar in the fridge to enjoy right away—or to share with a friend.
      12 cups chopped rhubarb
      2 cups sugar TO USE TO MACERATE YOUR RHUBARB
      2-4 cups raspberries
      1-2 more cups sugar (as you decide– taste test it)
      * 1/2 lemon pureed in blender to use as natural pectin

      1. Put a small lunch plate in the freezer. You’ll need it at the end.
      2. How finely you chop is gonna influence how much rhubarb fits into a cup right? So shoot for about half an inch size pieces. Don’t use a one cup measuring cup. Use a bigger bowl. Pictured above is an 8 cup measuring bowl. Heaping is about 12 cups.
      3. 🍃 To macerate your rhubarb
        Measure your rhubarb and place it into a large Dutch oven or bowl. Sprinkle 2 cups of sugar over the top, then gently toss to distribute it evenly.
        Let it sit for at least one hour to macerate (see note 1 below). I often leave mine much longer—sometimes I chop the rhubarb in the evening and let it sit overnight. Not because it’s necessary, but simply for convenience. When you’re juggling a few things, it helps to work in stages.
        By morning, the sugar will have softened the rhubarb and drawn out a surprising amount of liquid. Strain off this liquid before cooking—it makes the process much easier, with less moisture to cook down.
        Don’t discard that liquid—it’s amazing!
        Pour it into a jar and refrigerate it for later use.
      4. In a large pot, put the rhubarb on medium high heat and bring it to an easy rolling boil, stirring every few minutes to prevent scorching. You don’t have to stir constantly, but don’t go leaving the room and forgetting about it on the heat. Just try to stay close at hand so you can give it good attention, stirring frequently. I generally use this time to wash the jars, get the hot water bath boiling in another pot on the stove, and other general kitchen clean up. You can expect the process to take up to an hour.

        🍋 This is where the lemon comes in.
      5. Citrus fruits are naturally high in pectin—lemons especially so—and most of that pectin is found just under the peel. Adding lemon does more than bring that bright, fresh “zing.” It also helps your jam set beautifully and keeps the colour looking vibrant and appealing.
        Plums can also contribute pectin (depending on the variety), but lemon is the real star here.
        Pour the puréed lemon into the jam and stir well to distribute it evenly throughout.
      6. Continue cooking, adjusting heat as necessary. You’re looking for a good steady boil. You’ll see it begin to thicken after the first 15 minutes, continue stirring. As it thickens, the boiling will cause it to spit at you. Nothing you can do about that other than to wear an apron and be prepared to wipe up as necessary. Lowering the heat might help a little, but it will add a few minutes to your time. It’s just gonna ‘spit’. About half an hour in, add the raspberries. Stir well, taste and add another cup of sugar to sweeten. Stir while continuing to boil, and taste again, adding another 1/2 cup sugar at a time (as you decide) till you like the sweetness.
        You may find during the cooking process that a foam begins to form on top of the jam. With some jams or jellies it can be quite substantial. It shouldn’t be that much with this jam, so I just stir it in. But if you don’t like it, skim it off.
      7. In approximately an hour, perhaps a little less, you may decide it is thickening enough. Test the consistency by turning your spoon and dropping jam back into the pot; you’ll know when you like what you see (not too liquidy). Remember, it will set up a bit more as it cools. Take your small plate from the freezer, and drop about half a teaspoon of hot jam onto the plate. Don’t worry, that amount isn’t gonna break the plate. You’re trying to cool the jam quickly with this process. When the jam has cooled, draw your finger through it. If the two sides of jam stay separated, your jam is a good consistency. Turn the heat off.
      8. Your jam is done.

      If you plan to seal it for long term storage, ladle it into clean* (2,3 see below) jars using a canning funnel. Allow plenty of head space in jar.*(4 see below) Wipe with warm cloth to ensure the ridge is perfectly clean. Put a clean lid on, fasten it finger tight with the ring, and lower it on a slant into your boiling hot water bath.*(5 see below) Make sure each jar is covered by at least an inch of water. You may have to add a little water. If you do, pour into the side of the pot, never directly onto the jars.
      Begin timing when the water returns to a boil. 10 minutes.
      When the time is up, remove from water with a jar lifter, and place on folded clean tea towel on the counter. Allow air space between your jars. Lightly cover with another clean cloth and let the jars cool. You will hear a ‘pop’ sound as the jars seal.

      I made this jam three times in the last week or two. First one, I used 4 cups of sugar total. Second batch, I used 3.5 cups total. Last one, I used 3 cups. It was just enough – deliciously TART without being sour. My personal favourite.

      🌿 I hope you’ll try making rhubarb jam this way . . .….

      —on its own, or paired with whatever fruit you have on hand. I often reach for raspberries from the freezer—last year’s bounty—and they work beautifully.

      When it comes to sugar, you’re the boss.
      Be brave. Dare to use less.

      Taste as you go and adjust along the way—that’s the best way to avoid surprises and end up with something you truly love.

      Let me know how you love it.

      Warmly,

      Cindy Suelzle

      footnotes:

      1. Macerate means to soften – in this case, with sugar and time
      2. I recommend using pint sized jars (2 cups), or half pint jars (1 cup)
      3. 🫙 A note on jars and sterilizing
        I don’t pre-sterilize my jars. I wash them thoroughly in hot, soapy water, rinse well, and let them air dry.
        When I’m ready, I ladle the hot jam into room-temperature jars, then place them into boiling water for processing.
        Hot jam → hot water.
        Jars do not need to be sterilized ahead of time if they will be filled and processed in a boiling water bath for at least 10 minutes, or if they’re going into a pressure canner.
        If your processing time is less than 10 minutes, then sterilizing the jars beforehand is recommended. (Though honestly… what are you canning for less than 10 minutes?)
      4. Headspace is the space between the contents and the top of the jar. You want to leave enough headspace so that the food can swell and move about as it’s heated without boiling up and out of the jar, but not so much that there is an unnecessarily large quantity of air which may interfere with vacuum sealing it. If jam overflows, it will affect the integrity of the seal of the jar. Fill only to the bottom of the jar neck to allow for a vacuum to be created sealing the jar.
      5. If you are using a large pot as a makeshift canner, make sure you have a rack or a folded tea towel on the bottom to keep your jars off the bottom of the pot. Failing to do this may result in jars breaking.

      🌿

      HAIL, that great equalizer

      I had just laid my head down after spending another few hours in the garden that spring evening ….. finally got most of my herb plants and a few more flowers IN . . . when I heard it.

      ARGHHHHH HAIL!

      Hail. I hate hail. That great equalizer. Natures way of reminding us who is in charge, and that we are always dependent on Him. Big mistake to rely solely on “the arm of flesh”.

      I timed it.

      From beginning to end less than six minutes. But I knew it wouldn’t take more than that. It never does. It doesn’t have to. I mentally went through my garden beds and realized there was no one or two places that I could reasonably even hope to cover. If I had had warning. I was completely at the mercy of hail. My thoughts turned, as they often do, to my great grandparents who repeatedly got hailed out on the prairies after putting in all their blood, sweat and tears. I thought of them standing there, at the door, watching the hail fall, weeping. Not much else to do. . . . . And as always, my heart went out to them. My people. Most of whom I’ve never even met.

      early family garden in the city when the kids were little, around 1989

      For me hail means frustration, disappointment and inconvenience. For them it meant everything! For them it could have cost them their entire year, and they would have wondered how they were gonna feed their family in the winter to come. I knew there was nothing I could do but hope and pray. Just as they knew there was nothing more they could do.

      I went out the following morning to check my gardens. Fine. I checked each plant I put in last night. Fine. All fine. If I hadn’t heard the hail storm the night before, I likely wouldn’t even have known about it. I am relieved. And I am grateful. And again as I do so often, I wondered “why I am so favoured?”. And I love and appreciate all the more, those people who came before me, to this land. And paid such a high price, so that I could have what I have, a long time after they’re dead and gone. Thank you. Thank you to Charles and Sarah, to Alonzo and Elizabeth, to Andreas and Inger, Pearl and Leland, Heber and Capitolia, and all the others who sacrificed so that my children could be born HERE in this place, NOW in this time. The fullness of times.

      And I thank my Heavenly Father again for the bounty we enjoy in this land. And I recommit myself to Him, with the reminder that I am nothing without Him. All I can do for myself can be wiped away in 6 minutes, or less. Yes, I will continue to work hard. But in Him alone will I put my trust.

      Warmly,

      Cindy Suelzle

      Tomato Powder will make your kitchen a happier place

      Tomatoes are nature’s most potent source of lycopene. What IS lycopene and why do we care? Lycopene is a powerful antioxidant with many health benefits, including sun protection, improved heart health as in lower risk of stroke and heart disease, as well as a lower risk of certain types of cancer. It is most effective when consumed in the form of lycopene-rich foods like tomatoes and other red or pink fruits. Studies indicate that lycopene reduces bad cholesterol (LDL) while increasing good cholesterol (HDL) levels. This balance is important because high cholesterol develops fatty deposits in our blood vessels, which can clot and lead to a heart attack or stroke. Remember, RED foods are good for the heart.

      it is difficult to think anything but positive thoughts while eating a homegrown tomato

      And now, you’ve got all that natural tomato goodness in a concentrated form right in your pantry! I know right? Who could have imagined that now you can:
      STOP buying those little 6 oz cans of tomato paste that you never use all of anyway
      STOP buying canned tomato sauce (in all their varieties)
      STOP buying tomato juice
      Because you’ve got all three of these wonderful foods right here in powdered form (just add water). And its a lot more nutritious because it hasn’t gone through the high temperatures of canning (which only retains 40% at best of the nutritional value). Tomato Powder is a super useful food to have on hand in the kitchen at all times. I can’t speak to all tomato powders, but Thrive Life Tomato Powder has a strong, clear tomato taste, like you just picked a ripe tomato out of your garden! It’s got all that wonderful natural tomato acid, because . . . . . . guess what? The ingredient (yes, that’s singular) is: TOMATOES. That’s it. The only thing in the can – is tomatoes. No salt, sugar, colours, flavour enhancers, or other additives of any kind. You can add your own salt to taste. Or not. You do you.

      Making your own TOMATO POWDER

      drying your own tomatoes for tomato powder

      Making your own tomato powder is pretty straight forward. A little investment in the time department, but easy, and if you’ve got an excess of garden tomatoes, its a great use for them. Best practice is in a dehydrator, but you can dry in a slow oven, and if you live in a hot dry climate, you can dry them in the sun. I don’t – so that’s all I’ve got to say about THAT.

      The meatier type of tomatoes is preferable, as they have less water and less seeds – like Romas. Simply slice and lay evenly in your dehydrator. All dehydrators might be different, but select a low setting and expect it to take a full day and night. How long exactly, depends on too many factors to estimate with any precision. Factors like: type of tomatoes you are using, and how much water they contain, how thick you sliced them, even the weather – is it cold and rainy, or hot and dry?

      You’ll want to continue to dry them until they are brittle. Ensuring that you have removed all the moisture is critical to give you a good product in the end. Use a food processor or blender to grind the tomatoes into a fine powder. It may be helpful to break the tomato slices into smaller pieces as you add to the blender. You can sift the powder through a sieve to separate the larger pieces, which you can put back into the blender.

      Store in an airtight container in a cool, dry place. Nothing lasts forever, so plan to use it up in a year (or two at the most). Nutrition will diminish over time of course. Having it be VERY dry in the beginning is key to it staying dry, and it STAYING dry is key to longer shelf life. Keep it well sealed, as it will want to absorb the moisture from the air.

      tomato powder on right, tomato skins powdered on left

      10 WAYS TO USE TOMATO POWDER

      1. Tomato paste
      ratio 1:1-2
      1/4 cup tomato powder + 1/4 cup water = tomato paste
      start with the lesser amount of water, and then add a tablespoon more at a time to reach the consistency you prefer

      2. Tomato sauce
      ratio 1:4
      1/4 c. tomato powder + 1 cup of water = 1 cup tomato sauce

      3. Tomato juice
      ratio 1:8-10
      1 T. tomato powder + 1/2 cup (8-10 T.) water
      optional: add your choice of seasoning ie: onion powder, sugar, salt, pepper, to taste

      4. Spaghetti sauce
      ratio 1:4

      or use your own Mediterranean seasoning mix: any combination of oregano,
      thyme basil, rosemary, garlic, onion,

      5. Pizza sauce
      ratio 1:3

      or use your own Mediterranean seasoning mix: any combination of oregano,
      thyme basil, rosemary, garlic, onion,


      6. Cream of Tomato Soup
      ratio 1:16
      Prepare a roux from 1/4 cup butter and 1/4 cup flour over low to med. heat
      Add 1/4 cup tomato powder – whisk in
      Add 1 T. chicken bouillon – whisk in
      Slowly stir in 4 cups of milk, whisking all along to prevent lumps from forming.
      Simmer over low heat, whisking to combine well, heat thoroughly and thicken slightly. Add more liquid if needed.
      *optional: I like to rub some Freeze dried chopped onions through a sieve to create onion powder. Nice addition to the soup.
      *optional: add 1 tablespoon of Italian or Greek blend of herbs, or your own combination of oregano, thyme and basil.
      *optional: add another tablespoon or two of tomato powder if you want it richer

      Thrive Life had the best Tomato Powder ever. They no longer sell to individual homes, so I’ve been on a quest to match it with my own tomatoes. Nailed it.

      7. Ketchup
      1 cup tomato powder and 3 +1/2 cups water
      1/3 cup honey or brown sugar
      1/2 cup apple cider vinegar
      1 t. onion powder or 2 T Freeze Dried chopped onion crushed to make onion powder
      1/2 t garlic powder or 1 T Freeze Dried garlic crushed to make garlic powder
      1 t salt + 1/2 t pepper
      1/2 t dry mustard
      pinch of allspice and a pinch of cloves
      Combine all, and simmer over low heat stirring frequently to prevent scorching – till reduced to desired consistency. Expect it to take 30-45 minutes depending on your preference of thickness. Pour into jar and refrigerate. Expect 2 pint jars. Best to let it sit a day to allow flavours to fully blend.

      8. Barbecue sauce
      1/2 cup tomato powder
      1 cup water
      1/3 cup brown sugar
      2 T. apple cider vinegar
      1 T Worcestershire sauce
      1 T soy sauce
      1 T mustard
      1 clove garlic, minced
      2 T FD chopped onion
      1/4 t Cayenne pepper (or your favourite dash of hot) or NOT
      Salt & pepper to taste
      Mix all ingredients in large saucepan, heat over low and stir 15 or so minutes till slightly thickened. Stir frequently to prevent scorching.

      9. to add that beautiful rich ‘tomato’ zest concentrated
      To any tomato based soup, stew, chili or pot roast – add a tablespoon or two of tomato powder just because YOU CAN! You’ll be surprised at how it richens things up.

      10. As a garnish
      Sprinkle tomato powder  over top potato salad, deviled eggs, hummus, even a lettuce and tomato salad. Be creative.

      I’d love to hear your experiences with Tomato Powder, and your suggestions for recipes, please comment below.

      Warmly,

      Cindy

      extending your garden season adds BOUNTY to your table

      Two of the most important things to remember about gardening is that
      1) there are a lot of ‘rules’
      2) some of those rules should be broken

      There are many things about gardening that one has to experience to understand what the rules are there for. There are the things we must learn through experience – but they don’t always have to be your own, we can learn from each others’ experiences too. One of these age old rules in my part of the world, says that we should plant our gardens on the May long weekend (3rd weekend in May). But statistics say that the expected last frost is anywhere from May 1-10. Obeying that rule straight across the board, amounts to a week or more of lost growing time – when there are only an average of 120 (give or take) frost free days in the Edmonton area.

      I don’t pretend to be an astronomer or any other kind of expert, but there are some things that simply make sense to me. Consider this:
      The summer solstice in is between June 20, 21, 22 (so lets just say the 21st). It is longest day of the year – more daylight than any other. The center of “BEST SUN” days.
      Count back 7 weeks to May 1, and forward 7 weeks to August 9. Those days are going to be the BEST Sun days of the summer right? A reasonable assumption to make. In fact, in Edmonton, on May 1 – 2022 the sun rose at 5:57 AM and set at 9:05 PM = 15 hr 8 min of sunshine. On August 9 – 2022 the sun rose on 6:03 AM, and set at 9:14 PM = 15 hr 11 min of sunshine.

      My point? My point is that after August 9, the sun is not as high, and not as present. In fact only one month later, September 9, the sun rose at 6:57 AM (54 minutes later than Aug 9), and set at 8:04 PM (70 minutes sooner than Aug 9). That is 2 hours and 4 minutes LESS sun-time – in ONE MONTH! So yes, those may be frost free days, good time for things to ripen, but the ideal growing time has passed. If we’re planting on May 24, that gives us only two and a half months of best sun days to grow. When we could easily have another month or more.

      So, how does one make the best of those high sun, but possibly NOT frost free days of early spring?
      Answer: Plant earlier.
      The next obvious question then is this: what can we plant earlier that will not be killed or stunted by those chilly mornings of early spring?
      Answer: There are many hardy and semi hardy cool weather vegetables that thrive in our growing season. We just need to get to know them and learn to appreciate them. Here are some ‘hardy’ and ‘semi-hardy’ vegetables (and some notable fruits) that you can be growing in the average backyard garden in and around the Edmonton region, and planted much earlier than the May long weekend.

      HARDY VEGETABLES can tolerate a hard frost and temperatures between -5 and -10 Celsius

      If you haven’t made friends with some of these yet, then open your mind and introduce yourself. They’re not only anxious to make friends, but are extremely forgiving and loyal. Hardy Vegetables include: Brassicas like Broccoli, Brussels Sprouts, Cabbage, Collard Greens, Kale, and Kohlrabi, as well as Leeks, Parsley, Radishes, Spinach, assorted Asian Greens (like mustard greens, bok choi and tatsoi) and Rutabaga. THAT is a lot to choose from, and ALL of them can be planted as soon as the ground is dry enough to work in. If it snows again after planting – no worries, they laugh at snow. I have planted my Spinach seeds the beginning of April, but depending on the type of spring we’re having, I could easily have planted them a week or two early. Its not simply a matter of spinach tolerating the cooler weather, it thrives in it. I’m sure you’ve noticed that as soon as the weather warms up in June, your spinach bolts (goes to seed). These cooler crops don’t like the heat, and they don’t do well in it at all. They are best grown in the earliest parts of spring. In some climates they are winter crops, but not for us in Edmonton LOL. See below for some advice on ‘some’ of these hardy vegetables. I don’t have experience with all of them, but maybe you do. I’d love to hear your opinions and suggestions from your own experience. Please share by commenting below.

      KALE:
      Personally, I am not a fan of growing most brassicas because I’ve lost too many battles with the caterpillars that like them so much, but I make an exception for KALE. Knock on wood, I’ve never had a problem with kale (so far). It’s easy to grow, doesn’t attract pests, and it toughs out the cold weather in both spring and fall. It was a no brainer that we should become fast friends, I just needed to get to know how to use it more in the kitchen. That was the easiest part of all. I pick kale from May through September – a whole season of wholesome green goodness in salads, green smoothies, and everything in between. And it dehydrates beautifully for winter use. What else could I ask for? Depending on the weather, and the the type of spring we’re having, they can be planted outside by seed, as soon as the ground is dry and warm to the touch (anytime from April 1-30). And don’t worry if it snows – they won’t care. You can get a jump on the season by planting young seedlings outside around the 1st of May.

      MUSTARD GREENS and other Asian Greens:
      One of my personal garden rules is to try growing at least one new vegetable every year. I am SO glad I decided to do that many years ago, as I have learned to appreciate all sorts of great vegetables that I never would have any other way. In 2022 I grew Mustard Greens for the first time, 2023 I grew Tatsoi, which I have grown every year since. In 2025 I added Bokchoi. Several years ago I grew ground cherries and tomatillos (both warm weather vegetables) – huge win! I’ve grown them ever since too.

      PARSLEY:
      has been a favourite herb in my garden for years, and occasionally even comes back in the spring – though at best it is still only a biennial, so its best to count of replanting seedlings every spring. But no need to wait till late May, parsley plants can be planted by May 1st for sure. Don’t bother planting seeds outside. They take too long to germinate for that. Either start them indoors in February or early March, or buy your plants from a greenhouse.

      SPINACH:
      is wonderful, and one of the healthiest plants when eaten FRESH (within a couple hours of harvest). It’s leaves are tender and perfect for salads. I used to buy a lot of ‘fresh’ spinach from the grocery store, all year long, but I very rarely do anymore. We know that all produce begins deteriorating nutritionally within the first hour of harvest, and the sad new about spinach is that within four days – it has lost 100% of its vitamin C. I don’t know about where you buy yours, but I can pretty much guarantee that the spinach available in my local grocery store was NOT picked within the last 96 hours! So the very best source of spinach is the one that can it get to your table within only a few hours of harvest. That means its either grown in my garden, or its THRIVE LIFE Freeze Dried Spinach.

      The tricky part about growing spinach is that it LIKES COOL WEATHER. That is its great strength as a garden vegetable in Alberta, since we specialize in ‘cooler’ weather. But wait. The convers of that fact implies that it hates hot weather. And it does. When the sun gets real hot, spinach goes to seed (it ‘bolts’ – see below). If you plant spinach around May 24, it will bolt in the heat of late June, and you are very likely to be disappointed. What to do? Plant it earlier.

      Its good to know bytheway, that there are several other greens that grow well all summer long without bolting, so it doesn’t have to be “spinach or nothing”. But, back to spinach. Because it’s a cool weather crop, we can plant spinach in the early spring (early to late April depending on the year), when we can take advantage of the long ‘sun’ days that come with the cooler weather of April and May. Ironically spinach wants a nice sunny location, but doesn’t want the heat that comes with the sun, so its the perfect plant to extend your growing season. By the time your spinach has given up in the heat of summer, your swiss chard and other greens are ready to eat!

      Is it worth it? Absolutely. If you can get your spinach planted early enough in the spring, you’ll get a beautiful crop that will flourish. Its the perfect opening act to your summer garden. And its a great source of iron, calcium and vitamins A, B, C, and K.

      what is “bolting” and what causes it?
      Bolting is a common response of cool weather vegetables to stresses of summer – temperature stress, day length stress, or water stress. When the plant is in distress, it hastens it’s purpose in life – which is to go to seed. Long spells of hot dry weather may be good for peppers and tomatoes, but NOT good for spinach. Many other leafy vegetables do the same thing. Not much you can do about the weather in summer, so just work with it. Spinach doesn’t want what tomatoes want. So planting it when the days are cooler, and giving it as much cool time to grow as possible will make it happier.

      In some zones, spinach might be a good fall crop, but I’ve found that the end of our growing season is too fickle. In Edmonton, the sun is less by the end of August, but the days are still very warm and dry. We could just as easily have snow in October as not, and if we do, temperatures could drop quickly. I’ve tried extending my growing season by planting spinach at the end of August, but experience has shown me I’m gonna have more success in the early spring.

      Plant your spinach in rich soil – amended with old manure and/or compost. Keep it consistently moist, but not soggy. Water deeply and regularly. Spinach is a heavy feeder, so sprinkling blood meal around the plant mid growing season will encourage rapid growth of continuous new, tender leaves. Once you see five or six nice healthy leaves on a plant, go ahead and start snipping the larger ones off for spinach salad.

      RADISHES and TURNIPS/Rutabagas:
      I am not a fan of radishes for their roots, but I absolutely AM a fan of their greens! I grow them, but only for their tops. They have a little zip that is great in a fresh garden salad when they’re young – super nutritious – SO worth it. They’re best when they’re young, so start picking early while you’re thinning them out. Once the roots get big, the leaves are not as tender and suitable for salads, but they make a great Pesto. (click here Radish Green Pesto for the recipe)

      SEMI HARDY VEGETABLES will tolerate light frosts and temperatures around freezing (0°C)

      Semi-hardy vegetables can be planted quite a bit earlier than the May long weekend, but maybe don’t push it too far into April, unless its an especially warm spring. Some great Semi-hardy Vegetables include: Beets, Carrots, Cauliflower, Celery, Chinese Cabbage, Endive, most kinds of Potatoes, all kinds of Lettuces, Radicchio, Rutabaga, and Swiss Chard.

      BEETS:
      good for the tops as well as the roots. Plant at the beginning of May.

      young carrot tops are delicious as well as nutritious

      CARROTS:
      for example, take up to 3 weeks to germinate, so getting a heads start on them is important, but planting them too early, when the soil is still cold won’t help. The first days of May should be early enough for carrots. If you haven’t discovered making your own SEED TAPE, then you are in for a treat. Super easy to make yourself, and prevent wasting a ton of carrot seeds.

      Did you know that carrot greens are not only good to eat, but super nutritious? More vitamin C than the actual ‘carrot’. I use them lightly chopped when they’re young and tender (the thinnings) in garden salads and in smoothies. If I have more than I can use, then I lightly chop and freeze for later. They make a fantastic Pesto!

      Click HERE for the recipe.

      LETTUCE:
      of all kinds is fine with cooler temperatures and even the odd light frost in the beginning. They’ll germinate in a few days and will thrive in the bright light.

      POTATOES:
      could have an entire blog post devoted to growing them, but don’t wait till the long weekend in May to plant them. Shoot for the end of April / beginning of May, depending on the spring, when your soil is nice and warm. You don’t want them to pop up before the last frost, so don’t push your luck toooo far, but two or three weeks before last expected frost should be fine. You can expect them to be ready to harvest in 120 days, but you can begin ‘stealing’ young potatoes in early to mid August (depending when you planted them of course). The best potatoes I ever grew were hilled completely in hay. An experiment that I am trying to recreate this year. Stay tuned.

      RUTABAGAS:
      not to be confused with turnips. They are both root vegetables and have similar shape and appearance, but they are not the same. Turnips are usually harvested young – only 2 or 3 inches in diameter, and are a summer vegetable. Rutabagas are harvested closer to the end of the growing season, and are usually bigger. Turnips are white with a purplish top, rutabagas have a yellowish flesh, also a purplish top. Turnips taste a little like radishes to me, while rutabagas are a little milder and maybe even sweeter. Both can be eaten raw, steamed, boiled, roasted or stir fried. Its all about personal preference when judging between the two, and tastes change over time, so I think its a good idea to come back to certain foods that we may not have liked in younger years. Turnips and rutabagas are the perfect example of that.

      Rutabagas was one of my ‘new’ vegetables a few years ago. I had tried growing turnips the year before and discovered that my vague childhood memories of not liking them was very much true, and that I still didn’t like them. So the next year I grew rutabagas for the first time, and I’m a much bigger fan of them. I do like to oven roast them, by themselves like sweet potato fries, or with other roasted vegetables.

      swiss chard early afternoon, destined to become spanakopita for dinner

      SWISS CHARD:
      is one of my best friends in the garden. Fast Growing, Forgiving and Fabulous it is delicious, nutritious and very flexible in the kitchen. It is a staple in my summer kitchen, and the most important ingredient in my SPANAKOPITA. In fact I grow swiss chard especially for this summer delicacy.

      Chard will tolerate the heat of summer much better than spinach, but hot dry days will still cause it to bolt. Watering well when its dry will help cool it down, but its important to pick continuously throughout the season.

      Planting Non Hardy Vegetables must wait

      Rushing the season with tender plants like tomatoes and peppers, is asking for trouble, so yes, for them – stick to the age old rule of May long weekend. For the others mentioned above, a little frost, a little snow – pshaw, we’re talking about SUPER HEROES here! They’re not afraid of cold. A late, cold spring, doesn’t have to shorten our season, or decrease our harvest, in fact, cooler temperatures are best for these cool weather vegetables. Be brave, and Be positive. You’re the boss of your garden. Begin looking at cold rainy spring days as SPINACH DAYS. And there’s other good news – in the early spring, there are fewer pests around to damage plants. It’s a total WIN!

      Whether you’ve been around the block a time or two, or you’re just getting your feet underneath you in the garden, cool crops are a bountiful way to extend our season. And because they’re so forgivingly easy to grow, they are encouraging plants to start off with. Success means starting with winners. And the key is to EAT them. Broaden your horizons. Commit to experiment every year, with something new to you. Learn about one more vegetable that you never knew before. Plant it. Make friends with it, and learn ways to enjoy it.

      SPANAKOPITA is why everyone should always plant Swiss Chard!
      There is no question that the world would be a happier place if we all did.
      see full recipe HERE

      Hardy fruits:

      There are many fruits we can grow in and around Edmonton, most notably – BERRIES. I hope you love berries because we grow awesome raspberries around here. And great red and black currents. And terrific honey berries (haskaps). And saskatoons. And plums and sour cherries. And rhubarb and apples. And all of these come back every year! We also grow excellent strawberries and even some types of grapes. So don’t limit your gardens to annual vegetables, open your mind and your arms to perennial fruits. But that’s another blog post for another time.

      The one cardinal garden rule that everyone should obey is to:
      GROW WHAT YOU EAT, AND EAT WHAT YOU GROW. Otherwise, you’re just wasting your time and space.

      Have fun in your garden this year, and have fun planning and planting it. Don’t wait till all the stars align, the sun is warm and everything else is perfect. You’ll have wasted valuable growing time. Embrace the hardy vegetables of cool weather. Put your jacket and garden gloves on and get out there!

      I’d love to hear your thoughts on extending your gardening season. Please comment below.

      At the time of this writing it is mid April 2022. We’ve had an unseasonably cold early spring. Snow has not completely melted. The world is in turmoil. War is raging in the Ukraine as they fight to remain autonomous from Russia. This is affecting food supplies all over Europe, and the fallout will be felt worldwide. We in the west, are still recovering from droughts, floods, fires, storms, and labour shortages. Food prices have skyrocketed along with fuel and energy prices, and everything related to them (which is pretty much everything). If ever there was a good time to plant a garden to supplement our grocery dollar, this year would be it!

      Warmly,

      Cindy Suelzle

      planning next year’s garden

      I have a simple rule that I apply to everything I do. Whether its my garden, or an event that I am involved in – doesn’t matter, it pretty much always applies. At the end of whatever it is I ask myself these THREE Questions (and answer them of course).

      (while this one is still fresh in your mind)

      I have a simple rule that I apply to everything I ‘did’. Whether its my garden, an event that I was involved in, or a class that I taught – doesn’t matter, it pretty much always applies. At the end of whatever it is, I ask myself these THREE Questions (and answer them of course).
      1. What went well? What was I pleased with?
      2. What could have been better? What could I have improved on?
      3. What did I learn? In my opinion, the most important.

      All three questions are very important, and must be asked in order. It is very easy to get down on yourself when something didn’t go right. None of us seem to be short on negative self talk, if the season (or event) was disappointing. Its easy to get discouraged and give up if we focus on the bad, on the things that didn’t work out. So DON’T!

      What went well? There is always something that was good. Think about it, and WRITE DOWN the answers. A fruit or vegetable that grew well – a new skill that came in handy – a new hack that paid off – etc. Write down everything that was good about this year’s garden.

      For my 2021 garden: What went well?

      * Kale. I grew great kale. The year before was the first time I planted kale and I only planted 6 plants, but it encouraged me to plant again, this time I planted double that amount, and some variation. I planted them in three or four different spots, I picked from the plants all summer long, and well into October when I finally harvested the last of it. I used fresh kale in salads, omelettes and scrambled eggs, soups, casseroles, chopped in sandwiches, and smoothies. I tried kale chips in the oven for the first time, and was wowed. Repeated that several times, using less oil each time lol. I dehydrated the excess and ended up with two FULL 2 quart jars of dehydrated kale, crushed into them.

      * Tomatoes. I had a reeeeeally good harvest of tomatoes this year. Lots of tomatoes! Mostly the Romanian Giants. For the first time, I grew tomatoes all season long IN my new green house. Eight or ten tomatoes there, four around an arbour in the first garden bed, four around an arbour in the large horse trough, and some in their usual spot on the west side of the house. And some cherry tomato in planters on the patio. Made for a LOT. I admit it – tomatoes are my thing. The backbone of my garden, the one thing I look forward to the most. Everything else exists around them.
      The most successful places (in order), was the green house, garden arbour and large horse trough arbour – all in the sunniest locations. We ate fresh tomatoes pretty much all of August, September and October. We’ll have fresh tomatoes into November. I canned the excess that ripened faster than we could eat, a couple dozen quarts. I made fresh bruschetta and salsa, canning about 15 pints of salsa. I oven roasted lots of tomatoes. We had so many different types of tomato based soups.

      * Cucumbers: best crop ever. Honey berries, Cherries, Raspberries, Rhubarb, Oregano.

      * Compost. We reorganized our compost area since building the greenhouse, adding another large old garbage can turned upside down. Also had a mound of dried lawn trimmings in our compost area, ready to add to compost piles as needed, and use to mulch gardens. We also added to the city compost from time to time – with undesirable compost: either branches and things that take too long to break down, thistle, scraps that included oil or meat, ….. that sort of thing. It was valuable to be able to recycle these organics even though we didn’t want them ourselves.

      * Greenhouse. Dan built me a new greenhouse this spring. Not very big, 8×12 – the perfect size for our needs. I dug the soil down deep on both sides, and added gravel, compost and aged horse manure to the soil. When the shelves were no longer needed, I removed them and planted tomatoes, peppers and nasturtiums in the soil.

      * Soil amendment in the former spruce area. We took out two massive spruce trees a year and a half before and the following summer it was almost a dead zone. Nothing we planted did well, so we gathered our resources and came up with an amendment plan, thanks to the suggestion of our friend Scott Campbell. Aged horse manure, barley straw and early spring mowing. Became positively LUSH compared to last year.

      New Discoveries

      Horse trough raised beds
      Hori hori knife (my new favourite tool)
      Mexican Tarragon, Papalo, and Epezote

      What could have been better?

      Grapes. Plums. Carrots. Potatoes. Strawberries. Basil. Beans. Butternut Squash.
      My planting was too condensed, and I ended up shading some things I’d rather not have.
      I thought I planted bush beans, when they were in fact pole beans, and consequently they weren’t placed in the best spot. That was unfortunate. I experimented with two different ways to grow potatoes. Both were interesting and I’m glad I did it, but not that great of a yield.

      What did I learn?

      We’ve been growing tomatoes on the west side of the house which we knew was short on sun, but the best we had at the time. This year, the new greenhouse resolved that issue. 2021 is our last year for westside tomatoes. Next year, that partial sun/partial shade area will be best suitable for greens: lettuce and arugula, chard, kale, nasturtiums and celery.

      We topped up all of our beds with aged horse manure and completely redid the entire strawberry bed, including new plants, following the recommendations of some trusted friends. I allowed too many other things to grow in it as the summer progressed: dill, poppies and sunflowers. Next year, I’m gonna limit that. We’ll deep water the strawberries right away (end of October), and cover them in leaves to tuck them in for a long winter’s sleep, and hope for better strawberries next year.

      Plans for improvement next year?

      Gonna rent a small inground garden plot in our community garden, to plant carrots, potatoes and maybe beets. Those root crops I just don’t seem to have sufficient room or sun for in my small garden, and if there’s one thing the community garden has a lot of, it is SUN!

      Seeds for Next Year’s Garden

      I ALWAYS buy seeds one year in advance. For the most part, what I plant in 2022 will be the seeds I purchased in late winter 2021, and so forth. It’s part of my personal philosophy of preparedness. There will always be an exception, something I decide to try NOW, but generally speaking, I plan at least one year ahead for gardening. I don’t ever want to have a spring when for some unforeseen reason, I am unable to get seeds. Preparedness is not just food storage.

      Some of those seeds will be seeds I saved myself, especially tomato seeds from my own Romanian Giants, Nasturtiums, Poppies and Dill. Garden preparedness includes ensuring I have sufficient potting soil for next spring, as well as planting containers.

      I get my seeds from assorted sources: a local seed store on the west side, one of several Canadian seed companies I order online, the odd package that catches my eye at a greenhouse or garden centre, and of course those that I propagate myself or that friends have shared. But for next year I have decided to try another Canadian seed company a friend recommended. I am looking for a company that deserves my loyalty.

      Keep your plans for next year ACHIEVABLE.

      Seed catalogues are full of all sorts of potential, and it’s good to try something new every year. Some thing you haven’t tried before, a new vegetable, a new type, a new way of doing things, . . . And there’s nothing wrong with trying something totally ‘out there’ from time to time, like watermelon, cantaloupe, grapes, honeyberries …. You never know what’s gonna WORK, and you very well may be surprised. Some things may simply have been fun to try, but not really worth investing too much energy down the road, not to mention the garden space that may have been better used for other vegetables. And other things may be tremendous successes. However, keep the bulk of your garden plans for the “most likely to succeed” crops. Go for the tried and true types. Ask other gardeners for their recommendations.

      We’re fully expecting our Honey Crisp Apple, which we transplanted into our former spruce area two springs ago, to amaze us in 2022. It got set back when we transplanted it, and had a rough season in exceptionally poor soil, but we’ve apologized, and have done our best to make up for that rough start. I also have high hopes for our Royal Plum, which produced this year, but sparsely.

      I highly recommend keeping a garden journal of sorts. Don’t fool yourself into thinking you’re gonna be a great journaler if you’ve never done well with journals before, but don’t be a defeatest either. Commit to it.
      It doesn’t have to be fancy or expensive, just a simple notebook will suffice – but have a book that is gonna stick around. Not just a collection of note papers.

      Keeping a garden journal WILL improve your gardening experience, I promise. Why? Because you will hone your skills based on what you learned from previous seasons. It will provide you with historical information that will help you better predict future results. It will help you keep an inventory of your seeds and perennials, as well as record your harvests. It can effectively evolve into a personalized garden TEXT BOOK, and every year you add to it, it becomes more and more valuable.

      What to include in your garden journal? 15 suggestions

      1. Date your entries and write down your answers to the three questions above. Every year. Trust me, you’ll be glad you did. This will be your core.
      2. A pencil sketch of your garden layout with the year clearly marked. This is more important than you might think. You will want to ensure you rotate most crop areas, avoiding using the same spot year after year for the same vegetable.
      3. A list of the plants that worked out best, and the ones that did NOT.
      4. Dated sources for specific plants: greenhouses, nurseries or garden centres, seed companies, friends or neighbours.
      5. Planting times, ready times, harvest times. Maybe even a few recipes you discovered.
      6. Be more specific about times: dates you started seeds indoor, dates you transplanted them, and dates you planted seeds directly into the garden. Germination times. All these are things you THINK you’re gonna remember. Yeah right, you won’t. The information will come in handy for future years.
      7. Soil tests, soil amendments and subsequent assessments of that soil.
      8. Any problems with pests, diseases or other issues
      9. Approximate dates of harvests and the type of yield you got. I don’t have the patience to weigh, measure or count, but I know some do that. I think that’s great. Just not for me.
      10. Weather. I know right? But seriously, every year is unique, and not every season is good for every crop. So record your assessment on the weather trends by recording details, and make note of what crops are doing better than others. For instance, I have noticed that in our part of the city, we seem to be have less violence in the weather. The worst seems to go around us. I have also noted that other areas seem to get a frost quicker than we do, perhaps owing to our number of nearby trees creating a minor microclimate. You’ll be more likely to make note of weather patterns if you’re writing them down.
      11. New changes and experiments. How else are you gonna track what works?
      12. Suggestions, recommendations, and even recipes shared by other gardeners. I know, again with the recipes.
      13. Expenses: how much spent in greenhouses and garden centres, seed catalogues, garden paraphernalia, new builds, maintenance of raised beds etc, cold frames, lattices etc
      14. Hacks, suggestions, inspiration and ideas. Using your garden journal as the place to make quick notes about what they are, or where to find them, is the best way to keep them all in one spot for easy reference later
      15. Personal reflections, inspiration and musings . . . . . after all, it IS a journal. It is part of you. It is a record of yourself.

      What plans do you have for your garden next season?

      Warmly,

      Cindy Suelzle

      Thanksgiving – food and memories

      I don’t know when I started loving fall and Thanksgiving. The colours, the smells, the foods, the geese flying south, the warmth of the sun on still autumn days, the crunch of leaves while walking in the river valley, sitting around the fire on crisp evenings, . . . . . Not sure if I always have loved it, or if it started with autumn memories that included Dan. We started dating in Edmonton during the late summer, and I moved away within weeks to Cold Lake.  I was a teenager just starting high school. He came up to see me a time or two and we wrote for a while, but long distance romances when you’re that young are difficult at best.

      Two years later I was passing through Edmonton again in the late summer and we reconnected for a short while. A couple of dates and I was back in Cold Lake in September to begin my final year of high school. I had grown up a little, he had grown up a little more.  The following weekend, he drove to Cold Lake to visit me and I prepared us a picnic lunch.  There are plenty of beautiful places to go for picnics around Cold Lake, and we had a lovely time.  This became the beginning of many weekend pilgrimages from Edmonton to Cold Lake, throughout the fall and winter.  It wasn’t long before we became engaged.  He got an insider look at my family in all our glory: good, bad, and yes, even the occasional ugly.  He came to church with me on Sundays and met many of my friends.   Conversations lasting many hours helped us get to know each other, and eventually winter turned to spring.  He wanted to get married in the spring, but for me, it had to be fall.   I needed a little bit of time between high school and the commitment of marriage. And fall had become a significant time in our story anyway.  We were married the following October.  Thanksgiving weekend.  My apologies to everyone who had to give up their Thanksgiving weekend that year to travel to our wedding. That meant you didn’t get your usual traditional Thanksgiving Dinner – which I never considered at the time.   Sorry ’bout that.

      Thanksgiving includes DINNER to me – one that involves planning and preparation.   In the beginning, we were always at one of our parents’ homes on the Thanksgiving weekend. There were some constants between our homes of course: roast turkey, dressing, mashed potatoes with gravy,  cranberry sauce and pumpkin pie. And there were some variables: brussel sprouts, sweet potatoes, broccoli salad, perogies, cabbage rolls, variations on pies and pumpkin, and my Gramma Harrison’s marshmallow fruit salad – depending on where we were.  But it was always with family. That was the critical component.

      Thanksgiving however, is more than dinner. It’s memories. It’s harvesting the garden. It’s late summer tomatoes. It’s apples, and apple juice, purple grapes and high bush cranberries. It’s the humidity of the canner, the hum of the dehydrator. It’s crisp outside, warm inside. It’s family. It’s the time of year (not just the day, but all the weeks leading up to it) that the bounty of the season causes one to pause and reflect on those things we’re most grateful for. And more than that, its a good time to vocally express our appreciation to others and to Heavenly Father.

      Over Dan and my years together, Thanksgiving evolved from us going to our parents homes, to us hosting our parents and others.  That was when the metal of tradition was put to the test.  Which of our family’s established traditions would we incorporate into our lives? and which new traditions would we create with and for our children?  For those traditionalists like me, we like certain things done the same way, every time.  We like revisiting celebrations the same way.  For me, Thanksgiving must include turkey with all that means to me. Christmas Eve much include bread and cheese.  Easter must include coloured eggs.   All the above must include PEOPLE. But in these difficult Covid times that are messing with our usual way of doing things we can still find ways to celebrate and enjoy important ‘traditions’.   In fact there has probably never been a time when we were in more need of the cohesiveness of traditions.

      apples, apple juice, apple sauce, apple leather, apple crisp, and of course . . . apple pie

      I am a gardener, so harvest has particular meaning to me, and a definite connection to our Thanksgiving menu.  In addition to the must-have turkey with fixings, dinner must include things I’ve harvested.  Things like Cranberry juice from our own high bush cranberry. Made into a sparkling drink.  Homemade Cranberry sauce – made from fresh or frozen cranberries, or even better – freeze dried cranberries. Dressing made with homemade bread, onions, garlic and other herbs from the garden. Vegetables of course, from this year’s harvest. Apples: apple pie, apple juice, apple sauce, apples in salad. Pumpkin: maybe pie, maybe tarts, maybe cheese cake, maybe cookies, maybe dip for gingersnap cookies. Grape: pie from our own grapes.  Bread – homemade rolls. And of course, FAMILY – the greatest harvest of all.  This year, by stupid covid necessity our numbers will be fewer.  One son’s family will be with their other grandparents.   One son’s family will be with another son’s family.  My mother will be with my niece.   Our daughter’s and another son’s families will be with us.  Friends – another great harvest, will be not be around our table this year.  But we will gather as we can, and enjoy the food and companionship of each other.  

      Don’t ever discount the importance of food in celebrations, traditions and memories.  Most of us have very strong food-memories, for good or bad. That is why food is so important in how we celebrate special days, and in how we associate with certain people. A strong (and good) food memory for me is “chicken noodles”; many years of family gatherings and happy times are associated with this family favourite. And it is the natural suffix of Thanksgiving turkey. Ukrainian Cabbage Rolls are another strong food-memory for me. No one could make cabbage rolls like Dan’s step-mom Margaret, and no family dinner that she put on would be complete without them. Its been a loss for many years. University of Massachusetts Professor of Psychology Susan Krauss Whitbourne teaches us that “Food memories involve very basic, nonverbal areas of the brain and can bypass your conscious awareness.   This is why you can have strong emotional reactions when you eat a food that arouses deep unconscious memories. . . . The memory goes beyond the food itself to the associations you have to that long ago memory.”   For many of us, those food memories are already well established, but our children’s food-memories are still forming, and we have a tremendous influence on their creation and evolution.   Wouldn’t it be nice if most of those associations were good ones?

      Happy Thanksgiving dear ones.


      Warmly,
      Cindy Suelzle

      Vinegars from the Garden

      These vinegars are “INFUSED Vinegars” – meaning I started with an existing vinegar and infused the flavours. So easy you can make your own and be guaranteed an amazing result. The results have been spectacular for me from beginning to end, and I am never going to be the same again. Infused Garden Vinegars and me are best-friends-forever now.

      2020 was my experiment year for vinegars. I had tried a few vinegars from scratch in the past with varying degrees of success but I think I overthought it, or I simply didn’t know how to use them. Whatever it was, I got discouraged and backed away until that year when it seemed so easy to try again (and I had all the time in the world), I couldn’t resist. SO glad l did. These vinegars below are actually “INFUSED Vinegars” – meaning I started with an existing white vinegar and infused the flavours. So easy, you can make your own and be guaranteed an amazing result. The results have been spectacular and I am never going to be the same again. Infused Garden Vinegars and I are best-friends-forever now.

      Sun Vinegars

      A new fave way for me to use my fresh garden herbs (and especially to carry their wonderfulness into winter) is to make ‘sun vinegar’. So called because you set them out in the sun to ‘steep’. Use a quart jar, a 2 quart jar, or a gallon jar – depends how much you want to make.

      recipe:
      Chive Blossom Vinegar

      Chive blossoms in white vinegar, less than 24 hours and already that gorgeous pink colour!

      When the chive blossoms or garlic chive blossoms are in full bloom, pick them, shake off to ensure they’re free of insects or dust. Swish them in clean water and shake off excess moisture. Fill a clean glass jar without stuffing them in. Top up with white vinegar, making sure all are covered. Secure lid and place in a safe, sturdy spot where the sun with shine on it for about 2 weeks. You’ll watch the vinegar change colour into a beautiful pink/rose/mauve shade as the blossoms fade. When the blossoms have lost their colour your vinegar is ready. Strain through a cheese cloth into clean jar to store – discarding old blossoms. Store in pantry out of direct light to preserve it lovely colour. Plan to use within the year, just in time to make some more.

      Basil – Oregano – Rosemary – Sage – Tarragon – Thyme

      Basil vinegar just before straining. Colour transferred from leaves to vinegar.

      Be adventurous. Try other garden herbs alone, or in combination to make other flavours. Use the same basic recipe as for the Chive Blossom Vinegar. They’ll all taste different depending on the herb. Keep everything clean and sterile, strain vinegar well to ensure a nice clear product.

      using herb vinegars:

      Herb vinegars can be used in a variety of salad dressings, sauces or marinades to add a fresh, delicious ‘herby’ flavour to a perfect garden salad, a bowl of steamed garden greens or fresh sliced cucumbers. Be brave, try different things.

      Our very first venture was to use the Basil vinegar ALONE as a marinade for chicken breasts. Wow! Best grilled chicken I ever remember eating. The tangy basil flavour was in every single moist bite. Definitely remaking that one. We also used an herb vinegar to marinade thin strips of chicken and pork to grill on skewers. The meat absorbed too much of the vinegar and took on an almost ‘pickled’ taste, a disappointment. Won’t be revisiting that.

      using fruit vinegars:

      straining raspberries through jelly strainer

      My first fruit vinegar was raspberry. I had a lot in my garden and was picking every other day, so it was a natural place to begin. And raspberries are SO good for you. They are a high antioxidant food and contain several phyto-nutrients that give raspberries their beautiful colour. Making a fruit vinegar is easy and extends the wonderfulness of summer into the non-growing seasons. You can make a refreshingly delicious raspberry vinegarette dressing for your salad in the summer, or long after fresh raspberries are only a fond memory. Whenever possible I try not to heat foods too high (or too long) in an effort to retain as much of the nutritional value as possible, other than the necessary hot water bath if I want to seal the jars. For this reason I opted for a ‘fresh’ uncooked raspberry vinegar. It was shockingly delicious. And because its so easy, there is no reason you cannot make some raspberry vinegar in the middle of winter using frozen berries. You froze your excess from last summer right? *See instructions to make the vinegar below. In the meantime, how to use it . . . .

      Raspberry vinegar (scroll down to see recipe) can be used in a variety of salad dressings to add a fresh, delicious flavour, or add a couple of tablespoons to a glass of cold ice water. Oh my. Don’t judge until you try it. For a salad dressing, this vinegar is delicious enough to simply mix with a beautiful oil and shake, but if you’d like something a little more ‘reciped‘, try this one:

      Double Raspberry Vinaigrette recipe: (to make in blender or food processor)
      1 small onion coarsely chopped (or minced if you’re not using blender)
      1/2 cup frozen raspberries, freeze dried raspberries or raspberry jam
      2 T honey
      1 t dry mustard
      1/2 t salt
      1/4 t pepper
      1/2 cup raspberry vinegar
      1 cup of your choice of oil (or combination of two: vegetable oil, olive oil, grapeseed, avocado etc)

      add all ingredients except oil into blender. Puree till well combined, then turn the speed down and add oil in a steady stream. If you would like the texture of the whole or mashed raspberries (instead of pureed into a liquid), hold the jam out till after the blender part.
      Stir in afterward.
      If the vinegarette is too thick, thin it by whisking in a little water or apple juice.

      Raspberry Poppy Seed Vinaigrette recipe: BEST EVER and less than 5 minutes to make. 
      For more than a beautiful green salad. Use it as a sauce for grilled chicken breasts. 

      adapted from a recipe I developed almost 7 years ago – see original post here
      1/2 cup raspberry vinegar
      1-2 cloves of garlic minced (depending on size and taste)
      1/4 minced fresh onion or 2 T THRIVE Freeze Dried Onion cause its so simple
      1 tsp coarse salt 
      dash of black pepper
      * 1/2 cup fresh or frozen raspberries or THRIVE Freeze Dried Raspberries (optional but very nice texture)
      2/3 cup Canola oil – or your favourite vegetable oil 
      2 tsp poppy seeds 

      Directions: 
      Combine everything except the oil and poppy seeds into the small jar of a small blender. Blend till completely smooth. Or whisk well in a jar with a hand whisk. Not necessary to mince garlic or onion ahead of time if you are using the blender. 
      Slowly drizzle in oil continuing to whisk. Whisk in poppy seeds last. 
      Thats It! Super Simple. Super Quick.  Super Delicious. 
      Can be made earlier. Letting it sit in the fridge for an hour or more will give the flavours time to blend better. 

      Raspberry Vinegar – or Sour Cherry, or Saskatoon, or Concord (Valiant) Grape, or Highbush Cranberry or Black or Red Current Vinegar. The sky is the limit.

      Finished Raspberry, Cherry, Basil and Garlic Chive Vinegars.
      Note the gorgeous deep colour of the fruit vinegars and the delicate rose’ of the herb vinegars.

      basic recipe:
      using a 2 quart glass jar
      6 cups clean fresh raspberries
      2 cup sugar (consider substituting honey or using half sugar / half honey)
      6 cups white vinegar
      Place raspberries into clean jar. Dissolve sugar or honey in vinegar over low to medium heat. When hot and sugar completely dissolved, pour the sweetened vinegar over top the raspberries, making sure they all get covered. Cover with a lid, and let it sit on the counter out of the sun for a minimum of two days or up to a week. Will turn a gorgeous deep red colour. Strain through jelly strainer or several layers of cheese cloth (to keep the vinegar clear) into a clean storage glass jar. Cover and store at room temperature.
      * recommended to use within 6 months
      *
      I love the unique flavour of honey, but don’t want the raspberry flavour overpowered by it so I use a combination of sugar and honey together.

      They’ll all taste different depending on the fruit. Be brave and try new things. Keep everything clean and sterile, strain vinegar very well to ensure a nice clear product.

      SO. The next question of course, is what to do with the fruit you strain out of the vinegar. . . .

      While the herbs were pretty spent and I had no problem throwing them into the compost, there was no way I was gonna throw the fruit out. I first intended to combine it with some fresh and puree it for a fruit leather. I still might do that one day, but after tasting the strained fruit – Oh! My! Goodness! – it was so wonderful, that it deserved something better. It tasted like chutney to me. So that is what it became.

      By definition, a chutney is a relish-type-of-sauce made up of sweet and sour flavours, usually with fruit as the base and seasoned with herbs and spices. A condiment. The origin is from India but the variation of flavours are as wide as the world, lending itself to anything you’ve got on hand. So with the ‘sweet’ of the sweetened cherries and raspberries, and the ‘sour’ of the vinegar – it was a match from the beginning. What do you do with a chutney? Topping for meat (think about cranberry sauce, its a sort of chutney), or any dish that is more mild flavoured (think about plum sauce on egg rolls, another type of chutney). Use it with cream cheese on crackers. Use it with roast beef, pork chops, any type of chicken, with a grilled cheese sandwich, with a cheese plate, with samosas, Asian dumplings, egg rolls . . . . etc.

      recipe for CHUTNEY from strained vinegar fruit:

      lame title I know, but what else should I call it? The thing to remember is that you can make this from whatever fruit you have leftover from whatever fruit vinegar you make. I added flavours that I thought would go well with cherries and raspberries, but there were lots of other flavour possibilities for another time. See below. Again, be adventurous and creative.

      * 3 cups cherries and raspberries combined, strained from making fruit vinegar see below
      (with the skin, cherries have more texture so I chopped them finely)
      1 onion chopped finely
      4 apples (the tarter the better) peeled and chopped
      1/2 cup apple cider vinegar
      1/2 cup brown sugar
      * 2 cups chopped cranberries (I always have freeze dried on hand, but you can use frozen or dried craisins if you have them. If you don’t, then use raisins.) see below
      1/2 t salt
      1/4 t pepper
      2 T grated fresh ginger (I suppose if you don’t have it, try 1 teaspoon ground ginger)
      *** other possibilities see below

      Into the pot with everything on medium heat, stirring to mix well and heating to combine flavours. I prefer not to over-cook anything, and unless there is a good reason for more cooking, I opt for less heat where I can, so I never boil chutney for the length of time most recipes tell you to. That makes it mushy, and mushy is yucky to me. I just had the pot on the burner and added things as I measured them, stirring often. It eventually came to a natural simmer and I let it simmer for about five minutes.

      From this amount, I got three pints. Two pints I processed in a hot water bath (15 minutes) for winter use, and the other one I put in the fridge for immediate use. Obviously the ones processed are going to be a softer texture than the pint in the fridge.

      * 3 cups is simply what I happened to have, if I had more or less I might have adjusted the other ingredient amounts. I am sure it would change every time I made vinegar.
      ** Cranberries are very important in this recipe because of their colour. Raspberries will fade in the heat to a dark pinky colour which I don’t like (so I always add cranberries to raspberry jam). They also seem to have a natural pectin that thickens on its own so I never have to add pectin to raspberry or rhubarb jam if using cranberries. For this chutney, I noticed right away that the raspberries were fading so I added cranberries.
      My first choice would always be freeze dried because of their superior nutrition and bright colour, and of course the ease of storage. Always ‘ready’. Second choice would be frozen cranberries that I buy lots of at Thanksgiving to keep on hand. Might want to chop them for this chutney. Third choice is dried cranberries. These are usually very sugared so I don’t buy them as a general rule, but they still have that wonderful cranberry taste and of course the colour which is very important when canning.

      *** other ingredients to consider adding are numerous. I didn’t want to lose the distinctness of any of the flavours by adding too many, but to consider for another time:
      Garlic minced – a natural for anything savory
      Cloves and or cinnamon – preferably whole and in a cheesecloth bag for easy removal later
      Red pepper flakes for some heat – I almost added it this time but wanted to know what it would be like without first. The ginger has some natural heat too, so that worked
      Dry mustard – always a great flavour enhancer and a natural emulsifier if using more liquids
      Lemon or lime – didn’t need it this time with the apple cider vinegar and the strong cherry and raspberry tastes, but I love a citrus zing when suitable.
      Again, be adventurous with what you have on hand, and flavours you like.

      Have fun making your vinegars and in coming up with your own flavours depending on what you have on hand. Necessity is the mother-of-invention right?
      I’d love to hear your stories with your own flavours.
      Please leave me a comment.

      Warmly,

      Cindy Suelzle