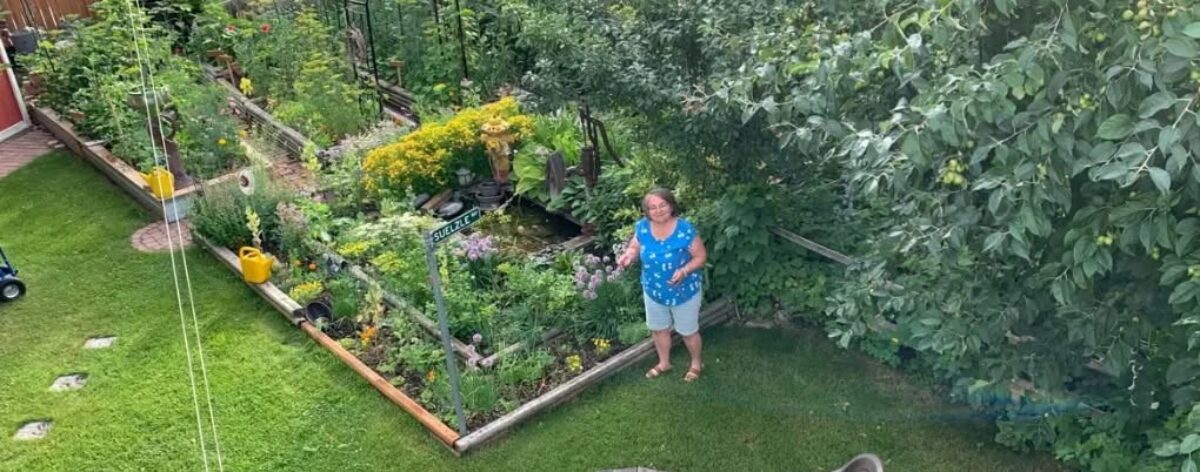
Stocking up on food for winter is about more than simply having a full pantry. It is about being prepared, being practical, and giving yourself a little peace of mind when the world outside becomes less predictable.
For those of us who garden, preserve, and try to live a little more self-reliantly, summer is a natural time to think about what we will need through the coming cold months.
Winter changes the way we get food
In summer, food can feel abundant. The garden is producing, farmers’ markets are overflowing, and fresh produce is readily available. And then there’s winter. In Alberta, that means months of cold, snow – and no local growing. In the past, preparing for winter was critical to having enough food, and keeping your family healthy. In recent generations we’ve become very ‘entitled’, and think we should have everything we want, whenever we want it, but that is not reasonable or sustainable in the long run.
A well-stocked pantry means that when the roads are bad, the weather is miserable, or you simply don’t want to venture out, you already have the makings of good meals at home.
Use the seasons as an analogy. Sometimes ‘winter’ is more than just the months between November and March when the trees are taking a break and the garden is sleeping.
It could be a period of unemployment, when the regular paycheque stops coming. Or an an illness, an unexpected expense that makes the household budget a little tighter than it used to be. Could be a transportation disruption, a shortage, or oh I don’t know …. maybe something completely wild, like – tariffs we’ve never experienced before, or some other circumstance that makes the things we normally take for granted suddenly harder to find.
Sometimes winter is simply a season of uncertainty.
Just as we prepare for the winter that arrives every year, we can prepare for some of these other ‘winters’ too. Stocking up isn’t about living in fear or expecting something terrible to happen. It is about recognizing that life has seasons—and not all of them are predictable.
Many of us have learned to put food by when there is plenty. We preserve the garden harvest, fill the pantry, tuck things into the freezer, and make sure we have some basic staples on hand. We do these things because we know that ‘summer’ won’t last forever.
The wise gardener doesn’t wait for winter to begin before thinking about winter. And perhaps the same principle applies to life. When things are going well is the very best time to prepare for the season when they aren’t.
Eventually, spring comes again.
Stocking up also makes good economic sense
Buying and preserving food when it is plentiful can save money.
When your garden produces more tomatoes, beans, carrots, onions, berries or rhubarb than you can eat immediately, with a few skills, you have an opportunity to turn that abundance into food for later.
The garden doesn’t have to stop feeding you just because the ground freezes.
Potatoes, onions, garlic and jars of roasted tomatoes in the cold room; jars of jam, dried apples and herbs in the pantry, berries and pesto in the freezer, apple cider, kefir and sauerkraut in the fridge – mean that reliance on the grocery store is minimized.
A stocked pantry gives you choices
There is an important difference between having food and having food you will actually eat.
If we’ve been friends for a while, you already know my philosophy has always been to Store what you eat, and eat what you store.
There isn’t much value in filling shelves with foods nobody in the household enjoys. Those jars of gorgeous red crabapple preserves look nice on the shelf but if no one knows how to eat them, they’re a waste of jars.
A practical winter pantry might contain the ingredients your family regularly uses:
canned and dried tomatoes
dried or canned beans
rice, pasta and grains
flour and other baking supplies
onions, potatoes and other good keepers
frozen or dehydrated vegetables
fruit, jams and preserves
meat and other sources of protein
soups, broths and meal ingredients
spices, oils and other cooking essentials
And don’t forget the simple things that can be surprisingly inconvenient to run out of in winter – special baking ingredients your family likes, pet food and other household staples like laundry soap and toothpaste.
Preserving your own food adds another layer of security
There is another thing I love about gardening and preserving. When I freeze, dry or can something from my own garden, I know where it came from. I know what I DIDN’T use while I watched it grow. I harvested it when it was ready. I preserved it when it was at its best.
There is something deeply satisfying about opening a jar in February and finding summer inside.
It isn’t merely food storage. It is the continuation of the growing season.
And then there is the emergency side of preparedness
We don’t stock food because we expect disaster.
We stock food because life happens.
Power outages happen. Snowstorms happen. Illness happens. Family emergencies happen. Supply problems happen. Sometimes a person simply doesn’t have the time, money, transportation or physical ability to get to the store.
Having food already in the house gives you breathing room.
You don’t need to panic-buy when life throws you a curve ball, because you have been gradually building your supply all along.
Perhaps most importantly, it is a mindset
Stocking up isn’t about fear. It is about responsibility and self-reliance.
I don’t expect to provide absolutely everything my household might ever need. None of us can.
But I can ask:
What can I reasonably provide for myself?
If I can grow some of my food, preserve some of it, store some of it and keep a reasonable supply of everyday staples on hand, then I have made my household just a little less dependent on circumstances beyond my control.
And I think that is a worthwhile goal.
Winter comes every year. We know that.
So rather than waiting until the shelves are bare or the weather turns nasty, now is the perfect time to look at what we have, decide what we will need, and to begin filling the pantry.
There is a wonderful feeling that comes from looking at a well-stocked pantry in the middle of winter and thinking: “We’re okay. We’ve got food.”
I’d love to hear your ideas about what you stock up on, where you store it, and how you use it in the winter.
1st Rule of Tomatoes EAT them! Every. Single. Day when they’re in season. There is NOTHING better than homegrown tomatoes. That is a foundational truth I live by.
2nd Rule of Tomatoes Don’t waste them! The end of summer is all about tomatoes ripening daily, counters overflowing with bowls of gorgeous, vine-ripened tomatoes – each one a delicious reminder of the rewards of summer gardening. . . .
Toasted tomato sandwiches (with pesto mayo, of course), fresh tomato salsa, bruschetta made with fresh sourdough bread . . . every day is another tomato day—and that’s awesome!
It’s what we’ve been looking forward to for months.
And I have another personal rule when it comes to tomatoes: I choose not to buy “fresh” grocery-store tomatoes. Honestly, they’re just too disappointing.
I figure that if we’re eating tomatoes every single day when they’re at their freshest, most delicious, and most nutritious—straight from the backyard—we can live without them for a few months when the garden is done.
And you know what?
We do just fine.
In fact, I think it makes that first juicy, sun-ripened tomato of the next season taste even better.
BUT. It. All. Happens. NOW. No stretching it out over the next few months like potatoes and butternut squash. And if you’re paying attention to the rules, you know better than to waste them.
Okay, relax. I get it. And I’m here to help. There are many things you can do to preserve your ‘excess’ – tomatoes are probably the easiest produce to preserve with incredible variety.
But it all takes time! And there’s only so much of that to go around right? As a young mom, I learned a good lesson from an older lady I used to buy milk from. Her name was Elsie Manchak. It was 40 years ago so I might not be quoting exactly, but in essence Elsie told me “when something in the garden is ready – it IS. READY. NOW! That means you adjust, and you pivot. Whatever you thought you were gonna do today, just got trumped. You take care of the food when its ready, because that is what you’re gonna feed your family with all winter long.”
I absorbed her philosophy. It became formative for me at a very impressionable time in my life. It seems it may even have became part of my DNA. Thank you Elsie. There are many things you can do with your excess tomatoes (by excess, I mean more than you can eat fresh), and time becomes of the essence. Did you know you can freeze them?
Freezing Tomatoes
Yes! You can freeze fresh, ripe tomatoes to buy yourself some time now – and then deal with them later when things slow down a bit. Whether it is better to freeze tomatoes whole or chopped depends on how you plan to use them later, AND how much freezer space you have. Freezing them whole (or halved) requires the least amount of effort and lets you easily slip off the skins later. Chopping them first saves freezer space and prepares them to go straight into recipes.
Truth be told, I am not a fan of freezing tomatoes as a general rule, but I do it when I have to buy time.
I freeze them whole and store in a plastic bag to come back to later in the season. Just don’t forget they’re there!
You can freeze without blanching or any special preparation. However, freezing changes their cell structure and they will become soft and mushy once thawed. Sometimes its helpful for what your ultimate plan is. Especially if your plan include Tomato Jam (see below for recipe). Also great for soups, stews, chilis or sauce.
How to Freeze Them Safely
when packing, do your best to remove air from bag
Wash ripe, sound tomatoes and pull off the stems.
Best to core them even if you intend to freeze whole. Easier to do that while they’re still fresh, than later when they’re ‘squishy’.
I freeze whole on a cookie sheet, then bag them frozen into a plastic bag later.
OR you can pack them raw – tightly into freezer bags pressing out the air.
OR you can chop them unpeeled or peeled and pack in amounts to use in specific recipes later.
Seal – eliminating as much air as you are able to, and label with date. *Rookie mistake: you think you’ll remember what’s in the bag and when you froze it. You won’t. Your thawed tomatoes are squishy when they thawed out? Yup. Remember that freezing changes their cell structure and they will become soft and mushy once thawed. Nothing you can do to prevent that. They’re still great for soups, stews, chilis and sauce.
Suggested Shelf Life for frozen tomatoes When I freeze tomatoes it is SHORT TERM, buying me some time at a busy time of year. But if you’re actually planning to STORE them in the freezer, then pay attention to these rules of thumb: *Optimal nutrition for frozen tomatoes is 6-12 months, when stored properly in airtight freezer bags or containers, though they maintain the best flavour and quality if used within 6 months. If they are vacuum-sealed, they can last up to 2 years.
Chopped or Sliced Pieces: Less time before flavour and texture degrade significantly. Shelf Life is 3-6 months max.
Standard Freezer Bags / Containers: 6 to 12 months (best quality under 6 months).
Vacuum-Sealed Bags: 2 years.
Important Tips for Canning Once-frozen Tomatoes
Best Uses: Freezing breaks down the cell walls, making thawed tomatoes very soft. This makes them perfect for cooked products like sauces, juices, or crushed tomatoes. They are not suitable for fresh-style salsas or to be canned whole.
Peeling Trick: When you thaw them, the skins will slip right off easily without needing to blanch them in hot water. Yay.
Acidify: Always follow tested canning recipes and add the required bottled lemon juice or citric acid to each jar, just like you would with fresh tomatoes.
RULES
For the most part, I am very flexible with recipes and I like trying new things, but when it comes to canning, I have a few “Non Negotiable” rules I follow when it comes to canning
1. Acid foods in hot bath canner – non acid foods in a pressure canner. Period! 2. Processing times must come from a reliable source (not your memory or your gramma’s memory). Get yourself a good book. It might be pricey. It’s worth it. If you’re searching google for information, remember anyone can publish information – go to an official government source. 3. Only use jars that are made for canning. They are tempered glass – intended for repeated use in high heat. 4. Use ONLY proper canning lids, and only use them ONCE. There are plenty of ways you can save money. Re-using lids isn’t one of them. 5. Just DON’T MESS AROUND with SOME THINGS.
Canning Tomatoes
So, about Rule #1 about acid foods vs non acid foods . . . . TOMATOES are considered borderline foods. They can go either way, so pay attention. Don’t skip this information and go straight to the recipe. It’s important.
Probably the most common way of preserving tomatoes is to bottle them and process them in a hot water bath canner. Tomatoes are the ONLY vegetable that can be safely canned in a hot-water-bath canner. (yes I know that tomatoes are technically a fruit – which is why they fit into the safe zone, but we usually EAT them like they’re a vegetable) There is a right way to do this, but there are also a few wrong ways to do it. And it’s all about BOTULISM.
“Botulinum spores are on most fresh food surfaces. Because they grow only in the absence of air, they are harmless on fresh foods.
Most bacteria, yeasts, and molds are difficult to remove from food surfaces. Washing fresh food reduces their numbers only slightly. Peeling root crops, underground stem crops, and tomatoes reduces their numbers more. Blanching also helps, but the vital controls are the method of canning and making sure that recommended research-based process times are used.“1
Salt or No Salt, and How Much? Let’s talk about salt first because it’s easy. Yes. Use it because without salt life is boring. How much? 1 teaspoon per quart / litre OR 1/2 teaspoon for a pint / 500 ml What kind? Pickling salt or pure salt of whatever variety you like – as opposed to regular table salt which has added iodine in it – which can make your liquid cloudy or dark. Table salt often contains anti caking agents too.
to ADD ACID or not to add acid; that is the Question. Why and what type and how much? Experts say that modern tomatoes have lower natural acidity levels than older varieties. Additional Acid is an absolute MUST when canning tomatoes.
WHY IS ACID SO IMPORTANT? Botulism prevention: Adding acid lowers the pH to a safe level to prevent the growth of dangerous Clostridium botulinum spores during water-bath canning. See more about botulism here.
Lemon juice or Vinegar? Which is the recommended ACID for canning tomatoes?
Lemon Juice: Flavour: Mild and subtle; blends into the tomatoes without altering the overall taste. Amount needed: 1 tablespoon per pint or 2 tablespoons per quart. Many people prefer to use bottled lemon juice because the level of ph is identified, and consistent. I generally use fresh lemon because its convenient for me and I usually have some on hand because I use it for a lot of other things.
Vinegar: Flavour: Strong and distinct; can cause noticeable changes in plain tomato dishes. Amount needed: Requires twice the volume: 2 tablespoons per pint or 4 tablespoons per quart. Must be standard 5% acidity white or pickling vinegar. Other vinegars such as balsamic, white wine or rice vinegar are not acidic enough. My advice: use lemon juice over vinegar.
To sum up – salt may be optional, but adding acid is not optional. ALWAYS add lemon juice (fresh or bottled) or citric acid to EVERY jar of tomatoes to ensure safety. 2 tablespoons lemon juice per quart/litre, or 1 tablespoon per pint / 500 ml.
When using a Hot Water Canner, how long should Tomatoes be processed?
Processing begins being timed after the water has returned to a full rolling boil. 40 minutes for a pint / 45 minutes for a quart.
Is there such a thing as processing tomatoes too long?
Yes you can process them too long. Once the hot water in your canner has returned to a rolling boil, set the timer so you don’t lose track of it. If you’ve left them an extra 5 or so minutes, don’t worry about it. Its not a safety issue, but it will begin to affect the quality, taste and texture of your finished tomatoes. Boiling longer than necessary affects the texture, breaking down cell walls, giving tomatoes a soft, mush consistency. Obviously nutrient loss will become an issue, as will ultimate flavour (and even colour) loss.
the TOMATO CONTROVERSY
Over the last few decades there has been a good deal of controversy about whether or not all tomatoes are acidic enough to be canned in the traditional boiling water bath method. Tomatoes have generally been considered a sufficiently high acid food, but they are border-line in their PH range. Safe PH level is considered anything under 4.4. Over that is considered a low acid food. Tomatoes can range between 4.05 to 4.7 – just under and just over the acceptable level. Pretty IFFY.
Variations can be attributed to: Tomato Variety There are many types of tomatoes, some of them sweeter than others. Some more acidy than others. Stage of Ripeness or damaged fruit The riper a tomato, the lower the acid level. As a tomato ripens, the concentration of primary organic acids decreases. This causes the overall pH level to rise slightly. The lower acidity is heavily influenced by a surge in natural sugars in the ripening tomato. Damaged tomatoes can have an even higher PH level.
It is therefore very important to use only prime, properly ripened fruit when canning.
AND, as an extra precaution, add 1 tablespoon of lemon juice per pint of tomatoes, and 2 tablespoons per quart.
The additional acid is not intended to compensate for overripe fruit. It is an extra precaution to take when everything else is right—when you are starting with sound, properly ripened tomatoes and following safe canning practices.
Properly canned foods retain about 40% original nutritional value – OF WHATEVER THE FOOD WAS THE MINUTE IT WENT INTO THE JAR. This fact was supremely disappointing to me when I learned it, because I raised my family on home canned food. But it shouldn’t come as any surprise, when you remember that those tomatoes were in boiling water for 45 minutes. It is also very important when preserving food, that you attend to it as soon after harvesting as possible. The nutritional value begins to dissipate within the first HOUR of picking.
Canning tomatoes safely as a beginner requires the following: 1. canning jars – pints or quart sizes, with lids and rings to fit. NEVER RE-USE the lids from a previous canned jar. Modern lids are made for SINGLE USE only. 2. Hot water bath canner or a stock pot deep enough for boiling water to cover the tallest jar in use by at least two inches. 3. A rack or something else to keep glass jars from sitting directly on the bottom of the pot. If you don’t have a rack, use a folded tea towel. 4. Another large pot to boil water for blanching tomatoes. 5. Cold water and ice to cool blanched tomatoes fast. 6. Mason jars that are identifiably intended for hot water bath canning. NEW lids and rings for each jar. 7. Jar lifter or a lowering rack for the canner. 8. pickling salt or any salt OTHER THAN the iodized salt (and pepper if desired) 9. Lemon juice 10. Firm, ripe tomatoes in good shape. Plan for approximately 3 pounds per quart jar or 1.5 pounds per pint.
*TIP: when canning in a hot water bath for a minimum of 10 minutes it is not necessary to sterilize your jars. Freshly wash them in HOT water, rinse in HOT water and allow to air dry. Don’t hand dry. Or of course, use your dishwasher.
Directions
1. Freshly wash jars in hot soapy water. Rinse and set aside to drain. Not necessary to sterilize jars that will be processed at least 10 minutes. 2. Wash tomatoes in cool water. Set aside to drain. 3. Heat a big pot of water to boiling for blanching tomatoes. 4. Fill your canner with clean water and begin heating it to a boil. Make sure there’s a rack on the bottom to prevent the jars from touching the bottom during processing. Set a clean thick tea towel on the counter beside the canner to receive the HOT finished jars from the canner. 5. Wash and core the tomatoes. Cut an ‘X’ on the bottom. Set aside.
6. Prepare a sink or plastic tub with ice water – deep enough for all the tomatoes to fit and be cooled. 7. In stages (no more than 8-10 tomatoes at a time), drop scored tomatoes into the boiling water and let sit for a minute or two, until the skins begin to split. 8. Remove tomatoes from boiling water and immediately drop into ice bath to arrest the cooking process. 9. When tomatoes are cooled, peel them with a sharp knife. The skins should slip off easily. (SAVE THE SKINS – see below) 10. Cut the tomatoes into halves or quarters (depending how big they are).
11. Pack cut tomatoes into freshly cleaned jars, pushing down with your hand, to make the tomato juice come to the surface. You’re goal is to cover the tomatoes with liquid from the tomatoes. Leave 1 inch (2 cm) headspace. 12. Add 2 Tablespoons of lemon juice and 1 teaspoon of salt to each quart. Half that amount for each pint. 13. Remove air bubbles with a long table knife. Wipe the top of your jars with a clean hot cloth to ensure they are perfectly clean. Put a clean lid on the jar, and tighten moderately. (Don’t tighten the lid excessively.) 14. Use jar lifter to slowly lower jars into hot water. Bring water to a boil, or if its already boiled, return to a rolling boil. Jars should be covered by water at least an inch. I usually shoot for two inches of coverage. 15. Begin timing once water has returned to a full rolling boil. 40 minutes for pint jars, 45 minutes to quart jars. If water is boiling violently, reduce the heat but keep it rolling.
16. When the timer goes off, remove jars slowly to the prepared clean tea towel. Set jars on the towel, keeping some air space between them. Loosely cover the jars with a thin clean tea towel. Allow to cool undisturbed for at least 12 hours. 17. Canning jars seal because heating expands the air and food inside, forcing excess air out. Subsequent cooling contracts the contents to create a strong vacuum lock. When the sealing has completed you hear a gentle ‘ping’ as the vacuum pulls the lid down. It’s music to a canner’s ears. 18. When completely cooled, wipe jars with a hot wet cloth and label the lid with date and ingredients.
Once you’ll learned how to peel tomatoes, and how to process them – you can apply the same principles to canning PEACHES, APRICOTS, PEARS, PLUMS, RHUBARB AND APPLES with slight variances that you can work around with a little confidence. ie: – Peaches are peeled the same way (by blanching). Be sure to cool immediately after removing from boiling water. Unlike tomatoes however, you’ll add syrup of your own make (light, medium or heavy syrup – your choice). – Apricots don’t get peeled and neither do plums. Both take a syrup. – Pears and apples get pealed the same way. Apples often get canned as a sauce. Personally I don’t like this kind of apple sauce. I’d rather make it fresh, and since apples are available all winter long, its easy to do. – All fruits (including rhubarb) are best cold-packed) when canning.
The Sealing Process: Heating: As the jars process in a boiling water or pressure canner, the air and food inside heat up and expand. Venting: This expansion pushes the extra air and steam out from under the flat metal lid. This is why the outer band should only be “fingertip tight” – so the trapped air can escape easily. Cooling: When you remove the hot jars from the water and let them cool, the food and remaining air inside contract and shrink. Vacuum Lock: This contraction pulls the lid down tightly against the jar rim. The flexible sealing compound (plastisol) on the flat lid hardens into an airtight vacuum seal.
Roasted Tomatoes
THIS is my favourite way to can tomatoes, and its my favourite way of eating canned tomatoes. instruction with pictures coming soon
Roasted Tomato Sauce
I make my tomato sauce with roasted tomatoes. Once you’ve tried it, you’ll never go back to the old way of boiling on the stove top.
The instructions are pretty simple and easy to customize. Put them into your biggest pyrex cake pan, or roaster in the oven at 350F. OR if you’re making a LOT, use an electric roaster set to 350F. Be creative, use what you have.
15 lb Roma tomatoes chopped 1 T salt and 1 T coarsely ground pepper dried oregano (big handful) dried basil (slightly less of a handful) dried thyme (slightly less than the basil) 1 heaping T garlic salt
Don’t can overripe tomatoes. Eat those today. If you have more than you can eat, make tomato soup for supper tonight and give a jar to your neighbour. Or use them to make tomato paste and then have pizza for supper tomorrow. But don’t can them because the sugar has begun displacing the acid.
15 pounds of tomatoes roughly chopped
Step 1 Wash tomatoes.
Step 2 Remove blossom/core end. Chop tomatoes and put them in a large baking pan or roaster at 350F.
Step 3 Be patient. This is gonna take a long time. 2-3 hours. Maybe even more if you have a lot. I’ve got 15 pounds in this roaster. Stir every 15 minutes or so to keep from scorching.
Step 4 2 hours in. Add salt and pepper. I added 1 Tablespoon of each for 15 pounds of tomatoes. If you’re doing less in the oven, start with 1 teaspoon salt and 1 teaspoon pepper. Easier to add more later than to take it away lol. Repeat step 3.
this is after about 2 hours. Starting to simmer down beautifully. I added 1 Tablespoon each of salt and coarsely ground pepper
to this amount (15 pounds) of Roma tomatoes, I seasoned with a big handful of dried oregano, slightly less dried basil, and slight less again of dried thyme. I also added 1/4 cup tomato powder.
Step 5 Add seasoning of your choice. For this amount, I added 1 big handful of dried oregano 1 medium handful of dried basil 1 slightly smaller handful of dried thyme a heaping tablespoon of homemade Garlic Salt2
Step 6 I like to add a little tomato powder to most tomato recipes. It adds more Tomato-Zing, and helps to thicken a little. In its place, you can add tomato paste if you have it. Otherwise don’t worry about it.
INSERT: If you’re planning to can this tomato sauce, get your canner filled with water and on the stove. Bring it to a boil over high heat. Make sure you’ve got a rack in the bottom to prevent the jars from being sitting directly on the bottom.
Have your jars ready with lids and rings handy. You’ll be hot-packing the sauce so you don’t want to fill the jars until they’re ready to go into hot water. This simply means that you’re packing HOT sauce into the jar, and putting the jar into a HOT water bath canner. Hopefully both jar and water will be in a similar range of HOT.
Step 7 Stir it all in and be patient a little while longer. When most of the water is gone, and the texture is looking ‘saucey’, you’re just about done. At this point, I take about 1/3 of the sauce and zip-zip it for a couple of seconds in the blender, then mix back in. You can puree all or nothing, depending on your personal preferences. I like the sauce, but I also like some texture.
NOTE: If I intend to can the sauce, I do not add onion or garlic cloves, or any type of vegetable. The only thing I add is seasoning. I don’t want to compromise high acid tomatoes with low acid vegetables. THIS IS VERY IMPORTANT. If you add low acid ingredients, the sauce must be canned in a pressure canner. There are acceptable amounts of certain vegetables that can be added, but generally I choose to err on the side of caution, and avoid adding them – except for seasoning. For more information, click the image below.
Step 8 Add lemon juice to the finished sauce. You’re going to have to estimate unless you want to measure it out. About 1/4 cup lemon juice for 2 quarts (4 pints or 8 cups) of sauce. Better to put in a little more than necessary, than to be under. Stir to distribute the lemon juice.
By the time you’re to this point, hopefully your water is ready to receive your jars.
Step 9 Using a wide mouth funnel, and using a big scoop begin measuring out into jars. 2 cups into pint jars, 4 cups into quart jars. Leave about 2 cm head space (just under an inch). Adjust by taking away a spoon here or there, or With a clean, hot, wet dishcloth wipe the jar rim to ensure its perfectly clean. Put the lid on, screw the ring on to hold the lid down – snug but not super tight.
Step 10 Put the jars into the canner with almost boiling water. Make sure there is enough water to cover the highest jar by 1-2 inches of water. Turn the heat up and start watching for it to reach a FULL rolling boil. When it does, set the timer for 40 minutes for pints or 45 minutes for quarts.
Don’t go too far away. Keep an eye on the boiling water. If its too violent, the jars may bang together – adjust the heat down a bit. If its not boiling completely, turn the heat up and start your timer over again.
roasted tomato sauce on the left, canned tomatoes on the right. Each in boiling canner for 45 minute per quart / 40 minutes per pint
Step 11 When the timer goes off, the sauce is finished. Turn the heat off, and one by one remove the jars to set on a clean, thick tea towel. Leave a little space between the jars to cool slowly. I usually drape a clean tea towel over top to ensure they down cool down too quickly.
GOOD JOB! Now you can start listening for that wonderful ‘ping’ sound telling you the jars sealed. Let the jars sit there at least 12 hours. Then label and put away.
Pesto Mayo
disclaimer: there are no tomatoes in this recipe. BUT it is the foundation for all things good about September eating-of-tomatoes.
2 Tablespoons mayoanaise 2-3 Tablespoons pesto (you decide) stir to mix. Use on toasted bread that you are going to lay thick slices of fresh tomato on. Salt and pepper. ENJOY. This is what Augusts and Septembers are all about.
Salsa
“Salsa is America’s #1 condiment. This popularity has extended to home food preservers who want to make use of a seasonal harvest of garden-grown tomatoes and vegetables. Most salsa recipes mix low-acid foods, such as onions, green peppers, and jalapeño peppers, with acid foods, such as tomatoes. Currently the USDA and the National Center for Home Food Preservation recommends that a boiling water canning process be used only for research-tested salsa recipes that provide evidence of safe acidification to inhibit Clostridium botulinum growth. Only a few such research-tested salsa recipes are available and these must be followed with little deviation.”
2. Use your own favourite recipe and go straight to canning with pressure canner.
Sarah’s Salsa
This is my daughter Sarah’s long standing salsa recipe. She takes it from a favourite book of ours – Patti Shenfield’s “Flavors of Home”published 1994. Sarah has tweaked it a little over the years and she’s flexible with what she has on hand. 15 lb tomatoes, chopped (5 quarts / litres / 20 cups) 5 fresh jalapeno peppers seeded and chopped (save the seed from 2) 10 cups chopped white or yellow onions 2 large green peppers finely chopped 2 cups white vinegar (higher acid than other varieties) 1 cup tomato powder or 12 ounces tomato paste 1 Tablespoon salt (never use iodized table salt for canning) 6-8 large garlic cloves minced 1/2 cup white sugar 1 Tablespoon freshly ground pepper 1 teaspoon cumin 2 teaspoons cayenne pepper
Prepare 14 pint jars or 7 quart jars by washing well in HOT water, rinsing well in HOT water and sitting to drain. Don’t hand dry, just let them air dry. Blanch and peel all tomatoes using the system outlined above. (Remember to save the skins to dehydrate later.) Wash, core and chop the tomatoes, placing in a LARGE pot. Using gloves, dice jalapeno peppers. Add the seeds of 2 or 3 jalapeno peppers to pot (discarding the rest). Unless you like more heat, then add all the seeds. Add remaining ingredients, and bring to a boil. Simmer until vegetables are tender (about 15 minutes).
Ladle into hot jars and process in PRESSURE CANNER at 10 pounds for 30 minutes.
~ note ~
Because of the ‘other’ non-acid ingredients, this combination-food MUST be processed in a pressure canner. I know that’s not convenient and I know you may not have a pressure canner, and yes, I know they’re expensive. Sorry about all that inconvenience, but let me clarify: * because of the large amounts of onions, peppers and garlic used in this recipe – THIS IS A PRESSURE CANNING RECIPE. In my “reliable source book”, for onions it recommends 10 lb pressure and 30 minutes for quarts. For peppers, that same source has me using 5 lb pressure. I take the highest recommended pressure for the additional foods I’ve added – 10 lb for 30 minutes, and apply it.
If one eliminates those non-acid foods, electing to add them later AFTER canning but before serving, then we would be completely in the safe zone for hot-water-bath canning.
Tomato Juice
Use only the freshest, juiciest tomatoes in your garden for juice. This is one of those times that meaty tomatoes like Romas are not the best choice. Whichever method you use, wash and core the tomatoes, removing any ugly spots.
Don’t use a steam juicer for tomatoes.
method 1 – if you have a fresh juicer Once you’ve juiced it, you can freeze the juice or you can CAN it in jars just like tomatoes – adding 1 T lemon juice for a pint or 2 T lemon juice for a quart. See the suggestion for seasoning in method 2.
method 2 – if you do not have a fresh juicer Chop the tomatoes coarsely. Add to a large stock pot and add a cup of water to initiate the ‘juicing’. Bring the pot to a boil and simmer until the tomatoes are softened but not mushy. Mash with potato masher. Strain the tomatoes through a fine sieve to remove seeds, skins and extra pulp. You can add this pulp to tomato sauce or put it in the fridge to use in dinner tomorrow. Measure the strained juice and return to the pot. For each quart (4 cups) of juice, add 1 T lemon juice, plus your choice of seasoning: 1 teaspoon pepper 1 teaspoon celery salt or garlic salt or onion salt or dill salt – if you’re not using any seasoned salt, add 1 teaspoon of kosher salt Season to YOUR taste. Stir to dissolve seasonings.
At this point you can pour it into a pitcher and refrigerate it for use in the next couple of days. Or you can process it in a hot water bath canner. to can: Heat the seasoned juice to almost boiling. Pour hot juice into clean and prepared quart jars. Leave the appropriate head space of a 1/2 inch or so. Wipe the jar rim with clean wet cloth, put the lid on, put the ring on – nice and snug but not too tight (air must be able to escape in the process of boiling). Same timing as for canned tomatoes: 45 minutes for a quart, 40 minutes for a pint. Remember: don’t start timing till the water has returned to a full rolling boil.
method 3 – My preferred – unless I have so many tomatoes that I’m desperate to use up. I most often choose to make tomato juice from the tomato powder and cold water. I use a ratio of 1:8-10 ie: 2 T. tomato powder+ 1 cup (16 T.) COLD water Stir to completely emulsify powder. Season as you choose and ENJOY!
A savoury combination of roasted small tomatoes, garlic, basil and butter! Use in place of traditional garlic butter. Spread on toast to serve with eggs, saute vegetables in it, top a quick pasta dish, even spread on your grilled corn on the cob!
It is so-so-so easy to make; start with this basic recipe and then customize to your hearts content. I like to add pepper. A lot of pepper. Like a tablespoon of coarsely crushed pepper. If you’re not a big pepper fan, that’s okay. You be You, but Be a BRAVE You!
Basic recipe: 1 pint (2 cups) cherry tomatoes 2 Tablespoons olive oil Broil tomatoes till nicely charred. Could take up to 10 minutes – but don’t leave the kitchen. Peek at it every couple minutes. When they start to char, its a fine line to ‘burnt’. Stir it up a little, and put it under the broiler again if needed. When you’re happy with them, strain additional tomato water out of the charred tomatoes. You want them pretty dry.
2 garlic cloves handful of fresh basil – if you don’t have any fresh, use a smaller handful of dried basil pinch of salt black pepper – I like coarsely ground and I use a lot. So you do you, measure with your heart. 1 teaspoon – 1 tablespoon 1 cup butter at room temperature (1/2 pound)
Process the whole combination till smooth. Pour into a wide mouth jar and store in the fridge. Can be frozen.
Tip: in the winter when you don’t have fresh tomatoes, use sundried tomatoes and dried herbs to make tomato butter.
Tip: Remember, you’ve got fresh basil, fresh tomatoes and fresh garlic mixed in with your butter. Those foods will mold if they sit too long in the fridge. If you’re not going to use the butter up in about a week, then freeze by generous spoonfulls on parchment paper; once frozen, store them in a ziplock bag – labelled properly, in the freezer. Take out the amount you want to use, and use it.
Tomato Jam
Tomato jam was one of those “surprises” that you need to be open minded for. The word “jam” sometimes puts people off, but get over it. It was never intended to be part of a peanut butter and jam sandwich. It is something far different than that; a rich balance of sweet, savoury, complex and tangy flavours.
It is made by slow-cooking ripe tomatoes with sugar, vinegar and warm spices. The slow simmer breaks down the tomatoes into a gooey, sticky and spreadable ‘jam’.
It raises the bar on the traditional BLT, and adds pizzaz to a normal grilled cheese sandwich. A favourite way for us to eat it, is spread over flat bread, put cheese over top and set under the broiler for a couple minutes. Serve with crackers and cream cheese, on a hamburger (it’s the new ketchup), bagels n cream cheese, on top of frittata or quiche, with cheese, on toasted whole what bred with fried eggs, with butter on fresh sourdough bread or on your next charcuterie board.
Basic Recipe: 4-5 quarts of chopped Roma tomatoes (16-20 cups) 1 cup brown sugar 1 cup white vinegar
Add all ingredients together in saucepan over medium heat, or roasting pan in the oven at 350F. Expect it to take 2-3 hours minimum. Stir frequently to prevent scorching. Lower heat as it thickens. Continue to stir frequently as it thickens.
You’ll know its finished when you’ll be able to slide a spoon through it and see the bottom of the pot distinctly before it starts to slowly seep together.
If you intend to can it, I recommend using 1/2 pint jars (250 ml). Spoon hot jam into jars, affix lid and ring and slowly submerge into a boiling hot water bath. Process for 10 minutes (as you would any other kind of hot jam). Remember not to start timing until the water has returned to a boil. Enjoy!
Dehydrating Tomatoes
Properly dehydrated food can retain as high as 80% original nutritional value. Optimal shelf life is impossible to gage as there are too many factors to consider, like: was it completely dry when you put it into the jar? Storage should be a little on the cool side if possible, and in the dark as much as possible. But if all the conditions are right, you can reasonably expect up to two years.
*Tip: I know you can have dehydrated food stored for YEARS! But just because it doesn’t look disgusting, doesn’t mean there’s any nutritional value in it. Try to keep your ‘stored’ food optimum by rotating it, by EATING it!
You can use any kind of tomato you have, but I find that the ‘meatier’ ones, like a Roma or Romanian Giant work the best because they have less ‘water’ in them, and they hold their body better. But just use what you have. If you’re drying cherry tomatoes, either cut in half or at least puncture them with a knife. The skin protects them well and they’ll take forever to dry otherwise.
*Tip: If your dehydrator has screens for the rack, you’ll want to use them for tomatoes. Not the end of the world if you don’t, they’re just easier to remove from a screen.
directions: Wash tomatoes and core. Slice into 1/4 inch (1/2 cm) slices and lay onto the dehydrator rack. If you slice too thinly they’ll dry paper thin and will be very difficult to remove from the rack or screen.
Dry at medium heat. Expect them to take several hours – so many factors will affect the timing: the water level of the tomatoes, the humidity in the air that day, the heat and fan of your dehydrator etc.
Every hour or so, rotate the racks – moving the bottom one to the top. Rotating helps keep the drying even. If you have to go out for a few hours, simply turn the dehydrator off and restart it when you get home.
When you can see them starting to dry, its helpful to turn each one over by hand, and even move some to other screens to fill in the gaps created by them shrinking. This enables you to another rack of fresh tomatoes if you’ve got more waiting for room.
They will not all be ready at the same time. You’ll know they’re completely dry by feel. They should be leathery or even crispy. No soft spots. If in doubt, leave them a little longer. Remove the ones you deem dry and put into an airtight container with a lid. Label your jar with the date.
Continue to add to your jar till all are done. Easy Peasy!
TOMATO SKINS
I know right? Who ever heard of such a thing?
Did you know that Tomato Skins contain a high concentration of the tomato’s key nutrients!?
MORE ANTIOXIDANTS: Up to 98% of the flavonoids found in tomatoes are located IN THE SKIN. Flavonoids are the phytonutrients that give many fruits, vegetables, and flowers their vibrant colours and offer antioxidant and anti-inflammatory benefits.
HIGH LYCOPENE: The tomato skins hold high levels of lycopene, a powerful compound that helps fight cell damage and may lower the risk of heart disease and certain cancers.
DIETARY FIBRE: Leaving the skin on adds extra fiber to your diet, which aids digestion.
BETTER TEXTURE IN COOKING: Unpeeled tomatoes break down more slowly in sauces, adding richness and better body to cooked dishes.
Next time you’re peeling tomatoes to can them, don’t toss the peels into the compost. Save them, and stick them in the dehydrator, or slow bake them in your oven at 250 degrees F until they’re crispy.
They’re quick to dry (by quick I still mean a few hours lol). Once they’re dry powder them. Use in EVERYTHING TOMATO: soups, stews, sauces, up your salsa or bruschetta, even add some to your meatloaf!
Tomato Powder
Put dehydrated tomatoes into a dry blender in small amounts at a time and turn onto high. (a high powered blender is best) Process till they’re powdered. That’s all there is to it. When the powder gets deep enough that its not receiving any more, stop the blender and pour it into a clean air tight container and put the lid on. Repeat another couple of times till you get as much as you want.
You will inadvertently leave quite a bit of tomato powder residue on the inside of your blender. Juice add a little water and blend again. Tomato Juice! Drink it.
*Hint: tomato powder will in time begin to compress and get ‘chunky’ from the moisture in the air. For that purpose, I usually only make a cup or two at a time. No problem when the powder does get chunky, simply scrape it with a fork to loosen. This ‘compacting’ is unavoidable without anti-caking agents, so live with it.
I also powder up the dehydrated tomato skins. It’s really the only way I can think to use them. They’re super easy to ‘puree’ in a high speed blender, and they remain nice and fluffy – not compressing like the tomato powder itself. For this reason, I often mix the two together in a jar and use them that way.
Pickled Tomatoes
Pickled cherry tomatoes are new to me this year. If you know me well, you’ll know that I make a point of trying at least TWO New things in the garden every year, and I also like to try new ways of using them in my kitchen and of preserving them. This year, one of my ‘new’ things is the whole idea of pickled tomatoes! It literally blows my mind. And they are surprisingly delicious.
Canning pickled cherry tomatoes is not only a delicious way to preserve the harvest, but it adds a wonderful tangy flavour to charcuterie boards, salads, sandwiches and so much more. They are literally bursting with juicy sweetness and a zesty vinegar kick.
method 1 – short term, into the fridge we go fresh pickled tomatoes to consume this week – 1 quart 4 cups of a mixture of different cherry tomatoes (just for colour) 1/4 T whole black peppercorns 2 cloves garlic sliced 2 or 3 sprigs of fresh herbs: basil, rosemary or thyme 2 teaspoons sugar 1.5 teaspoon salt
Preparing the Tomatoes: Wash the tomatoes, removing any green stems Use a toothpick or skewer to poke a small hole in each tomato. This step lets the hot liquid get inside the tomato so it pickles evenly. Put peppercorns and garlic in the bottom of wide mouth quart jar. Put tomatoes into jar, tucking sprigs of fresh herbs along the sides. Pack tightly. Set aside.
Preparing the Brine: 1 cup water 1 cup white vinegar 1.5 teaspoons pickling salt 2 teaspoons sugar dash red pepper flakes Stir to dissolve sugar, heat liquid till almost boiling. Pour hot brine over the tomatoes. Put lid on and wait for it to cool. Store jar in fridge for at least 24 hours. Best after 48 hours. Eat within a few days.
method 2 – longer storage, canned Preparing the Tomatoes for two pints: 4 cups cherry tomatoes few peppercorns for each pint 2 cloves of garlic sliced. One for each jar 1 sprig of fresh herb in each jar (my personal favourite with tomatoes is BASIL)
Same as for above – wash the tomatoes, removing blossom end. Use a toothpick or skewer to poke a small hole in each tomato.
Preparing the Brine: 2 cups white vinegar 2 cups water 1 tsp pickling salt 2 tsp sugar Heat brine on stove and stir to dissolve salt and sugar.
Packing the Jar Put peppercorns and garlic in the bottom of two wide mouth pint jars. Pack tomatoes tightly into jar, tucking one or two sprigs of fresh herbs along the sides. (fresh herbs: rosemary, thyme, basil, dill . . . your choice)
Pour the hot pickling liquid over the tomatoes, leaving ½ inch of headspace. Remove any air bubbles by inserting a table knife along side. With clean cloth – wipe the jar rims, then put the lids and bands on finger tight. (tight enough for the lid to stay in place, not too tight for the air to escape during processing)
Place the filled jars into the canner (you’ve got a rack in there right?). Make sure the water covers the jars by at LEAST an inch. When the canning water returns to a boil then start timing. Process the pint jars for 10 minutes, making sure the water covers the jars by at least one inch. Ensure water stays at a rolling boil.
When the time is up, turn off the heat, remove the jars to a folded kitchen towel or rack (prevent them from touching the cool counter top). Throw a tea towel or cloth napkin over top while cooling. Once the jars have sealed, let them sit a good 12 hours or more, before labelling them and putting them away. ENJOY!
my cousin Kim’s Garlic Salt, made from garlic she dried ↩︎
What is pH? pH is a numerical measure of how acidic or alkaline (basic) a water-based solution is. The pH Scale: Range: The scale normally runs from 0 to 14. Neutral: A pH of 7 is neutral, meaning it is neither acidic nor basic (like pure water). Acidic: A pH below 7 is acidic. Lower numbers mean higher acidity (like lemon juice or vinegar). Basic (Alkaline): A pH above 7 is basic. Higher numbers mean higher alkalinity (like soap or bleach). What does this mean to me? If you looking for a SAFE level of acid in the food you home can, then pH MATTERS! Anything lower than a pH value of 4.6 (4.4 is better) is considered safe to can in a hot water bath – the lower the better. Why a low pH Matters Stops Botulism: Boiling water only reaches 212°F (100°C), which does not kill dangerous Clostridium botulinum spores. Inhibits Growth: High acid levels with a pH of 4.6 or less stop these spores from growing and producing deadly toxins. Safe Foods: High-acid foods like fruits, jams, jellies, and properly pickled vegetables fit this safe zone naturally or with added vinegar.
Managing Borderline Foods Low-Acid Risk: Foods with a pH of 4.7 or higher (like most vegetables, meat, and seafood) are low in acid and require a pressure canner. Adjusting Acid: Borderline foods like tomatoes need added lemon juice or citric acid to safely lower the pH to 4.6 or below for water bath processing. ↩︎
We’ve all had ‘moments’ in our lives that influenced us for good; perhaps defining moments that altered our life trajectories, or foundational moments that awakened some sense of who we really are.
Some of my fondest early childhood memories involved our bedtime routine. My mom would come to each of us individually to tuck us in. She always said something nice about our day, and pulled our blankets up nice ‘n’ snug under our chins. It was a safe, comfortable way to close the day. She taught us to say a little prayer.
Now I lay me down to sleep; I pray the Lord my soul to keep. If I should die before I wake, I pray thee Lord my soul to take.
It was a comforting little ritual, and the words themselves caused me to ponder God as I was closing my eyes. I considered what they meant. . . . .
“I pray thee Lord my soul to keep” sounded like I was asking Heavenly Father to take care of my soul while I was sleeping, since I couldn’t do it myself. I was sleeping. “If I should die before I wake, I pray the Lord my soul to take” made me hope that God would take my soul and give it a good home since I wouldn’t be needing it anymore – if I were dead.
I never really understood them, but the ritual and repetition brought comfort to me – the words inspired godly thoughts that helped shape the beginning of my understanding of who I was.
When I was older and learned that prayers should be more personal, I still opened them with that little rhyme. It was a prayer my mother’s mother taught her, and I assume it was one her mother had taught her, since it’s been around that long – and much longer.
Though both my parents were born into it, we weren’t raised in the church. We were, however, all four of us baptized. I have often wondered what propelled my parents to make sure that happened, but I’ve always been grateful they did. Clearly, there was something that pulled them in that direction. I am ever SO grateful they followed through. Some of my aunts and uncles did not.
I admit when I was asked to speak in church on Spiritual Leadership in the Home recently, I wasn’t thrilled about the topic. I told the person who asked me if he’d have asked me 15 or 20 years earlier, I might have felt that I was rockin’ it, but lately I was feeling very inadequate. As I have been thinking about Spiritual Leadership in the Home, though, the spirit began opening new things for me to consider. Like the little prayer I told you about.
Like me, neither of my parents was raised in strong LDS homes, but they and all their siblings were baptized. In both their homes, it was their mothers who were the spiritual leaders.
My mother’s father was not a good dad, and not a good husband, and certainly not a spiritual leader in his home. He abdicated that responsibility to his wife, and he died at the age of 42 years, the father of 8 children. Though his death affected them all and caused great financial hardship, the older four did not miss him, the youngest never knew him, and the others had varying memories of him.
I’ve often wondered about him and the legacy he left his family. I assume from his vantage point in the spirit world, he has many regrets. I imagined he was not unlike Jacob Marley’s ghost, wishing he could undo a bunch of terrible choices. But lately, the spirit has me looking at him a bit differently.
The Hand of God by Yongsung Kim
It was his job to take care of his family. He was a good provider, but he should have done better on the home front. Leaving this earth did not take that responsibility away from him. Families are eternal. And when we die, we don’t get released from all our responsibilities to them.
I believe it may have been Jeffrey R. Holland who taught that guardian angels are real and that they are most likely family members who came before us, intimately connected with us and highly invested in our spiritual well-being and progression. Russel M. Nelson taught that the most important job any of us could ever be involved in is the gathering of Israel, on BOTH sides of the veil.
What if those of our family members who’ve passed away continue to be interested in us? They know us. What if they truly love us? What if they see the good in us and also the challenges we currently struggle with? What if my grandfather repented of the things he did in this world? Repented of breaking the heart of his wife and losing the confidence of his children. What if he is sorrowing for the generational trauma he caused? What if he truly wants to make things better for his children, grandchildren and great-grandchildren? What if he were given the chance to do that?
So this Spiritual Leadership in the Home thing . . . . . Whose job is that anyway? Dads? Moms? What if it’s both of our jobs? And what if we don’t ever get released from that calling when we die?
It wasn’t my dad who took the spiritual lead in the family I grew up in. It was my mom who made sure we blessed our food and said our little prayers at bedtime. We didn’t go to church often in my young years, but when we did, it was she who took us.
We didn’t live the “Word of Wisdom” or read scriptures. My mom smoked the whole drive to church (and then popped a piece of gum in her mouth so nobody would know lol). My dad spent a lotta time in the bar with other dads who should have been home. We had a Bible, and I liked to look at the pictures in it. I didn’t know any of those stories, and neither did she, but I’m confident it was she who made sure we were baptized. It was she who spent her evenings with us, read to us, tucked us into bed and made us oatmeal for breakfast.
It was she who planted the seeds of love we would come back to.
My father’s brother entered our lives when I was 10 years old. He was transferred to CFB Cold Lake, where we lived – both these brothers being in the Royal Canadian Air Force (as it was called then). It didn’t take long for me to notice that my dad was a better dad when my uncle was around. Over the next two years, it was my uncle’s family who influenced me and quietly tutored me in my values, my character, and my understanding of what a strong, caring family could look like. It was my father’s brother who, after having left this life many years later, continued to work with my dad from the spirit world, until we were sealed together as a family in the temple.
I asked my dad as we walked out of the temple that day “Why now? …. After ALL this time, and after all the things we tried, why Now?” He said, “It was Uncle Merlin’s death.” He meant that for the first time in his life, he stared mortality in the mirror and decided he had better start cramming for his final exams, but I came to realize that he was ‘righter’ than he thought. Though my uncle was the younger brother, he was a great example of what a GOOD MAN looked like. I had four girl cousins, three of whom were all within a year of me: one a year younger, one the same age, and one a year older. So I spent more time in my cousins’ home than my siblings did. I saw what a faith-filled home looked like and felt like. When I was only 11 years old, I consciously knew that when I grew up, I wanted to marry someone like my uncle, not someone like my dad (bless his heart). That was one of those defining moments I mentioned earlier, and even from that tender adolescent age, it changed the course of my life.
Uncle Merlin had done all he could for my dad in this life. But after he died, he had different ‘access’. They were no longer miles apart. I don’t pretend to know how things in the spirit world work, but I know Uncle Merlin was with us in the temple that day. There was no way he wouldn’t have been. He literally changed the trajectory of my family’s life and relationship forever – through love and example. And his family did the same.
To be clear, that change of course wasn’t a sharp turn. It wasn’t a right angle. It was a very slight shift—almost imperceptible at the time—that took decades to fully reveal itself.
But it was pivotal.
Let the Children Come by Liz Lemon
And along the way, I learned an important lesson: If you’re ever going to come back, it helps to have something to come back to.
Sometimes we might get impatient when things aren’t moving quickly enough. There were times I didn’t believe anything in my family could change. But I knew I was baptized. I was on the records of the church. I belonged. I had received the gift of the Holy Ghost, who never let me down. And when I decided I wanted to come back, there was a place for me.
~
When I married Dan, he was not a member of the church. He had been attending church every Sunday for the year we dated, because that was where I was. He committed to baptism a time or two, but then changed his mind. His family was not happy with this whole “Mormon thing,” and they didn’t like that Dan seemed to be changing right before their eyes. He wasn’t resolute about the gospel, but he was resolute about me. And the good people in the Cherry Grove ward (which was where I went to church) were kind and welcoming to him. You could even say they were loving. They modelled what a ward family was and what life with the gospel could look like. Among them, and in my Uncle Merlin’s home, he felt the spirit for the first time.
A year after we were married, Dan was baptized. A week or two later, he started smoking again—and so began a roller coaster.
There were times he felt deeply loved by God, and others when he felt like a dismal disappointment. Such is the nature of addiction, pulling a person back and forth, between hope and shame, between resolve and relapse.
That pattern lasted for over 30 years.
During that time, we raised five children. One by one, most of them came to realize that their dad smoked. And one by one, they came to me—each carrying the same difficult question in their own way.
I would ask them, “Are you trying to tell me that you think Dad smokes?”
“YES!” “And you want to know that I know?” “YES!” “Okay. I know, And I have one thing to say. Your dad is a good man. He has an addiction that none of us can fully understand, and it beats him up sometimes. It’s between him and God. But here’s what I do understand…”
“Charity is the pure love of Christ—and it endures forever. Moroni taught that if we don’t have charity, nothing else we do really matters. It all counts for nothing. Because charity is greater than all. Your dad has charity. He would give the shirt off his back—I’ve seen him do it, and so have you. God counts charity. In the meantime, we’ll support him. As long as Dad stops one time more than he starts, he’s still on the right road.”
Spiritual leadership in the home is not about doing everything right. It’s not about never making mistakes. It’s about being real. It’s about knowing that God loves us—and choosing to love Him.
It’s not about being better than anyone else, but about knowing who you are.
It’s about being a window to God’s love. Julie de Azevedo wrote a song by that title –
“I want to be a window to His love So when you look at me, you will see Him. I want to be so pure and clear That you won’t see me standing here ‘Cause His love will shine brightly through me. … I want to be a doorway to the truth So when you walk behond, you will find Him. I want to stand so straight and tall That you won’t notice me at all And through my open door He will be seen.”
Spiritual Leadership in the home when you have young children involves training and teaching and modeling. And sacrifice. It is about protecting your home emotionally and spiritually.
When your kids get older, it also involves letting them see struggle and faith, and letting God prevail. It involves a lot of humility and hoping you did right when you had the chance, because the years have flown by and you need to start letting go. And it involves MORE sacrifice.
When they become adults, there is an added dimension, and it becomes quieter.
Spiritual Leadership now means worrying about them—and praying for them—more than you ever have before. It means trusting that your God is also their God, whether they recognize Him or not.
It means understanding that your job as a parent will never be over. And you continue to love. You continue to sacrifice.
And you hold onto one quiet, steady hope: That if they ever choose to come back, they know they have something to come back to.
As I reflected on all of this, I asked a friend this week for her thoughts on spiritual leadership in the home. Her words are a fitting way to close.
She said, “Love makes everything else work. There is always room to love better and deeper; always room to be kinder and softer; and always room to try to see things from another’s perspective, rather than just our own.”
I whole heartedly agree. I’d love to hear your thoughts and feelings.
Three years ago, I came to know this marvelous woman. Her name is America Ann (Steele) Beirdneau. The reason I never knew about her for most of my life was because my sweet grandmother Pearl Harrison, did not like her mother in law. How does that affect my relationship with America Ann? Well, Pearl’s mother in law was America’s daughter Capitolia. So our family was stuck at Capitolia, we never even asked about those who came before her. We never brought her name up in my grandmother’s presence. In fact their disdain for each other was the thing of legends.
I have some semblance of an understanding of the discord between my grandmother Pearl and my great grandmother Capitolia, but I suspect there was another side which I never heard. And it doesn’t even matter. As a mother in law myself, I decided to give Capitolia a little grace, and to try to know her notwithstanding my grandmother’s prejudice. To give Pearl some credit, she was a sweet, kind and loving woman, not given to hating anyone or anything to my knowledge – ‘except her mother in law’. I’m sure she had what she considered good reasons, but I expect she regrets most of them now, and can recognize her part in them a little better from her present vantage point in the spirit world. In fact it’s entirely possible that it is her influence prompting me to get to know America. Who knows how things like this work in the spirit world?
America was born in Kentucky in 1829 just one year before the Church was organized. When she was a little girl her folks moved west to Iowa, where they heard the Restored Gospel preached and embraced it wholeheartedly. Abandoning previous plans, they moved to Nauvoo Illinois, becoming one of the hundreds of convert families who gathered there to live among the Saints.
America Ann Steele Birdneau
There, with people like themselves, they enjoyed a brief time of peace. America was baptized January 1 1844, just 6 months before Joseph and his brother Hyrum were murdered. She was 15 years old.
Her father William H. Steele worked on the temple in Nauvoo, and was in attendance at the meeting where it was reported that Governor Ford “pledged the honor of the State of Illinois that the Prophet and his brother should be protected, and have a fair trial”. It was recorded that when William told his wife Margaret about it later, he remarked that he knew from Governor Ford’s looks and actions, that Brother Joseph would be killed before morning.
When the ‘Mormons’ (those who followed the Church of Jesus Christ of Latter-day Saints) were expelled from Illinois (and everywhere else), the Steele family joined the refugees in their trek to find a place to live and be safe, gathering with others in Council Bluffs Iowa. It was there that America met her future husband Nehemiah Wood Beirdneau (he was called ‘Wood’) in 1846.
She was nearly 17 and he was 22 when they married. I don’t know the events of the next few years. They had 5 children in the transitionary 11 years it took them to reach Utah. Their 5th child was Mary Capitolia, reportedly born in a covered wagon enroute to Zion on 12 August 1859, 17 days before they entered the Valley of the Great Salt Lake (on August 29, 1859). Mary Capitolia later became the mother of Leland Albert Harrison, my grandfather.
In April of 1861, nearly two years after arriving she received her endowment and was sealed to Wood and children in the Endowment House.
The family settled in Logan and built a home where Wood was a successful blacksmith, earning a comfortable living for them. Wood and America had a total of 8 children, 3 of them being born under the covenant in Logan. Like many men, Wood worked on the Salt Lake Temple. He had also worked on the Nauvoo Temple.
What I didn’t know until recently, was that somewhere along the line, not uncommon among the Saints, Wood took a second wife, Mary Bird Farrell a convert from Wales. Polygamy suddenly got real for me, and my heart breaks for the real people in such a difficult situation. Mary and America both received their endowments on the same day April 13 1861. They were both sealed to their husband Wood 10 days earlier, April 3 1861.
I do not know if they had separate homes or not; some polygamous families did, some did not, but clearly they knew each other well. Mary’s first child (a son Charles) was born 6 November 1862, a year and a half after they were sealed, so the implication is that they were married close to their sealing date. Mary had 6 children (all sons), and was 5 years younger than America. I hope they were friends.
Mary Bird Farrell Beirdneau
22 years later, Wood was called to assist in the settlement of Arizona. He was 59 years old when he took up the immigrant trail again to carve out a new life in the desert with Mary. America was 54 years old, and Mary was 49. Wood and Mary settled in Gila Valley Arizona. America refused to go, staying back with her two youngest (teenage) children, close to her six married children. I can hardly breathe when I try to imagine what that must have been like – for all concerned, but especially for America. I would have liked to have known them, these people from whom I came. About this – I would have cried with them. ALL.
It is interesting to note that beginning in 1862, the U.S. government passed a series of laws designed to force Latter-day Saints to relinquish plural marriage. From the very beginning, there had been tremendous opposition to polygamy, which continued to escalate. “In 1882, the U.S. Congress passed the Edmunds Act, which made unlawful cohabitation (interpreted as a man living with more than one wife) punishable by six months of imprisonment and a $300 fine.” 1 Up till that time, the Church did all it could to protect their right to live their religion, including years of court action, but after 1882. living plural marriage became an issue that conflicted with ‘the law‘. As a Church, a foundational tenet of their faith was to obey the law “We believe in . . . . obeying, honoring and sustaining the law.” (Article of Faith 12). Up till now, though unpopular, plural marriage was not against the laws of the land. Now it was. And now what?
Members of the Church were used to living with opposition; plural marriage was just part of the package, but now there was the added heartache of the uncertainty about the future of their families. Nehemiah Wood Beirdneau had two wives, and by 1883, had 14 children between them. Decisions had to be made. Very hard decisions. Painful decisions – that no one should ever have to make.
Wood never saw America or his first 8 children again. And in turn, though they communicated by letter, they never saw their husband, father and grandfather again.
Nehemiah Wood Beirdneau
In 1887 Congress went one step further, passing the Edmunds-Tucker Act to punish the Church itself, not just its members, for continuing to live as plural families. In consequence of tremendous pressure and at risk of losing all property, including the existing temples, Three years later, and more than a decade of fighting in the courts for their right to ‘live their religion’, President Wilford Woodruff announced on September 25 1890, what came to be known as “The Manifesto”. In it, he said, “Inasmuch as laws have been enacted by Congress forbidding plural marriages, which laws have been pronounced constitutional by the court of last resort, I hereby declare my intention to submit to those laws, and to use my influence with the members of the Church over which I reside to have them do likewise.” The Manifesto was presented formally to the Church one week later at General Conference. While some no doubt were relieved, many Saints were devastated. It was an entire generation that had been raised in a world of plural marriage.
Zina Young – then General President of the Relief Society wrote this in her journal: “Today the hearts of all were tried but looked to God and submitted.”
Years later Wood’s daughter Chloe wrote “We tried to persuade him to return to Utah, but he always remarked, ‘I was called to Arizona and I will remain here until I am honorably released.’ He was honorably released by death September 7, l90l in Thatcher Arizona. He was 77.”
Her daughter Chloe said of America “My mother was a typical pioneer woman, taking the raw material and spinning and weaving yarn for stockings and cloth for dresses, petticoats, men’s clothing, blankets, etc. She was a member of the Logan choir for a good many years, and was a member of the Relief Society from the time of its first organization. She raised a family of eight children, but with it all, she had time always to assist the needy and those who were in distress.“
During the later years of her life she was a widow and spent her time with her children in Utah, Idaho, Oregon and Canada. She was active until the last few months of her life. She died in her 80th year in Logan, Utah.” (journal of Chloe Beirdneau) I find these words of her daughter Chloe interesting. She mentions her mother’s last years as a widow (which were 13 years), but before then she had lived 18 years separated from her husband by 800 miles, which may well have been 8000 miles for all their ability to travel them.
Thank you America Ann Steele Beirdneau, for accepting the gospel and for living it’s precepts all your days. Thank you for raising a good posterity, and for every tear you shed while doing so. Thank you for your mother’s heart. I’m sure it would have made you sad to learn of Capitolia’s poor relationship with her daughter in law, and subsequently with 16 of her grandchildren. I wonder what your counsel would have been to her through all those years?
I’ll give my gramma Pearl Harrison one more thing. She knocked herself out to have a loving relationship with her daughter in law – my mom. You’d have been proud of that. And she made a good wife and lifelong companion for your grandson Leland.
Like many weeds, lambs quarters self seeds, so they are up and established weeks before your regular garden. Also called goose foot – lambs quarters is a relative of spinach and quinoa. Sometimes known as wild spinach, and considered a weed in most gardens, it deserves more credit than it usually gets. Highly nutritious, tasting similar to spinach but more tender, rich in Vitamins A, C and E, essential fatty acids, iron, calcium, minerals and antioxidants.
Name: I always thought the name was curious and so odd. Apparently, it comes from “Lammas quarter“, an old English harvest festival celebrating the first grain harvest at the beginning of August. Lammas means “loaf mass” in Old English, originating from two words meaning bread and festival. It seems the name evolved from “Lammas” to “lamb’s” over time. It may have had nothing to do with ‘lambs’ except that it likely was a field green they liked to eat. Certainly, it was an abundant green that people liked to eat as well.
Identifying: I’ve heard many people call it pigweed, and fair enough they look similar. Sometimes pigweed is simply an easy name to call all sorts of weeds that look similar and are often given to pigs, but more precisely both lambs quarters and pigweed are in the amaranth family. That may not help much, because there are officially 42 types of amaranth in North America. For the record, red rooted amaranth IS red rooted pigweed.
Leaves: Young leaves are often opposite and become alternate as the plant matures. They are triangular to diamond-shaped, sometimes resembling a goose foot (often called Goosefoot). Powdery Coating: The most distinctive feature is a whitish, dusty powder on new growth and the underside of leaves. Stems: They are succulent, hairless, and frequently have reddish, purple, or light green lengthwise stripes. Flowers: Small, grey-green, roundish flowers grow in tight clusters at the top of the stalk or in leaf axils. Size: Generally grows 2 to 3 feet tall but can reach up to 6 feet. Edible Parts: All parts are edible and nutritious, but the best-tasting and easiest to eat are the young leaves. Once the plant matures, energy goes into flowering, seeding and growing taller so the seeds can be more widely dispersed. Location: Grows best in full sun to partially sunny areas, including gardens, roadsides, fields, and disturbed soil. Growing Season: Germinates early in the season, with peak growth in late spring to early summer. After that, it begins going to seed, with less energy devoted to the leaves – but no matter, it’s filled its job of providing us with early greens, and it can step into the background while other garden greens become the focus.
What if nature gave you a FREE vegetable that is super nutritious, cold-hardy, and fed you while you waited for the rest of your garden to produce? Oh Wait! It did!
Surely you recognize lambs quarters as a common weed in your garden. I did, and I was trained to look at all weeds as the enemy and to get rid of them. At the same time, I was a big fan of spinach, but when the spring weather warmed up, spinach would bolt – which means that a plant prematurely produces a flowering stem and goes to seed. This usually happens as a result of heat or stress. The plant takes its cues from hotter, longer, rainless days, and goes into the next phase of its life. It stops producing edible leaves or roots to focus energy on reproduction. Bolting commonly affects lettuce, chard, spinach, cilantro, broccoli and onions. It is irreversible, but you can break off the stem to buy yourself a few more days, and harvest all you can while you still can.
*tip: to prevent bolting, plant the affected plants earlier in the season when the weather is still cool, provide shade during heatwaves and keep the plants well watered.
This would be a big frustration to me. Had I understood that spinach should be planted much earlier, (at least a month earlier) when the spring was still cold, I would have been less frustrated. At the same time, while I was mourning the loss of spinach, I noticed lambs quarters in my garden living its best life. It seemed to be snubbing its nose at me – this incorrigible WEED. I also noticed that it tasted good (yes I tasted it). One day the light went on so-to-speak. “Why am I knocking my head against a brick wall trying to grow spinach, when this weed that tastes so much like it, WANTS TO GROW? Why am I ripping it out and feeling sorry for myself because my spinach hates me?” My story changed that day.
I looked into Lambs Quarters, and discovered it had much to offer a gardener with an open mind. I opened my mind.
Lambs Quarters in the Kitchen
* tip: Like spinach, beet greens, swiss chard and most other greens lambs quarters contains some oxalic acid which, when eaten raw in large quantities, can inhibit calcium absorption. These plants are so loaded with calcium, however, that the amount of calcium not absorbed due to oxalic acid is minimized. Its a good idea to rotate your ‘greens’ for that reason anyway. Variety is always a good thing. Individuals with kidney issues, gout or arthritis – know that oxalic acid should be consumed in moderation.
Lambs Quarters is highly nutritious, with a taste similar to spinach, and is often used in salads, sautéed, or blanched. The black seeds are edible and are an excellent source of vegetable protein.
early spring green garden salad with a base of romaine and some marigold sprinkled on top. Use a nice mild vinaigrette dressing.
The underside of Lamb’s Quarters’ leaves and the top of the new leaves are covered in a fine whitish or pinkish ‘dust’. Resist the temptation to wash it off, as it is full of calcium and protein. Lambs quarters contains more protein than kale, more iron than spinach, and it WANTS to grow in your garden. You don’t even need to plant it; it is so comfortable that it invites itself to the party. You’ve gotta respect that quality.
The stems and leaves can be eaten raw, steamed, or sautéed; used in any way and in any recipe calling for spinach: scrambled eggs, omelets, fresh as a green in sandwiches, in a mixed green salad, or in a green breakfast smoothie. Add some to your next spaghetti sauce, soup, or fried rice. Use them in your favourite “spinach dip”.
wash well as it can be gritty
recipe: Korean Lambs Quarters Side Dish
Serves 2-4 10 oz lambs quarters (300 g) young leaves and stems 3 tablespoons doenjang (soybean paste) 1 tablespoon gochujang (hot pepper paste) 2 garlic cloves minced 1 green onion chopped 1 tablespoon toasted sesame oil 1 tablespoon toasted sesame seeds Directions 1. Boil 3 quarts of water. Blanch the lamb’s quarters for about 1 to 2 minutes, until the leaves are tender. 2. Strain and rinse them in cold water a couple of times to stop them from cooking and to remove any grit. 3. Strain and squeeze out any excess water. If the leaves and stems are too long, cut them a few times into bite-sized pieces. 4. Put them into a mixing bowl and add soybean paste, hot pepper paste, garlic, green onion, and toasted sesame oil. 5. Mix by hand until all the leaves are well coated with the seasonings, and have absorbed them. You can wear disposable plastic gloves if you want. 6. Sprinkle with sesame seeds and transfer to a serving plate.
Serve as a side dish to rice. Toss in or garnish with sundried tomatoes if desired.
When I am in my garden, I will often pick the tender new plants and eat them while I work. I never pull them to get rid of them. They’re much too valuable for that, I just break them off, hoping they’ll come back and offer more. I’ll throw them into early season salads, and combine with other greens that I steam, including our favourite: spanakopita.1 (read more about Spanakopita here)
Back to that nasty rumour about lambs quarters being considered a ‘common weed’. It’s true. Officially. But don’t listen to that sorta ridicule. Those other plants are just jealous. Who cares what people call it? “Weed” is just a word. Don’t be unkind or avoid eating it. It’s not it’s fault that some uneducated person gave it such a rude nickname.
5 Facts: 1. Lambs quarters is cold-hardy, and heat-tolerant. That’s quite a talent. 2. Because it self-seeds, it will grow before any of your cultivated greens have even germinated. 3. It WANTS to grow in your garden. It WANTS to be your friend. And it’s FREE. 4. It is a versatile, nutrient-dense substitute for spinach or chard in nearly any recipe. 5. It deserves to be accepted on its own merit, not indiscriminately discarded because of some misunderstanding carried over from a previous generation.
Did you know that you can plant spinach outside while there is still snow on the ground? In my world (central Alberta), that generally means mid April. In fact, the best time to plant spinach outside was yesterday; the next best time is tomorrow. Spinach THRIVES in Edmonton’s cool spring. 1st Spring, 2nd Spring, False Spring, Spring around the corner …. You name it, in the spring, spinach is your best friend. But when the weather gets hot, it’s done. It’ll bolt (go to seed) in a heartbeat.
Did you know that 100% of the vitamin C in “fresh” spinach is gone within 4 days of harvest? I can pretty much guarantee that the spinach we buy from the produce department of our local grocery stores was not harvested within the last 96 hours. And even if it was – are we really going to use it within hours of buying it?
I confess that when I learned that sad fact, it took the appeal out of so-called “fresh” (store-bought) spinach for me. But I love fresh spinach, in fact, I’m a huge advocate of it. I just want to make sure it’s FRESH. Only one way to do that, and that is to grow it myself. So, that is what I do.
WHEN?
The secret to growing great spinach is to remember that it likes cool weather. In central Alberta, if we plant it later in May, when we plant the rest of our garden, it’s just getting going by the time the days and nights are pretty warm. This may be good for you and me, but it’s not so good for spinach. Keep it cold. That means – APRIL planting! As soon as the sun has melted the snow in your predetermined spot and the soil is workable, get out there and plant your seeds. Four to six weeks BEFORE the last frost expected, typically anytime after the beginning of April to EARLY May. It’s okay if there is snow still around, and it’s okay if it snows right on top of your seeded area, even on top of your newly sprouted spinach plants. Spinach laughs at spring snows.
When you’re feeling sorry for yourself because the days are still cooler than you’d like, remind yourself THIS IS GOOD SPINACH WEATHER. Get OUT THERE and plant some!
WHERE?
Choose and area that receives lots of bright sunlight – 6-8 hours a day. Partial afternoon shade is alright.
in WHAT?
Spinach loves a rich, well-draining soil – with plenty of regular compost enhancement. Raised beds are perfect. The last thing your spinach seeds want is to sit in a soggy spring puddle of melted snow.
If you’re in a small space with little or no soil, no worries. Even a small balcony or patio space will help. Good size containers at least 12-18 inches across and at least 6-8 inches deep can easily hold 4 or 5 spinach plants. Galvanized pails, plastic pots, terracotta planters or fabric bags will all be comfortable homes as long as their drainage is good.
HOW?
Direct sow. If you’re in the country and have a big garden, go ahead and plant in rows 10 inches apart. I am in the city, and my growing space is considerably less; typically, my rows are 6 inches apart. For spinach, however, I usually just broadcast the seed in my growing area and let them grow up in a loose spinach forest. Cover with no more than ½ inch of soil.
Keep your seeds well-watered until they germinate, which usually takes less than a week, but can take a little longer in cooler temperatures or if you’re growing certain spinach varieties. Once your seedlings develop their first true leaves, you can start thinking about thinning your plants out so each plant is spaced about 6” from its neighbour.
Spinach enjoys regular and consistent watering and will sulk if it gets too dry. Water when the top inch is dry to the touch. Best to water at the bases and keep the leaves as dry as possible. Mulching with a few inches of organic mulch can slow evaporation and reduce the need to water. *I use chopped straw, but you can also use chopped leaves. Don’t use them both at the same time – best to do one or the other.
Since I don’t grow spinach once the weather starts to get hot, it’s a relatively short season. I don’t feel the need to fertilize as I top up my growing areas with compost every spring, and the breakdown of the mulch keeps the area well nourished. Keep your spinach patch well weeded – but again, if you’re mulching, that keeps the weeds at bay. Mulch will also help prevent issues like mildew because it keeps the moisture off the leaves.
Once the spinach is ready to start thinning, make sure you’re harvesting regularly. There is no reason you cannot have fresh spinach on the table every other day until the weather gets too warm and it begins to bolt. By continuing to harvest, you’ll be paying attention to your plants, continuously checking for weeds, pests or drought. General garden care is all they need. dryness. Once they begin to bolt, read the writing on the wall and let them go. You can now plant that same area with lettuce or flowers, or even some nice herbs like basil that will appreciate the summer heat.
WHY eat spinach? And why plant it in your garden?
Why should you want to plant spinach? Because it’s good for you, that’s why. And because spinach is the segway between winter and spring. It’s the first garden vegetable you’ll be harvesting. By the time they start to complain about the warm weather, you’ve got lettuce growing and amaranth and other leafy greens fully present and doing beautifully.
Spinach is a nutrient-dense leafy green that boosts eye health, lowers blood pressure, supports heart health and aids digestion. Packed with vitamins A, C, K, folate, fibre and iron. It helps protect your immune system, reduces inflammation and strengthens bones.
As a rich source of vitamin C, spinach is wonderful served fresh in a salad. But lightly cooking (which harms the vitamin C of course), increases the availability of other nutrients like iron, calcium and vitamin A. So use it a lot, in many different ways. Pairing it with healthy fats like olive oil or avocado oil improves the absorption of nutrients.
To harvest: I begin harvesting by gently pulling baby plants that are too close together. When they get a little bigger (about 3 or 4 weeks old), I start pinching off some of the larger leaves. By the time the plants are fully mature (6 to 8 weeks) they’ll begin to form a rosette shape in the center of the plant. You can continue to pinch off the bigger leaves, including a center stalk that might sprout up (its starting to bolt). Then you can pull the whole plant out.
To use: Fruits and vegetables begin to deteriorate within the first hour of harvest – in every way, including nutrition. Nutrient content rapidly declines right after picking, so snip off as much as you plan to use. Store anything you don’t eat in the fridge, but eat it as soon as possible. Make sure you’ve shaken all moisture from rinsing it off, and pat dry. Wrap in a paper towel and place in an air tight container.
To preserve:
Freezing: If you need to pick more than you can use, you can always freeze it. Before freezing, blanch or steam for two minutes in or over a pot of boiling water. Strain immediately and plunge the hot spinach into ice water to stop the cooking. Once cool, strain again, and squeeze as much moisture out as you can. You can press the brightly coloured steamed spinach into silicone muffin pans (holds about 1 cup) or silicone ice cube trays that hold ¼ cup. Lay on the level in your freezer for at least 4 hours. Once they have frozen, you can remove them from the trays and pop them into labelled plastic bags or containers. This makes the spinach easily accessible to throw into soups, or to lightly chop and throw into stir-fried vegetables, scrambled eggs or omelettes. Freezing is my preferred way to preserve whatever excess spinach I might have.
Canned Spinach: WHY? Of all the ways to preserve spinach, this would be the least healthy. Yes its convenient, but “how can it possibly taste good?” says the person who admittedly has no recollection of ever having tasted it. My dad used to buy canned spinach when I was a young child. Must have been some fond childhood memory of his. I remember him opening the can and eating it straight outta the can with a fork. Only once was it sufficiently compelling to me that I asked for a taste. Though I cannot remember what it tasted like, I do recall being profoundly disappointed, and I recall that I didn’t ask for another. Ever. When I was a child, there was no ‘fresh’ spinach on the grocery store shelves, and no frozen spinach either. But there was canned. The only other way was to grow it yourself, but I didn’t grow up in a gardening family, and I didn’t even know one could grow food.
“I’m strong to the finich, cause I eats my spinach. I’m Popeye the Sailor Man.”
A popular cartoon when I was very young was Popeye the Sailor Man, featuring a pipe-smoking, spinach-eating, unusually physically strong sailor man who always had to fight bad guys. When he was getting beaten, all he had to do was eat a can of spinach, and instantly he was strong as an ox, and no one could beat him. As an adult, I wrongly assumed that he was created as a marketing gimmick to get kids to eat their canned spinach, but I’ve since learned that the spinach came later, as some kind of explanation for his strength. His famous quote: “I’m strong to the “finich”, ’cause I eats me spinach.” Whether it was the original intention or not, the consumption of spinach is reported to have increased by a third after Popeye started eating canned spinach on TV in the 60’s. It certainly was enticing to me as a child, and had fresh or frozen spinach been available to the average household I might have learned to like it. As it was, I was in my twenties the first time I tasted fresh spinach. In a salad. In a restaurant. I was immediately converted, and it became a favourite dish in our house for many years.
For the record, canned spinach is NOT good for you, neither commercially canned nor home canned. At 70 minutes per pint, 90 minutes per quart under 11 pounds pressure, there is not enough nutrition left in the jar (or can) to justify the salt.
Freeze Drying: Once spinach-season is over, my preferred way to serve spinach to my family is freeze dried. The brand I used to buy was Thrive Life, which was the most nutritious way of eating spinach that didn’t come straight out of one’s own organic garden. The company stopped selling to individual homes in 2025, choosing instead to sell exclusively to big businesses. Huge loss to the public. Freeze dried spinach, if processed correctly and immediately after harvest, is the most nutritious, delicious and convenient way to eat spinach all year long. Second only to FRESH out of your backyard garden – of course.
Any which way you serve it, spinach is a great addition to your garden in the coolness of early spring – aka NOW! It has earned an honoured place in my garden.
I’d love to hear your thoughts, and any tips you might have for growing spinach.
Whether we live in an urban area, a rural community or remotely, we have an environmental responsibility to each other. John Donne’s assessment, “No man is an island“1 means we are all fundamentally interconnected and cannot thrive or survive in complete isolation. We rely on the support and companionship a community provides. But in the last generation or two, our awareness of the effect we have on our natural environment, both close at hand and globally, has become greater and more realistic. Individually, as a community and as a society, we impact the quality of the world we ALL live in.
Stewardship essentially means “the job of taking care of“. It implies that we are not “the owner”, but rather, the caretaker; in effect, we are a trustee making conscious, ethical choices and commitments that will benefit far more than simply ourselves and our own families. With that in mind, specifically addressing the environment, stewardship is the responsibility of planning, managing and protecting the resources that influence the world in which we live. It addresses having a voice in the planning and management of those resources. It also means being accountable and trying hard not to be part of the problem. It means on a personal level, doing our part to be part of the solution.
When we were young parents in the 80’s, Alberta experienced a severe economic downturn. We were so busy taking care of our young children and trying to make ends meet, that we knew little about what was going on in the financial world around us. We knew that mortgage rates were higher than they’d ever been before, but we didn’t know why. We paid 10.5% on our mortgage of a little OLD house we bought in 1975. We knew we loved the small town-ness of Calmar, and the elementary school our kids attended. But we also knew Dan travelled far for employment, and was away long hours. In 1984, Dan was laid off and struggled to find steady work. He took whatever odd jobs he could, but it wasn’t enough to keep up with the house payments. Eventually, we realized that the only real path forward was for Dan to return to school, which meant moving back into the city. Like many Albertans that year, we lost our home.
We moved into subsidized housing in Edmonton and stepped into a new chapter – a temporary detour from our life plan. Dan began driving bus for Edmonton Transit while attending NAIT full time, working long, exhausting days in pursuit of something better.
It took a little attitude adjusting to get used to the higher density of our neighbours in a subsidized complex. We (mostly me), missed the small town atmosphere we had become accustomed to in the previous 5 years. But life is full of adjustments, and sometimes we have to bend a little. Though we had little means and worked hard every day, we had enough, and we were happy.
We planted flowers in our sunny front, as well as strawberries, herbs and pole beans strung to cover our southern window and shade our living room from the heat of the day. We planted vegetables in Dan’s mom’s nearby backyard garden. I came across a quote in those early months that helped me. “Let everyone sweep in front of his own door, and the whole world will be clean.” by Johann Wolfgang von Goethe 2 – an 18th century German “Influencer“. I took it to heart. I understood it to mean that I had a responsibility to make the world a better place simply by caring for and beautifying the areas I have control over – my “front door step” as it were.
Spencer W. Kimball, another INFLUENCER who influenced me greatly in those early years, was more specific. “Even those residing in apartments or condominiums can generally grow a little food in pots and planters. . . . Make your garden neat and attractive, as well as productive. ”
With this philosophy in mind, personal environmental stewardship becomes more than an idea—it becomes a responsibility. It rests with each of us to protect and conserve natural resources through the choices we make every day.
“Doing our part” isn’t just a phrase; it’s a series of small, meaningful actions—conserving water and energy, reducing waste, choosing more sustainable ways to get around, and supporting the health of our local ecosystems. Individually, these efforts may seem modest, but together, they shape the kind of world we leave behind.
What can WE do at home that will affect the environment?
Drawing on Johann Wolfgang von Goethe’s philosophy, “Let everyone sweep in front of his own door…”, we are reminded that meaningful change begins with personal responsibility. The small, intentional steps we take each day may feel like minor inconveniences, but they matter.
Individually, they may seem insignificant; collectively, they have the power to create real, lasting change. How many of these action steps listed below are you already employing? Which ones can you improve on? Which ones are you willing to commit to?
Energy and Water Conservation:
Switch to energy-efficient LED light bulbs and energy-efficient appliances.
Use a clothesline in warm weather instead of a dryer.
Adjust our thermostats for heating and cooling to be more moderate. Put a sweater on, wear slippers.
Unplug electronics, computers, and chargers when not in use.
Take shorter showers and fix leaky faucets promptly.
Mulch in the garden to reduce the need for watering.
Waste Reduction and Management:
Make “Use it up, Wear it Out, Make it Do, or Do Without” your household motto. The chic new way of saying the same thing is: “Reduce, Reuse and Recycle“. Who knew thrift would ever be ‘cool’?
Reduce the things your household consumes that include excessive or single-use packaging.
Reuse shopping bags, water bottles and other materials. Compost food, garden and yard waste.
Recycle when appropriate.
Sustainable Transportation:
Walk, bike, use public transit or carpool when possible, instead of driving.
Sustainable Food Management:
Grow more of your own fruits and vegetables. If this is new to you, LEARN how, by taking classes and attending workshops in your community.
If your yard isn’t sufficient, join a community garden.
Learn how to preserve what you grow, to extend it into the cold months.
Reduce food waste by shopping in your fridge and freezer more and eating out less.
Compost kitchen scraps to use as natural soil builders and fertilizers.
Volunteer in your community garden, charitable organizations, and food bank.
Volunteer with your community league to protect natural areas, create pollinator parks, and encourage urban gardening and habitat restoration.
We all share a responsibility and an accountability to improve the places we call home. It begins right at our own front door—by caring for what we can see and influence—and then slowly extends outward.
We may find that our efforts inspire others to do the same, creating a quiet ripple of change. But even if they don’t, that isn’t the point. What matters is staying true to our own conscience, choosing each day not to be part of the problem, but part of the solution.
Stewardship plays a vital role in shaping sustainable relationships between people and nature—especially in rapidly growing urban landscapes like our own.
Reach out. Be a good neighbour. Take care of what you can see from your own front door, and then go a little further. Get involved. Volunteer. Support the good things happening around you.
Make the world a better place simply because you are in it. And above all, find joy in the doing. When you approach it with a willing heart, your attitude begins to shift. You find more reasons to smile, more moments to appreciate—and, in ways you might not expect, life becomes richer for it.
I’d love to hear your experiences and thoughts.
Cindy
“No man is an island, entire of itself. Every man is a piece of the continent, a part of the main. If a clod be washed away by the sea, Europe is the less. As well as if a promontory were. As well as if a manor of thy friend’s or if thine own were. Any man’s death diminishes me, because I am involved in mankind. And therefore, never send to know for whom the bell tolls. It tolls for thee.” John Donne ↩︎
Johann Wolfgang von Goethe, a German writer and natural philosopher, was born Aug. 28, 1749. Goethe is best known for his literary works, such as The Sorrows of Young Werther (1774) and Faust (1808 and 1832). Goethe also saw himself as a Naturforscher, an investigator of nature. ↩︎
Also known as honey berries, haskaps are blue-purple berries that look similar to a blueberry or a saskatoon, except for their elongated – oblong shape. They are native to the northern boreal forests of the world. In the 1950’s Russia began cultivating them, and by the 1970’s Japan began commercially breeding the fruit. By the early 2000’s, the University of Saskatchewan in Saskatoon joined the party, and began their own research program, introducing haskaps to the prairie region.
The name Haskap comes from the Japanese name “hasukappu” which means “little present on the end of a branch”. You’ve gotta respect a name like that. It gets straight to the point. As a backyard fruit, Haskaps are gaining popularity fast in western Canada.
In Canada they are often called honey berries, but don’t let this fool you – they don’t taste like honey. When we first got them, I only knew them by that name, expecting they must taste like honey – else why the name? Trickery! They are actually an edible member of the honeysuckle family – that’s where “honey” part comes from, LOL Once you get over that misconception you can appreciate it for what it IS, not what it isn’t. If you’ve ever tasted a honeysuckle berry, you’ll identify slight hints of that taste. Warning: most honeysuckles have poisonous berries, so don’t get any bright ideas about eating THEM.
The names have become interchangeable. Don’t be confused: HONEY BERRIES and HASKAPS are both referring to the SAME berry.
berries in June, against the east wall. Some of these berries are fully ripe, some are still green.
In about the year 2010, we planted our first six haskap bushes. I should clarify that it was Dan who brought them home after reading some very compelling information. I hadn’t read the same reports, so I wasn’t much interested at the time. He planted them in one of our raised beds because we didn’t have anything else prepared, and they stayed there for a couple of years—until I banished them from my limited vegetable-growing space.
By then they had doubled in size and were attractive plants, but they still hadn’t produced any berries.
The only spot we had available was beside the house on the east side. It was an area that didn’t get much attention—pretty dry and rarely watered. It received the morning sun, but not much past noon. All in all, it was one of the most inhospitable spots in our yard.
However, a couple of years after transplanting them, we noticed dark blue, oblong berries growing on the bushes. The taste was quite tart, but not unpleasant. Unfortunately, the birds noticed them too.
That was the beginning of our love affair.
I am not very patient with plants that are persnickety. I don’t have the time or inclination to fuss over those that don’t want to grow here—those that sulk and pout if they don’t get enough to drink once in a while, or complain about the cold (sissies).
The way to my heart is through strength of character. And after four years of intermittent care in a less-than-desirable location, our haskaps showed their true colours. They appreciated their new home. They had adapted to their surroundings, like true native plants. They didn’t mind the winters, had no apparent health or insect problems, and required no pruning or special care. In short, they proved themselves stronger than whatever opposing forces might threaten them.
They wanted to stay. They loved me, and they wanted to be of service. They found my soft spot. If a food producing plant wants ‘that much’ to be my friend, and if the food they offer is nutritious – I’m all in. You could say I converted to haskap-ism.
The modern name “haskap” translates to “berry of long life and good vision”, also a great name that gets right to the point.
Gramma Great picking haskap berries the beginning of June.
While haskaps have grown wild since time immemorial, they only started being scientifically bred and cultivated in the 1950’s – in Siberia (appropriately). Since then, Japan and Canada joined the party, and many commercial varieties popular today were developed right here in our own backyard, at the University of Saskatchewan in Saskatoon – improving size and taste. “U of Sask” is renowned for global leadership in water security and agricultural sciences. Go Riders!
Why We Should Grow Haskaps
The Perfect Berry for Northern Gardens
They are the ultimate superfood, and we don’t have to import them from some tropical climate. They grow right here, in your own backyard!
🌱 Built for Our Climate
Haskaps are incredibly hardy—thriving in temperatures as low as Zone 2. Here in Edmonton (Zone 4a), they don’t just survive—they flourish. They are ideal for cold-climate farming.
🌸 Easy to Grow
Haskaps grow as compact shrubs and require at least two plants for cross-pollination. Once established, they are low-maintenance, need minimal pruning, and can produce fruit for up to 50 years. Haskaps are hardy, healthy, productive, and delicious—an ideal fruit for northern growers and backyard gardeners alike.
⏰ Early & Extended Harvest
Haskaps are among the earliest fruits to ripen, often ready by June. By planting multiple varieties, you can enjoy an extended harvest season.
💪 A True Superfood
These berries are nutritional powerhouses – rich in:
Vitamins A & C
Fiber
Potassium
Antioxidants Haskaps have a higher anthocyanin content than many other berries. Potent antioxidants that help protect eyes from oxidative damage. Anthocyanins are associated with enhanced night vision and improved circulation within the retinal capillaries. Regular consumption is believed to help fight against age-related macular degeneration and to prevent retinopathy in diabetic patients.
👀 Unique & Beautiful
Haskaps are easy to recognize:
Oblong shape
Deep blue skin (similar to blueberries)
Striking crimson interior
🍇 Bold, Complex Flavour
Their flavour is unlike any other—often described as a blend of blueberry, raspberry, and black currant, with a tangy, slightly pungent edge that makes them unforgettable. Personally, I’d throw the taste of honeysuckle berries into that mix. And I might add the word “pungent”.
🍽️ Incredibly Versatile
Enjoy haskaps:
Fresh off the bush
In baking (pies, muffins, crisps)
As jams, syrups, and sauces
Juiced or added to smoothies
life story of a haskap muffin
In short, Haskaps are doing everything in their power to earn a place in your yard and on your table.
the boys picking berries
* I am told that haskaps require two different varieties that bloom at the same time for pollination. I am not convinced that we have two or more different varieties among our six bushes. I’m pretty sure we didn’t know that when we bought them all those years ago. It seems information has evolved since then. We will buy a couple more plants this spring, and I will do my best to be certain they are different ‘enough’, while blooming at the same time. Even though our berries are growing fine, I am anxious to benefit even more with this new information.
Growing is an ongoing journey. I’ll share my progress here so stay tuned, but in the meantime, I’d love to hear your experience with growing or using Haskaps.
do you know the difference between wild blueberries and cultivated?
Did you know that blueberries are one of the only foods naturally blue in colour? Did you know that wild blueberries have been harvested by humans for more than 13,000 years? Did you know that cultivated blueberries were developed in the 20th century? Did you know that the silvery ‘bloom’ on blueberries is a protective coating and shouldn’t be washed off until you are ready to eat them? Did you know that the United States is the world’s largest producer of cultivated blueberries? Did you know that Canada is the world’s largest producer of wild blueberries? Did you know that WILD blueberries are smaller in size than cultivated blueberries? Did you know that wild blueberries have an intensity of flavour that cultivated blueberries simply don’t have? Did you know that wild blueberries vary in colour from different shades of red, purple and blue to almost black, and that they also vary in sweetness? Did you know that wild blueberries are more flavourful and nutrient dense than their cultivated and well mannered cousins? Did you know that wild blueberries are considered a Superfood? and that they have double the antioxidants that cultivated blueberries have?
Why does any of this matter?
Because wild blueberries have a higher rate of genetic diversity than their cultivated 2nd cousins twice removed.
Cultivated blueberries grow 6 to 12 feet tall, depending on the variety. Not surprisingly, they’re called HIGH bush.
and why does this matter? Because that is what makes wild blueberries better for you!
Why? Because they have a higher antioxidant content (double that of cultivated blueberries).
Why? Because their smaller size gives them a higher skin-to-pulp ratio, containing more fiber, iron and a higher concentration of bioactive compounds including anthocyanins (remember that word).
Unlike cultivated blueberries which are the result of generations of selective breeding and farming practices designed to make them easier to harvest, as well as bigger and juicier, wild blueberries grow 100% on their own (wild), not planted, or tampered with in any way. This means they have NO genetic engineering, they are exactly what nature originally created.
What does this mean for you? It means BLUEBERRIES are very good for you, but WILD BLUEBERRIES are even better!
Wild blueberries grow 1 to 2 feet in height and breadth – commonly referred to as Low bush blueberries.
Great right? Well-l-l, when was the last time you saw wild blueberries in the grocery store?
Problem #1: you cannot PLANT wild blueberries. That’s why they’re call wild. They grow where they want to, and only where they want to. They have very specific soil requirements that cannot be duplicated. Wild blueberries (lowbush) primarily grow in the acidic soils of Eastern North America, especially in Atlantic Canada (Quebec, Nova Scotia, New Brunswick and Prince Edward Island), and in north Atlantic USA (Maine), thriving in cool climates on sandy, well-drained land, often in areas previously burned or cleared.
Wild blueberries grow naturally in fields and rocky hills called barrens. No one ‘plants’ them; they’ve grown naturally for thousands of years by spreading via underground runners. As such they are a pretty ‘low-maintenance crop’ for the most part. Field owners are hands-off throughout most of the growing season, although they prune fields with rotary mowers on alternate years, working with the natural two year crop cycle. Bees and other natural pollinators are critical to pollinate the bushes.
Key Growing Regions and Conditions:
While Dan and I drove the roads of rural Nova Scotia last fall (October 2025), we saw this gorgeous site of red fields mile after mile. We looked for clues as to what it was, but found none. Finally we pulled over and walked out into the ‘red’ to get a closer look, My phone app told me we were looking at fields of WILD Blueberries! Who knew? If you’re a native to Atlantic Canada you probably recognize the site, but neither Dan nor I had seen anything like it. And so began my deep dive into learning about wild blueberries.
Wild blueberries are native to Canada so you may find them growing in all sorts of wild areas that meet the climate and soil requirements. But those are generally small patches. I grew up in northern Alberta and well remember going out to pick blueberries on summer days with my mom and a few other moms. We’d spread out and find a place to sit. My mom (and her other mom friends) were good blueberry pickers because they were motivated by love – making blueberry pie and other delectable treats that could only come to our families one way. Their children however, were not very good blueberry pickers. I was there for the fun of running around with my friends and eating whatever blueberries I picked. I was not beyond eating from my mom’s bucket if she let me – she DIDN’T. I can’t claim to have contributed much to the cause, but I benefit from the good memories. Since growing up and leaving home however, I moved to the city and have never picked a wild blueberry again.
Other than the small patches that are picked privately dotting the country, it is the eastern Canadian provinces of Quebec, Nova Scotia, New Brunswick and Prince Edward Island, where WILD BLUEBERRIES grow naturally – thousands of acres are set aside for them – protected. In the United States, Maine is the single largest producer of wild blueberries.
Ideal Conditions are: Cold climates with plenty of fresh water. Acidic, sandy, and well-drained soil. Habitat naturally occurs on open, treeless land, pine barrens, or areas recently cleared by fire, which stimulates growth.
Problem #2: it is very difficult to find wild blueberries in our world of shrinking wildlands. Wildland areas suitable to growing them are getting less continually. Naturalized fields are often managed through controlled burns or mowing to promote new growth and spread. Wild blueberry bogs are protected.
I already knew that next to freshly harvested, no method of preserving would be as nutritious as freeze drying, and since I am not likely to ever eat a “fresh” wild blueberry that I didn’t personally pick, my next best alternative to buying wild blueberries is to find them freeze dried.
Problem #3: even if you knew where some wild blueberries grew, most people will never be able to access them. Lucky you. I hope you thank the Lord continually for your privilege.
Problem #4: because wild blueberries grow low to the ground, they must be harvested by hand – or with a hand rake specifically designed for this purpose. This is labour intensive, making harvesting difficult and expensive.
While cultivated blueberry plants have been engineered to grow tall (called highbush), and are planted in rows, making harvesting easier, wild blueberry plants spread low and wide randomly through runners.
So how can we partake of WILD BLUEBERRIES in a sustainable and affordable way?
Wise Harvest Freeze Dried Foods1only buys wild blueberries from sustainable farms that are dedicated to preserving their wild habitat, and YES they’re still harvested by hand or with a hand rake specifically designed for this purpose.
Wild blueberries are flash frozen within 24 hours of harvest, then transferred to a facility where remaining moisture is removed without thawing – in the second stage of the two step freeze-drying process.
I found a source of freeze dried WILD Blueberries that I trust. Wise Harvest.
This means that wild blueberries are available to all, in non perishable freeze dried form – which preserves over 90% of the original natural nutrition, and is packaged to have a shelf life of up to 8 years.
Freeze drying wild blueberries makes them completely snackable – any time, any where. An easy go-to breakfast or midday snack – resealable so you can come back to it later.
start at 8:34 to see the wild blueberries
* Spoiler alert: Though it might be a year or two out, Wise Harvestis moving toward packaging in BPA free cans which will extend the shelf life to 25 years. Remember you heard that here first.
I’d love to hear your thoughts about Wild Blueberries, and your experiences. Were you lucky enough to have picked them in the wild when you were growing up? Or maybe you still do? Have you tried the freeze dried?
Beets quietly sit on the grocer’s shelf, a little shy, nothing really spectacular to look at. You may even walk right by without noticing them; admittedly they’re a little on the plain side, down to earth. You might have to look specifically for them as they’ll never jump out at you – they’re just not ‘that way’. In fact, I don’t believe I’ve ever seen a big splashy display of beets at a grocery store. But if you did walk right by them, you’d be missing one of the nature’s most nutritious vegetables, one that deserves a special place on your plate.
A recent survey listed beets in the top two LEAST liked vegetables in North America, second only to turnips. That seems a little harsh to me. 26% of those surveyed said they disliked beets; even brussels sprouts scored higher.
Why do people dislike beets? Here are the top reasons given:
Lack of exposure or delayed introduction The first reason may simply be “lack of exposure”. Since beets are seldom on the menu at home, we’re not accustomed to them. Often times a lack of exposure to beets, especially in childhood, can lead to a long term suspicion of “different” and prevent some from trying them. Sometimes, a single negative experience can create a lasting aversion.
Many food preferences are established from continued exposure. In fact, statistics say that a ‘new’ food may have to be tried up to 30 times before one develops a taste for it.
Colour Admittedly, the colour of beets is highly unusual. Because it’s different, some may shy away from them, preferring the plain and usual colours of vegetables: green or orange. Truth is, we eat first with our eyes; to some, the vibrant colour is appealing, while to others it’s the opposite – too weird. An aversion to the colour may cause people to hesitate trying it.
The texture Some people dislike the texture of beets, especially when canned.
Taste Some people say that the taste of beets resembles ‘dirt’. I’ve thought of this as I eat them from time to time, and I suppose I can see their point – but I personally, like that earthy flavour.
Preparation time Okay, I admit it – beets take a little more time, a little more fuss, and a little more mess than simply peeling carrots. You have to be ‘invested’ in the idea of wanting to eat beets if you’re going to go to that much trouble to prepare them.
So, why we should TRY to like them?
Beets are a root vegetable known for their vibrant colour and earthy-sweet flavour. They are versatile and nutrient-dense, both the root and the green, leafy tops are eaten. They are considered a SUPERFOOD due to their rich nutritional profile.
Beets are high in natural nitrates, which the body converts to nitric oxide. This compound helps relax and widen blood vessels, which can significantly lower blood pressure. These nitrates can also improve blood flow and oxygen delivery, potentially enhancing stamina and exercise performance.
Beets are an excellent source of fiber, supporting digestive health and contributing to a feeling of fullness, which can aid in weight management. They contain unique plant compounds called betalains, which are powerful antioxidants and anti-inflammatory agents that protect cells from damage. And they are an excellent source of potassium, manganese, iron, folate (vitamin B9), vitamins A, C, K and E, as well as vitamin B6. The deep red colour is indicative of the high amount of antioxidants.
These are very compelling facts for me; high nutrition is always the key factor in encouraging me to want to include any food in my family’s diet.
So how best to introduce beets to your family? and to yourself if necessary?
Start early
Early experiences with nutritious foods and flavours will maximize the likelihood that children will choose them as they grow. The key is variety: variety of healthy vegetables, but also a variety of ways to serve them. A healthier life long diet is more likely if children are continually exposed to different fruits and vegetables and different ways of eating them.
I grew up on pickled beets, but I never much cared for them. They were on the table at Christmas time, and I dutifully took one as the plate was passed around, but I was always disappointed. My first exposure to beets served as a vegetable was at my Aunt Jolayne’s table when I was 11 years old. “What is this?” I asked my cousins. I loved them.
Interestingly, my mother grew up eating beets, with two rows in the garden being dedicated to them. But she rarely if ever put them on the table in my younger years. Why? In those days we lived on a military base in northern Alberta with a small grocery store, carrying limited items – especially produce. Fresh beets were most often not available to us. I suppose canned beets may have been, but if so, we never had any. Though both my parents grew up in large families, with large gardens, we never had one. In my teen years, my mother served beets from time to time. I have to assume that availability improved in the grocery store. (?)
Association
When foods are associated with good memories they are more likely to be appealing as time goes on. Even if the taste or texture was initially unappealing, taste preferences mature, so continued exposure is important.
* case in point: I grew up with canned cranberry sauce on my plate twice a year: Thanksgiving and Christmas. I tried it every year, but never liked it. I did however, have good memories of those special dinners. Uncharacteristically, Dan came into our marriage liking cranberry sauce, so I endeavoured to include homemade cranberry sauce in our traditional meals for his sake. As time went by, I developed a taste for it, and all my kids were raised on homemade cranberry sauce – more than twice a year. Owing to repeated exposure and it being associated with good memories of favourite meals, they all enjoy it, as do their own kids.
Beets can be prepared in many ways.
Boiled: When my mom did cook them, she boiled them unpeeled and then slipped the skins off in the sink, before cutting and serving. That is how I prepared them for most of my adult life. They were messy as heck, but worth it.
Roasted: When I discovered that I could roast beets unpeeled in a dutch oven, and then slip the peel off the way I always had, it became my preferred way. Less mess. But then I discovered taking that to the next level: peel, cut into wedges and roast in the oven with a little olive oil drizzled over top, and salt and pepper. Roast in a 350F oven for almost an hour (depending how big your pieces are), till fork tender.
Pickled: Many of us grew up with pickled beets on the Sunday table, and many of my friends really enjoy them. For me they’ve always be ‘okay’, but not tempting enough to walk across the street for. I’m pretty sure I’ve pickled a few batches in my early years, but there was never a compelling enough reason to do it regularly. So sorry, I’ve got nothing to offer in this area.
roasted beet salad with feta and toasted walnuts, served with balsamic vinegar and olive oil
Salads: When cooking beets, cook extra so you can have leftovers in the fridge. They’re great to eat cold or add to salads. A nice green salad topped with beets, feta cheese and toasted walnuts. Shred raw or cooked beets into your favourite coleslaw. Or just beets by themselves, served cold or at room temperature. Drizzle a light vinaigrette over top with a sprinkling of parsley.
Freezing: Once cooked, beets can be frozen. SO HANDY! Put into a ziplock freezer bag – dated and labeled. So handy! Simply thaw and add to your meal or favourite beet recipes. I’ve heard that you can freeze them raw, but I’ve never tried it. It doesn’t make sense to me.
You can puree your beets in the blender and then freeze in ice cube trays. Once frozen, pop them out of the trays and store in zip lock freezer bags, labeled and dated. Use them smoothies later, or in borscht.
Baking: Just like carrots, beets can be shredded and added to cakes, muffins, cookies – in fact use your carrot cake recipe with beets. I cook them first and then shred, as its much easier and less messy than shredding raw. Makes borscht available all year long.
Borscht: A whole subject of its own. Borscht is Beet Soup. That means its red. I’ve heard of green borscht but that is an abomination; it doesn’t deserved to be called “borscht”. It’s simply vegetable soup. The best borscht is probably made by your gramma, but if you’d like a recipe, try mine in this link1
Borscht is a necessary part of autumn in my house. It looks like, smells like and tastes like “autumn” to me. I look forward to it all year long.
Juicing: When you’re making carrot juice, add a couple of beets. Delicious! You can even freeze your beet juice.
Smoothies: If you don’t have a centrifugal juicer, throw a few beets into your blender with your morning smoothie.
Beet Greens: Don’t throw away the greens! They are rich in vitamins A, C, K and can be steamed like spinach or sauteed, or added to stir fried vegetables or soup, or used alone or in combination with other greens in Spanakopita.
Yellow Beets: I had never heard of yellow beets till my gardening friend Myrna introduced them to me. They are milder in flavour and easier to prepare without that red juice that gets everywhere and stains whatever it touches. I’ve roasted them without peeling, and they never disappoint.
Sometimes called Golden beets, they’re sweeter and have a less earthy flavour than their red cousins. That might make them more appealing to those who don’t care for red beets. They don’t stain, making them easier to prepare and use in dishes where you don’t want the colour transfer. Nutritionally, both types are very good for you. Red obviously contains more antioxidants, but yellow beets having more Vitamin A.
Yellow beets have a beautiful bright yellow colour when cooked. They can be eaten raw, roasted or boiled like the red ones.
Where do beets come from? The people of the ancient Mediterranean coastal areas began cultivating what was known as a sea beet for its leafy greens around 2000 BC. Around 200 AD the Romans began hybridizing them to focus on the large roots. These Roman-era beets came in both the red and white varieties, with the red ones being more popular. From there they were carried throughout Europe where they thrived in the cooler temperatures, gaining particular popularity in the northern Slavic countries and Scandinavia. To those countries they were a nutritional godsend, offering more vegetable variety to countries with short growing seasons. They made their way to North America with settlement of Europeans.
Growing Beets in central Alberta
Who? Anyone with a sunny patch of ground can grow beets. They are very forgiving.
What? There are many varieties of beets that do well in home gardens in our area, the most popular one being DETROIT DARK RED, an all-purpose heirloom variety with a sweet, deep red flesh. Matures in 50-80 days.
Where? Beets are considered a cool weather crop, and like carrots, they prefer a rich, loose and well drained soil. They want SUN, so give them space in a nice sunny spot. Just because a vegetable does well in cool weather does not mean it does well in a shady area. Not the same thing. Plant beet seeds about one inch apart and one inch deep in rows 10 inches apart near the end of April. If you are planting beets later than mid May, beet seeds can be soaked for 24 hours for faster germination.
When? Beets are a cool weather crop so they can be planted early in May or even late April if the spring is warm (in central Alberta).
Seeds germinate 5-15 days after seeding. The first half of the beet’s growing cycle consists of the leaves shooting up. The leaves help provide the necessary nutrients for the root to grow. In general, beets are a pretty low maintenance crop, but throughout the growing season weeding is important to ensure they get all the available nutrients.
They can be / and should be harvested almost the entire growing season, beginning with the young leaves. As they grow bigger, you can continue to harvest by thinning the row out, opening up space for the remaining beets to grow bigger. Beets are most tender when they are young, and can be harvested once they are 2.5 inches across. To check how large your beets are, gently remove the surface of the soil from around them. Beets can be left in the ground until late fall, handling frost and cold weather below 0 Celcius.
Why? Beets are naturally sustainable. They don’t require a lot of water, grow quickly, are super nutritious, and can be harvested for many weeks. They are perfectly suited to our climate, and soil type.
and How? Seeds should be 1/2 an inch deep. They should be rotated annually, ideally coming after nitrogen fixing crops like beans or peas.
Once the leaves are set, they gather nutrients that focus on the taproot. That is when they need to be thinned out. Pulling the leaves to eat at the beginning of summer, allows more room for the root to grow in size during the second half of the growing season. As you continue to thin, your goal is to have at least a 3-finger-span between each plant. Eating the greens, and then the tiny beets is the best of both worlds – harvesting from the beginning of July through the end of September.
Beets should be dry and soil-free before storage. Remove their tops and only store the healthiest ones. They should be stored in the fridge in loose plastic bags (high humidity) to prevent drying, evaporation, and wilting. Beets will keep up to 6 months under these storage conditions.
If you have a patch of sunny ground, I hope you’ll grow beets next gardening season. Reach out to a gardening community near you. It’s fun learning from each other and sharing successes and recipes. I’d love to hear your experiences, some favourite varieties and favourite ways of putting them on the table.