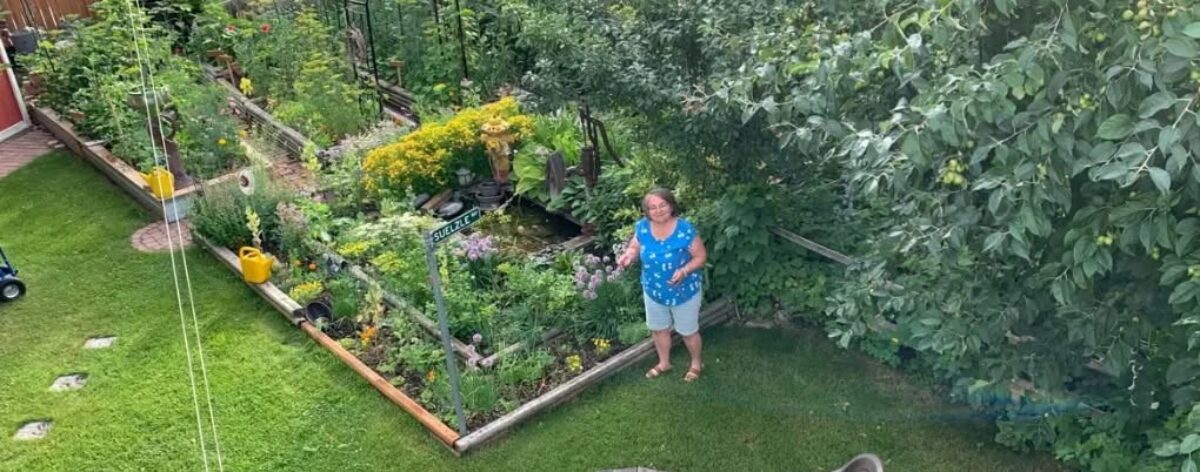
Stocking up on food for winter is about more than simply having a full pantry. It is about being prepared, being practical, and giving yourself a little peace of mind when the world outside becomes less predictable.
For those of us who garden, preserve, and try to live a little more self-reliantly, summer is a natural time to think about what we will need through the coming cold months.
Winter changes the way we get food
In summer, food can feel abundant. The garden is producing, farmers’ markets are overflowing, and fresh produce is readily available. And then there’s winter. In Alberta, that means months of cold, snow – and no local growing. In the past, preparing for winter was critical to having enough food, and keeping your family healthy. In recent generations we’ve become very ‘entitled’, and think we should have everything we want, whenever we want it, but that is not reasonable or sustainable in the long run.
A well-stocked pantry means that when the roads are bad, the weather is miserable, or you simply don’t want to venture out, you already have the makings of good meals at home.
Use the seasons as an analogy. Sometimes ‘winter’ is more than just the months between November and March when the trees are taking a break and the garden is sleeping.
It could be a period of unemployment, when the regular paycheque stops coming. Or an an illness, an unexpected expense that makes the household budget a little tighter than it used to be. Could be a transportation disruption, a shortage, or oh I don’t know …. maybe something completely wild, like – tariffs we’ve never experienced before, or some other circumstance that makes the things we normally take for granted suddenly harder to find.
Sometimes winter is simply a season of uncertainty.
Just as we prepare for the winter that arrives every year, we can prepare for some of these other ‘winters’ too. Stocking up isn’t about living in fear or expecting something terrible to happen. It is about recognizing that life has seasons—and not all of them are predictable.
Many of us have learned to put food by when there is plenty. We preserve the garden harvest, fill the pantry, tuck things into the freezer, and make sure we have some basic staples on hand. We do these things because we know that ‘summer’ won’t last forever.
The wise gardener doesn’t wait for winter to begin before thinking about winter. And perhaps the same principle applies to life. When things are going well is the very best time to prepare for the season when they aren’t.
Eventually, spring comes again.
Stocking up also makes good economic sense
Buying and preserving food when it is plentiful can save money.
When your garden produces more tomatoes, beans, carrots, onions, berries or rhubarb than you can eat immediately, with a few skills, you have an opportunity to turn that abundance into food for later.
The garden doesn’t have to stop feeding you just because the ground freezes.
Potatoes, onions, garlic and jars of roasted tomatoes in the cold room; jars of jam, dried apples and herbs in the pantry, berries and pesto in the freezer, apple cider, kefir and sauerkraut in the fridge – mean that reliance on the grocery store is minimized.
A stocked pantry gives you choices
There is an important difference between having food and having food you will actually eat.
If we’ve been friends for a while, you already know my philosophy has always been to Store what you eat, and eat what you store.
There isn’t much value in filling shelves with foods nobody in the household enjoys. Those jars of gorgeous red crabapple preserves look nice on the shelf but if no one knows how to eat them, they’re a waste of jars.
A practical winter pantry might contain the ingredients your family regularly uses:
canned and dried tomatoes
dried or canned beans
rice, pasta and grains
flour and other baking supplies
onions, potatoes and other good keepers
frozen or dehydrated vegetables
fruit, jams and preserves
meat and other sources of protein
soups, broths and meal ingredients
spices, oils and other cooking essentials
And don’t forget the simple things that can be surprisingly inconvenient to run out of in winter – special baking ingredients your family likes, pet food and other household staples like laundry soap and toothpaste.
Preserving your own food adds another layer of security
There is another thing I love about gardening and preserving. When I freeze, dry or can something from my own garden, I know where it came from. I know what I DIDN’T use while I watched it grow. I harvested it when it was ready. I preserved it when it was at its best.
There is something deeply satisfying about opening a jar in February and finding summer inside.
It isn’t merely food storage. It is the continuation of the growing season.
And then there is the emergency side of preparedness
We don’t stock food because we expect disaster.
We stock food because life happens.
Power outages happen. Snowstorms happen. Illness happens. Family emergencies happen. Supply problems happen. Sometimes a person simply doesn’t have the time, money, transportation or physical ability to get to the store.
Having food already in the house gives you breathing room.
You don’t need to panic-buy when life throws you a curve ball, because you have been gradually building your supply all along.
Perhaps most importantly, it is a mindset
Stocking up isn’t about fear. It is about responsibility and self-reliance.
I don’t expect to provide absolutely everything my household might ever need. None of us can.
But I can ask:
What can I reasonably provide for myself?
If I can grow some of my food, preserve some of it, store some of it and keep a reasonable supply of everyday staples on hand, then I have made my household just a little less dependent on circumstances beyond my control.
And I think that is a worthwhile goal.
Winter comes every year. We know that.
So rather than waiting until the shelves are bare or the weather turns nasty, now is the perfect time to look at what we have, decide what we will need, and to begin filling the pantry.
There is a wonderful feeling that comes from looking at a well-stocked pantry in the middle of winter and thinking: “We’re okay. We’ve got food.”
I’d love to hear your ideas about what you stock up on, where you store it, and how you use it in the winter.
1st Rule of Tomatoes EAT them! Every. Single. Day when they’re in season. There is NOTHING better than homegrown tomatoes. That is a foundational truth I live by.
2nd Rule of Tomatoes Don’t waste them! The end of summer is all about tomatoes ripening daily, counters overflowing with bowls of gorgeous, vine-ripened tomatoes – each one a delicious reminder of the rewards of summer gardening. . . .
Toasted tomato sandwiches (with pesto mayo, of course), fresh tomato salsa, bruschetta made with fresh sourdough bread . . . every day is another tomato day—and that’s awesome!
It’s what we’ve been looking forward to for months.
And I have another personal rule when it comes to tomatoes: I choose not to buy “fresh” grocery-store tomatoes. Honestly, they’re just too disappointing.
I figure that if we’re eating tomatoes every single day when they’re at their freshest, most delicious, and most nutritious—straight from the backyard—we can live without them for a few months when the garden is done.
And you know what?
We do just fine.
In fact, I think it makes that first juicy, sun-ripened tomato of the next season taste even better.
BUT. It. All. Happens. NOW. No stretching it out over the next few months like potatoes and butternut squash. And if you’re paying attention to the rules, you know better than to waste them.
Okay, relax. I get it. And I’m here to help. There are many things you can do to preserve your ‘excess’ – tomatoes are probably the easiest produce to preserve with incredible variety.
But it all takes time! And there’s only so much of that to go around right? As a young mom, I learned a good lesson from an older lady I used to buy milk from. Her name was Elsie Manchak. It was 40 years ago so I might not be quoting exactly, but in essence Elsie told me “when something in the garden is ready – it IS. READY. NOW! That means you adjust, and you pivot. Whatever you thought you were gonna do today, just got trumped. You take care of the food when its ready, because that is what you’re gonna feed your family with all winter long.”
I absorbed her philosophy. It became formative for me at a very impressionable time in my life. It seems it may even have became part of my DNA. Thank you Elsie. There are many things you can do with your excess tomatoes (by excess, I mean more than you can eat fresh), and time becomes of the essence. Did you know you can freeze them?
Freezing Tomatoes
Yes! You can freeze fresh, ripe tomatoes to buy yourself some time now – and then deal with them later when things slow down a bit. Whether it is better to freeze tomatoes whole or chopped depends on how you plan to use them later, AND how much freezer space you have. Freezing them whole (or halved) requires the least amount of effort and lets you easily slip off the skins later. Chopping them first saves freezer space and prepares them to go straight into recipes.
Truth be told, I am not a fan of freezing tomatoes as a general rule, but I do it when I have to buy time.
I freeze them whole and store in a plastic bag to come back to later in the season. Just don’t forget they’re there!
You can freeze without blanching or any special preparation. However, freezing changes their cell structure and they will become soft and mushy once thawed. Sometimes its helpful for what your ultimate plan is. Especially if your plan include Tomato Jam (see below for recipe). Also great for soups, stews, chilis or sauce.
How to Freeze Them Safely
when packing, do your best to remove air from bag
Wash ripe, sound tomatoes and pull off the stems.
Best to core them even if you intend to freeze whole. Easier to do that while they’re still fresh, than later when they’re ‘squishy’.
I freeze whole on a cookie sheet, then bag them frozen into a plastic bag later.
OR you can pack them raw – tightly into freezer bags pressing out the air.
OR you can chop them unpeeled or peeled and pack in amounts to use in specific recipes later.
Seal – eliminating as much air as you are able to, and label with date. *Rookie mistake: you think you’ll remember what’s in the bag and when you froze it. You won’t. Your thawed tomatoes are squishy when they thawed out? Yup. Remember that freezing changes their cell structure and they will become soft and mushy once thawed. Nothing you can do to prevent that. They’re still great for soups, stews, chilis and sauce.
Suggested Shelf Life for frozen tomatoes When I freeze tomatoes it is SHORT TERM, buying me some time at a busy time of year. But if you’re actually planning to STORE them in the freezer, then pay attention to these rules of thumb: *Optimal nutrition for frozen tomatoes is 6-12 months, when stored properly in airtight freezer bags or containers, though they maintain the best flavour and quality if used within 6 months. If they are vacuum-sealed, they can last up to 2 years.
Chopped or Sliced Pieces: Less time before flavour and texture degrade significantly. Shelf Life is 3-6 months max.
Standard Freezer Bags / Containers: 6 to 12 months (best quality under 6 months).
Vacuum-Sealed Bags: 2 years.
Important Tips for Canning Once-frozen Tomatoes
Best Uses: Freezing breaks down the cell walls, making thawed tomatoes very soft. This makes them perfect for cooked products like sauces, juices, or crushed tomatoes. They are not suitable for fresh-style salsas or to be canned whole.
Peeling Trick: When you thaw them, the skins will slip right off easily without needing to blanch them in hot water. Yay.
Acidify: Always follow tested canning recipes and add the required bottled lemon juice or citric acid to each jar, just like you would with fresh tomatoes.
RULES
For the most part, I am very flexible with recipes and I like trying new things, but when it comes to canning, I have a few “Non Negotiable” rules I follow when it comes to canning
1. Acid foods in hot bath canner – non acid foods in a pressure canner. Period! 2. Processing times must come from a reliable source (not your memory or your gramma’s memory). Get yourself a good book. It might be pricey. It’s worth it. If you’re searching google for information, remember anyone can publish information – go to an official government source. 3. Only use jars that are made for canning. They are tempered glass – intended for repeated use in high heat. 4. Use ONLY proper canning lids, and only use them ONCE. There are plenty of ways you can save money. Re-using lids isn’t one of them. 5. Just DON’T MESS AROUND with SOME THINGS.
Canning Tomatoes
So, about Rule #1 about acid foods vs non acid foods . . . . TOMATOES are considered borderline foods. They can go either way, so pay attention. Don’t skip this information and go straight to the recipe. It’s important.
Probably the most common way of preserving tomatoes is to bottle them and process them in a hot water bath canner. Tomatoes are the ONLY vegetable that can be safely canned in a hot-water-bath canner. (yes I know that tomatoes are technically a fruit – which is why they fit into the safe zone, but we usually EAT them like they’re a vegetable) There is a right way to do this, but there are also a few wrong ways to do it. And it’s all about BOTULISM.
“Botulinum spores are on most fresh food surfaces. Because they grow only in the absence of air, they are harmless on fresh foods.
Most bacteria, yeasts, and molds are difficult to remove from food surfaces. Washing fresh food reduces their numbers only slightly. Peeling root crops, underground stem crops, and tomatoes reduces their numbers more. Blanching also helps, but the vital controls are the method of canning and making sure that recommended research-based process times are used.“1
Salt or No Salt, and How Much? Let’s talk about salt first because it’s easy. Yes. Use it because without salt life is boring. How much? 1 teaspoon per quart / litre OR 1/2 teaspoon for a pint / 500 ml What kind? Pickling salt or pure salt of whatever variety you like – as opposed to regular table salt which has added iodine in it – which can make your liquid cloudy or dark. Table salt often contains anti caking agents too.
to ADD ACID or not to add acid; that is the Question. Why and what type and how much? Experts say that modern tomatoes have lower natural acidity levels than older varieties. Additional Acid is an absolute MUST when canning tomatoes.
WHY IS ACID SO IMPORTANT? Botulism prevention: Adding acid lowers the pH to a safe level to prevent the growth of dangerous Clostridium botulinum spores during water-bath canning. See more about botulism here.
Lemon juice or Vinegar? Which is the recommended ACID for canning tomatoes?
Lemon Juice: Flavour: Mild and subtle; blends into the tomatoes without altering the overall taste. Amount needed: 1 tablespoon per pint or 2 tablespoons per quart. Many people prefer to use bottled lemon juice because the level of ph is identified, and consistent. I generally use fresh lemon because its convenient for me and I usually have some on hand because I use it for a lot of other things.
Vinegar: Flavour: Strong and distinct; can cause noticeable changes in plain tomato dishes. Amount needed: Requires twice the volume: 2 tablespoons per pint or 4 tablespoons per quart. Must be standard 5% acidity white or pickling vinegar. Other vinegars such as balsamic, white wine or rice vinegar are not acidic enough. My advice: use lemon juice over vinegar.
To sum up – salt may be optional, but adding acid is not optional. ALWAYS add lemon juice (fresh or bottled) or citric acid to EVERY jar of tomatoes to ensure safety. 2 tablespoons lemon juice per quart/litre, or 1 tablespoon per pint / 500 ml.
When using a Hot Water Canner, how long should Tomatoes be processed?
Processing begins being timed after the water has returned to a full rolling boil. 40 minutes for a pint / 45 minutes for a quart.
Is there such a thing as processing tomatoes too long?
Yes you can process them too long. Once the hot water in your canner has returned to a rolling boil, set the timer so you don’t lose track of it. If you’ve left them an extra 5 or so minutes, don’t worry about it. Its not a safety issue, but it will begin to affect the quality, taste and texture of your finished tomatoes. Boiling longer than necessary affects the texture, breaking down cell walls, giving tomatoes a soft, mush consistency. Obviously nutrient loss will become an issue, as will ultimate flavour (and even colour) loss.
the TOMATO CONTROVERSY
Over the last few decades there has been a good deal of controversy about whether or not all tomatoes are acidic enough to be canned in the traditional boiling water bath method. Tomatoes have generally been considered a sufficiently high acid food, but they are border-line in their PH range. Safe PH level is considered anything under 4.4. Over that is considered a low acid food. Tomatoes can range between 4.05 to 4.7 – just under and just over the acceptable level. Pretty IFFY.
Variations can be attributed to: Tomato Variety There are many types of tomatoes, some of them sweeter than others. Some more acidy than others. Stage of Ripeness or damaged fruit The riper a tomato, the lower the acid level. As a tomato ripens, the concentration of primary organic acids decreases. This causes the overall pH level to rise slightly. The lower acidity is heavily influenced by a surge in natural sugars in the ripening tomato. Damaged tomatoes can have an even higher PH level.
It is therefore very important to use only prime, properly ripened fruit when canning.
AND, as an extra precaution, add 1 tablespoon of lemon juice per pint of tomatoes, and 2 tablespoons per quart.
The additional acid is not intended to compensate for overripe fruit. It is an extra precaution to take when everything else is right—when you are starting with sound, properly ripened tomatoes and following safe canning practices.
Properly canned foods retain about 40% original nutritional value – OF WHATEVER THE FOOD WAS THE MINUTE IT WENT INTO THE JAR. This fact was supremely disappointing to me when I learned it, because I raised my family on home canned food. But it shouldn’t come as any surprise, when you remember that those tomatoes were in boiling water for 45 minutes. It is also very important when preserving food, that you attend to it as soon after harvesting as possible. The nutritional value begins to dissipate within the first HOUR of picking.
Canning tomatoes safely as a beginner requires the following: 1. canning jars – pints or quart sizes, with lids and rings to fit. NEVER RE-USE the lids from a previous canned jar. Modern lids are made for SINGLE USE only. 2. Hot water bath canner or a stock pot deep enough for boiling water to cover the tallest jar in use by at least two inches. 3. A rack or something else to keep glass jars from sitting directly on the bottom of the pot. If you don’t have a rack, use a folded tea towel. 4. Another large pot to boil water for blanching tomatoes. 5. Cold water and ice to cool blanched tomatoes fast. 6. Mason jars that are identifiably intended for hot water bath canning. NEW lids and rings for each jar. 7. Jar lifter or a lowering rack for the canner. 8. pickling salt or any salt OTHER THAN the iodized salt (and pepper if desired) 9. Lemon juice 10. Firm, ripe tomatoes in good shape. Plan for approximately 3 pounds per quart jar or 1.5 pounds per pint.
*TIP: when canning in a hot water bath for a minimum of 10 minutes it is not necessary to sterilize your jars. Freshly wash them in HOT water, rinse in HOT water and allow to air dry. Don’t hand dry. Or of course, use your dishwasher.
Directions
1. Freshly wash jars in hot soapy water. Rinse and set aside to drain. Not necessary to sterilize jars that will be processed at least 10 minutes. 2. Wash tomatoes in cool water. Set aside to drain. 3. Heat a big pot of water to boiling for blanching tomatoes. 4. Fill your canner with clean water and begin heating it to a boil. Make sure there’s a rack on the bottom to prevent the jars from touching the bottom during processing. Set a clean thick tea towel on the counter beside the canner to receive the HOT finished jars from the canner. 5. Wash and core the tomatoes. Cut an ‘X’ on the bottom. Set aside.
6. Prepare a sink or plastic tub with ice water – deep enough for all the tomatoes to fit and be cooled. 7. In stages (no more than 8-10 tomatoes at a time), drop scored tomatoes into the boiling water and let sit for a minute or two, until the skins begin to split. 8. Remove tomatoes from boiling water and immediately drop into ice bath to arrest the cooking process. 9. When tomatoes are cooled, peel them with a sharp knife. The skins should slip off easily. (SAVE THE SKINS – see below) 10. Cut the tomatoes into halves or quarters (depending how big they are).
11. Pack cut tomatoes into freshly cleaned jars, pushing down with your hand, to make the tomato juice come to the surface. You’re goal is to cover the tomatoes with liquid from the tomatoes. Leave 1 inch (2 cm) headspace. 12. Add 2 Tablespoons of lemon juice and 1 teaspoon of salt to each quart. Half that amount for each pint. 13. Remove air bubbles with a long table knife. Wipe the top of your jars with a clean hot cloth to ensure they are perfectly clean. Put a clean lid on the jar, and tighten moderately. (Don’t tighten the lid excessively.) 14. Use jar lifter to slowly lower jars into hot water. Bring water to a boil, or if its already boiled, return to a rolling boil. Jars should be covered by water at least an inch. I usually shoot for two inches of coverage. 15. Begin timing once water has returned to a full rolling boil. 40 minutes for pint jars, 45 minutes to quart jars. If water is boiling violently, reduce the heat but keep it rolling.
16. When the timer goes off, remove jars slowly to the prepared clean tea towel. Set jars on the towel, keeping some air space between them. Loosely cover the jars with a thin clean tea towel. Allow to cool undisturbed for at least 12 hours. 17. Canning jars seal because heating expands the air and food inside, forcing excess air out. Subsequent cooling contracts the contents to create a strong vacuum lock. When the sealing has completed you hear a gentle ‘ping’ as the vacuum pulls the lid down. It’s music to a canner’s ears. 18. When completely cooled, wipe jars with a hot wet cloth and label the lid with date and ingredients.
Once you’ll learned how to peel tomatoes, and how to process them – you can apply the same principles to canning PEACHES, APRICOTS, PEARS, PLUMS, RHUBARB AND APPLES with slight variances that you can work around with a little confidence. ie: – Peaches are peeled the same way (by blanching). Be sure to cool immediately after removing from boiling water. Unlike tomatoes however, you’ll add syrup of your own make (light, medium or heavy syrup – your choice). – Apricots don’t get peeled and neither do plums. Both take a syrup. – Pears and apples get pealed the same way. Apples often get canned as a sauce. Personally I don’t like this kind of apple sauce. I’d rather make it fresh, and since apples are available all winter long, its easy to do. – All fruits (including rhubarb) are best cold-packed) when canning.
The Sealing Process: Heating: As the jars process in a boiling water or pressure canner, the air and food inside heat up and expand. Venting: This expansion pushes the extra air and steam out from under the flat metal lid. This is why the outer band should only be “fingertip tight” – so the trapped air can escape easily. Cooling: When you remove the hot jars from the water and let them cool, the food and remaining air inside contract and shrink. Vacuum Lock: This contraction pulls the lid down tightly against the jar rim. The flexible sealing compound (plastisol) on the flat lid hardens into an airtight vacuum seal.
Roasted Tomatoes
THIS is my favourite way to can tomatoes, and its my favourite way of eating canned tomatoes. instruction with pictures coming soon
Roasted Tomato Sauce
I make my tomato sauce with roasted tomatoes. Once you’ve tried it, you’ll never go back to the old way of boiling on the stove top.
The instructions are pretty simple and easy to customize. Put them into your biggest pyrex cake pan, or roaster in the oven at 350F. OR if you’re making a LOT, use an electric roaster set to 350F. Be creative, use what you have.
15 lb Roma tomatoes chopped 1 T salt and 1 T coarsely ground pepper dried oregano (big handful) dried basil (slightly less of a handful) dried thyme (slightly less than the basil) 1 heaping T garlic salt
Don’t can overripe tomatoes. Eat those today. If you have more than you can eat, make tomato soup for supper tonight and give a jar to your neighbour. Or use them to make tomato paste and then have pizza for supper tomorrow. But don’t can them because the sugar has begun displacing the acid.
15 pounds of tomatoes roughly chopped
Step 1 Wash tomatoes.
Step 2 Remove blossom/core end. Chop tomatoes and put them in a large baking pan or roaster at 350F.
Step 3 Be patient. This is gonna take a long time. 2-3 hours. Maybe even more if you have a lot. I’ve got 15 pounds in this roaster. Stir every 15 minutes or so to keep from scorching.
Step 4 2 hours in. Add salt and pepper. I added 1 Tablespoon of each for 15 pounds of tomatoes. If you’re doing less in the oven, start with 1 teaspoon salt and 1 teaspoon pepper. Easier to add more later than to take it away lol. Repeat step 3.
this is after about 2 hours. Starting to simmer down beautifully. I added 1 Tablespoon each of salt and coarsely ground pepper
to this amount (15 pounds) of Roma tomatoes, I seasoned with a big handful of dried oregano, slightly less dried basil, and slight less again of dried thyme. I also added 1/4 cup tomato powder.
Step 5 Add seasoning of your choice. For this amount, I added 1 big handful of dried oregano 1 medium handful of dried basil 1 slightly smaller handful of dried thyme a heaping tablespoon of homemade Garlic Salt2
Step 6 I like to add a little tomato powder to most tomato recipes. It adds more Tomato-Zing, and helps to thicken a little. In its place, you can add tomato paste if you have it. Otherwise don’t worry about it.
INSERT: If you’re planning to can this tomato sauce, get your canner filled with water and on the stove. Bring it to a boil over high heat. Make sure you’ve got a rack in the bottom to prevent the jars from being sitting directly on the bottom.
Have your jars ready with lids and rings handy. You’ll be hot-packing the sauce so you don’t want to fill the jars until they’re ready to go into hot water. This simply means that you’re packing HOT sauce into the jar, and putting the jar into a HOT water bath canner. Hopefully both jar and water will be in a similar range of HOT.
Step 7 Stir it all in and be patient a little while longer. When most of the water is gone, and the texture is looking ‘saucey’, you’re just about done. At this point, I take about 1/3 of the sauce and zip-zip it for a couple of seconds in the blender, then mix back in. You can puree all or nothing, depending on your personal preferences. I like the sauce, but I also like some texture.
NOTE: If I intend to can the sauce, I do not add onion or garlic cloves, or any type of vegetable. The only thing I add is seasoning. I don’t want to compromise high acid tomatoes with low acid vegetables. THIS IS VERY IMPORTANT. If you add low acid ingredients, the sauce must be canned in a pressure canner. There are acceptable amounts of certain vegetables that can be added, but generally I choose to err on the side of caution, and avoid adding them – except for seasoning. For more information, click the image below.
Step 8 Add lemon juice to the finished sauce. You’re going to have to estimate unless you want to measure it out. About 1/4 cup lemon juice for 2 quarts (4 pints or 8 cups) of sauce. Better to put in a little more than necessary, than to be under. Stir to distribute the lemon juice.
By the time you’re to this point, hopefully your water is ready to receive your jars.
Step 9 Using a wide mouth funnel, and using a big scoop begin measuring out into jars. 2 cups into pint jars, 4 cups into quart jars. Leave about 2 cm head space (just under an inch). Adjust by taking away a spoon here or there, or With a clean, hot, wet dishcloth wipe the jar rim to ensure its perfectly clean. Put the lid on, screw the ring on to hold the lid down – snug but not super tight.
Step 10 Put the jars into the canner with almost boiling water. Make sure there is enough water to cover the highest jar by 1-2 inches of water. Turn the heat up and start watching for it to reach a FULL rolling boil. When it does, set the timer for 40 minutes for pints or 45 minutes for quarts.
Don’t go too far away. Keep an eye on the boiling water. If its too violent, the jars may bang together – adjust the heat down a bit. If its not boiling completely, turn the heat up and start your timer over again.
roasted tomato sauce on the left, canned tomatoes on the right. Each in boiling canner for 45 minute per quart / 40 minutes per pint
Step 11 When the timer goes off, the sauce is finished. Turn the heat off, and one by one remove the jars to set on a clean, thick tea towel. Leave a little space between the jars to cool slowly. I usually drape a clean tea towel over top to ensure they down cool down too quickly.
GOOD JOB! Now you can start listening for that wonderful ‘ping’ sound telling you the jars sealed. Let the jars sit there at least 12 hours. Then label and put away.
Pesto Mayo
disclaimer: there are no tomatoes in this recipe. BUT it is the foundation for all things good about September eating-of-tomatoes.
2 Tablespoons mayoanaise 2-3 Tablespoons pesto (you decide) stir to mix. Use on toasted bread that you are going to lay thick slices of fresh tomato on. Salt and pepper. ENJOY. This is what Augusts and Septembers are all about.
Salsa
“Salsa is America’s #1 condiment. This popularity has extended to home food preservers who want to make use of a seasonal harvest of garden-grown tomatoes and vegetables. Most salsa recipes mix low-acid foods, such as onions, green peppers, and jalapeño peppers, with acid foods, such as tomatoes. Currently the USDA and the National Center for Home Food Preservation recommends that a boiling water canning process be used only for research-tested salsa recipes that provide evidence of safe acidification to inhibit Clostridium botulinum growth. Only a few such research-tested salsa recipes are available and these must be followed with little deviation.”
2. Use your own favourite recipe and go straight to canning with pressure canner.
Sarah’s Salsa
This is my daughter Sarah’s long standing salsa recipe. She takes it from a favourite book of ours – Patti Shenfield’s “Flavors of Home”published 1994. Sarah has tweaked it a little over the years and she’s flexible with what she has on hand. 15 lb tomatoes, chopped (5 quarts / litres / 20 cups) 5 fresh jalapeno peppers seeded and chopped (save the seed from 2) 10 cups chopped white or yellow onions 2 large green peppers finely chopped 2 cups white vinegar (higher acid than other varieties) 1 cup tomato powder or 12 ounces tomato paste 1 Tablespoon salt (never use iodized table salt for canning) 6-8 large garlic cloves minced 1/2 cup white sugar 1 Tablespoon freshly ground pepper 1 teaspoon cumin 2 teaspoons cayenne pepper
Prepare 14 pint jars or 7 quart jars by washing well in HOT water, rinsing well in HOT water and sitting to drain. Don’t hand dry, just let them air dry. Blanch and peel all tomatoes using the system outlined above. (Remember to save the skins to dehydrate later.) Wash, core and chop the tomatoes, placing in a LARGE pot. Using gloves, dice jalapeno peppers. Add the seeds of 2 or 3 jalapeno peppers to pot (discarding the rest). Unless you like more heat, then add all the seeds. Add remaining ingredients, and bring to a boil. Simmer until vegetables are tender (about 15 minutes).
Ladle into hot jars and process in PRESSURE CANNER at 10 pounds for 30 minutes.
~ note ~
Because of the ‘other’ non-acid ingredients, this combination-food MUST be processed in a pressure canner. I know that’s not convenient and I know you may not have a pressure canner, and yes, I know they’re expensive. Sorry about all that inconvenience, but let me clarify: * because of the large amounts of onions, peppers and garlic used in this recipe – THIS IS A PRESSURE CANNING RECIPE. In my “reliable source book”, for onions it recommends 10 lb pressure and 30 minutes for quarts. For peppers, that same source has me using 5 lb pressure. I take the highest recommended pressure for the additional foods I’ve added – 10 lb for 30 minutes, and apply it.
If one eliminates those non-acid foods, electing to add them later AFTER canning but before serving, then we would be completely in the safe zone for hot-water-bath canning.
Tomato Juice
Use only the freshest, juiciest tomatoes in your garden for juice. This is one of those times that meaty tomatoes like Romas are not the best choice. Whichever method you use, wash and core the tomatoes, removing any ugly spots.
Don’t use a steam juicer for tomatoes.
method 1 – if you have a fresh juicer Once you’ve juiced it, you can freeze the juice or you can CAN it in jars just like tomatoes – adding 1 T lemon juice for a pint or 2 T lemon juice for a quart. See the suggestion for seasoning in method 2.
method 2 – if you do not have a fresh juicer Chop the tomatoes coarsely. Add to a large stock pot and add a cup of water to initiate the ‘juicing’. Bring the pot to a boil and simmer until the tomatoes are softened but not mushy. Mash with potato masher. Strain the tomatoes through a fine sieve to remove seeds, skins and extra pulp. You can add this pulp to tomato sauce or put it in the fridge to use in dinner tomorrow. Measure the strained juice and return to the pot. For each quart (4 cups) of juice, add 1 T lemon juice, plus your choice of seasoning: 1 teaspoon pepper 1 teaspoon celery salt or garlic salt or onion salt or dill salt – if you’re not using any seasoned salt, add 1 teaspoon of kosher salt Season to YOUR taste. Stir to dissolve seasonings.
At this point you can pour it into a pitcher and refrigerate it for use in the next couple of days. Or you can process it in a hot water bath canner. to can: Heat the seasoned juice to almost boiling. Pour hot juice into clean and prepared quart jars. Leave the appropriate head space of a 1/2 inch or so. Wipe the jar rim with clean wet cloth, put the lid on, put the ring on – nice and snug but not too tight (air must be able to escape in the process of boiling). Same timing as for canned tomatoes: 45 minutes for a quart, 40 minutes for a pint. Remember: don’t start timing till the water has returned to a full rolling boil.
method 3 – My preferred – unless I have so many tomatoes that I’m desperate to use up. I most often choose to make tomato juice from the tomato powder and cold water. I use a ratio of 1:8-10 ie: 2 T. tomato powder+ 1 cup (16 T.) COLD water Stir to completely emulsify powder. Season as you choose and ENJOY!
A savoury combination of roasted small tomatoes, garlic, basil and butter! Use in place of traditional garlic butter. Spread on toast to serve with eggs, saute vegetables in it, top a quick pasta dish, even spread on your grilled corn on the cob!
It is so-so-so easy to make; start with this basic recipe and then customize to your hearts content. I like to add pepper. A lot of pepper. Like a tablespoon of coarsely crushed pepper. If you’re not a big pepper fan, that’s okay. You be You, but Be a BRAVE You!
Basic recipe: 1 pint (2 cups) cherry tomatoes 2 Tablespoons olive oil Broil tomatoes till nicely charred. Could take up to 10 minutes – but don’t leave the kitchen. Peek at it every couple minutes. When they start to char, its a fine line to ‘burnt’. Stir it up a little, and put it under the broiler again if needed. When you’re happy with them, strain additional tomato water out of the charred tomatoes. You want them pretty dry.
2 garlic cloves handful of fresh basil – if you don’t have any fresh, use a smaller handful of dried basil pinch of salt black pepper – I like coarsely ground and I use a lot. So you do you, measure with your heart. 1 teaspoon – 1 tablespoon 1 cup butter at room temperature (1/2 pound)
Process the whole combination till smooth. Pour into a wide mouth jar and store in the fridge. Can be frozen.
Tip: in the winter when you don’t have fresh tomatoes, use sundried tomatoes and dried herbs to make tomato butter.
Tip: Remember, you’ve got fresh basil, fresh tomatoes and fresh garlic mixed in with your butter. Those foods will mold if they sit too long in the fridge. If you’re not going to use the butter up in about a week, then freeze by generous spoonfulls on parchment paper; once frozen, store them in a ziplock bag – labelled properly, in the freezer. Take out the amount you want to use, and use it.
Tomato Jam
Tomato jam was one of those “surprises” that you need to be open minded for. The word “jam” sometimes puts people off, but get over it. It was never intended to be part of a peanut butter and jam sandwich. It is something far different than that; a rich balance of sweet, savoury, complex and tangy flavours.
It is made by slow-cooking ripe tomatoes with sugar, vinegar and warm spices. The slow simmer breaks down the tomatoes into a gooey, sticky and spreadable ‘jam’.
It raises the bar on the traditional BLT, and adds pizzaz to a normal grilled cheese sandwich. A favourite way for us to eat it, is spread over flat bread, put cheese over top and set under the broiler for a couple minutes. Serve with crackers and cream cheese, on a hamburger (it’s the new ketchup), bagels n cream cheese, on top of frittata or quiche, with cheese, on toasted whole what bred with fried eggs, with butter on fresh sourdough bread or on your next charcuterie board.
Basic Recipe: 4-5 quarts of chopped Roma tomatoes (16-20 cups) 1 cup brown sugar 1 cup white vinegar
Add all ingredients together in saucepan over medium heat, or roasting pan in the oven at 350F. Expect it to take 2-3 hours minimum. Stir frequently to prevent scorching. Lower heat as it thickens. Continue to stir frequently as it thickens.
You’ll know its finished when you’ll be able to slide a spoon through it and see the bottom of the pot distinctly before it starts to slowly seep together.
If you intend to can it, I recommend using 1/2 pint jars (250 ml). Spoon hot jam into jars, affix lid and ring and slowly submerge into a boiling hot water bath. Process for 10 minutes (as you would any other kind of hot jam). Remember not to start timing until the water has returned to a boil. Enjoy!
Dehydrating Tomatoes
Properly dehydrated food can retain as high as 80% original nutritional value. Optimal shelf life is impossible to gage as there are too many factors to consider, like: was it completely dry when you put it into the jar? Storage should be a little on the cool side if possible, and in the dark as much as possible. But if all the conditions are right, you can reasonably expect up to two years.
*Tip: I know you can have dehydrated food stored for YEARS! But just because it doesn’t look disgusting, doesn’t mean there’s any nutritional value in it. Try to keep your ‘stored’ food optimum by rotating it, by EATING it!
You can use any kind of tomato you have, but I find that the ‘meatier’ ones, like a Roma or Romanian Giant work the best because they have less ‘water’ in them, and they hold their body better. But just use what you have. If you’re drying cherry tomatoes, either cut in half or at least puncture them with a knife. The skin protects them well and they’ll take forever to dry otherwise.
*Tip: If your dehydrator has screens for the rack, you’ll want to use them for tomatoes. Not the end of the world if you don’t, they’re just easier to remove from a screen.
directions: Wash tomatoes and core. Slice into 1/4 inch (1/2 cm) slices and lay onto the dehydrator rack. If you slice too thinly they’ll dry paper thin and will be very difficult to remove from the rack or screen.
Dry at medium heat. Expect them to take several hours – so many factors will affect the timing: the water level of the tomatoes, the humidity in the air that day, the heat and fan of your dehydrator etc.
Every hour or so, rotate the racks – moving the bottom one to the top. Rotating helps keep the drying even. If you have to go out for a few hours, simply turn the dehydrator off and restart it when you get home.
When you can see them starting to dry, its helpful to turn each one over by hand, and even move some to other screens to fill in the gaps created by them shrinking. This enables you to another rack of fresh tomatoes if you’ve got more waiting for room.
They will not all be ready at the same time. You’ll know they’re completely dry by feel. They should be leathery or even crispy. No soft spots. If in doubt, leave them a little longer. Remove the ones you deem dry and put into an airtight container with a lid. Label your jar with the date.
Continue to add to your jar till all are done. Easy Peasy!
TOMATO SKINS
I know right? Who ever heard of such a thing?
Did you know that Tomato Skins contain a high concentration of the tomato’s key nutrients!?
MORE ANTIOXIDANTS: Up to 98% of the flavonoids found in tomatoes are located IN THE SKIN. Flavonoids are the phytonutrients that give many fruits, vegetables, and flowers their vibrant colours and offer antioxidant and anti-inflammatory benefits.
HIGH LYCOPENE: The tomato skins hold high levels of lycopene, a powerful compound that helps fight cell damage and may lower the risk of heart disease and certain cancers.
DIETARY FIBRE: Leaving the skin on adds extra fiber to your diet, which aids digestion.
BETTER TEXTURE IN COOKING: Unpeeled tomatoes break down more slowly in sauces, adding richness and better body to cooked dishes.
Next time you’re peeling tomatoes to can them, don’t toss the peels into the compost. Save them, and stick them in the dehydrator, or slow bake them in your oven at 250 degrees F until they’re crispy.
They’re quick to dry (by quick I still mean a few hours lol). Once they’re dry powder them. Use in EVERYTHING TOMATO: soups, stews, sauces, up your salsa or bruschetta, even add some to your meatloaf!
Tomato Powder
Put dehydrated tomatoes into a dry blender in small amounts at a time and turn onto high. (a high powered blender is best) Process till they’re powdered. That’s all there is to it. When the powder gets deep enough that its not receiving any more, stop the blender and pour it into a clean air tight container and put the lid on. Repeat another couple of times till you get as much as you want.
You will inadvertently leave quite a bit of tomato powder residue on the inside of your blender. Juice add a little water and blend again. Tomato Juice! Drink it.
*Hint: tomato powder will in time begin to compress and get ‘chunky’ from the moisture in the air. For that purpose, I usually only make a cup or two at a time. No problem when the powder does get chunky, simply scrape it with a fork to loosen. This ‘compacting’ is unavoidable without anti-caking agents, so live with it.
I also powder up the dehydrated tomato skins. It’s really the only way I can think to use them. They’re super easy to ‘puree’ in a high speed blender, and they remain nice and fluffy – not compressing like the tomato powder itself. For this reason, I often mix the two together in a jar and use them that way.
Pickled Tomatoes
Pickled cherry tomatoes are new to me this year. If you know me well, you’ll know that I make a point of trying at least TWO New things in the garden every year, and I also like to try new ways of using them in my kitchen and of preserving them. This year, one of my ‘new’ things is the whole idea of pickled tomatoes! It literally blows my mind. And they are surprisingly delicious.
Canning pickled cherry tomatoes is not only a delicious way to preserve the harvest, but it adds a wonderful tangy flavour to charcuterie boards, salads, sandwiches and so much more. They are literally bursting with juicy sweetness and a zesty vinegar kick.
method 1 – short term, into the fridge we go fresh pickled tomatoes to consume this week – 1 quart 4 cups of a mixture of different cherry tomatoes (just for colour) 1/4 T whole black peppercorns 2 cloves garlic sliced 2 or 3 sprigs of fresh herbs: basil, rosemary or thyme 2 teaspoons sugar 1.5 teaspoon salt
Preparing the Tomatoes: Wash the tomatoes, removing any green stems Use a toothpick or skewer to poke a small hole in each tomato. This step lets the hot liquid get inside the tomato so it pickles evenly. Put peppercorns and garlic in the bottom of wide mouth quart jar. Put tomatoes into jar, tucking sprigs of fresh herbs along the sides. Pack tightly. Set aside.
Preparing the Brine: 1 cup water 1 cup white vinegar 1.5 teaspoons pickling salt 2 teaspoons sugar dash red pepper flakes Stir to dissolve sugar, heat liquid till almost boiling. Pour hot brine over the tomatoes. Put lid on and wait for it to cool. Store jar in fridge for at least 24 hours. Best after 48 hours. Eat within a few days.
method 2 – longer storage, canned Preparing the Tomatoes for two pints: 4 cups cherry tomatoes few peppercorns for each pint 2 cloves of garlic sliced. One for each jar 1 sprig of fresh herb in each jar (my personal favourite with tomatoes is BASIL)
Same as for above – wash the tomatoes, removing blossom end. Use a toothpick or skewer to poke a small hole in each tomato.
Preparing the Brine: 2 cups white vinegar 2 cups water 1 tsp pickling salt 2 tsp sugar Heat brine on stove and stir to dissolve salt and sugar.
Packing the Jar Put peppercorns and garlic in the bottom of two wide mouth pint jars. Pack tomatoes tightly into jar, tucking one or two sprigs of fresh herbs along the sides. (fresh herbs: rosemary, thyme, basil, dill . . . your choice)
Pour the hot pickling liquid over the tomatoes, leaving ½ inch of headspace. Remove any air bubbles by inserting a table knife along side. With clean cloth – wipe the jar rims, then put the lids and bands on finger tight. (tight enough for the lid to stay in place, not too tight for the air to escape during processing)
Place the filled jars into the canner (you’ve got a rack in there right?). Make sure the water covers the jars by at LEAST an inch. When the canning water returns to a boil then start timing. Process the pint jars for 10 minutes, making sure the water covers the jars by at least one inch. Ensure water stays at a rolling boil.
When the time is up, turn off the heat, remove the jars to a folded kitchen towel or rack (prevent them from touching the cool counter top). Throw a tea towel or cloth napkin over top while cooling. Once the jars have sealed, let them sit a good 12 hours or more, before labelling them and putting them away. ENJOY!
my cousin Kim’s Garlic Salt, made from garlic she dried ↩︎
What is pH? pH is a numerical measure of how acidic or alkaline (basic) a water-based solution is. The pH Scale: Range: The scale normally runs from 0 to 14. Neutral: A pH of 7 is neutral, meaning it is neither acidic nor basic (like pure water). Acidic: A pH below 7 is acidic. Lower numbers mean higher acidity (like lemon juice or vinegar). Basic (Alkaline): A pH above 7 is basic. Higher numbers mean higher alkalinity (like soap or bleach). What does this mean to me? If you looking for a SAFE level of acid in the food you home can, then pH MATTERS! Anything lower than a pH value of 4.6 (4.4 is better) is considered safe to can in a hot water bath – the lower the better. Why a low pH Matters Stops Botulism: Boiling water only reaches 212°F (100°C), which does not kill dangerous Clostridium botulinum spores. Inhibits Growth: High acid levels with a pH of 4.6 or less stop these spores from growing and producing deadly toxins. Safe Foods: High-acid foods like fruits, jams, jellies, and properly pickled vegetables fit this safe zone naturally or with added vinegar.
Managing Borderline Foods Low-Acid Risk: Foods with a pH of 4.7 or higher (like most vegetables, meat, and seafood) are low in acid and require a pressure canner. Adjusting Acid: Borderline foods like tomatoes need added lemon juice or citric acid to safely lower the pH to 4.6 or below for water bath processing. ↩︎
Every plant wants to go to seed; that’s what their designed to do. Plants like tomatoes, cucumbers, peppers and squash have their seeds inside. Plants like greens will bolt, forming seed heads toward the end of the season. Peas and beans (legumes) produce pods with seeds inside. Annual flowers form seed heads that are easy to gather. Every plant has its unique way to reproduce. They are gifts from nature, and we can afford to be choosy about picking only the best.
Saving seeds is not difficult and there really is no mystery involved. There are a few basic rules to follow, but they all make perfect sense, so once you understand them – you’re off to the races. But first . . . . WHY would you want to? Well, I don’t know why you’d want to, but I know there are some reasons that compel me to want to save seeds.
7 reasons I save my own garden seeds
SELF RELIANCE I love that I’m not dependent on stores providing for all my needs. If COVID taught us anything it was that supply chains are fragile. I still buy seeds – don’t get me wrong, but there is something about being independent in as many areas as possible that speaks to me. Self reliance is a major factor in most decisions I make. I was raised by a dad who always had a ‘backup’, and often times he had a backup for his backup – so it’s kinda ingrained in me. I know now that I have enough seeds to plant my garden next year. That’s not to say I might choose to buy something specific next spring, but I don’t need to.
COST SAVINGS It saves me a lotta money. It’s hard to beat ‘FREE’.
PRESERVING HEIRLOOM VARIETIES Some plants I grow, I couldn’t buy the seed if I wanted. The only way for me to grow my Romanian Giant tomatoes for example, is if I save my own seed. And I love these particular type of tomatoes. I’ve grown them for over a decade – they’re my tomato of choice. I got my first plants from my sister Pearl-Ann, which I loved and saved the seed from. Since then I’ve shared them with countless other gardeners. (see more about HEIRLOOM SEEDS below)
GREATER CONTROL OVER CHARACTERISTICSYOU LIKE By saving seeds, I can select good strong plants with features and traits I prefer in appearance and size, as well as colour, flavour, even resistance to disease. Over time these characteristics can become stronger, allowing me to fine tune exact traits I prefer.
ADAPTATION Similar to control over the characteristics, seeds saved from my own garden are better adapted to the conditions of my location: the climate, the soil, even the pests. Over time, these seeds will produce plants that are more resilient to the negatives and more responsive to the positives features of my area. That means increased yield.
6. COMMUNITY We’re not alone. Sowing Seeds that Others May Reap, and Reaping What Others Have Sown – is part of the cooperative effort that ‘community’ is all about. There are other gardeners like us collecting their own seeds, and like us, they’re likely be happy to share. You’ve probably already benefitted from someone sharing seed and you’ve probably also shared your own. A GARDEN COMMUNITY! That’s what I’m talking about, doesn’t matter whether you live near or far. I’ve shared with my next door neighbour, friends in our community garden, and cousins who live a thousand miles away.
Our local community garden recently hosted our 4th SEEDY SATURDAY. We outgrew our first year’s event in the community hall. Among other things we’ve since added, it’s still essentially a time where people bring seed to share, and hope to come home with shared seed. We look forward to it every year.
7. Personal SATISFACTION Saving my own seed is rewarding and it helps to establish a closer connection to the food I grow and that I feed my family.
If any of my reasons for saving, sound compelling to you, then read on –
HOW TO
STRONG AND HEALTHY Choose only healthy plants that have all the desirable attributes you want to perpetuate. Save seeds from the strongest, best looking, and most disease resistant plants and fruit.
RIPE Allow plants to FULLY mature. Wait for them to complete their life cycle and for the seeds to be dry. For seeds from fleshy fruits like cucumbers and tomatoes, see below.
HYBRID Be careful that the seeds you’re collecting are NOT from hybrid plants. Hybrid plants are created by deliberately cross pollinating two different varieties of a plant aiming to produce an offspring that contains the best features of both parents. These seeds are not likely to produce exactly true to form. If they’re in a package, they’ll be labelled as ‘hybrids’ so don’t forget what you planted. I keep a record of the type of seeds I planted in gardening journal. I suggest you do the same.
LABEL You think you’re gonna remember, but you. will. NOT! Don’t trust yourself. Label with the type of seed, the date gathered or stored, and any other pertinent notes you’ll be glad to know when you plant it. DON’T count on remembering those details, you’re just setting yourself up for failure.
DRY Lay them out: After collecting, spread seeds in a single layer on paper towels or a tray to continue drying. Don’t rush them. Being properly dried will make the difference between whether they last or not. Use a bag for drying: For tiny seeds, place the dried seed heads in a paper bag for a week to allow them to finish drying and release the seeds. Ensure thorough drying: Seeds must be completely dry to prevent rotting.
USING A BROWN PAPER BAG For plants with seed heads (marigolds, poppy pods, lettuce that has bolted, sunflowers, herbs like dill), wait for seeds to dry completely on the plant, then cut them and place in a paper bag to prevent seeds from falling all over the place. Leave in the bag for a couple of weeks depending on how moist or big the seeds were at gathering. Shake the bag to dislodge all the seeds. Remove stems and foliage. Fold the bag and label to store, or pour into another container. Label!
FLESHY FRUITS Cucumbers – allow to over ripen on the vine – yellow. Cut open and gently scoop the seeds out. Rinse in a fine colander and shake seeds on a paper towel to dry. Peppers, select a mature pepper and let it turn completely red, then remove seeds by hand or with a spoon. Spread onto paper towel and allow them to sit till fully dry. About a week if the weather isn’t too humid. Squash – Zucchini or any kind of winter squash – allow to fully ripen, then cut squash open and scoop out seeds to lay on paper towel. Leave for a week or two or even more if necessary. Ensure they are totally dry. Tomatoes – allow to over ripen on the vine (if possible). Cut open and gently scoop the seeds out. 1) Rinse well, freeing the seeds from the jelly like substance they’re suspended in, pour in a fine strainer and allow to drain. You can either spread out onto a paper towel to dry, or let them sit in the strainer till they’re completely dry. Scroll down for more details.
CLEAN Remove chaff, husks, dry leaves or other debris.
STORE Have your containers decided on, prepared and waiting. Prepared means cleaned well and dried. Remove all labels. Suitable containers are envelopes, paper bags for big seeds or seed heads, recycled pill bottles and/or cleaned glass jars.
IT’S ALL ABOUT BEING DRY AND DARK. When completely dry, store seeds in a paper envelop or bag or if you’re absolutely sure they’re as dry as possible, you can store in a pill bottle (with the label removed), or a suitably sized jar. Keep in a cupboard or away from direct sunlight till next planting season. If you have an additional fridge, go ahead and store them in it.
Heirloom Seeds
What is an Heirloom Seed? An heirloom seed is one that comes from an open pollinated (naturally pollinated) plant that has been passed down (sometimes for generations, and typically at least 50 years) without being crossbred or otherwise altered. My Romanian Giant Tomatoes are “Heirloom” to me, but by this definition – they are not a true “heirloom”. Though I have no doubt these seeds have been passed down for over 50 years, I can only attest to the years I personally have been growing them. Heirloom varieties produce plants with the same desirable qualities – like unique appearance, colour, flavour, texture and growing habits. When you find a plant you love, you want to protect it by propagating your own seed. Always ensure you’re saving seed from the healthiest, strongest plants that have thrived in their space.
Recap: features of an heirloom variety are that they are open pollinated and that they “breed true”, meaning that they retain the original traits from one generation to generation. To ensure that they stay “true”, to be grown for seed, that particular variety must be grown in isolation from other varieties of the same plant species.
What is meant by “open pollination”, and why should we care? Open pollinated plants – also called “natural pollination”, are pollinated without our intervention relying completely on insects, birds and wind, and occasionally by natural “self” pollination. Their seeds produce “true to type” new plants – genetically similar to the parent. For gardeners, this is the best way to continue growing plants with unique characteristics we’ve come to prefer. This doesn’t mean there cannot be a certain degree of ‘natural’ genetic variation among heirloom plants, quite the opposite – that’s part of adaptability to local conditions, and is desirable.
Heirloom vegetables are often considered to be more nutritious than hybrid versions of the same type.
SELF POLLINATING FRUITS AND VEGETABLES Many fruits and vegetables are self pollinating, meaning they don’t require assistance from insects or birds – like beans, peas, lettuce, peppers and tomatoes. Generally these are the best ones for beginner seed collectors, as they have true to type descendants. Tomatoes are consider self-pollinating because they have both male and female parts within the same flower, but they do require a little wind or vibrations to spread the pollen around. Though they don’t require pollinators, they may still attract them, which enhances over all plant health.
What vegetables are the easiest for beginners to collect seed from? Focus on open pollinated plants, preferably heirloom varieties – AVOID hybrid seeds and taking seeds from unknown origin produce.
We are more likely to have successful experiences with self-pollinating vegetables and fruits like the following – Legumes: beans and peas Leafy Greens: lettuce, spinach Root Vegetables: carrots, radishes and onions Brassicas: Cabbage, broccoli and cauliflower (which is why they can produce under a netting that prohibits flying insects) Tomatoes and Peppers Grapes, strawberries, raspberries, gooseberries, saskatoons, rhubarb
Why choosing self pollinating plants helps gardeners and over all harvest? We only need one plant to have a successful harvest. While not requiring pollinating insects, bees and other pollinators are still attracted to the plants for nectar and pollen – increasing overall productivity. With less reliance on external pollinators, it is possible to grow many of these fruits and vegetables in enclosed or protected areas and in urban communities.
Annual plants (meaning they grow one season only) produce mature seeds in a single growing season, and are easy to collect. Examples are legumes and flowers like dill, poppies, marigolds and nasturtiums.
Peas and beans: wait until the pods are dry and crisp, then harvest the seeds within.
Poppies with mature poppy pods inset. Wait till the pods are tan coloured and completely dry. You’ll be able to hear the tiny black seeds inside. I bring a bowl with me to shake them into.
Annual flowers: sweet peas, poppies, bachelor buttons, marigolds: wait till seeds are dry, gather in a bowl, clean and ensure they’re completely dry before storing in paper envelopes or bags. Label what, where from and when.
Nasturtiums: wait till seeds are dry to gather.
Seeds form at the base of the flowers and start out small and green. Over time, they’ll grow in size and eventually turn pale green, then light brown or beige, signaling that they’re nearing maturity. Gently pull them off the plant. If they resist, wait a few days. By the time the seeds are ready, many may have already fallen. Go ahead and collect them, ensuring they’re not damaged or starting to rot. Mature nasturtium seeds are the size of a pea, pale green to tan in colour with a wrinkled rough texture. I bring a large plastic bowl with me while collecting seed. It allows me to see what I’ve got and to sort through them, keeping only the best. If they aren’t completely dry when I pick them, then I dry them on a tea towel for a couple of days. Store in a paper bag or envelope, clearly labeled with what they are, when and where collected.
Chives and onions: they will bolt, save the seed Spinach and other greens: they will ‘bolt’ (meaning it puts out a strong, tall stem and flowers to produce seeds). Allow the seeds to dry and gather.
Cucumbers: Allow fruit to ripen fully – yellow and soft texture. Cut open and remove seeds into sieve. Agitate and rinse. Spread on paper towel to dry completely.
Tomatoes: Allow the fruit to ripen fully, then scoop the seeds out. Option #1: fermenting – scoop the seeds and gel into a jar, add some water and let sit at room temperature for 3 or 4 days. A layer of mould will form, which tells you that fermentation has broken down the seed’s protective coating. Drain-rinse-swish, drain-rinse-swish again. then pour into a fine sieve and rinse till clean. Spread out on a paper towel to dry completely. Label and place in a sealed container. Option #2: scoop seeds and gel out into a sieve. Agitate and rinse a few times. Spread on paper towel to dry completely. Label and place in sealed container. Peppers: Collect seeds from fully mature, ripe peppers.
The crisp cheery white and yellow of the daisy-like FEVERFEW flowers in front of the purples of chives, cornflowers and Lupins.
Biennial plants (meaning they grow two seasons, flowering the second season), will produce mature seeds in the second growing season – also easy to collect from. Examples like feverfew, parsley and root crops like beets and carrots.
I rarely if ever collect the seed from biennial plants in my yard like feverfew. I do however, allow some flowers to go to seed, then I pinch them off and sprinkle them over the areas I want them to grow, trusting in nature to do the rest. She never lets me down. Next spring I’ll have a thousand little feverfew plants, so I can decide where I want them to grow and pull up the rest. The only reason I’d save some seed is if someone else wants it.
Collecting seed from Tomatoes – easiest thing ever!
Select the BEST specimen of the variety you want to save for next year. If its a small tomato, simply squish it and squeeze the seeds and pulp into a small glass jar or cup. If its a bigger tomato, cut it and scoop out the pulpy part containing all the seed – into a small glass jar. 3 methods: 1. If you have few – spread the seed onto a paper towel and let them dry.
2. If you have lots – put them in a fine strainer and rinse them well to remove the pulpy parts. You can let them dry in the strainer, or spread on a paper towel to dry.
3. Ferment. Squeeze the seed and pulp into a small jar. Add water and agitate by stirring vigorously. Let sit a couple of days – mould will form on top, simply scoop it off, then strain the seed and spread out onto paper towel to dry.
I’ve done all three, but could never see the value in taking the time to ferment, when it appeared to me that the end result was the same. I’ve read compelling evidence recently however, that claims the additional step of fermenting lowers the odds of the seed carrying disease forward. That extra precaution sounds worthwhile to me. I’m converted.
Regardless of the method you decide on, the seed must be DRIED. I often just leave it on the paper towel, write the name, date and any other details on it, then roll it up and store in a jar or a paper envelop.
an excellent self help video on collecting seed. Keep in mind that he’s on Vancouver Island in zone 8 when he talks about winter. Central Alberta is zone 3b to 4a. But seed collecting methods are pretty standard.
a good summary of saving and storing several different types of garden seed Keep in mind that he is in zone 5b in Colorado, but collecting the seed is pretty standard.
If you’re new to saving seed, I really hope you’ll pick a few easy ones to save this year. It’s a rewarding task. If you’re already a serious seed collector, then try one fruit or vegetable you’ve never saved before. Share some of your favourites with a friend. I’d love to hear about your experiences. Please comment below.
For years this quote was over my kitchen door leading out to the garden. Sadly I had to take it down a couple of years ago to repaint the wall, but its in the plan to replace it. It is an essential life truth.
Is there a difference between home grown tomatoes and store bought tomatoes? Oh My! YES! The taste of a homegrown tomato is UNlike anything else this world has to offer. And a store bought tomato tastes nothing like it, even when grocers say they are “vine ripened” . . . . So, speaking of ‘vine ripened, let’s talk about that for a minute: what it is and what it is not. Ostensibly, that term should be clear right? It means ripened-on-the-vine. . . . Right? Allowing fruits to ripen on the plant before harvesting ensures the completion of its growing cycle, implying that all of nature’s nutrition is intact. But don’t be fooled when you see a sign that says “vine ripened” with tomatoes that are together on a small branch. The whole truth is that those tomatoes ripened while still attached to that little branch. No one says that branch was on the plant or that the plant was still in the ground at the time they ripened, so yesssss, okay – by definition I guess we cannot dispute it, but by its truest definition – NO! They are NOT necessarily ripened on the plant. I hate when I see that term, because if we believe everything we read we’ll fall for the implication that THESE tomatoes are somehow better than other tomatoes we see on the store shelf without the ‘vine ripened’ sign. I seriously doubt it. In most cases, the only difference is that little branch – those 4 or 5 tomatoes that are clustered together. And No, in most circumstances they were not ripened ON a plant which was still living.
In central Alberta even in our home gardens, it is not possible for all of our tomatoes (specifically Indeterminate), to ripen on the plant before the season is over, so we pick the last of them green, allowing them to ripen in their own time. It’s the best we can do with approaching winter. Tomatoes naturally produce their own ethylene gas which causes them to slowly redden as they ripen at their own pace – even once they’re picked. This of course takes time. To speed up the process of ripening, many companies lock immature green tomatoes in an ethylene-filled chamber. This seems like a good solution on the surface, but it merely forces them to turn red, not affecting the “ripening” process enough. The result is that yes, they may be red, but they never had the chance to develop flavour – which is usually a natural companion to ripening AND an indicator of nutritional value. If like me, you have to pick some of your tomatoes not quite red or still green, allow them to ripen in their own time, the way nature designed. You will be richly rewarded by the homegrown tomato-taste, and its associated nutritional value.
Okay, thank you for the chance to rant a little – on one of my pet peeves. I’ll set that aside for now.
“A tomato may be a fruit, but it is a singular fruit. A savoury fruit. A fruit that has ambitions far beyond the ambitions of other fruits.” – E. Lockhart
Several years ago I decided to put more effort into eating IN THE SEASON. The concept is encouraged by a directive in what I consider ‘scripture’. “All wholesome herbs God hath ordained for the constitution, nature and use of man – Every herb in the season thereof, and every fruit in the season thereof . . . .” 1 This is good counsel indeed, especially since we understand now that nutritional value begins to dissipate within the hour after harvest. The fresher the produce, the more nutrition it contains, so eating it in the season we are guaranteed to have the best that nature can offer. Keeping that tomato for months in it’s “fresh” state, gives us the outward impression that it is nutritional, but in actual fact it is impossible. In my opinion, we use the word “fresh” too loosely in this context.
Based on tomato retail sales, the average North American eats almost 30 pounds of tomatoes a year. If you like pizza or spaghetti, you probably eat more. If you like salsa, you probably eat even more. If you don’t like tomatoes, then I’m pretty sure I ate enough to make up for you. But what about those of us who grow and preserve our own? How would stats ever reflect that? I’m pretty sure no statistician keeps track of how many plants I grow (this year, 28 plants), or the fact that we eat FRESH tomatoes every single day from mid July through till the last one gets eaten in late November. I do not ever buy tomatoes from my grocery store or anywhere else off season, because they are almost always supremely disappointing. So based on sales of ‘fresh’ tomatoes, I wouldn’t even be counted, but make no mistake – our household consumes a LOT of tomatoes.
Let’s get it over with and off the table. Yes tomatoes are really ‘fruits’, and yes we eat them as vegetables. Why? Simply because their natural ‘sugar’ content is much less than other fruits, making it more suitable to be used in a salad or main dish rather than a dessert. In fact, because the seeds are inside (like a blueberry, gooseberry, currant or grape) the tomato is actually a ‘berry’. It doesn’t make any difference, we’re still gonna eat tomatoes as vegetables – but it is interesting.
where do tomatoes come from?
Tomatoes originated in South America where the indigenous people cultivated them to use in their cooking. Not surprisingly, it was the Spanish who brought them to Europe and ultimately to the rest of the world. Within a short time, they became very popular in Spain, and were distributed throughout the Spanish colonies in the New World, including the Caribbean, and Central America, even as far away as the Philippines. They grow easily in warm climates so it was an easy fruit to adopt, and it literally changed the way the world ate.
In Europe it took a little longer, as they were regarded with suspicion for a number of reasons. They were identified as part of the nightshade family, and though the fruit was edible, it was well understood that the plant itself was dangerous; that was hard for many to get over. As well, wealthy Europeans often ate off pewter plates. Pewter being a metal alloy includes tin, copper, sometimes lead, and sometimes silver. The acid in tomatoes reacts with many metals and lead poisoning could result when lead is present. It’s not the tomato’s fault, but the chemical reaction with tomato acid and the pewter dishware would definitely come to everyone’s attention. Consequently, in England and her colonies tomatoes were considered ‘unfit’ to eat. In fact in most of Europe (even Italy) for almost a century, tomatoes were grown primarily as an exotic ornamental plant in flower gardens. Ironically, the poorer people ate off wooden plates or pottery, so that chemical reaction would never have been an issue for the more common folk. Who could have guessed, that simply using clay dishes would make tomatoes wonderful, while using pewter dishes could make them deadly?
The plant’s ability to adapt and even to mutate, creating new and different varieties contributed to its spread throughout the warmer European countries. Still, it took a very long time for the fruit as a ‘food’, to gain favour among the general European population. Even in areas where the climate was perfect for growing them, the fact that they grew naturally along the ground suggested ‘low status’. Funny how people can be that way. Still it was a beautiful fruit, and for the rich, it became a tabletop decoration – not eaten, just ‘for looking’. Although tomatoes were embraced sooner in Spain and Portugal, it took nearly two hundred years before they were incorporated solidly into the bigger Mediterranean cuisine. It was the invention of pizza in Naples, Italy in the late 19th century, that endeared tomatoes to Italians. By then, fears surrounding them had begun to fade, and tomatoes had grown immensely popular in America.
In the east, it was a very different story entirely. From the Philippines (under Spanish colonialism), tomatoes spread to southeast Asian and then to the entire Asian continent. It was brought to India by Portuguese explorers and exploded in popularity as it was perfectly suited to the climate. Today, China is the highest consumer of tomatoes in the world, and India is second, but the sheer population of those two countries (being the most populace in the world) would account for that. Per capita, one might expect Italy to score the highest for consumption because we all have pizza, spaghetti, lasagna in mind, but in actual fact – Egypt, Turkey, Iran and Uzbekistan are all ahead of Italy. Yes, tomatoes play a big role in Mediterranean cuisine, but evidently they are pretty crucial in the cuisine of the Middle East as well. But the big surprise (to me at least) is the third highest consumer – the United States. I suspect ketchup has something to do with that.
Highest Consumption of Tomatoes in the World: 1. China 2. India 3. United States
and Now?
Tomatoes are the king of ‘versatility’, present in almost all cuisines. They can be used in soups and noodle dishes – like in China; curries – like in India; pasta dishes like in Italy; salads, grilled, gazpacho, and various stews in Europe and the Mediterranean; stewed – like in the Middle East; salsas – like in South and Central America; goulash in Eastern Europe – and an amazing cross over of all the above in our global adaptation to different cuisines. EVERYONE eats tomatoes.
Highly cultivated the world over – even in Russia and Scandinavia, tomatoes are one of the most popular backyard garden vegetables in North America. In northern climates like our own, they must be started indoors to extend the season long enough to make them viable, but that is not a problem when every commercial greenhouse grows thousands of them.
Most gardeners would benefit from growing both types of tomatoes, but they really should know exactly what they are getting in order to accommodate its growing preferences best.
The varieties are endless, but there are essentially two distinct types of tomatoes: determinate and indeterminate. It’s easy to remember which is which because a ‘determinate‘ tomato is one that has a finite or ‘determined‘ size, and amount of fruit. It is a smaller plant, ‘determined‘ to grow to a ‘pre-determined’ height, with all its fruit coming on in a short amount of time – perfect for a climate like ours with a short growing season. It grows easily in a pot, or within the confines of a tomato cage, so for those who need something easily contained, it’s your best option.
An INdeterminate tomato on the other hand, will grow and grow and grow, continuing to produce new fruit until the winter kills it. In its native land or in warmer climates, it could grow for years, and left to its own it will be a trailing plant, continuing to grow along the ground. Everywhere the stem touches the ground is a potential spot for the plant to grow new roots, conceivably having innumerable new independent plants all along the trail. I have no idea how long it could grow, or how it would eventually die in its native Central and South America. In a temperate climate (with distinct seasonal changes) like our own, it is the winter that kills it, but during the growing season it never stops reaching to new heights.
are tomatoes good for you?
almost 2 1/2 pounds this tomato will be dinner with a loaf of sourdough bread. It deserves a thick slice of toasted sourdough and some fresh pesto mayo. A late summer treat. One slice makes a whole sandwich. These Romanian Giants are the best tasting tomatoes I’ve every grown.
YES! In a word, they sure are! Tomatoes are nutrient-rich powerhouses, packed with vitamins, minerals, and antioxidants. Their secret ingredient is the antioxidant LYCOPENE, to which we owe the beautiful strong red colour. They reduce the risk of heart disease and cancer, improve eye health, digestive health, and the risk of osteoporosis. In the kitchen in they offer immense versatility and flavour.
* Fresh (as in uncooked) tomatoes are rich in vitamin C – a powerful antioxidant which is important for skin, bones, and connective tissue. It also promotes healing and helps the body absorb iron. * Fresh tomatoes are rich in Potassium – needed to build proteins in the body, including muscle. * Fresh tomatoes are rich in Vitamin K – required for blood to clot.
Like most fruits and vegetables, it is preferable to eat tomatoes FRESH, straight out of the garden to get the best nutrition and benefit. But that doesn’t mean that eating tomatoes grilled, fried, roasted, sauced, dried or juiced aren’t wonderfully good for us too. One of the best things about tomatoes is their versatility in adapting easily to an infinite number of different cooking styles, and using them in their many forms and styles opens up their full range of nutritional benefits.
There’s a very good reason they’re so popular in dishes ranging from Greek Salad to Thai Curry to Italian pasta to Mexican Pico de Gallo to toasted tomato sandwiches. Tomatoes have a unique flavour that isn’t found in any other vegetable. They are acidic, but less sour than other acidic fruits. That acid causes the colour to remain bright, and contributes to the texture of the dish it is in, including acting as a tenderizer.
That’s at least — in part — why so many cultural cuisines such as Italian, Mexican, Middle Eastern etc rely on tomatoes in such a wide array of dishes. Foods like pasta and pizza sauces, stews, and casseroles rely on tomatoes. Because North American cuisine is made up of dishes and flavours from numerous cultures, it is no wonder we find ourselves reaching for tomatoes so often in the kitchen.
Growing
In Canada, we generally plant tomato plants outside after all danger of frost is over. Starting seedlings indoors months in advance, is a must in Alberta, and if we cannot personally do so, not to worry – every greenhouse has a huge assortment to pick from. In Alberta, plan to plant them indoors by mid to late March at the latest. If you plant in February, they’ll be bigger, but sometimes that gets difficult to handle in the house. Expect to put them outside mid to late May, after all danger of frost has passed. You can grow them well into September in a typical year, but be prepared to cover up on cold nights, or to pick in a hurry if a cold front settles in.
Tomatoes love the sun so pick the sunniest spot in your garden for them. Conventional wisdom suggests that crops be rotated every year, and for most vegetables I do that, but for my tomatoes I’m a little more lax. In most backyard gardens its not always practical to change locations as the “sunniest” are limited by the house, garage, trees or neighbours house, garage, and trees. In mine (as in most), if they’re to have the sunniest spot, I am limited in my options. I pacify myself a little by remembering that in their native habitat tomatoes are perennial – every growing. They extend their vines along the ground, growing new roots where their stem touches the soil – literally growing into a new plant. Talk about nepotism eh? LOL. They aren’t physically moved, they physically move themselves – but they don’t move very far. At the end of the day, we can only do the best we can do. So let’s keep the idea of changing garden spots in our heads, and do our best to accommodate it BUT acknowledge our limitations and work within them.
Growing in the same SPOT is not necessarily the same as growing in the same SOIL. My garden is set up for tomatoes to be in one or two spots, each with semi permanent trellises to tie them to. For this reason, my attention to soil amendment is important as they are heavy eaters. Rotating faithfully without taking proper care of your soil is only half the job. Adding new compost and other organic matter every spring replenishes the soil’s fertility, and is my best line of defense against pests and disease. So far, I have been able to avoid any diseases by proper care and continual amendment and I do move them when I can,
Planting
When I plant a new tomato plant, I dig a DEEP hole – deep enough to bury all but the top 6 – 8 inches of the plant if possible. I put a raw egg in the bottom of the hole, crack it with my trowel and place the plant in the hole, laying it slightly if necessary to get as much of the stem below the surface as I can. This gives the plant a stronger base especially if your stem has gotten a little spindly before transplanting outdoors. If you look closely at the stem of a tomato plant, you’ll notice thousands of little ‘hairs’ called “trichomes’. These have a distinctive ‘smell’ which is repugnant to pests, and their texture makes it difficult for ants and other insects to climb. You’ll also notice numerous small bumps or nodules along the lower stem – among the trichomes. These are potential root starts which will grow roots if that part of the plant touches soil. Burying the stem will allow all these little nodules to develop into roots, strengthening the base of plant. The broken egg adds protein to nourish the new plant as it grows, and calcium as the shell breaks down – which is an important nutrient for tomatoes.
Throughout the growing season, adding crushed egg shells to the base of your tomatoes adds the “promise of continual calcium”, and a place that soft bodied cutworms or slugs are deterred from gliding across easily. Calcium is important and egg shells take an entire season to break down, so its a long term investment, so plan to add them often and throughout the growing time. Mulching with dry grass or compost around the base of your plants will keep water from evaporating quickly and will add nutrients as it breaks down.
Tomatoes are a vine, but unlike other vines they don’t naturally climb up. They want to trail. Gardeners want them growing UP to keep free air flow and to make best use of ground space. Stake them and tie frequently as they grow, securing them continually with cloth strips or clips. I trim all lower leaves as the plant grows, at least for the lower 6-8 inches. As the plant grows and I can spare the room, I prune the lower leaves higher – as high as 12 inches. This prevents water from splashing up onto the leaves (which may cause decay and introduce disease), and allows light penetration and free air flow making for a healthier environment.
The tomato usually has a single main stem, but every branch has the potential of having a new stem grow out of its ‘elbow’, creating many other stems and directions for the plant to take. These additional stems are rarely suitable for staking purposes, so clip them out when you can. Sometimes I keep only one stem, but often I will allow two or three stems to thrive, tying them securely as they grow. If your plant was allowed to grow for years and take over your garden, you might want to leave many of those sub stems on, but because of our shortened season, it is advisable to reduce them – encouraging the plant to put more energy into fruiting rather than building an empire.
Indeterminate tomato plants can easily grow 8-10 feet high, even in an Alberta summer. About the beginning of August, I begin topping mine off – pruning the growth that comes from the top, encouraging growth on the existing plant. By mid August I begin pruning all branches without fruit and the ends of the branches with fruit – reducing the energy going to green growth and redirecting it to existing fruit.
I plant a few cherry type tomatoes that will start producing early, ripening by mid July for early eating, and then bigger tomatoes for later eating and eventual harvest. That way I stretch the season of eating tomatoes out as long as I can.
Trouble Shooting
Probably the most common problem seen in tomatoes is Blossom End Rot. For many years it was believed that the cause was a lack of calcium, but this is only partially true. In actual fact, most of the time, good quality soil in our area of central Alberta, has a sufficient amount of calcium in it. The plant however, has been stunted in its ability to absorb that calcium due to inconsistent watering.
Another problem, especially in larger tomatoes, can be cracks along the top – stem end of the fruit. This is caused by inconsistent watering – especially when the fruit is forming. The only thing you can do is try to avoid the floods and droughts. Mulching will help maintain a good moisture level.
blossom end rot appears as a dark sunken spot on the blossom end (bottom) of the tomato. It is not a disease, but rather a physiological disorder caused by calcium deficiency due to inconsistent watering or rapid growth. It is not reversible, but it can be prevented. Remove the affected fruit, and commit to watering more consistently.
What should you do? Remove the affected fruit, its ugly anyway. And commit to a more healthy soil environment.
Causes and Symptoms: Calcium deficiency in developing fruit. Inconsistent watering, usually in the form of fluctuations in watering: over watering the drought can disrupt calcium uptake. Over stimulating growth with over fertilizing may cause rapid growth in plants, and leading to an inability to absorb calcium. It will start as a dark spot at the blossom end of the tomato, and progresses to a sunken, brown or or black area disfiguring the plant.
Prevention and Management: Maintain consistent moisture levels, especially during fruit development. Keep your soil healthy with consistent additions of compost and mulch. Make egg shells and bone meal a regular addition to your compost or directly add CRUSHED egg shells frequently. Avoid over fertilization.
Harvesting when they’re ripe
almost, but not quite ready. Give it another few days. These tomatoes are about 2 pounds each. Romanian Giants. As most heritage types, they’re not the prettiest tomatoes on the block, but definitely the most delicious I’ve ever grown. I’m committed to them.
Most of my earlier tomatoes are picked purely for eating out of hand or to add to garden salads. When the bigger ones start ripening and you’re picking to slice for a sandwich, look for firm texture and that beautiful red colour we all love. When the numbers increase and you can harvest more, then roast, grill or fry them to use as building blocks for pasta, soup, pizza, or to use as simple sides next to your favorite entrees. Two of our favourite ways to eat fresh tomatoes are on a toasted sandwich with pesto mayo, and in a fresh tomato bruschetta on focaccia or sour dough bread. Fresh tomato soup is a dish I wait all year for. For months not a single day goes by that tomatoes are not a major part of our meals. We’ve waited all year long for this season and I do not waste it.
When your tomatoes are ripening faster than you can use them – happy day. That’s when you look for ways to preserve the excess: * can them in quarts or pints, * make salsa to eat fresh or can, * make roasted tomato sauce, * freeze them whole for short term storage, * freeze your roasted tomatoes, * dry roast them in your oven with garlic, oil and a few herbs (my version of ‘sundried tomatoes‘), * or if you have an excessive amount, dehydrate them in slices to use for tomato powder.
Store at room temperature – in the kitchen – where you can see them and constantly pick out the ripe ones to use. They retain they’re distinctive acid-base flavour at room temperature. Never ever, ever store them in the refrigerator unless they’re ripening too fast and you intend to cook them right away anyway. Refrigerating them wrecks the taste of tomatoes and softens the texture. Once they’ve been refrigerated they’re only good for cooking.
On the other hand, a cut tomato must be refrigerated. Some say that storing it cut side down and wrapped in plastic is the best way, but time if of the essence. A day or two at most is all you can expect it to stay good.
Harvesting when they’re green
At the end of the season, covering your tomatoes with a big sheet for the night, is good protection for a short term frost. And its worth it, if there’s promise of another week or two of warm September weather. But if you have to do that every night, its time to give up and concede that summer is over. Get some big boxes out there and pick your tomatoes. Pull the plants out and turn upside down to see all the potential harvestable tomatoes. Twist and pull them off the stem and gently lay in the box. I separate the partially ripe ones so that I can keep a closer eye on them. Store them at room temperature.
Don’t waste anything: I prune the smaller branches off the main woody stalks and mow them up to add to our end-of-season compost. The big stalks I put in the city compost as they’ll take too long to decay in my little garden set up.
Saving seed
When you have a heritage tomato you’re in love with, do yourself a favour and save its seed for planting next late winter or early spring. Easy to do in a fully ripe tomato: simply use a spoon to scoop out some seed. Rinse in a fine sieve to get rid of additional pulp and lay the seed on a piece of paper towel in a single layer. Allow seeds to fully dry out on the paper towel, then roll it up, label the type and year with a black felt pen and store in in plastic or paper bag with your other seeds. That’s it. It really is that simple. When you’re ready to plant, gently remove the seed from the paper towel. If it doesn’t want to come off, no problem – just bury the piece of paper with the seed. It will germinate just fine.
The time table for canning tomatoes in a hot water bath is 35 minutes for a pint, 45 minutes for a quart. Use 1 teaspoon salt in a quart and 1/2 teaspoon in a pint. I also use 1 tablespoon lemon juice for quarts and 1/2 tablespoon for pints to up the acid level just a little. A friend recently told me that she adds coarsely ground peppercorns to her canned tomatoes which I thought was a wonderful idea. I’ve done it ever since. I love pepper, it adds additional flavour without dominating the dish. Might be my new thing.
FREEZING: When I freeze tomatoes I’m usually in a hurry – so I don’t prep them at all. I just put them whole in a freezer bag and try to lay them flat in the freezer till they freeze. I label them with a date of course, and I try to use them that first winter to free up freezer space and because freezing has a shorter shelf life than we might imagine.
tomato slices on a dehydrator rack
DEHYDRATING: is not my first choice for preserving tomatoes, and I would only use it as a method if I had lots to spare. Slice fresh ripe tomatoes, remove excess water and seeds, lay slices flat on your dehydrator racks. I try to keep the temperature around 110 degrees. It will take a good 24 hours+ to dry fully. When they’re crisp enough that you can break in half, they’re done. Store in a glass container out of the light. Use in soups or chilies. Or put them into the blender to powder them. Use the powder in place of tomato paste in any recipe.
For years I purchased tomato powder from Thrive Life. Thanks for the introduction. But with a dehydrator and an excess of fresh tomatoes, make your own!
This post is too long to add tomato recipes, so I’ll create another post for my favourite recipes. I’d love to hear some of yours too.
Homegrown tomatoes are my favourite garden crop. I hope you’ll grow them and discover the value of them and how easy it is to add them to your life. I’d love to hear your comments and your experiences with tomatoes. Below, for your convenience I have inserted screenshots from a workshop I teach in communities on Growing Tomatoes. You’re welcome to use them as a guideline for your own use in teaching similar workshops.
Tomatoes are nature’s most potent source of lycopene. What IS lycopene and why do we care? Lycopene is a powerful antioxidant with many health benefits, including sun protection, improved heart health as in lower risk of stroke and heart disease, as well as a lower risk of certain types of cancer. It is most effective when consumed in the form of lycopene-rich foods like tomatoes and other red or pink fruits. Studies indicate that lycopene reduces bad cholesterol (LDL) while increasing good cholesterol (HDL) levels. This balance is important because high cholesterol develops fatty deposits in our blood vessels, which can clot and lead to a heart attack or stroke. Remember, RED foods are good for the heart.
it is difficult to think anything but positive thoughts while eating a homegrown tomato
And now, you’ve got all that natural tomato goodness in a concentrated form right in your pantry! I know right? Who could have imagined that now you can: STOP buying those little 6 oz cans of tomato paste that you never use all of anyway STOP buying canned tomato sauce (in all their varieties) STOP buying tomato juice Because you’ve got all three of these wonderful foods right here in powdered form (just add water). And its a lot more nutritious because it hasn’t gone through the high temperatures of canning (which only retains 40% at best of the nutritional value). Tomato Powder is a super useful food to have on hand in the kitchen at all times. I can’t speak to all tomato powders, but Thrive Life Tomato Powder has a strong, clear tomato taste, like you just picked a ripe tomato out of your garden! It’s got all that wonderful natural tomato acid, because . . . . . . guess what? The ingredient (yes, that’s singular) is: TOMATOES. That’s it. The only thing in the can – is tomatoes. No salt, sugar, colours, flavour enhancers, or other additives of any kind. You can add your own salt to taste. Or not. You do you.
Making your own TOMATO POWDER
drying your own tomatoes for tomato powder
Making your own tomato powder is pretty straight forward. A little investment in the time department, but easy, and if you’ve got an excess of garden tomatoes, its a great use for them. Best practice is in a dehydrator, but you can dry in a slow oven, and if you live in a hot dry climate, you can dry them in the sun. I don’t – so that’s all I’ve got to say about THAT.
The meatier type of tomatoes is preferable, as they have less water and less seeds – like Romas. Simply slice and lay evenly in your dehydrator. All dehydrators might be different, but select a low setting and expect it to take a full day and night. How long exactly, depends on too many factors to estimate with any precision. Factors like: type of tomatoes you are using, and how much water they contain, how thick you sliced them, even the weather – is it cold and rainy, or hot and dry?
You’ll want to continue to dry them until they are brittle. Ensuring that you have removed all the moisture is critical to give you a good product in the end. Use a food processor or blender to grind the tomatoes into a fine powder. It may be helpful to break the tomato slices into smaller pieces as you add to the blender. You can sift the powder through a sieve to separate the larger pieces, which you can put back into the blender.
Store in an airtight container in a cool, dry place. Nothing lasts forever, so plan to use it up in a year (or two at the most). Nutrition will diminish over time of course. Having it be VERY dry in the beginning is key to it staying dry, and it STAYING dry is key to longer shelf life. Keep it well sealed, as it will want to absorb the moisture from the air.
tomato powder on right, tomato skins powdered on left
10 WAYS TO USE TOMATO POWDER
1. Tomato paste ratio 1:1-2 1/4 cup tomato powder + 1/4 cup water = tomato paste start with the lesser amount of water, and then add a tablespoon more at a time to reach the consistency you prefer
2. Tomato sauce ratio 1:4 1/4 c. tomato powder + 1 cup of water = 1 cup tomato sauce
3. Tomato juice ratio 1:8-10 1 T. tomato powder+ 1/2 cup (8-10 T.) water optional: add your choice of seasoning ie: onion powder, sugar, salt, pepper, to taste
4. Spaghetti sauce ratio 1:4
or use your own Mediterranean seasoning mix: any combination of oregano, thyme basil, rosemary, garlic, onion,
5. Pizza sauce ratio 1:3
or use your own Mediterranean seasoning mix: any combination of oregano, thyme basil, rosemary, garlic, onion,
6. Cream of Tomato Soup ratio 1:16 Prepare a roux from 1/4 cup butter and 1/4 cup flour over low to med. heat Add 1/4 cup tomato powder – whisk in Add 1 T. chicken bouillon – whisk in Slowly stir in 4 cups of milk, whisking all along to prevent lumps from forming. Simmer over low heat, whisking to combine well, heat thoroughly and thicken slightly. Add more liquid if needed. *optional: I like to rub some Freeze dried chopped onions through a sieve to create onion powder. Nice addition to the soup. *optional: add 1 tablespoon of Italian or Greek blend of herbs, or your own combination of oregano, thyme and basil. *optional: add another tablespoon or two of tomato powder if you want it richer
Thrive Life had the best Tomato Powder ever. They no longer sell to individual homes, so I’ve been on a quest to match it with my own tomatoes. Nailed it.
7. Ketchup 1 cup tomato powder and 3 +1/2 cups water 1/3 cup honey or brown sugar 1/2 cup apple cider vinegar 1 t. onion powder or 2 T Freeze Dried chopped onion crushed to make onion powder 1/2 t garlic powder or 1 T Freeze Dried garlic crushed to make garlic powder 1 t salt + 1/2 t pepper 1/2 t dry mustard pinch of allspice and a pinch of cloves Combine all, and simmer over low heat stirring frequently to prevent scorching – till reduced to desired consistency. Expect it to take 30-45 minutes depending on your preference of thickness. Pour into jar and refrigerate. Expect 2 pint jars. Best to let it sit a day to allow flavours to fully blend.
8. Barbecue sauce 1/2 cup tomato powder 1 cup water 1/3 cup brown sugar 2 T. apple cider vinegar 1 T Worcestershire sauce 1 T soy sauce 1 T mustard 1 clove garlic, minced 2 T FD chopped onion 1/4 t Cayenne pepper (or your favourite dash of hot) or NOT Salt & pepper to taste Mix all ingredients in large saucepan, heat over low and stir 15 or so minutes till slightly thickened. Stir frequently to prevent scorching.
9. to add that beautiful rich ‘tomato’ zest concentrated To any tomato based soup, stew, chili or pot roast – add a tablespoon or two of tomato powder just because YOU CAN! You’ll be surprised at how it richens things up.
10. As a garnish Sprinkle tomato powder over top potato salad, deviled eggs, hummus, even a lettuce and tomato salad. Be creative.
I’d love to hear your experiences with Tomato Powder, and your suggestions for recipes, please comment below.
I have a simple rule that I apply to everything I do. Whether its my garden, or an event that I am involved in – doesn’t matter, it pretty much always applies. At the end of whatever it is I ask myself these THREE Questions (and answer them of course).
(while this one is still fresh in your mind)
I have a simple rule that I apply to everything I ‘did’. Whether its my garden, an event that I was involved in, or a class that I taught – doesn’t matter, it pretty much always applies. At the end of whatever it is, I ask myself these THREE Questions (and answer them of course). 1. What went well? What was I pleased with? 2. What could have been better?What could I have improved on? 3. What did I learn? In my opinion, the most important.
All three questions are very important, and must be asked in order. It is very easy to get down on yourself when something didn’t go right. None of us seem to be short on negative self talk, if the season (or event) was disappointing. Its easy to get discouraged and give up if we focus on the bad, on the things that didn’t work out. So DON’T!
What went well? There is always something that was good. Think about it, and WRITE DOWN the answers. A fruit or vegetable that grew well – a new skill that came in handy – a new hack that paid off – etc. Write down everything that was good about this year’s garden.
For my 2021 garden: What went well?
* Kale. I grew great kale. The year before was the first time I planted kale and I only planted 6 plants, but it encouraged me to plant again, this time I planted double that amount, and some variation. I planted them in three or four different spots, I picked from the plants all summer long, and well into October when I finally harvested the last of it. I used fresh kale in salads, omelettes and scrambled eggs, soups, casseroles, chopped in sandwiches, and smoothies. I tried kale chips in the oven for the first time, and was wowed. Repeated that several times, using less oil each time lol. I dehydrated the excess and ended up with two FULL 2 quart jars of dehydrated kale, crushed into them.
* Tomatoes. I had a reeeeeally good harvest of tomatoes this year. Lots of tomatoes! Mostly the Romanian Giants. For the first time, I grew tomatoes all season long IN my new green house. Eight or ten tomatoes there, four around an arbour in the first garden bed, four around an arbour in the large horse trough, and some in their usual spot on the west side of the house. And some cherry tomato in planters on the patio. Made for a LOT. I admit it – tomatoes are my thing. The backbone of my garden, the one thing I look forward to the most. Everything else exists around them. The most successful places (in order), was the green house, garden arbour and large horse trough arbour – all in the sunniest locations. We ate fresh tomatoes pretty much all of August, September and October. We’ll have fresh tomatoes into November. I canned the excess that ripened faster than we could eat, a couple dozen quarts. I made fresh bruschetta and salsa, canning about 15 pints of salsa. I oven roasted lots of tomatoes. We had so many different types of tomato based soups.
* Compost. We reorganized our compost area since building the greenhouse, adding another large old garbage can turned upside down. Also had a mound of dried lawn trimmings in our compost area, ready to add to compost piles as needed, and use to mulch gardens. We also added to the city compost from time to time – with undesirable compost: either branches and things that take too long to break down, thistle, scraps that included oil or meat, ….. that sort of thing. It was valuable to be able to recycle these organics even though we didn’t want them ourselves.
* Greenhouse. Dan built me a new greenhouse this spring. Not very big, 8×12 – the perfect size for our needs. I dug the soil down deep on both sides, and added gravel, compost and aged horse manure to the soil. When the shelves were no longer needed, I removed them and planted tomatoes, peppers and nasturtiums in the soil.
* Soil amendment in the former spruce area. We took out two massive spruce trees a year and a half before and the following summer it was almost a dead zone. Nothing we planted did well, so we gathered our resources and came up with an amendment plan, thanks to the suggestion of our friend Scott Campbell. Aged horse manure, barley straw and early spring mowing. Became positively LUSH compared to last year.
New Discoveries
Horse trough raised beds Hori hori knife (my new favourite tool) Mexican Tarragon, Papalo, and Epezote
What could have been better?
Grapes. Plums. Carrots. Potatoes. Strawberries. Basil. Beans. Butternut Squash. My planting was too condensed, and I ended up shading some things I’d rather not have. I thought I planted bush beans, when they were in fact pole beans, and consequently they weren’t placed in the best spot. That was unfortunate. I experimented with two different ways to grow potatoes. Both were interesting and I’m glad I did it, but not that great of a yield.
What did I learn?
We’ve been growing tomatoes on the west side of the house which we knew was short on sun, but the best we had at the time. This year, the new greenhouse resolved that issue. 2021 is our last year for westside tomatoes. Next year, that partial sun/partial shade area will be best suitable for greens: lettuce and arugula, chard, kale, nasturtiums and celery.
We topped up all of our beds with aged horse manure and completely redid the entire strawberry bed, including new plants, following the recommendations of some trusted friends. I allowed too many other things to grow in it as the summer progressed: dill, poppies and sunflowers. Next year, I’m gonna limit that. We’ll deep water the strawberries right away (end of October), and cover them in leaves to tuck them in for a long winter’s sleep, and hope for better strawberries next year.
Plans for improvement next year?
Gonna rent a small inground garden plot in our community garden, to plant carrots, potatoes and maybe beets. Those root crops I just don’t seem to have sufficient room or sun for in my small garden, and if there’s one thing the community garden has a lot of, it is SUN!
Seeds for Next Year’s Garden
I ALWAYS buy seeds one year in advance. For the most part, what I plant in 2022 will be the seeds I purchased in late winter 2021, and so forth. It’s part of my personal philosophy of preparedness. There will always be an exception, something I decide to try NOW, but generally speaking, I plan at least one year ahead for gardening. I don’t ever want to have a spring when for some unforeseen reason, I am unable to get seeds. Preparedness is not just food storage.
Some of those seeds will be seeds I saved myself, especially tomato seeds from my own Romanian Giants, Nasturtiums, Poppies and Dill. Garden preparedness includes ensuring I have sufficient potting soil for next spring, as well as planting containers.
I get my seeds from assorted sources: a local seed store on the west side, one of several Canadian seed companies I order online, the odd package that catches my eye at a greenhouse or garden centre, and of course those that I propagate myself or that friends have shared. But for next year I have decided to try another Canadian seed company a friend recommended. I am looking for a company that deserves my loyalty.
Keep your plans for next year ACHIEVABLE.
Seed catalogues are full of all sorts of potential, and it’s good to try something new every year. Some thing you haven’t tried before, a new vegetable, a new type, a new way of doing things, . . . And there’s nothing wrong with trying something totally ‘out there’ from time to time, like watermelon, cantaloupe, grapes, honeyberries …. You never know what’s gonna WORK, and you very well may be surprised. Some things may simply have been fun to try, but not really worth investing too much energy down the road, not to mention the garden space that may have been better used for other vegetables. And other things may be tremendous successes. However, keep the bulk of your garden plans for the “most likely to succeed” crops. Go for the tried and true types. Ask other gardeners for their recommendations.
We’re fully expecting our Honey Crisp Apple, which we transplanted into our former spruce area two springs ago, to amaze us in 2022. It got set back when we transplanted it, and had a rough season in exceptionally poor soil, but we’ve apologized, and have done our best to make up for that rough start. I also have high hopes for our Royal Plum, which produced this year, but sparsely.
I highly recommend keeping a garden journal of sorts. Don’t fool yourself into thinking you’re gonna be a great journaler if you’ve never done well with journals before, but don’t be a defeatest either. Commit to it. It doesn’t have to be fancy or expensive, just a simple notebook will suffice – but have a book that is gonna stick around. Not just a collection of note papers.
Keeping a garden journal WILL improve your gardening experience, I promise. Why? Because you will hone your skills based on what you learned from previous seasons. It will provide you with historical information that will help you better predict future results. It will help you keep an inventory of your seeds and perennials, as well as record your harvests. It can effectively evolve into a personalized garden TEXT BOOK, and every year you add to it, it becomes more and more valuable.
What to include in your garden journal? 15 suggestions
Date your entries and write down your answers to the three questions above. Every year. Trust me, you’ll be glad you did. This will be your core.
A pencil sketch of your garden layout with the year clearly marked. This is more important than you might think. You will want to ensure you rotate most crop areas, avoiding using the same spot year after year for the same vegetable.
A list of the plants that worked out best, and the ones that did NOT.
Dated sources for specific plants: greenhouses, nurseries or garden centres, seed companies, friends or neighbours.
Planting times, ready times, harvest times. Maybe even a few recipes you discovered.
Be more specific about times: dates you started seeds indoor, dates you transplanted them, and dates you planted seeds directly into the garden. Germination times. All these are things you THINK you’re gonna remember. Yeah right, you won’t. The information will come in handy for future years.
Soil tests, soil amendments and subsequent assessments of that soil.
Any problems with pests, diseases or other issues
Approximate dates of harvests and the type of yield you got. I don’t have the patience to weigh, measure or count, but I know some do that. I think that’s great. Just not for me.
Weather. I know right? But seriously, every year is unique, and not every season is good for every crop. So record your assessment on the weather trends by recording details, and make note of what crops are doing better than others. For instance, I have noticed that in our part of the city, we seem to be have less violence in the weather. The worst seems to go around us. I have also noted that other areas seem to get a frost quicker than we do, perhaps owing to our number of nearby trees creating a minor microclimate. You’ll be more likely to make note of weather patterns if you’re writing them down.
New changes and experiments. How else are you gonna track what works?
Suggestions, recommendations, and even recipes shared by other gardeners. I know, again with the recipes.
Expenses: how much spent in greenhouses and garden centres, seed catalogues, garden paraphernalia, new builds, maintenance of raised beds etc, cold frames, lattices etc
Hacks, suggestions, inspiration and ideas. Using your garden journal as the place to make quick notes about what they are, or where to find them, is the best way to keep them all in one spot for easy reference later
Personal reflections, inspiration and musings . . . . . after all, it IS a journal. It is part of you. It is a record of yourself.
What plans do you have for your garden next season?