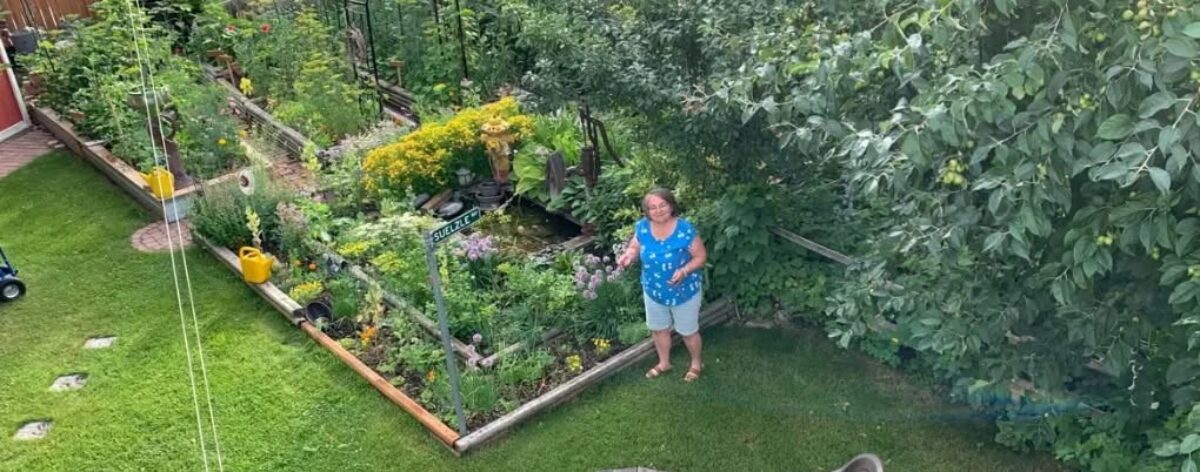
It’s getting close to Raspberry season in my part of the world, and Fresh Raspberries straight from the garden make EVERYTHING life can throw at you worth it!
A favourite raspberry memory of mine involves a family story of my two sisters. It makes me smile every time – so I am sharing it with you. My sister Pearl-Ann used to have a wonderful, big raspberry patch in her back yard in Cold Lake. My sister Wendy didn’t, so she would sometimes come pick in Pearl-Ann’s patch when the season was at its peak. Pearl-Ann also had a VERY BIG spider that lived in a corner of her raspberry patch, a corner the family dubbed “Ted’s Corner”. Yep, they named the spider; it seemed like the right thing to do since he was part of the family so-to-speak. The family pretty much all agreed that Ted being so big and scary looking, could have the raspberries in his corner unchallenged. Life is after all, full of compromises.
One day when Wendy came to pick, Pearl-Ann – having neglected (we’ll be kind and say she’d ‘forgotten’) to tell her about Ted – stood at the kitchen window to watch. Her husband Brett came in and asked “Whad’ya doin?” “Watching Wendy pick raspberries.” “Did you tell her about Ted?” “Nope.” “Can I watch too?” “Sure.” Not surprisingly, the biggest and juiciest unpicked raspberries were in Ted’s Corner. The kids came up and asked “What are you guys doing?” “Watching Aunt Wendy pick raspberries.” “Did you tell her about Ted?” “Nope.” “Can we watch too?” “Sure.”
What happened next has become a thing that family legends are made of, and when it was over, Pearl-Ann was inspired to write poetry: Wendy wailin’ went a pailin’ to make some raspberry jam. Ted came a crawlin’, and Wendy went a’sprawlin’ and screamed “I’ll KILL you Pearl-Ann!
In the end, I’m not sure Wendy got too many raspberries, I think some got lost in the ‘sprawling’ part. But she eventually saw the humour and took one for the team – as sacrifices must be made when creating family folklore.
This gentle captured moment of three year old Danica picking the season’s end of raspberries are part of why they’re part of my DNA. I hope to never be without a raspberry patch.
Originating in Europe and introduced to North America in the late 1700’s, raspberries thrive in the wild and in backyards across Canada – a favourite summer staple. 80% of the cultivated raspberries we buy in grocery stores are grown in the Fraser Valley of southern British Columbia. While FRESH raspberries are the best food in the world, they’re only available for 3 or 4 weeks a year. What to do? Well, its freeze dried raspberries to the rescue of course. Always the next most nutritious choice after hand picked and still warm.
5 reasons eating Raspberries will improve your health
Raspberries are amazing, with many health benefits, packing a lot of nutrients to keep you healthy. They satisfy your sweet teeth without being high in sugar, in fact they are one of the lowest sugar-fruits of all, even less than apples, making them an excellent choice for those of us wanting to reduce our sugar intake.
They are a powerhouse of antioxidants which makes them highly valuable in lowering the risk of heart related diseases, cancer and stress related diseases, as well as reducing inflammation associated with arthritis.
Raspberries are a high whole food source of dietary fiber which supports good digestive health, contributing to a feeling of fullness and reducing overeating. Their fiber helps beneficial gut bacteria flourish – good news for everyone, but especially those with chronic gut diseases.
Research indicates that adding raspberries to a diabetic’s diet reduces the amount of insulin needed to manage blood sugar levels.
Raspberries contain flavonoids which help improve coordination, memory and mood, also helping to eliminate toxic proteins associated with brain dysfunction. They are a top brain-supporting food, highly valuable for those with Alzheimers or Parkinsons because they help counter oxidative stress associated with those diseases.
more ways to eat them
Fresh raspberries are wonderful to eat out of hand, or better yet – straight off the cane, but they have a very short season, and they spoil quickly too, so don’t pick them until you’re ready to eat them. While you can, sprinkle fresh raspberries on your cereal, in your yogurt, over a fresh salad, on the side of your plate and in your morning smoothie. Mash with a fork and sweeten to taste to use as a fresh jam on toast, pancakes, muffins or waffles. Throw them into your muffin batter (folding them in at the last minute to prevent squishing them).
Freeze drying is the #1 best way to preserve natural goodness of all fruits and vegetables, including Raspberries. Thrive Life is my brand of choice – primarily for their NUTRILOCK guarantee which assures me of their nutritional superiority, as well as being completely GMO free, and containing NO artificial colours, flavours or additives of any kind. In addition to that, the shelf life is an impressive 25 years! making it the perfect choice for long term food storage. I highly recommend it! As the perfect example of why I choose Thrive Life over any other form of purchased raspberries, this nutritional comparison to store purchased ‘fresh’ raspberries (below) says it all. Why the difference? Because one of the guarantees Thrive Life stands behind, is that their produce is picked, washed, and flash frozen within 6 hours (usually 2-4) of harvest. In that frozen state they are transported to Thrive Life’s state-of-the-art facility where they go through the second step of the two step process of freeze-drying. They are then sealed in BPA free cans (oxygen free, moisture free). I call that “fresher than fresh”. The only thing better is right out of your backyard garden.
“With THRIVE freeze-dried raspberries you can have deliciously ripe raspberries any time of the year. THRIVE Raspberries, with their rich, red colour and succulent sweetness make the perfect snack, dessert, or topping. You can add freeze dried Raspberries to almost anything! Try them in ice cream or yogurt, use them to top your cereal, make them into sauces and syrup, or you can always just eat them straight from the can. No matter how you eat THRIVE Raspberries, you can be certain that you are strengthening your immune system and improving your cardiovascular health.” – from the website
While you have garden fresh raspberries enjoy them every day of their relatively short season. Freeze your excess to use all winter long, or make raspberry jam, or add them to rhubarb fruit leather. Any way you can incorporate them into your diet you’ll be better for it.
I’d love to hear your about favourite ways to eat raspberries.
First of all, let’s clarify the name – its always sorta bugged me. It implies that this soup is traditionally served at Italian weddings, but its not. It is actually a poor translation of the Italian name – Minestra Maritata, which directly translates: Minestra – Soup, Maritata – Married. While this doesn’t roll off the English tongue as easily – it refers to the ‘marriage’ of the intense flavour combination of seasoned sausage, leafy green garden vegetables and of course garlic and basil. There! Now that we’ve got that cleared up, it makes a lot more sense and we can appreciate what we’re creating.
For my soup, my ingredients of choice generally come from my garden. Fresh garden spinach is ideal, but I generally have that only in the early part of the growing season. I do NOT buy the ‘not-as-fresh-as-you-think-it-is‘ spinach in the produce department. There is ZERO vitamin C left in spinach after the 4th day of harvest. Unless you know for sure that the ‘fresh’ spinach you’re eating has been picked within the last 96 hours, you are not getting what you previously assumed you were. When I am not using my own FRESH spinach, I prefer to use THRIVE LIFE freeze dried spinach. My reason is simple. It is picked at the peak of perfection – when all nutrients are the way nature intends, then it is washed, chopped and flash frozen within 2-4 hours! In that frozen state, it is shipped to one of their facilities where it goes through the second step of the two-step ‘freeze-drying’ process. In actual fact, it retains 95% (+) of its original food value! To me, that is a very big deal. I want the food on my table to be the best, most nourishing food I can possibly put there. Add to that the fact that it has a 25 year shelf life, and it is a total winner for me. Freeze Dried Spinach holds an honourable place in my food storage and in my pantry. It is a vegetable I use several times a week and would never be without.
The key to a beautiful Italian Wedding Soup is the combination of its intense flavours. Keep in mind that this is common food, I expect – kinda like cabbage rolls in a Ukranian household – where every family prefers it the way their gramma made it. So don’t be intimidated, but pay attention to some key ingredients.
pay attention to your ingredients
1. don’t add raw meat (yuck). Make sure the sausage or meatballs are cooked and browned. Otherwise they’ll be a yucky colour and squishy. bleh 2. garlic and Italian cooking are synonymous so be generous with it. 3. parmesan is also synonymous with Italian cooking. Just sayin’ . . . . . . 4. I think its preferable to use tiny pasta, but if you’re needing to go gluten free, or you don’t have any, use rice, and if you only have larger pasta, go for it, but be cautious about not cooking it too long. 5. Pesto. If you don’t have it, you can use lots of basil (you already have the garlic and parm in the soup). But pesto stands alone as a beautiful thing, and in my opinion – is important to the final outcome of your soup. link to my basil pesto recipe
Because I use so many freeze dried vegetables, it takes less than 20 for me to decide what I’m making, and have it on the table. Watch video here.
using the best ingredients gives you the best results
You’ll notice in this video that I added green onions (because I had them), and lemon juice (because I had it), and celery (because I like to). You can also substitute other greens for spinach if that’s what you have. I really prefer spinach, but I’d use kale in a pinch. I generally use freeze dried options from my pantry which simplifies everything, and keeps me up close and personal with the food I choose to include in my food storage.
Recipe: Cindy’s Italian Wedding Soup
6-8 cups chicken broth (add the remaining 2 cups later as needed) 2-3 cloves minced garlic 1 cup orzo (or other type of small pasta) 1/2 cup Thrive FD chopped onions 1 cup Thrive FD sausage crumbles 2 T Thrive dehydrated carrots 2 heaping T Pesto (I mean HEAPING, but if you’re shy, add less) 2 cups Thrive spinach 1/2 cup parmesan cheese
Bring 6 cups of broth to a boil. Add orzo, return to boil and reduce heat to a simmer. Add garlic, onion, sausage crumbles and carrots. Gently simmer till pasta and sausage are tender, stirring frequently (3-5 min). Remove from heat. Add pesto and spinach. Stir to combine. Add additional broth if needed. Add parmesan. Always taste test. Season with salt and pepper IF you feel it needs it, especially if you went light on the pesto.
Let soup sit 5 minutes for everything to get along beautifully together. Serve and ENJOY. +hint: I often serve with a dollop of fresh Tzatziki on top (mmmm)
Do you have any favourite tips you use for Italian Wedding Soup? I’d love to hear them.
At first glance you might think that a simple garden can do little to improve a community, but you’d be wrong. Sometimes, “By small and simple things great things are brought to pass“(1) Through community gardens, neighbourhoods come together, friendships are established, individuals become part of a thing bigger than themselves, and local governments forge new partnerships and connect with their residents. While it isn’t everyone’s cuppa tea, you don’t have to actually ‘garden’ to see the value in it, or to support one. Community gardens are a low cost way to repurpose wasted, unsightly space. What town or city in their right mind would turn down a well thought out plan to create one?
Take Sakaw Gardens for instance, in the heart of Mill Woods. At summer’s end of 2020, community member Myrna Peters pitched her idea of a community garden to those attending an Annual General meeting. Her idea was to use the space of a former ice rink in the nearby school field. It was enthusiastically embraced by the Millhurst Community League. In fact, a garden had been on their radar since a Needs Assessment Survey in 2015 determined that it was the number one choice for using that space. A volunteer willing to head up the project just hadn’t been found.
I was in that meeting – with other masked strangers sitting six feet apart. It was my first AGM for the community league. My interest was piqued – I was intrigued – I was allured – and I was excited about the possibilities – all at the same time. Like others in 2020, I had been feeling some compulsion toward community service, and had reached out – which is why I was in that meeting. But gardening! Gardening was a personal passion.
The stars aligned that day for a lot of people. For Myrna – her idea landed in fertile ground. For the community executive – they finally found a willing volunteer to head up a project they already supported. For me – this was something I already loved. I followed Myrna out to the parking lot, introduced myself, and gave her my phone number. I promised to do what I could to help her.
To say it all fell together would undermine the hundreds of hours of preparatory work that went into getting it off the ground. But there were a lot of things that did come together. First of all, we didn’t have to invent the wheel, we reached out to other community gardens and asked for help. Nearby Ridgewood Gardens freely shared their experience in getting their community garden up and functional. Coordinator Danna Schumann gave us a tour, highlighting their strengths and pitfalls and shared information that assisted us with our application to the city. They were two years ahead of us, so their experience was fresh and helpful. A handful of community members responded to the call, coming forward with skills necessary to get a project like this put together. We established a team, met regularly, applied for grants, coordinated volunteer efforts, jumped through hoops to comply with city requirements, and established friendships.
Two and a half years into our project, we have not only completed our Phase 1 and Phase 2, but are on track to complete Phase 3 by this spring. What are the different Phases? Well, funny you should ask, as I was just about to tell you.
Phase 1 was the garden itself: complete with 35 plots, some inground, some raised beds. Included were two public gardens, a school plot and a Food Bank plot.
Phase 2 began with an orchard including all things “Fruit”. Trees: apple, plum and cherry Bushes: saskatoon, raspberry, currant and gooseberry Plants: rhubarb and strawberry It also included a rabbit fence, a rain roof, a dry creek for runoff, picnic tables and benches, as well as a hardpack crushed limestone path connecting 11a avenue to the garden. We call this PAT’S PATH. And the jewel on Phase 2: six wheelchair garden boxes. We call these PAT’S PLANTERS.
Pat Whaley
Pat Whaley was a long time community volunteer who was a double amputee confined to a wheelchair. She wouldn’t want to defined this way, but it was a fact of her life and it affected every part of it. Pat was present in those early weeks while Myrna’s vision was unveiled, but she stopped Myrna in her tracks when she said “This is so awesome, but I’ll never be able to see it because I’ll never be able to get there.” Funny how one simple statement can stand out and haunt you. It changed everything for Myrna. It changed ‘the vision’. Before that year was over, Pat Whaley left this world for a better one. She left her wheelchair behind, but she’d made her point. It was agreed that a community garden should be INCLUSIVE, and that meant those in wheelchairs or walkers or with other mobility issues should be able to not only “get there“, but should be able to garden. Such is the legacy Pat Whaley left behind.
No doubt Pat looks on from her vantage point and is happy with what she sees. Her wistful comment back in the fall of 2020 inspired changes to the original plan that included six wheelchair accessible garden beds, a hard pack, crushed limestone path connecting the main sidewalk to the garden and winding through the orchard area, wheelchair accessible picnic tables, and swinging gates on our fence. Pat would also be happy to know that our Gazebo (Phase 3 and on schedule to be completed this spring) is at ground level, making it fully accessible by wheelchair.
In honour of Pat Whaley, at of the end of our 2022 season, six wheelchair beds were built, installed and filled.
They are reserved for wheelchair gardeners, and able bodied gardening volunteers stand ready to assist as needed, to make gardening at Sakaw accessible to all – even those in wheelchairs. Thank you Pat. You are remembered. And in response to your desire to partake, we hope to be accessible to others like you.
If you, or someone you know in a wheelchair, thought that eating vegetables you grew yourself was not possible, you were wrong. If you’re in the area, Sakaw Gardens welcomes you. Plots are available now to reserve on a first come basis.
warmly,
Cindy Suelzle
footnotes: 1. Alma 37:6
“a garden can be the salve that heals our hurting communities”
Food does not last forever. It must be properly cared for and rotated or you will lose it. And what a waste of money and resources that is! The idea of permanent food storage – or food that lasts indefinitely needs to be discarded. It’s ridiculous. Food will deteriorate even under the best conditions. The secret to success is to work within the facts, to take advantage of the best storage-ability of nutritious (excellent quality) foods, and to make a habit out of USING it, and continually replenishing – “Rotating” – to keep it at its best. That’s the secret in a nutshell; if you live by it the rest is a breeze.
Our early years of storing food
Shortly after Dan and I were married, we began to give serious attention to establishing our own food storage (such as it was possible in a small 2nd floor apartment). And we took more than our fair share of ribbing about it (especially me), from friends and family. Some family members were like minded, some were not – but respectful, and some outwardly ridiculed. And you know what? That’s just the way some people are – no use losing sleep over, adjusting your priorities for, or being offended because some people see life differently (no matter how rude they are).
“Food Storage was never meant to be an inheritance for your grandchildren.”
What is food storage?
I think a good way to explain what food storage is, is to understand what it is NOT. Food storage does not involve ‘panic buying’, and does not involve ‘shelf clearing’, buying on credit or hoarding. It does involve INTENT, coming up with a plan, working on that plan, priorities, budgeting, strategies, vision, some sacrifice , short term inconvenience in the beginning which transitions into long term convenience, satisfaction, comfort and peace of mind. It also requires some dedicated space. It does not have to be accomplished quickly, in fact it shouldn’t be – for a number of good reasons. It doesn’t have to be a whole lotta money upfront – quite the opposite, it can save you a lotta money. It can be accomplished one day at a time. Starting Right Now.
Food storage is all about preparing for adversity by having a basic supply of food, water and necessities on hand. There are two types: short term food storage – 3 months (which is usually just the first stage of a bigger plan) long term food storage – 1 year+ A critical component of any good food storage plan is WATER – for drinking and also household use. I am not including ‘water’ in this post, but only for the sake of room. It will be its own discussion.
Panic buying is based on FEAR, and it causes us to do things that we later might regret with regards to what we purchased or how we purchased it. When we haven’t planned ahead, and are suddenly faced with an emergency, we can find ourselves being very self centered. In that scarcity mentality, we may buy too much, and we may put our perceived needs ahead of every one else’s. We clear shelves. We think we deserve something more than somebody else might, simply because we got there quicker. When Covid first became a thing, we saw items flying off the shelves, people taking much more than they needed with no regard for others. The behaviour was a symptom of fear, but was completely avoidable with a little forethought and planning.
First of all, we are not the most important person in the world – even though we may think we are. And we are not more deserving than any one else. When we remove FEAR from the equation, it changes everything. That scarcity mentality becomes an abundance mentality. Go ahead and shop the sales as you can afford them – in times of plenty. There really is enough for everyone.
8 Hints for Success
Don’t buy more than you can afford
Start small
Picking up an extra can or two when you’re able (and they’re on sale) adds up soon and is Visibly satisfying
Re-allocate a few dollars where you can. In many cases, saving $ from one impulse fast food stop on the way home could be enough to add a case of some food-storage essential.
Be open to try new things. Open your eyes and you mind.
Rotate items to prevent them from expiring.
The freezer is NOT food storage. It is convenient and important, but not dependable in an emergency. It depends on a resource you cannot control: electricity.
Remember, for the most part, electricity is your best friend, and it will not let you down. But there are times it will.
So WHY food storage? That’s the big question . . . .
It seemed that in 2022 more people have opened their eyes to the idea of food storage. Some who may previously have only given it a cursory thought, and others who have never felt the urge or even saw the wisdom of food storage before now – were suddenly getting on board.
For years, governments on all levels, communities, social agencies and even religious organizations have urged people to prepare themselves by storing extra food, water and other necessities at home. With the recent changes we’ve all seen in these unsettling times, the wisdom of doing so is becoming more and more apparent to many of us. There is no replacing the peace of mind that you have when you know you’re prepared. And that doesn’t have to mean the radical preparations of a doomsday prepper. It can mean something as simple as not having to go out for groceries for a week when you’re sick, or for a month when you’ve been laid off. It can mean something as simple as being prepared to live with less income than you currently are.
The sad reality is that when we receive a few days warning of an impending hurricane or blizzard or other disruption in services, stores are crammed with people trying to get the last loaf of bread, the last bag of apples, the last jug of milk, or that last package of toilet paper because they’re not prepared. Or as we’ve all seen, hoarding those commodities preventing others from buying them – out of some sense that “WE” need it more than “they”. But truthfully, without warning, each one of us may face a personal emergency in our own lives. A job loss. A health crises. A death in the family. A pandemic. Let’s face it, life’s emergencies can be sporadic and unpredictable. Being prepared to weather these storms is not as difficult as you might think. What if you could relax, take that veritable load of worry off your shoulders? You can of course. It simply requires a plan, some focus, and some intentional action working toward the goal.
Food Insurance
Food is usually the second largest expense in any family budget, coming in a close second to the cost of shelter. And I’m sure you figured out that food prices only go up, increasing at a shocking rate these last few years. I can’t see that changing any time soon. Can you?
You’d be hard pressed to find someone without household insurance. Most of us agree that life insurance is important, and it’s mandatory to have car insurance. We buy travel insurance when we travel, and medical insurance. So why not for something as important as food? Food insurance! That’s pretty much what food storage is. But its surprising how many of us fail to protect our family with the most basic insurance of all – protection against an interruption in our ability to buy groceries. And with the recent Covid pandemic fresh in our minds, and subsequent shortages in nearly everything, we’ve all seen first hand, things we didn’t ever think we would.
The big difference of course, is that Food Insurance doesn’t disappear at the end of the month like fire insurance. We eat it. For the cost of “insuring” our family against the unthinkable, or simply against an interruption in our income, we can literally BUY peace of mind in the area of food. “Full Coverage Food Insurance“, ready when we need it. And no insurance broker to deal with LOL.
Building your food storage may seem daunting at first, both in effort required and the financial investment. Here are some steps to get you started.
1. Where to start?
When I was a little girl, fruits and vegetables in food storage were in cans or bottles. They were stored in our cold room and brought up daily for meals. Meat was stored in the freezer. Flour and sugar were stored in pails. And pasta was stored in cardboard boxes. (we always had lots of macaroni). When my kids were little, it was more of the same with the addition of more dehydrated foods (more than just raisins), a lot more home bottled fruits, vegetables and even meats, and a bigger variety of grains and beans. These days, I keep some of those same foods, with a few adjustments, improvements, additions and editions I’ve learned over the years.
When you’re just starting out with Food Storage, there is always the question of *Where on earth do I begin(?). And then the follow up questions of *What to get? *How much to get? *Where to get it from? *How to afford it? *How to store it? *Where to store it? *How long will it last? *How to prepare it? *Where to find the time to prepare it? *How to rotate it to keep it ‘fresh’? *How not to waste it? *And will my family eat it?
Nowadays, we have a new player in the food storage game. Ironically, it is not so new, its more a matter of more people becoming increasingly aware of it. And its the answer to all the above questions. FREEZE DRIED FOOD. Nutritious. Convenient: easy to use. Tasty. And get this – shelf life of 25 years. It adds “SMART” to traditional food storage of cans and bottles.
STORE WHAT YOU EAT.
Having a Food Storage may be one of the smartest things you do for your family. But there is one very important rule that everyone must follow. Your Food Storage may not look like mine or anyone else’s, and it shouldn’t. You need to Store what your family eats! Foods you like, that are easy to prepare but more importantly, that your family is used to, and will enjoy. In our younger years, there were often times that we relied on our food storage. Groceries were the only flexible thing in our tight budget, but I never wanted my children to feel that life was harder this month than last month. I wanted every day to be comfortable and normal. So we ate the same way, in good months and difficult months. If I could not buy groceries in any given month, or my budget was reduced for some reason, I didn’t want my kids to notice. I cannot emphasize the rule of “storing what you eat and eating what you store” – enough. When life is hard on so many levels, it is soothing to know that your family has good food that they’re accustomed to, on the table. Store what you eat, but then EAT what you store.
MAKE room.
That’s different that having room. Most houses these days offer no accommodation for food storage, but they’re also bigger than houses of yester-year. Ironic isn’t it? If you can’t find room, then MAKE it. Be creative. You’re the boss. Ideally it should be in the basement where it is cooler, but if you don’t have a basement, convert a bedroom, or a storage room or a portion of your garage if you must, or even a closet. Think outside the box. If possible, keep everything together. When we moved into the house we currently live in, it took us a few years of experimenting with where to put our food storage before we finally ‘found’ the room. We had to put up a wall and create a small room where there wasn’t one.
AFFORD. Never, ever ever EVER invest in something as important as food storage with money you don’t have. It doesn’t matter how good that bargain was, if you’re paying 25% interest on it, its a bad deal. Shift your budget if you need to, do without something else if needed to add $100 a month to your food storage, but do NOT buy it on credit. Debt is contrary to the principle of being prepared. Debt is the quickest way to either lose everything you’ve got, or to be held hostage by it. Preparation can be accomplished on a budget.
ROTATE. Everything has a shelf life, even you! Trying to stretch food too far past it’s recommended shelf life will result in an inferior product – especially in its nutritional value. An important part of using the food in your storage is ‘rotating’ it. First in, first out. Replacing it as you use it keeps it current and puts your ‘food storage’ into the same category as ‘groceries’, which normalizes it. Rotating also gives you experience using the food you’re storing, and lets face it, sometimes we can use the practice right? The shelf life of food varies widely, but here are some basics that might help you estimate.
CANNED FOOD (home canned or commercially canned) has a shelf life of up to 2 years. If your canned food gets too old, you’ll end of discarding it, and that is a sad waste of money.
FROZEN FOOD has a shelf life of 3 months to one year – depending on what it is. So yes, its convenient, but don’t count on it for the long term. And of course we all know that frozen food is 100% dependent on our access to electricity – which may be disrupted without notice. DEHYDRATED FOOD has a shelf life of up to one or two years. If you’ve ever kept raisins longer than two years, you know they’re not very good. Too dry and crystalized.
FREEZE DRIED FOOD has a shelf life of 25 years (sometimes more). Not sure how anyone can beat that, but even 25 years doesn’t mean forever. You’ll be surprised one day to find out how quickly that time has slipped by. But when you’re using the food, and constantly replenishing – it is completely without the stress of worrying about its shelf life. Once you open it, most freeze dried foods will last a year if properly sealed and protected from the moisture in the air.
TODAY. It’s true that those who began investing in Food Storage many years ago, are advantaged. They simply maintain what they’ve been doing all along. But as Maya Angelou once counselled “Do the best you can until you know better. Then when you know better, DO BETTER.” I love this simple piece of advice. It is wisdom to me, and I have adopted it as my personal motto. It reminds me not to beat myself up for mistakes I made in the past, and opportunities I’ve neglected. I did the best I knew how with the resources I had at the time. But now, I know better. And my obligation is to act on my new knowledge and awareness. I am accountable for my actions based on what I understand. Truly the best time to get my food storage together was a long time ago. But if I didn’t, I didn’t. It can’t be changed. The point is, that I can start NOW. The next Best time to do better is always right now. TODAY.
2. What to get?
When I was a young girl, my mother answered that questions with the same answer my grandmother gave – “whatever fills the hollow spot“. She gleaned that philosophy from being a child of the depression and war years. While I respect the practical experience, I’d like to think that we have a more enlightened perspective of nutrition nowadays that would influence the question of what to invest in.
When you’re in a situation where you’re living on your food storage, you want the best nutrition for your family. In fact, if letting “food be thy medicine” was ever important, it will be critically important in times of need. Nutrition is key. Make sure the food you buy has something more to offer than calories. Having said that however, calories will be very important too. Calories are where energy comes from, just make sure they’re super nutritious calories.
All produce (fruits and vegetables) begins to deteriorate in the hour it is harvested, so eating fresh from the garden is of course optimal. But as lovely as that is, most of us cannot do it consistently, at least not all year round. And food storage generally consists of preserved food, so lets look at options. Rule of thumb to remember when choosing the type of food for your food storage: * Canned food (whether home canned or commercially canned) retains about 40% of it nutritional value. This is not the original food value of what it was in the hour it was picked. It represents 40% of the nutritional value of the food when it was put into the can or bottle. When I first learned this, I was very disappointed because I canned fruit all my parenting years, and we relied on canned fruit all winter long. But I was not surprised.
If you’ve ever canned peaches, you know that those peaches are in a hot water bath of 212 degrees for 40-45 minutes. Of course nutrition is going to be affected. And of course, when we buy those peaches (that were picked green before all the nutrients were fully developed), we usually have to wait a few days till they’re fully ripened and perfect for canning. This time means further nutritional loss. Still 40% is better than no peaches in February right? And home canning is still the easiest and most reliable way to preserve food long term at home. So let’s just be mindful of its pros and cons. * Frozen food retains about 60% of its nutritional value and is generally flash frozen very quickly after harvesting. It’s biggest draw back is the limited shelf life. * Dehydrated food is difficult to pin down for nutritional retention, as there are so many factors involved in dehydration. Was it commercially dehydrated? Or dehydrated at home? Sulfur dioxide is a preservative often used in commercial dehydrating. Most raisins, prunes and apricots contain it, and while this sulfite extends the shelf life of dehydrated food, but it is very bad for us. Generally you can count on dehydrated foods having close to 80% original food value, but for how long? And dependent on so many factors, it is difficult to have confidence in it. * Freeze dried foodretains up to 95% of the original food value. This is astounding, especially when considering its exceptionally long shelf life. Look for brands that guarantee their produce was picked RIPE and flash frozen within hours of harvest. This ensures the best possible nutrition right from the beginning. How is this possible? Here’s a good explanation in a nutshell . . . .
3. How much to get?
Following the SMART rules above will help you with most questions you might have, but . . . how much? How much is enough? And how much should you start with? My strong suggestion is to not bite off so much that you are overwhelmed and give up. There are two ways to start slowly:
Add extra Simple adjustments like – if you would normally buy two cans of tomato sauce, buy four. If you would normally buy three cans of tuna, buy six. If you would normally buy a box of cereal, buy two. And so on. Focus on non perishable items. Put them away, in your pantry or in your new ‘food storage’ area. Next time you go shopping do the same thing. Gradually these extras add up and you will be amazed to see the results after only a few months. *hint: always write the date you buy it in permanent marker on the package. This is a loud reminder of keeping it properly rotated.
Two weeks Think of seven meals your family enjoys – one week’s worth. Easy ones, with non-perishable food in them. Perhaps your list is something like this: spaghetti, chili with cornbread, potato chowder, chicken parmesan, lasagna, cheesy chicken and rice, sloppy joes, Italiantuna salad with orzo, refried bean burritos, Indian dahl . . . . whatever your family enjoys. SEVEN meals. Multiply by two – to make fourteen meals. Break each meal into a recipe shopping list like for instance, your recipe for spaghetti might call for one package of spaghetti, two cans of tomato sauce, a pound of ground beef, an onion and some herbs – write it down. Multiply that by two. Add double of each of those ingredients to your shopping list. Go to your next meal. Perhaps your recipe for lasagna calls for one package lasagna noodles, one large can of tomato sauce, one pound of ground beef, one onion, garlic, one pound of mozzarella cheese, one container of cottage cheese and some spinach. Multiply that list by two. Two meals down.
What other meals does your family enjoy? Write up your shopping list, and as you can afford those ‘extra’ items necessary to make the meals, purchase them. Easy peasy. You’ve got two weeks worth of dinners stored. Add breakfast items like porridge, pancake ingredients, juice, etc.
Either of those methods are a great place to start small. But don’t stop there. Once you’ve got two weeks packed away, reset your goal to one month, Then three months. Then six months. Then one year. It’s a process. Celebrate each milestone, and then push toward the next goal. I promise, you’ll feel great about your progress and success. This is easier than you thought.
4. Where to get it from?
For the most part, you’ll want to buy the majority of your food storage items wherever you normally buy your groceries. That is where you’re comfortable. You know what they have, and what you like. Bulk stores or wholesale outlets are good resources for those items you want to buy in larger amounts.
Ask around. There might be places around that you don’t necessarily frequent. Open your eyes and your mind to try new things and new sources. You might find some great resources on line, to have delivered right to your door. While I am all about shopping locally, there are some food items I cannot buy locally. Those, I am happy to be able to order them in.
The industry leaders in the freeze dried world is undoubtedly THRIVE LIFE. They are the largest company in North America, with the biggest variety. Available in United States and Canada at this time.
5. How to afford it?
You afford it by starting small. You buy when you’re shopping already, a little here and a little there, just add a few more cans. Make whatever sacrifices you need to in order to ‘afford’ it. If you’re eating out once in a while, consider how much you could have added to your food storage with what that meal cost you. If you’re in the habit of buying junk food, consider how much real food that bag of chips or candy could have been converted into. Affording important things sometimes requires adjustments. Do what you need to do to accomplish your goal.
Investing large chunks of money will bulk up your food storage of course, but you don’t have to spend a lot to build it up. Just spend with a purpose, and spend differently. Using the illustration above, let’s assume my food budget was $600 a month. By re-allocating 1/3 of that budget into freeze dried foods (beginning with those I often waste), and continuing to spend the remaining 2/3 in my usual way, I slowly begin to introduce food that has zero waste, and long shelf life. As I began substituting the food I used to waste for freeze dried food that I will never waste, my grocery dollar started going a lot further. Within only a couple of months I noticed that by no longer wasting food, I actually saved money. No trim, no spoilage, no waste = saved money. More to invest into more food storage.
Having said that, for most of our parenting years we received tax refunds in the spring. We most often used those lump sums to bulk up on food storage – always watching the sales of course.
6. How to store it? and Where to store it?
Ideally, most foods should be stored in relative cool, with little temperature fluctuation. A shed outside? Absolutely NOT! Unheated garage? Depends where you live. If you can find a place where you can SEE what you’ve got, it will be a lot easier to use it, keeping it properly rotated. Underneath your stairs? Convert a closet?
Frozen food is not food storage. Yes, it is convenient and I wouldn’t want to do without my freezer, but anything that is as dependent on something completely beyond your control – like a freeze is dependent on power, is not something you can count on. Resist the temptation to invest a lot of money in frozen food.
*for more information on storage ideas, click here
7. How long will it last?
Go with accepted shelf life recommendations, and yes, I know you can push them a bit when they’re “best before” dates. But use those dates as a good guideline for trying to consume the food within. Frozen food – 3 months – 6 months – up to a year at most for some items. Canned food – 2 years. Dehydrated food – 1 to 2 years. Freeze dried food – 25 years.
8. How to prepare it? and Where to find the time to prepare it?
If you’re using food you generally use every day, you’ll have that pretty well sorted out. If you’re trying to incorporate some more shelf stable foods, then I highly recommend you start using them today to have all that figured out before a time of need. Remember – Store what you eat, and EAT what you store.
If time is an issue for meal prep now, welcome to the club. Preparing a meal with traditional food storage items like wheat and dried beans can be difficult when utilities may not be available. Using canned and dehydrated foods may be easier and less time consuming. Freeze dried foods are very quick to refresh and to prepare. Freeze dried meals that require only water to prepare, can be ready in about 10 minutes. That’s NO cooking. Very convenient in emergencies.
* a little about Freeze Dried Food It wasn’t that long ago that it was so new most people had never heard of it. Today it is readily available, being a fast growing industry in the food world. It IS the future. I firmly believe it is the answer to the problem of food waste in North America, and it is the vehicle people can use to secure a high quality, nutritious, long term food storage.
9. How to rotate it to keep it ‘fresh’? and how not to waste it?
Proper rotation is critical to a good quality food storage. So many buy food storage specifically for “food storage”, never intending to eat it. They say “Food storage is food storage and groceries are groceries.” The problem with that philosophy is, that your food storage gets dated while you’re not paying attention. And pretty soon, its nutritional value is questionable. You must pay attention. And using the food regularly ensures you stay on top of it. Storing it in the boxes, under beds and tucked away in closets makes rotation difficult. Remember the rule – Store what you eat, and EAT what you store. Abiding by that rule will keep your food fresh, and reduce any potential for waste.
Buying emergency food with the intention of sticking it in a hole in the ground in case of some zombie apocalypse is a good way to waste a lot of food, and a lot of money. No food will last forever. And there are a lot of real life emergencies that happen in the process of living, that can be relieved by a simple, well managed food storage. Imagine not having to worry about buying groceries for a week, or a month! Wouldn’t that take a lotta stress out of an already difficult situation?
10. Will my family / children eat it?
Some believe that when our kids are hungry they’ll eat anything. I suppose if they really are THAT hungry. But let’s hope we never get there. What about when you’re just trying to navigate a temporary interruption in income? Trying to make the best of a less than ideal situation? Familiarity is precisely why we should incorporate food storage items into our daily meals.
I discovered freeze dried foods when most of my children were already grown and gone, so most of them learned about it from an arm’s length distance. Some of my grandchildren however, have learned more up close and personally. My favourite example of this is my grandson Charlie.
When Charlie was a year old, he began spending a few days a week at our house while his mom worked. As he began eating finger foods, freeze dried blueberries were a healthy and delicious food to start out with. He loved them, and ate a lot! At one point, his parents wanted to increase the amount of calcium in his diet so they asked me to give him a glass of milk with lunch. One day while I was feeding him – with a glass of milk nearby, I thought about other excellent sources of calcium. Foods like fish, nuts, kale, eggs, broccoli . . . BROCCOLI. I had some freeze dried broccoli in my pantry. Whether he would like it or not remained to be seen – its a far cry from tasting like blueberries.
I retrieved the broccoli and showed it to him. I opened it up and took a piece out, ate it while he watched, then showed him the contents of the can and offered it to him. He took one and put it in his mouth. As he chewed, I half expected him to spit it out – I wasn’t even sure how many teeth he had. But he did not. When he finished it he asked for more. I gave him more, and he asked for more. And then more. And more. It was the beginning of a good thing. I encouraged his appetite for freeze dried broccoli, including it with every meal. I began calling him “Broccoli Boy”, and I even gave him small cans of it to eat in the car and at home. Those early exposures helped him develop a taste for freeze dried food, which is perfect, because its here to stay.
The point is, that Broccoli Boy wasn’t born on a different planet, transported here to become Broccoli Boy. He was molded and formed to become one, right here on earth. I created that alter ego, by introducing him to that wonderful, crunchy source of calcium early on. It made the perfect companion to his enjoyment of other ‘crunchy’ freeze dried fruits and vegetables.
Will your kids like the food? I think you can take it from Broccoli Boy. They will.
Learning to use foods that are less familiar to you – like freeze dried food, will make all the difference. Your family will be surprised to find out how delicious and satisfying it is. Exposing your kids to it early is very helpful. They get used to it. Again, its that ol’ familiarity thing right? Freeze dried food is easy to use, but it does require you to flip a switch in your brain. So flip the switch! Get used to it. It is the perfect food to insert into your Food Storage.
I’d love to hear ideas that worked for you when you first started out with your Food Storage. Or some of your favourite food storage items and or recipes. Or if you haven’t started yet, I’d love to hear about your journey. You can comment below.
Face it – by the end of August, we cannot deny the inevitable any longer. Growth has slowed down, fruit and vegetables are ripening, plants are drying out and going to seed. They’re all doing what nature intends for us all to do at certain times – get ready for bed.
In the spring, we’re all excited about our gardens, but tucking our gardens in for the winter is an important step that is often missed entirely. When the weather gets colder and things stop growing, we lose interest in being in the garden, but missing this final seasonal detail is a mistake. It’s tempting to be a bit lazy, and I get it. Its dark earlier, weather isn’t great, dead and dying perennials are kinda hard to get excited about. But don’t fall for it. Your garden NEEDS you. Putting your garden to bed is an important step in it’s health next spring. Come on, give yourself one more final push, then you can both rest in the winter – guilt free.
There have been years I’ve tried extending the season by planting things like spinach at the end of August hoping for a late crop. There have been years I’ve tried to extend the season by heating the greenhouse into the fall. But the simple truth is, we don’t have the sun for it in Alberta. In September, we have the same amount of sun as we do in March. No matter how many nights you heat the greenhouse in September, you cannot fake the sun during the day, and plants need sun. You’d have more success extending the season by planting earlier in the season than you would extending the season in the fall. Winter has its purpose, it isn’t the great enemy of gardeners that we sometimes make it out to be. My opinion? Give it up. Let fall be fall. And get on with your life. BUT. Put your garden to bed first! So you can both rest comfortably.
late summer bouquet
What to get rid of and what not to get rid of? That is the question.
By September, there are always a bunch of dead and dying plants, some that seem to be coming into their own, and of course lots of weeds going to seed. Some gardeners follow the philosophy of clearing everything out and leaving a nice tidy garden bed. I don’t have anything quite so tidy as a “garden bed” in my yard. I have lots of planted space but its not all together. I have perennial flower beds on all four sides of the house, sunny flower beds, shady flower beds, some flower beds under trees, some tucked into shady corners. I have repurposed horse troughs, a currant patch, rhubarb patch, raspberry patch, grapes, fruit trees dispersed throughout, a dedicated herb garden and three raised beds for edibles, with edibles planted here and there among flowers and herbs. There are still tomatoes trying to ripen and root vegetables that are doing just fine where they are for now. Every garden has its own needs. But there are some rules of thumb that I apply to all.
1. Clean up
There is plenty of debate in this area ranging all the way from getting rid of everything to leaving it all for spring clean up, and everywhere in between. I’ve listened to much of it, applied the counsel that made sense to me, and in the end, I’ve come up with my own pattern that I’m happy with. Truth is however, that sometimes life gets in the way, and you simply don’t ‘get to it’ in time. Don’t beat yourself up when that happens; there will be other years to do it better. But for now, here’s the ‘general’ plan. Keep in mind that life is about compromise and there are exceptions to every rule.
First of all get rid of the dead stuff. That’s a natural. For the most part: if its dead pull it out. Throw it into the compost. exceptions: If some of the weeds have roots or seeds or perhaps a plant has a disease – you don’t want to risk taking that into next year by putting them into your backyard compost, so either get rid of them in *the garbage or *Burn them! Otherwise, into the compost they go. (for more information on backyard composting click here) If it’s a perennial that has died back, cut it off at the ground.
Annuals are easy. Just pull them out and throw them into the compost. Most of the time, I throw big piles of compostables on the lawn. We mow them up and throw them into the compost, or into some of the beds that could use them. When I say ‘we’, I mean of course ‘Dan’. Getting rid of dead plants and other debris removes winter shelter for pests, preventing future problems next spring. There are some diseases that can overwinter. You don’t want that lingering over into a fresh new start in the spring time; if there is disease – get it outta there. Getting rid of weeds at the end of the season gets rid of their seeds and roots, reducing their annoyance next spring. Yes I know they’re no longer visibly causing a problem, but they’re going to seed or developing strong root systems (sneaky little jerks), so get rid of them.
RULE: *Healthy plants – even weeds – compost them. In my books there are good weeds and bad weeds. Good weeds to me, are weeds that we eat and that I don’t mind propagating next year, like chickweed and lambs quarters. (see Making Friends with your Weeds) Bad weeds are stupid weeds like Trailing Bellflower (devil-weed), or rooty weeds like dandelions, horse radish, and thistle – those I do not compost. Or other weeds that make a lotta seeds. Yes I know that compost may take care of most of these problems . . . but I usually don’t risk it. There are very few plants I feel the need to eradicate, so I’m not gonna waste time feeling guilty about them. They should feel guilty for disappointing me so much. *Unhealthy plants – get rid of them. No exceptions. And not into your compost.
Remove tender summer-flowering bulbs such as dahlias and store them in your cold room or garage for planting next season. I personally have never brought my dahlias in for the winter, I just buy more in the spring, but this year I am in love with the dahlias I grew, so I’m gonna give it a try. Besides, I figure since I fuss for my geraniums, it can’t be much different. (see below for the geraniums)
But what about the plants that are not dead? I cannot bear to kill things that want to live so much that they thrive in the inhospitable dryness, reduced light and chilly nights of early fall. Those are the things I don’t get rid of. I still water them when needed and in return, they do what they do best – gladden my heart. They will die on their own when the cold of late October makes it impossible for them to do otherwise. I leave them where they are because they will trap snow which will protect all around them, and help with needed moisture when the snow melts in the spring.
There are also good bugs that need shelter in the winter, like lady bugs and their friends. So don’t clear everything out, find some balance.
RULE: get rid of the uglies – keep the beautiful; get rid of the sick and dead – keep the healthy and strong
2. Fall Planting
Fall planting is a way of taking advantage of the earliest that spring has to offer. SPINACH: Planting spinach in the fall before the snow flies, should give you an early yield. Select a spot that is protected, but that will get good sun in April and May. Lightly sow a patch of spinach. Throughout the winter, ensure it has a good covering of snow. When the warmth of April days melts the snow in some nice sunny spots, your spinach seed will sprout. They are not afraid of cold. They’ll just patiently wait till conditions are better and then start growing again.
DILL, POPPIES, CALENDULA and other herb and flower seeds can be sown at the time of harvest to pop up in the earliest days of May. Simply broadcast them in your desire spots and let nature do what she does best. The seeds need a winter, and protective snow.
Some plants that inadvertently get left in the garden, may resurrect in the spring. My rule of thumb is to let most things that want to grow – grow. You may have a sage plant that comes back, lemon balm, parsley, even kale. You may have volunteer lettuce plants start to grow because something went to seed last fall.
GARLIC: Plant your garlic before the ground freezes to harvest at the end of next summer.
Spring Bulbs. Yes I know fall is the time to plant daffodils and more tulips etc for spring blooms. I’m sorry. I’ve got nothing to offer here. I aspire to plant more bulbs in the fall, but its just one thing that I rarely find time for.
3. Bring them in
Some plants might be healthy enough to bring indoors. I always bring in some geraniums (see below), and often bring in a rosemary plant. I’ve tried lots of other herbs, but I simply don’t have the sun for them. If you have a beautiful sunny window, I strongly encourage giving them a try indoor. Prune down to about 1/2 its original size, trimming off everything brown. Shake the old soil off to get rid of any unwelcome hitch hikers, and maybe even rinse the roots off. Then replant in fresh soil, water well and set in your sunniest window.
GERANIUMS. I love geraniums, and they love me back. Red ones. Only red ones. I’ve tried other colours, but I kept coming back to red, and now I don’t bother with any other colour when I know that it’s red I really want. Their bright vibrant flowers cheer me all spring and summer long. At the end of it, I cannot bear to kill them, or let them them die while they’re still trying so hard to make the world a better place. So I bring them inside. In actual fact, though we think of them as annuals, geraniums are actually ‘tender’ perennials, and will tolerate temperatures down to about 7°C while still actively growing. That is truly heroic. Another reason I love them. I’ll bring two or three into the house and let them live in a sunny window all winter long. Their favourite temperature is between 12°- 18°C, which is ideal for in-house if you’ve got enough light. However, I find that in the winter even though I have a south facing bay window, winter sun is just not very impressive and they stop flowering shortly after they get moved inside. And by about January they start to get quite ‘leggy’. I just trim them as needed to try to keep them content. Its the least I could do for all the joy they bring me outside for five months.
geraniums at season’s end, still being beautiful
But I cannot invite all my geraniums into the living room, so I do something else. I put my three wooden window boxes in the garage. Ours is a heated garage though its usually pretty chilly out there. We only turn the furnace on when Dan’s working on a project, but apparently it fine for geraniums. Before a killer frost (so sometime mid to late September), I will hard prune the plants by about one third to one half, removing any dead, damaged or unhealthy parts. I check for stupid aphids (I hate aphids) or other problem critters or disease. I water deeply, then I put them up on a shelf in the garage, kinda out of the way but not so much out of the way that I forget they’re there.
I give them a drink of water a few times – maybe every 4-6 weeks. If they’re too outta sight, I’ll forget to water them, and even though they’re mostly dormant, they still need a little moisture now and again. By about March they start responding to the little bit of light they get from a frosted window and miraculously they start to green up. I am always amazed that they do this, and I regard it as one of nature’s miracles. It’s still cold outside, with snow and ice, but they start being true to their calling in life. March has about the same amount of sun as September. I take this new growth as a sign to give them more to drink. By mid April, I can start letting them sit outside on nice days, giving them more water. This gradually gets them used to outdoor light and regular watering. I don’t put them outside permanently till after May 1, and even after that I put a cloth over top if I expect freezing night time temperatures. I can’t risk losing them that late in the game.
I trim them back as needed, give them some healthy mulch and all purpose fertilizer, and we go right back to being old friends. They’re grateful to be back in their rightful place, and I’m grateful to have them. They resume bringing me joy, and I resume my supportive role as their care-giver.
Some garden herbs: I’ve tried pretty much all herbs in the house for winter and I just don’t have enough light, even with my south facing bay window. Yes, I know I can use grow lights, but most of my plants are in the living room, and I don’t want grow lights in there all winter long. There are some though, that seem to do better than others.
*ROSEMARY: I often bring a rosemary plant indoors. In fact for several years I’ve kept one in a pot that I moved in and out, but eventually I lost it by letting it dry out. It’s surprising how much water herbs require in the dry climate of a house in winter. If you have a particularly happy healthy rosemary plant, go ahead and dig it up. Trim it down by about half, remove the soil and gently rinse off the plant and roots. Be sure the pot is clean, and you’re using fresh soil, then transplant into its new home and bring it inside. Keep it in the sunniest spot and water when the soil surface feels dry to the touch.
*BAY LAUREL: I have a bay laurel plant I bring in and out and in and out, for about 8 years now. I am very invested in keeping this plant safe. I had a couple near misses this last year with it, but we weathered the storm together. I keep it in the same pot, so I’m not digging it up, but this year I was particularly careful about cleaning it. I trimmed all the ‘iffy’ branches or leaves (anything that wasn’t pristine), removed it from its pot, removed all the soil, gently rinsed the roots of all old soil and washed the pot. Then I transplanted it back into its original but cleaned up pot, and brought it back inside. It’s very happy.
*CUBAN OREGANO: Unlike regular oregano cuban oregano won’t survive our winter, so its best suited in a pot where it can come inside for the winter. Give it a sunny spot and it’s an easy-to-grow house plant that will be your friend for years with just a little care and attention. A member of the mint family, and often referred to as Mexican mint, it has characteristic thick, fuzzy leaves with a strong pleasing odor. Water when the soil surface feels dry to the touch.
4. gleaning – the final harvest
It’s true that in Sept and October, late fruits and vegetables are ready to harvest. Root crops like carrots, beets and potatoes; fruits like apples, plums and grapes. Some apples and plums may be ready in August, others in September or October. Generally, the grapes we grow in the Edmonton area are ready in September after the weather cools a little.
*BUT – There are hidden harvests that often get missed. Just open your eyes.
Gardens don’t cease to bless your lives just because its autumn.
dill seed ready to harvest
If you grew DILL this year, you probably have some that has gone to seed. Go get it. Pull the plant out of the ground, cut the head off and put it in a bowl. Shake or brush the seeds off the plant into the bowl. Broadcast a handful where you want dill next year, and gather the rest to save for more deliberate planting in the spring. Yes, there are many ways to use it in the kitchen if you have enough. I’ll admit it, I rarely allow my dill to go to seed, except for a few delegated plants off to the side. I do this because aphids usually accompany dill when it goes to seed, and I hate aphids. But this year, I had a ton of dill – way way way over planted. I picked all the green ferny dill weed that I could use, gave plenty away, and still had too many dill plants all going to seed at the same time. I watched for aphids but didn’t see anything excessive. I let them ripen, ever watchful, but I never saw a problem, so I proceeded. Lucky me, I got lots of dill seed to grow next year, and lots to bring into the house. Store your seed in a paper envelop, labelled and dated.
POPPIES. If you’re not growing poppies you’re missing out on one of nature’s loveliest offerings. Beautiful before they flower. Gorgeous iconic papery flowers. And just as beautiful in the late summer after they’ve gone to seed. You’ll know the seed is ripe when you can hear it rattle inside the seed pod. At that point, pull the plant out of the ground and turn upside down into a bowl. Shake the seeds out. Broadcast the seed from two or three heads at most (that’s a LOT of poppies) where you want them to grow next year, and save the rest for poppy seed bread, muffins, cake, cookies and salad dressing. BEANS and peas that didn’t get picked in time, are ripening and drying. When they’re fully developed, pick them and store them for seed next year, in a marked and dated paper envelop or lunch bag. CHIVES and GARLIC CHIVES have gone to seed, producing thousands of little black seeds. You can let them fall and have a million little chive plants growing everywhere next year, or you can harvest the seed to sprinkle on bread or over top other dishes. *hint: they’re entirely edible, but don’t expect too much in the way of flavour. GARLIC. Mid September is the time to harvest garlic, and to plant more. KALE is planted in various places throughout my yard. In the vegetable garden, in the rhubarb patch, the asparagus patch, and interspersed among perineal flowers and herbs. A few here and a few there. One or two act as a trap crop for annoying pests – thank you for your sacrifice. They’ll get eaten by chickens (who bytheway enjoy annoying pests). Don’t worry, I’ve got others. Kale is hardy, and even in September, it’s on stage doing a full encore. Beautiful. How can you not love kale? I pick it every few days to add to dinner, and if I pick more than we need, I dehydrate it. Super simple. Just strip leaves off the stems, wash and chop to put in the dehydrator. When dry, store in a jar to use all winter long. This spring I had an unexpected surprise. A kale plant over wintered and started producing harvestable kale by mid May. I let it do its own thing and as time when on, it began to flower and go to seed. So by September I have a lot of beautiful ripe kale seed in pods. A gift. NASTURTIUMS have been giving all season long. But as much as I used their greens and flowers, some flowers always get left behind to go to seed. This is good, as I am all about collecting seed right now. SWEET PEAS are annual climbing flowers, that are so bright and cheerful, and hardy that they can be friends with everyone. I’ve always thought they should be spring or at least early summer flowers, but they do best, as summer progresses into August. They’ll go to seed if you let the last few flowers ripen. Easy to collect. I highly recommend starting them in-doors well ahead of growing season. This year (2022) is the first year I’ve let mine go to seed so that I can plant inside next April. The pods look very similar to pea pods (who’d suspected right? lol), and as they ripen the seeds are so perfect that it would have been a shame not to collect them. Having said that, if you wait to long, they’ll open and drop their seeds, but I have yet to have had one survive the winter and volunteer in the spring. SUNFLOWERS are ripening. Cut the smaller flowers for kitchen bouquets, but let the bigger ones ripen. If the seeds are still immature (white), but a nice size, bring them in, they’re delicious in salads and stir fries as a vegetable. If they’re big heads, share some with the birds over the winter. I leave them face up in several different places throughout the yard where wild birds like to hang out when its cold. Our favourite place is just outside our kitchen window where we can enjoy watching them all winter long. Its a win-win.
Lots of herbs are still doing beautifully, but its time to cut them down for the last time and bring them in for winter use. Sage, rosemary, tarragon, stevia, mint of course, lemon balm, oregano, thyme, parsley, lemon verbena, . . . My lavender gave me some late sprigs to add to what has already been harvested. Thank you Lavender.
Look around you – there is more bounty than you may have expected.
5. Mulch and other ‘protection‘
Everybody likes a comfy blanket. In gardens we call it ‘mulch’.
homemade patchwork quilt
My mom, throwing an additional blanket over top of me in bed on a cold winter’s night, is a comforting childhood memory. It provided a little weight, and that weight provided warmth.
Our gardens would appreciate an additional insulating blanket against the harshness of winter too. Some plants might be a little sensitive to the bitter cold of some winters that we have no control over and cannot always predict, but sometimes its simply a matter of protecting the bare soil and friendly critters in it. What kind of blanket? Nice clean fallen leaves that are so plentiful in the fall, is a perfect mulch. Between one to three inches is recommended. In the absence of leaves, the final mowing of dried grass would be good, or chopped/mowed up straw. Don’t use wood chips in the garden; they detract from the soil long before they can possibly add to it.
In addition to protecting the soil and plants in it, mulch slowly adds nutrients and humus. Humus is the Latin world for ‘earth’ or ‘ground. It refers to that dark organic matter in soil which comes from the decomposition of plants and animal matter. That a good thing because it improves soil structure, aeration, and water holding capabilities. Aeration reduces the compaction of soil, allowing roots to take up nutrients and spread out healthily.
Leaves or straw won’t magically disappear over the winter, miraculously becoming humus. Some of it will still be quite identifiable as leaves and straw in the spring, but some (the bottom layer) has begun to decompose. I simply rake off the identifiables and mow them up with the first mowings of spring to be used to as a top layer in an area I want to amend, as mulch between rows, or the beginning of this year’s compost. A good winter’s mulch is a beautiful start in prepping your soil for spring. Just sayin’ . . . . .
winter protection from foraging animals
Most urban yards don’t suffer too much from animals like deer foraging over the winter, but rabbits can be a problem. They ate the bark from my daughter’s lilac tree a few winters ago, and killed it. If you live in an area where rabbits might be an issue for you, wrap the bottom three or four feet loosely with chicken wire. Why so high? When the snow is deep and the rabbit is sitting on top of the snow, that is where they’ll be nibbling.
tips to remember 1. Disease is not something you want to add to your compost. Get rid of those plants. Either burn them or garbage them. 2. Roots like trailing bell flower, horse radish and dandelion, and seeds like thistle are not things you want in your compost. Get rid of them. Either burn them or garbage them. 3. Its helpful to mow up your bigger pieces before putting them into your compost. This speeds up the process of breaking down, a good thing.
6. Watering trees in late autumn keeps them healthy and strong
clockwise from upper left: Red Elderberry, Spruce, Honeycrisp Apple, Evans Sour Cherry
While your trees are dropping their leaves, or just after, they would appreciate a good long drink. Give both evergreen and deciduous trees a long, slow, deep watering. This is important, but the timing is particular. Too early might signal the tree toward new growth and may slow the onset of dormancy. Dormancy is not a light switch, it is a progressive stage allowing trees to prepare for colder weather and eventual freeze up. Too late (after the ground freezes) prevents the water from seeping into the soil and reaching the feeder roots. How will you know when the time is right? Look to your trees. Deciduous (leafy) trees will tell you the time is right when their leaves have fallen. This will also be your hint to water their neighbours, the evergreen trees. Because evergreens don’t go into full dormancy, they will actively use water throughout the year, except for when its really cold, so its even more important that they get a good watering in the fall.
Don’t water mature trees right up near the trunk, as the roots that need water will be further out – closer to where the canopy of the tree extends. The exception to this rule is newly planted trees who’s roots might still be close to the initial root ball.
Put your hose on the ground and water slowly so that the water doesn’t puddle on the surface. You’re looking to moisten the top foot of soil around the perimeter of the ‘drip line’ (distance from the trunk to as far as the outside branches reach). “Moisten” does not mean “soggy”. Testing the moisture level is easy – insert a wooden stick or a metal rod into the soil. Where the soil is moist, the stake should slide in easily. When it meets with resistance, that signifies to you that the soil is dry. You’re looking for about a foot of moistened soil. Anything deeper is of no value and is wasted.
Watering earlier in the day gives the roots time to absorb the moisture before the temperature drops at night.
Bonus tip 1. Protect your garden tools and equipment
Hold on! You’re not done yet. I know its tempting to just go inside when the cold hits and shut the door, but pay attention to your tools. They deserve it. Whether you have a garden shed or space in the garage, or box in the basement – use it. Don’t leave your clippers or spade outside to rust.
Tools: Clean them and put them in a box. Seed trays and pots: Wash them and store them where they’ll be easy to retrieve in the late winter or early spring when you’ll need them. Maintenance: Now is the time to fix those annoying little things that have needed patching all summer long.
Bonus tip 2. Garden journal
Hopefully you’ve been keeping a garden journal all along, but if you haven’t right now would be a good time to start one. Record the dates you harvested this or that, and the general yield. Record the temperatures in these close out days for reference next year. Record the seeds you harvested. Make sure you store them in paper envelopes, labelled and dated. Record your successes and failures and your ideas for fixing them next year – while they’re still fresh in your mind. I promise you will not remember them otherwise. Record what varieties did well, and what did not, what you’ll be sure to repeat and what you will not. Maybe you are an avid journaler, maybe you’re more of a casual note taker, but whatever you are – DO SOMETHING. I promise you’ll be happy you did when you go to reference it next spring.
stand back and enjoy the immense satisfaction of a “job well done” . . .
In my case its a challenge to even know where to begin when its time to wrap things up for the season. I rarely have two or three days that I can devote to the work of putting my garden to bed, and my ‘gardens’ are all over the yard, full of perennials. I catch a few hours here and there to go out and work, but the job is pretty overwhelming when you’re doing it in pieces. I find the only way I can proceed with any feeling of accomplishment is if I start in one corner and proceed in a single direction. ‘Finishing a piece’ with no intention of coming back to it till spring, helps me systematically make it through the whole yard.
Standing back to admire what you’ve done once in awhile is satisfying. Standing back when you’re ALL done, is immensely satisfying, but the truth is, there are seasons, that I never completely make it through the whole yard. Yes, I wish I had, but life simply gets busy and sometimes the snow comes before I am ready for it. Nothing to do in that case, but get on with my life, and try to do better next year.
*hint: don’t wait till its COLD and the job is horrible. On September 1, you KNOW cold days are coming. Start the job of putting your garden to bed while the weather is still pleasant – removing (or pruning back) those plants that have already given you everything they have to give, and deserve their rest.
Good Night Garden. Enjoy your rest. I’ll enjoy mine.
I’d love to hear your thoughts and experiences about getting your garden ready for bed and tucking it in for the winter, as well as your comments on some of the things discussed here.
– plant every fall for mid summer harvest. Garlic is a staple in the kitchen of course but there many other benefits that earn it an honoured place in every herb garden. The bulbs grown in your backyard garden may be smaller, but stronger, hotter and in every way more potent than the ones you buy in the grocery store. Use them in homemade salad dressings, pasta sauces, soups and in every other dish you might normally add onions to. Garlic and onions are best friends in any dish.
But medicinally, the key phytochemical in garlic is allicin which has antibacterial, antiviral, antifungal, antiseptic and antioxidant properties. It can also be anti-social. LOL I know, it seems too good to be true, but after a lifetime of using it, I am convinced it really is the super food it boasts about being with all of these properties. The thing to remember is that allicin is most potent when the garlic is consumed raw, and while some people swallow the clove whole, there is evidence to indicate that the allicin is best released when the fresh clove is chewed or crushed. But who wants to chew a clove of garlic right? (see below) Mincing the garlic and putting it into a salad dressing is a great way to eat it. The longer you wait the stronger it gets so you might want to eat it right away before it over powers the dressing.
Heart health: garlic reduces the risk of heart attack or stroke because it improves blood circulation and lowers harmful cholesterol. Studies have shown that garlic helps reduce blood pressure allowing blood to flow more freely,
Arthritis: Studies have shown that because of its antioxidant and anti-inflammatory properties, garlic reduces the pain and inflammation associated with rheumatoid arthritis.
Boost to Immunity: Garlic’s biggest benefit in my opinion is its ability to enhance natural immunity through its antibacterial, antimicrobial, antiviral and antifungal properties. It is a surprisingly good source of Vitamins C and B, as well as the minerals selenium and manganese – all of which strengthen the body’s defense mechanism in fighting infections.
Garlic is an excellent treatment – reducing the severity and shortening the duration of common colds, flues and other viruses, as well as chronic respiratory conditions. Again it is the compound allicin that is responsible for this antiviral action.
Fungal infections: Garlic’s powerful antifungal properties make is an effective agent against fungal infections such as ringworm and athlete’s foot, and yeast infections such as thrush.
The answer of course is to include raw garlic in your diet. But we all know that garlic has a powerful taste and cannot always be eaten fresh, no matter how much I desire these health benefits. Especially when it should be eaten raw and ‘chewed’ or crushed to best release the allicin.
When my kids were young and more trusting, I could entice them to chew a clove of garlic when they were suffering with a cold. I would crush it and put it on a small piece of bread with peanut butter and honey, and sit beside them with a glass of apple juice to help wash it down. But when they got bigger, it was not so easy to talk them into this course of action. I couldn’t blame them. We use it as much as we can in our diets, but it is not that easy. In the case of garlic, I recommend using garlic oil (made from crushed cloves in olive oil), oil of garlic (essential oil), and high quality garlic supplements that you can buy in the health food store. Normally, I’m all about using what I grow in the garden exclusively, but sometimes garlic needs a helping hand, simply because it is so anti-social.
growing
Growing your own garlic is well worth the effort. A good time to plant in the Edmonton area is late September or early October. For mid season harvesting, you want them to have time to establish the beginning of a root system before winter, but not enough to sprout. I’ve also planted garlic in the early spring for harvest at the end of the season.
After your first year you can plant next year’s garlic with this year’s bulbs, but to start with, buy from a local garden centre instead of planting the garlic you buy in grocery stores. Select the largest bulbs with the plumpest cloves you can find. Make sure they are firm and clean looking, without any signs of mould or fungus. Break the garlic bulb into cloves. Do not peel them. Each clove will grow into a bulb by the next year but it needs that protective papery covering.
Choose a sunny part of your garden with well-drained soil. Mark the area so you remember where the cloves are next spring. Don’t crowd them. Plant the cloves about 6 inches apart and about 2 inches deep, sprinkling a little bone-meal into each hole as you go. Because you’re going to leave them for the winter, spread about 3 inches of nice clean, organic mulch over the area, chopped up leaves, wood shavings, straw, – to help insulate.
First thing in the spring, gently move the mulch over. You’ll soon see the tender green sprouts. Let nature take care of them, watering when necessary. Remember they don’t like a soggy spot, they need the soil to be well drained. Mid growing season the plant will develop curly tendrils of greenery that come up from the stalk. This is the plant wanting to flower and go to seed. Snip it.
harvesting
When the stalks start to die back, about the beginning of August, you know its almost time to harvest. Give it a week or so, then gently remove one plant to test. Its tempting to pull, but dig so you don’t risk breaking the stalk off. Garlic is ready when it looks like you think it should. Too early and the protective papery wrapping will be thin or non existent. In that case give it another week. When ready, gently dig them all with a fork and lay in a box out of the sun and rain for a couple of weeks to dry out. I like to braid them into a hanging, but you can also cut the stalks off at this point and store for winter.
* GARLIC CHIVES – wonderful flat chives with more than a hint of garlic in the flavour. Like chives, its root base is a clump of ‘bulbs’. You can cut a handfull just like regular chives to use in the kitchen, and just like chives its root base is a clump of ‘bulbs’. This is super convenient when you want a stronger garlic taste for your dish. Pull up a few stocks from the base to gently separate some bulbs from the rest of the plant. Presto! Garlic bulbs. I have no idea if any of the medicinal properties of garlic are replicated, but the taste sure is. It is the perfect answer for midseason garlic while I’m waiting for my other garlic to ripen.
GINGER
fresh ginger root
Ginger – nearly everyone can identify its flavour in baking, which is where it is most often used in North American and European kitchens. But the last few years have opened up a whole lotta versatility as we adopt it as a savoury seasoning, not just for desserts. This is very good news. Ginger can be used fresh, dried, powdered, candied, juiced or even as an oil. Fresh Ginger root is readily available in the produce department of most grocery stores and is so easy to use. It deserves a place in your kitchen. You jut need to discover why, and then make friends with it.
Ginger ale, Gingerbread, Ginger Molasses Cookies, Pumpkin Pies, pretty much any pumpkin dessert . . . Those are the ways we’re most familiar with, but open your mind, and make room for ginger. You’re about to fall in love.
Did you know it also has great health benefits? Ginger is often used to calm an upset stomach, indigestion, motion sickness and other forms of nausea including morning sickness! It stimulates digestive enzymes which is helpful in enhancing digestion, and relieving heartburn and indigestion. It’s an absolute must-have in the kitchen for those times that nothing else is working.
Make yourself a soothing cup of fresh ginger tea by simply steeping a few slices in boiling water. How many slices? Well, that depends on how strong you like it. Start with one or two, and go from there. Chill it as a refreshing cold drink on a warm summer day. Drink it hot in your favourite mug on those cold winter days.
Grate it up to add to a salad dressing, a homemade teriyaki sauce, a curry recipe, or your favourite stir fried vegetables.
Yes, you can buy a bottle of ginger powder from the grocery store, but when you find out how easy it is to dry and powder your own, you’ll never go back to store bought powder again.
growing:
Not so easy to grow ginger in Alberta, but in the spring of 2020, I planted three pots of ginger root just for fun. I chose ginger roots with visible nodules and cut the root to ensure each piece had a few on it. I planted shallowly in a soil, just enough to cover, and kept them in sunny locations on my patio. I nurtured them along, and brought them into the house for the winter. The next spring I brought it back outside, but half way through the season, I kinda got tired of the plant which was interesting enough looking (a couple of tall spears), but not very spectacular. I decided to dig them up, but when I did, I saw that the root was significantly bigger than when I first planted it, so I put it back into the soil and took care of it. Eventually, I dug it up and used it. I was pretty happy to do so, but as fun as the experiment was, we are still dependent on store purchased ginger root in this country.
using:
Ginger honey: I recently discovered something lovely. Ginger honey. It seemed like such a natural combination – good tasting, as well as a good way of benefitting from the wonderfulness of ginger. I made my very first batch this week and am anxious to taste it in the coming weeks as the ginger has a chance to infuse throughout the honey.
ginger honey
I began with one pint of honey and one tablespoon of home ground ginger powder. It seemed like a lot of ginger, but when I mixed it all in, the taste was surprisingly mild. I think to get the maximum benefit, I’ll probably add more ginger later (stay tuned for update if I do), but I’m gonna give it two weeks before I decide to do that. The reason I chose ginger powder as opposed to fresh ginger root, is shelf life. It stands to reason to me that fresh ginger being moist, it might eventually go bad, and I should probably refrigerate it. I might surprise myself to find out that the honey actually preserves the ginger . . . but then for how long? I just decided to be safe and go with powder for now.
I have creamy honey. I also have fairly solid honey. And I have liquid honey which is very old, given to me from my dad who has long since passed away. I chose to use the liquid because its easier to mix up. If you used a more solid form, I think you’d want to slowly heat it over boiling water to get it to the point that you could actually stir the ginger into it. Personally, I wouldn’t melt it in the microwave. Yes, its quicker and easier, but I think I’d choose a more gentle way of melting it – to keep ‘goodness’ the prime focus. I also chose to use a wide mouth jar, just to make stirring it up easier.
directions: Pour honey into a clean dry glass pint jar – half full. Add 2 teaspoons ginger powder and stir with the blade of a table knife or a chop stick. When fully infused, pour a little more honey into the jar and add another teaspoon of ginger. Stir again to fully emulsify. Top up with honey and stir once more to blend completely. Put the lid on, label with date and set aside for two weeks. Enjoy in every way you would use honey: on toast in the morning, in a cup of herbal tea, whatever.
Ginger Tea: 1. Pour hot water over a small slice of fresh ginger in a cup and let it steep 5 minutes. Add a little lemon juice just before drinking if you like. 2. In the absence of fresh ginger, add a small amount of powdered ginger to hot water with lemon juice.
Ginger water: Add a few slices fresh ginger to a jug of water and leave to steep in the fridge. Sip throughout the day.
Ginger Lemonade: Prepare your favourite lemonade recipe (using fresh lemons of course), and add grated fresh ginger. Let steep at least ten minutes before serving.
. . . . . more to come on ginger
. . . . .
Tell me about your experiences with these herbs. I’d love to learn from you too.
Rhubarb gets it’s own post because there’s just so much to say about it.
Rhubarb as a plant has been used for centuries as a medicinal herb for digestive complaints such as constipation, diarrhea, heartburn and stomach pain. Even for cold sores. Whether it was ever effective for any of those concerns, I don’t even have an opinion. My only interest in rhubarb is as a food. And it is a nutritious food.
Though perfectly suited to our climate, it is not a native of North America. Originally from central Asia, it was introduced to Europe in the 1600’s, and within a hundred years, made it here, where it’s been at home ever since. Botanically, it is a VEGETABLE, but it’s so often used as a dessert that we commonly think of it as a FRUIT. We need to get over that type-casting and let it be what it wants to be. I’ve always thought of it as the vegetable-who-wants-to-be-a-fruit, but in actual fact, it is probably the most versatile food in your garden, lending itself as easily to savoury dishes as to sweet dishes. And contrary to what I believed most of my life, it doesn’t need a whole lotta sugar to make it palatable.
The leaves are poisonous, so let’s get that out of the way right off the bat. They contain a lot of oxalic acid, which, in the amount present, is toxic to both humans and animals. Oxalic acid is in a lot of things we eat, including the rhubarb stalks, many fruits, and leafy green vegetables, nuts and whole grains. We need some of it, so it’s good, but not to the degree that rhubarb leaves contain.
You won’t die from eating some rhubarb leaves, so don’t fret about that. And neither will your kids, so don’t avoid growing rhubarb because of some perceived danger. It would take a LOT of rhubarb leaves to kill someone and they’d have to be pretty dedicated to eating them. Poison doesn’t always mean ‘kill you’. In this case the oxalic acid will upset your stomach, make you sick, and probably cause vomiting and diarrhea if you ate enough. I doubt you’d eat too much to begin with, especially if it made you sick. I don’t know why someone would, but you’d have to eat a LOT of rhubarb leaves to be poisoned, and the symptoms are stomach, vomiting and diarrhea, (with your body trying to get rid of it).
Sadly, I had a chicken named Lacey who had a thing for rhubarb leaves. No matter how much I tried to make it INconvenient for her, it was impossible to keep her out of them since she was free range in the yard. Seemed like she was addicted. I rarely caught her in the act, but she could polish off a leaf in record time. For a long time, she seemed healthy enough but since the most common symptoms of oxalic acid poisoning are stomach pain, nausea, vomiting, diarrhea, weakness, and difficulty breathing – its kind of hard to pin those down in a chicken. The other hens didn’t seem interested in the leaves at all, but Lacey couldn’t stay out of them. Poor Lacey; she slowed down over a few days until one morning she just didn’t wake up. I don’t pretend to know for sure what killed her. She was older than the other hens, and she could have been nearing her end anyway. Or it could have been the stupid rhubarb leaves. The other ones didn’t seem to care, and no previous hen (or any that came after her) seemed to care about rhubarb leaves. You’d think that an animal would have an inner instinct not to eat things like rhubarb leaves, but I guess Lacey missed that memo.
I use the leaves to compost, and sometimes chop them up with the lawn mower first for mulch. Oxalic acid breaks down fairly quickly during decomposition. Some gardeners, I’ve been told, make a ‘tea’ from the chopped leaves to use as a natural pesticide in the garden, but I have never tried it. It seems like too much work to me.
The stalk is the edible part, and many people find it delicious. I can’t say I’ve always found the taste of rhubarb to be my favourite, and I never craved it, but I would certainly miss it if I didn’t have it. Rhubarb always tasted like ‘spring’ to me. In the last few years however, as I’ve learned to take better advantage of this wonderful garden offering, I can say now that I have come to very much enjoy the taste, and look forward to spring – when it’s plentiful. I love the freshness it adds to a morning smoothie. Like a true friend, it’s stayed with me all these years, selflessly giving to me, always underappreciated, and under-used, until I saw in it, its true value. After all this time, you could say that our friendship has developed into a true love affair.
Rhubarb is always there for you – a true friend
Many of my friends and cousins as children, used to eat rhubarb raw in the summer, dipping the stalk in sugar or even salt. I could never do that – I’ve actually never even tried it, waaay too sour for me to even wrap my mind around it. Although I consider myself an excellent “tryer”, I just can’t bring myself to take a bite of raw rhubarb, and I cannot even think about eating straight sugar. Combining rhubarb with sugar and cooking it however, changes the natural tartness into something quite delightful. Whether in a jam, jelly, syrup, cake, pie or punch, rhubarb’s bitterness fades when combined with a sweetener, and it becomes uniquely refreshing. The surprise is that it doesn’t require nearly as much sugar as we think it does. Try using less than you used to. You’ll be surprised.
I had read once that rhubarb has valuable nutrients to bring to the table, but I was always of the opinion if we had to use so much sugar to make it palatable, that the sugar pretty much negated any nutritional value we might have derived from it. It made it not worth the tradeoff to me. That opinion changed over the years as I have discovered ways to bring the burst of fresh flavour, without an excessive amount of sugar, (sometimes not using any at all.) I hope you’ll give it a better try.
I decided many years ago that since rhubarb grows so readily in cool climates (my part of the world), I should learn to take the best possible advantage of it and help my family enjoy it. Loving the taste of something good for us, that is easy to grow and to use, seems like a better idea than loving an exotic fruit that can be expensive and might be unavailable from time to time. For instance, while I love pineapple, it is impossible to get field-ripened pineapple (which we know is the most nutritious) ,when you live in Edmonton. Rhubarb, however, is in my garden and always at it’s plant-ripened-best when I pick it. I am all about IN SEASON, field-to-fork eating, and though my grow-months in Edmonton, Alberta are limited, I want to take full advantage of everything they have to offer. Though rhubarb is at its best in May, June and July, you can also pick from a well-established plant as early as April and right through to the end of the growing season. How accommodating is that? Rhubarb really WANTS to be your friend! Just don’t pick too heavily in the earliest part of spring or the end of summer. Give it a chance to re-establish its strength.
Why rhubarb?
Because rhubarb is good for you—that’s why.
It helps lower cholesterol, supports digestion and gut health, and is rich in natural fibre and Vitamin K, which plays an important role in maintaining strong, healthy bones.
Rhubarb is also an antioxidant powerhouse—containing as much or even more than an equal amount of kale. Antioxidants help support collagen production, contributing to healthier, more youthful-looking skin, while also protecting the body from harmful free radicals linked to chronic disease.
Its deep red stalks are rich in anthocyanins—the same compounds that give many red and purple fruits their colour. These powerful antioxidants have been shown to help reduce inflammation and support heart health by improving blood vessel function and reducing the narrowing and hardening of arteries.
And rhubarb wants to be your friend. It’s easy to grow, hardy in Alberta, and incredibly forgiving. Move it, divide it, or forget to water it for a while—it won’t hold a grudge.
It prefers a sunny location but will still do its best for you in partial shade. Give it plenty of water and you’ll be rewarded with thick, crisp stalks. Neglect it a little, and the stalks may be thinner and less crisp—but it will keep going.
Rhubarb has a quiet resilience. It will struggle through tough conditions, then bounce back when things improve—growing strong again, as if the hard times never happened.
And it’s versatile as heck in the kitchen, lending itself superbly from desserts to drinks, from salsas and chutneys to beautiful, refreshing summer smoothies (all year long if you freeze some), from breakfast muffins and scones to deep-fried fritters – and everything in between.
* I’ve had rhubarb doubters—even self-proclaimed rhubarb haters—tell me they became converts after sitting at my table. It wasn’t anything magical about the setting, and it certainly wasn’t because I’m some amazing cook (heaven knows I’m not).
The truth is simple: they had never given rhubarb a fair second chance after one bad experience.
I have a friend who came to my house for a late spring Food Drive meeting. Because it was in season, I served all things ‘rhubarb’ as refreshment: rhubarb slush, rhubarb cake, rhubarb crumble, rhubarb ice-cream. He told me later, “I used to make fun of people who said they liked rhubarb. I was convinced nobody actually did—they just pretended because . . . they had to.” As if it would be disloyal not to like something “as Canadian as Rhubarb“.
If he reads this, he’ll know exactly who I’m talking about. He came for information about the upcoming Food Drive… and left a rhubarb convert. LOL
growing
Rhubarb is a perennial plant that will be at its best for close to ten years. Though it will grow and produce, much longer than that, its helpful if you dig it up and separate it once in a while. When selecting a plant, always go with a type of rhubarb with the reddest stalks. They’re sweeter and richer in anthocyanins and other valuable antioxidants. Rhubarb needs a dormant season – winter, and grows best in cool weather, so it’s one of the first garden fruits in the springtime. It wants sun, the more the better, so give it a nice sunny spot. It prefers slightly acidic soil, well drained and rich. Good to prepare your spot with well rotted compost.
If planting in your vegetable garden, plant along the edge so they can remain undisturbed each spring. They’d do well against the house or garage, or in the back of a flower garden. Allow about a square yard of space to grow outward. In the Edmonton area, you’ll be picking rhubarb by May, and certainly May, June and July are when it’s at its best. It will however, do well enough throughout the summer, unless it is an especially hot one, but even then – just make sure it has plenty of water. It really wants you to be happy and will seldom let you down.
If you don’t have a yard to grow your own rhubarb plants …. then ask around, often times people have more on hand than they can use. Next best place is a Farmer’s Market. Next best place is a grocery store. It is so plentiful however, that I cannot even imagine having to resort to buying it from a store. Just find more friends.
harvesting
Pulling vs cutting. Don’t cut the rhubarb stalks out. This leaves residue that will decay and invite disease. Pulling triggers the plant to replace what was taken. When harvesting rhubarb, select stalks that are firm and upright, and pull up gently from the base of the stem, twisting just a little. The stalk should pop out cleanly, but if it breaks off, pull out the remaining piece out. Don’t leave it there. See above about inviting disease. Remove all dead, or limp stalks and leaves to throw into the compost. Cut the nice big red stalks from the leaves, and throw the leaves into the compost. Trim any blemishes from the stalks and rinse to clean. From here you can chop into one inch pieces to freeze (in freezer bags) or to use right away. They can be kept a few days in the fridge if needed.
Officially rhubarb is actually a vegetable, but it is most often used as a fruit. Don’t be too quick to typecast it though, just because it’s most commonly used alone or in combination with other fruits to make desserts, doesn’t mean it can’t pull off a respectable part of the main event as a savory dish. Add it to a salsa, use it to make chutney or even as a marinade for meat. I use it with BBQ sauce, and tomatoes when making pulled pork.
Never harvest a plant completely. Leave about 1/3 – the smaller less mature stalks to regenerate new growth. Pick the bigger stalks. At the end of the season, sometime in late August (in central Alberta) or early September, do your last picking, and then remove any plant debris. If you cover the base with a nice thick layer of compost before winter, your plant will be advantaged in the spring. It is not necessary to cover the plant in mulch or hay, but make sure it has a good covering of snow for the winter.
using
when dicing small amounts of rhubarb, you cannot beat an ulu knife and board
Don’t get stuck in the trap of always thinking rhubarb must paired with sugar, and don’t get stuck into thinking it always has to be eaten with a spoon.
For years, I had the mistaken idea that because it was ‘sour’, rhubarb NEEDED sugar, so I didn’t use it as much as I would have otherwise. Though its nutrition was compelling, the sugar seemed to neutralize its goodness. Until one day, I was brave enough to use it without sugar, in a summer smoothie with other fruits. My eyes were opened! It was delicious, refreshing, and NOT sour, the companion fruits compensated beautifully. Fully converted, I chopped a stalk of rhubarb into every smoothie for the rest of the summer, and froze some to use for that purpose later in the year. Now I anxiously look forward to the fresh, crisp red stalks getting big enough for that picking. I have three rhubarb plants in my fruit garden, and two planted outside my fence for alley gleaners. Yes, I still use rhubarb for dessert, but I am not bound by that outdated rule.
Recipes:
preparing rhubarb for it’s future offering: wash, and chop into 1/2 inch (2 cm) pieces
Drinking your Rhubarb:
rhubarb lemonade
Rhubarb Lemonade Can anything be more refreshing than rhubarb and lemon in a chilled glass? Or more simple? for 8 servings: prep time 10 minutes, cook time 10 minutes. Ingredients: 2 c. chopped rhubarb; the redder, the sweeter 1 c. white Sugar 1 tbsp. unsweetened Lemonade powder or the juice of two lemons 8 c. Water Directions: In large saucepan, stir together rhubarb and sugar into 2 cups water and bring to boil. Reduce heat and simmer on low for about 10 minutes, or till rhubarb is tender, stirring from time to time to prevent scorching. You want the rhubarb to be soft. Remove from heat and strain through a sieve to get a reasonably clear juice. Save the pulp for lots of other uses or to just eat. 🙂 Stir in the unsweetened lemonade powder or lemon juice. This is now a rhubarb SYRUP. Let it cool. You can store it in the fridge for a few days. When ready to serve, pour cold syrup into a pitcher with 6 cups ice COLD water. Stir completely to blend. Serve over ice. I am a fan of sparkling water, so I prefer to add sparkling water if I have it on hand.
Rhubarb Slush I grew up on Rhubarb Slush. It was at every party, or gathering. Every mom had a pail or two in the freezer that they pulled out for special occasions. For all my early ‘mom’ years, I did too. If it was a big gathering, it was served in a punch bowl, if you only had a few guests, then you would scoop into a glass and top up with ginger ale.
Basic Slush Recipe with suggested variations: 8 cups coarsely chopped rhubarb equal amount of water 2 cups sugar in a fairly large pot. Bring to a boil and reduce heat to simmer rhubarb till tender. This will only take 5-10 minutes so don’t go too far while its cooking. You can puree in the blender at this point, or pour it through a sieve to remove the pulp. I mash the rhubarb with a potato masher and leave the pulp in it. I like the texture, it adds to the ‘slushiness’ of it in my opinion. Add 1/2 cup lemon juice. Stir well and freeze in an ice-cream pail. For lg jug or punch bowl, dump in the entire pail of frozen slush and top off with 2-4 litres of gingerale, or 7 Up or your fave pop. For individual glasses, thaw enough to scoop slush into glasses. Top up with pop.
variations: Add any one of the following, or a combination of your choice. You’re the boss of YOUR Rhubarb Slush. Create your own signature recipe. Add strawberries to the simmering rhubarb for the last 5 minutes. Cooking the strawberries too long will damage the colour. Add a pkg of strawberry jello to the hot cooked rhubarb, stir to dissolve well. This will add a lot of strawberry flavour, colour and slushiness. Add a can of orange juice concentrate after the liquid has cooled down a bit. Add a litre of pineapple juice after the liquid has cooled down a bit.
RHUBARB CORDIAL A cordial drink is a sweet, concentrated syrup. You mix it with water or soda before you drink it. I do not cook the rhubarb when making a cordial. In fact the cordial is sometimes a by product of preparing rhubarb for making jam (or just about anything else). A Big Lucky BONUS!
What does it mean to ‘macerate’?
Macerating means to soak the fruit in sugar, alcohol or other liquid to soften it and draw out its natural flavour. The process pulls juices out of fresh fruit to create a rich syrup.
How to Macerate Rhubarb
With Sugar: I measure out the chopped rhubarb to know how much I’m starting with. With Rhubarb I generally use a 5:1 ratio – 5 parts chopped rhubarb, 1 part white sugar. Add the appropriate amount of sugar and toss it well to coat everything. Cover with a clean cloth and leave for a minimum of two hours. I usually prepare the rhubarb at night and leave it sit over night. (if you think you want it sweeter, go ahead and add another cup of sugar making it 4:1, but I suggest giving this amount a try before you assume it’s not sweet enough)
in this tub: 20 cups chopped rhubarb, coated well with 4 cups white sugar
By morning I can easily have a quart (litre) of syrup sitting in the rhubarb. Simply pour it off – into a glass jar. It is absolutely delicious and there is ZERO need to cook it and damage the nutrients. (there might be a slight variation in the amount of liquid you pour off, depending on how well the rhubarb has been watered and how big and crispy the stalks are)
Recipe for Rhubarb Cordial – expect 2 or 3 cups of syrup from 10 cups of rhubarb. I usually double this amount.
10 cups chopped fresh rhubarb 2 cups white sugar this is a 5:1 ratio, if you want to use a 4:1 ratio for sweeter cordial, go ahead
Put freshly chopped rhubarb in a large bowl, and cover with sugar. Stir well to completely coat every piece of rhubarb. Cover and let sit several hours. I try to leave mine 8-10 hours (overnight). Strain rhubarb into a jar. You’re done! That’s how easy it is.
How to Store Rhubarb Cordial: In a glass jar in the fridge. You can expect it to last for MONTHS! It will begin to ferment of course, but in the process the flavour is enhanced and the cordial becomes fizzy. I love ‘fizzy’. The fizzier the better.
How to Serve Rhubarb Cordial: I serve with ice and sparkling water. In an 8 ounce glass for instance: 6 ounces sparkling water with ice + 2 ounces cordial. The carbonation of the sparkling water mixes beautifully with the fizziness of the cordial. A wonderfully refreshing and delicious drink. * During the summer, I will add cherry liquid, raspberry liquid and any other fruit liquid that comes my way. At that point its lost its identifiability, but not its deliciousness.
Baking:
*Rhubarb Pie, Crisp or Cobbler What is the difference between pie, Crisp or Cobbler?
Answer: Baked in a crust = pie baked in a dutch oven or a baking dish with a crumble topping = crisp or crumble baked in a batter or with a batter on top = cobbler.
There are many recipes to be found, but essentially the basics are to thicken with flour or cornstarch and sweeten with sugar.
Rhubarb CRISP (with a crumble topping) recipe:
TIP: I always prefer to macerate1 rhubarb when I can spare the time, as it removes a significant amount of liquid. To do this, put chopped rhubarb in a large bowl, sprinkle with full amount of white sugar over top. Toss to coat evenly. Cover with a clean cloth and set aside to rest for a few hours (at least one hour). I try to leave it covered with a tea towel several hours or even over night if possible.)
If you left it overnight, don’t pour off all of the liquid (reserve a cup or two). If you left it only an hour, go ahead and strain the liquid (as there is sufficient moisture still in the rhubarb to make a nice sauce). This syrup is wonderful. Save it to use for Rhubarb Cordial.
Rhubarb filling: for 9×13 pan (can be halved easily) You can use the same filling recipe for whatever dish you want to end up with. The difference is in the topping. 8-10 cups chopped rhubarb (about 4 pounds / 10 med-large stalks) 1 cup sugar 2 Tablespoons cornstarch *optional: add 2 Tablespoons fresh lemon juice OR if you love the taste of lemon as I do, 1/4 medium lemon, pureed in blender
preparing the filling In large bowl, use wire whisk or sift, to combine sugar and cornstarch thoroughly.
RHUBARB CRISP TOPPING (for a crispy crumble topping) : 2 cups old-fashioned rolled oats 1/2 cup unbleached flour 1 cup brown sugar (packed) *1/2 teaspoon salt (optional) 1 cup COLD butter
directions: – Butter a 9×13 baking pan and set aside. Preheat oven to 375 degrees Fahrenheit. – Pour sugar/cornstarch mixture over top of the rhubarb, and toss to thoroughly incorporate. – If you’re using fresh lemon puree or juice, mix it in now. – Pour rhubarb mixture into prepared pan. set aside. – Prepare topping by mixing oats, flour and sugar well. Cut in cold butter (or margarine) and mix till crumbly. Spoon over top rhubarb filling. Bake 375F for approximately 30 minutes – till nice and browned on top. Remove from oven and let sit at least half an hour before serving. Great combinations are: Rhubarb & Strawberry, Rhubarb & Raspberry, Rhubarb & Saskatoon, Rhubarb & Cherry . . . Serving suggestions: with a little table cream poured over top, or ice-cream of course, or just by itself
*hint: if you have macerated your rhubarb, pour off most (but not all) of the liquid, do NOT use the additional cup of sugar (it’s already sweet enough) and use only 1 Tablespoon of cornstarch.
Rhubarb Cobbler
The filling is the same as for above. The only difference is that the topping will be made from a batter. This amount will be for 6-8 cups of rhubarb, in a 9×13 pan as above. The recipe can be easily halfed.
Spoon batter on top of rhubarb filling. Bake in 350F oven for 35 to 45 minutes. I suggest setting the timer for 30 minutes so you can check on it, then go back for another 5 minutes at a time. Crust will be tender but firm, and lightly browning when done. Allow to cool at least half an hour before you serve. Enjoy with ice cream.
*Rhubarb Coffee Cake or Muffins Such an easy variation to make to your favourite recipes. Just use your favourite recipe and add chopped rhubarb instead of whatever else it calls for. I like to add a little lemon powder to the dry ingredients, it just seems to perk everything up.
Soft Rhubarb Cookies
Nice, soft cookies with just the perfect combination of tart and sweet. Makes 4+ dozen.
Preheat oven to 375 degrees F. Dice fresh rhubarb (about pea size), enough to make heaping 2 cups, and set aside.
In a large bowl, cream 1 cup butter or margarine with 2 cups brown sugar together. Beat in 2 large eggs and 1 tsp vanilla. In a separate bowl, sift 3+1/2 cups of flour 2 tsp cinnamon 1 tsp each of salt, baking soda and baking powder together. Add to the sugar mixture 1 cup at a time, stirring to mix thoroughly between each addition. If it gets a little too dry, add a couple of tablespoons of milk. Add rhubarb pieces and fold in. Spoon onto prepared baking pan (I use parchment paper) and bake 12-14 minutes or until cooked through. Test by tapping gently with your finger. Cool for 2 minutes, then remove cookies onto a baking rack. Enjoy!
optional: We’re oatmeal fans in our house. Substitute 1 cup flour for rolled oats. optional: I like to add even more rhubarb. Another cup.
Rhubarb Chocolate Extreme Brownies Strong chocolate flavour pairs itself really nicely to the sudden bursts of ‘zing’ that comes with fresh rhubarb. Cut the pieces small, but make sure you have lots of them. You’ll be glad you did.
1 cup sugar ½ cup vegetable oil (your choice) 3 lg eggs 1 t vanilla
½ cup flour 1/4 cup cocoa powder ½ t baking powder ½ t salt
2 cups rhubarb, diced small *optional: ½ cup dark chocolate chips ½ cup chopped walnuts
1. Preheat oven to 350 and butter an 8×8 baking pan, set aside. 2. Whisk sugar, oil, eggs and vanilla together, set aside. 3. Sift dry ingredients together, set aside. 4. Stir wet ingredients into dry ingredients until all is moistened. Batter is very thick – just sayin’. Fold in chopped rhubarb, chocolate chips and walnuts, till thoroughly distributed. 4. Pour into buttered baking pan and spread out to make it even. Bake 20-25 minutes or until toothpick comes out clean. Don’t over cook. 5. Allow to cool at least 10 minutes, then cut into squares. Serve with whipped cream or vanilla ice-cream. ENJOY!
*Simple Rhubarb Sauce 3 cups chopped rhubarb 1/2 cup sugar Stir together and let sit (macerate) for an hour or more to draw out some natural juice. Bring to a slow simmer in a medium saucepan, 10-15 minutes or until rhubarb starts to soften and break down. Add more sugar if desired in small amounts taste testing as you go, and add a small amount of water if it gets dry. Serve stewed rhubarb over pancakes or waffles, ice-cream or in a bowl with cream. * Special treat, add a cup to homemade ice-cream during the mixing process. * Add fresh strawberries right at the end of the cooking process so as not to lose their brilliant red colour. * You will need a lot less sugar than you’re accustomed to expecting, so be cautious as you’re adding it, and taste as you go to prevent adding too much. * I love the added tart taste of lemon – I add a whole lemon worth of juice, 1/4 cup. Enjoy.
If you’ve never tried pickled rhubarb, you’re in for a surprise. We usually think of rhubarb as something destined for pies, crisps and jam—but rhubarb has a whole other side that is savoury, tangy and wonderfully crunchy.
Here’s why I think you should give it a try:
🌿 It’s rhubarb in a whole new way. Forget dessert. Pickling brings out rhubarb’s natural tartness and turns it into a crisp, bright condiment that works beautifully with savoury foods.
🥒 It stays wonderfully crunchy. Unlike cooked rhubarb, which can quickly turn soft and mushy, properly prepared pickled rhubarb keeps much of its satisfying crunch.
🧀 It’s fantastic with rich foods. That sharp, acidic bite is exactly what you want alongside foods that are rich or fatty. Try it with cheese, charcuterie, roast pork, sausages, burgers or pâté.
🥪 It can wake up an ordinary sandwich. Add a few pieces to a ham, turkey or roast beef sandwich and suddenly you’ve got something much more interesting.
🌱 It’s a great way to use a rhubarb harvest. When your plants are producing faster than you can make desserts, pickling gives you another way to preserve that abundance—and something completely different for your pantry.
🫙 It makes a beautiful little jar. Those rosy-pink stalks look gorgeous in a jar, especially when the rhubarb is young and brightly coloured. They’re almost as pretty as they are delicious.
And here’s my favourite reason: Pickled rhubarb makes you rethink what rhubarb can be. We tend to put rhubarb in the sweet category because that’s how most of us grew up eating it. But rhubarb doesn’t have to be covered in sugar to be good. Its natural tartness makes it perfect for pickling.
So if your rhubarb patch is producing like crazy this year, don’t make just one more strawberry-rhubarb pie.
Cut up a few stalks, put them in a jar, and try pickling them. You may find yourself wondering why you waited so long. 🌱🫙
*Easy Pickled RhubarbRecipe: I do not process this recipe or try to preserve it at all. You would lose the “crunch” of the rhubarb. You can keep it a few weeks for sure, but best to know ‘It’s a summer treat’. They are simple refrigerator pickles, and the beauty of that, of course, is that they take only a few minutes to make. They’re tart and a bit crunchy.
ingredients: nice ‘pink’ stalks of rhubarb cut into 2 inch lengths and about 1/2 inch across a nice white vinegar like rice vinegar or white balsamic vinegar OR something completely different like a bold red wine vinegar 1/3 cup white sugar for every cup of vinegar you use
directions: wash and cut the rhubarb into 2 inch (5 cm) lengths. Arrange in a nice clean pint (500 ml) jar. Start with one cup of vinegar and dissolve 1/3 cup sugar in it. Depending on how much you want to make, double it. Pour the cool, sweetened vinegar into the jar, over top the rhubarb. Submerge completely. Cover the jar and let sit for about two weeks in the fridge before serving.
optional: insert a couple large basil leaves along the side of the jar OR a sprig of tarragon. Told you it was simple.
if you’d like to know more about flavouring vinegars and recipes, click on this link Vinegars from the Garden
Rhubarb Ketchup is one of those recipes that makes you wonder why you didn’t try it years ago.
It may sound a little unusual, but think of it this way: rhubarb already has the tartness that makes tomatoes so good in ketchup. Add onions, vinegar, sugar and warm spices, and that sharp rhubarb flavour transforms into a rich, tangy, slightly sweet condiment.
Here are a few reasons to give it a try:
🌿 It gives you another way to use rhubarb. When the rhubarb is coming faster than you can make pies and crisps, it’s nice to have something completely different to put in the pantry.
🍅 It’s a delicious alternative to tomato ketchup. It’s not trying to taste like tomato ketchup. It has its own personality—tangy, savoury, slightly sweet and wonderfully spiced.
🥩 It’s incredibly versatile. Try it with burgers, sausages, meatloaf, roast pork, chicken or grilled meats. It’s also surprisingly good alongside eggs, potatoes and sandwiches.
🫙 It’s a great preserving recipe. Rhubarb ketchup turns a seasonal harvest into something you can enjoy long after the rhubarb season is over.
💚 It’s a good “use what you grow” recipe. This is exactly the kind of thing I love about growing food. You don’t always have to grow something new—you can find NEW ways to use what is already growing abundantly in your backyard.
And perhaps the best reason?
People are curious about it. Put a bottle of homemade rhubarb ketchup on the table and somebody is going to ask, “What’s that?” Then they’ll try it—and quite possibly ask you for a jar. (so make a few extra)
Backyard City Homestead tip: If you’ve got an abundance of rhubarb this year, don’t just make another batch of jam. Make ketchup. You might just discover your new favourite way to eat rhubarb.
Rhubarb Ketchup recipe
ingredients: 8 cups diced rhubarb 1 lg onion diced – enough to be about 3 cups 1 quart of home bottled tomatoes, or a 28 oz can diced tomatoes – undrained 1/2 cup white sugar + 1/2 cup brown sugar 1 T pickling salt *optional: 1/4 cup Tomato powder (or tomato paste) *optional: 1 teaspoon cinnamon *optional: 1 cup white vinegar
directions: In a large saucepan, sprinkle the sugar over top the rhubarb and let it macerate for about half an hour. Add all remaining ingredients. Bring to a boil, stirring to prevent scorching. Turn heat down, but keep it at a slow boil till thickened. Cooked rhubarb doesn’t have a beautiful colour, and I thought anything less than red, would be too difficult for my family to accept since I was passing this off as ‘ketchup’. I added 1/4 cup of tomato powder to intensify the tomato taste, and add to the colour. It was perfect! I’ll use it every time. If you want to know more about Tomato Powder click here.
Expect the process of reducing to take at least an hour, but probably not quite 2 hours. Stir frequently to prevent scorching. I set the stove timer for every 20 minutes so I don’t forget. When you’re happy with a nice thick consistency, turn the heat off and allow to cool to room temperature. Store in small jars in the fridge. This amount makes about 3 pints depending on the consistency you like.
The first time I made it I didn’t add the cinnamon or vinegar, but fully expected to do so at some point. It tasted amazing without either of them, and I didn’t want to spoil a good thing, so I didn’t. I will at some point try them both, just out of curiosity, but in the meantime I love this recipe the way it is. Adds a lotta class to things you might typically use ketchup for: hamburgers, meatloaf etc.
* If I was going to can it, I’d be adding the vinegar or better yet, lemon juice – just to be on the acid safe side. I would can it in pint jars and process it for 10 minutes just like for jam.
Fresh Rhubarb Salsa – use both recipes so that you get a feel for how easy and ‘varied’ it can be. Don’t ‘not’ make salsa because you don’t have some of these ingredients on hand. Be flexible, and use what you have.
Rhubarb in the early spring is almost alone in the garden. That’s when freeze dried veggies in the pantry come to the rescue.
Fresh SPRING Rhubarb Salsa this is what you make in the earliest part of spring, when the most courageous plant in your garden is your ever faithful friend – Rhubarb, and maybe your chives too. This is what you make before anything else in the garden is ready. Its my spring tribute to RHUBARB.
1 cup packed of finely chopped (by hand, NOT a food processor) rhubarb 2 T your favourite vinegar (I use a rhubarb vinegar I made the season before) 2 T olive oil (or your fave kitchen oil) 1/2 cup finely chopped red onion OR 1 T freeze dried chopped onion OR 2 T finely chopped fresh chives 1 t sugar * optional: add juice of a small lime 1. Put everything together, toss to dissolve sugar and mix everything well. 2. Serve immediately, or make ahead a couple of hours. Remember YOU’RE the boss.
Recipes are only guidelines to get you going. I use these amounts only to give you an idea of measurement estimates. It’s not very likely I’d ever make a single cup of this salsa. This is a great start, but if you like it a little sweeter, make it sweeter. If you like garlic, add a little garlic.
*Fresh Rhubarb SUMMER Salsa I call this ‘summer salsa’ because of the many other ingredients that are plentiful in a summer garden, but not so plentiful in the spring as early as rhubarb is ready. This combination is terrific, delicious all by itself. Who said rhubarb has to be sweet? When you use it as a vegetable, you’re a little more willing to use less sugar. Only 1 tablespoon of brown sugar with over 8 cups vegetables.
fresh rhubarb summer salsa
4 cups+ finely diced rhubarb 1 small red onion chopped finely (same size as rhubarb pieces) 1 lg green pepper finely diced (*try to keep dice sizes uniform) 1 lg red pepper chopped * 1 lg yellow pepper chopped * 3 fresh meaty tomatoes (like roma) finely diced 1 T brown sugar 1/3 cup lime juice or 1 T powdered lime crystals 2 t coarse salt I added a few stocks garlic chives including the bulb – chopped slightly smaller than the other vegetables * optional: if you like a little heat, add 1 seeded and finely chopped jalapeno pepper; if you love the taste of cilantro, add 1/2 – 1 cup chopped fresh cilantro. I didn’t have either of these on hand the first time I made it. It’s all about making what you have – work for you. I added about 1/4 cup of chive vinegar – home flavoured. It was a nice touch. * optional: I added a beautiful fresh nectarine – because I had one. It was perfect! * optional: I added two very small garden onions sliced and diced thinly
Directions: Chop the rhubarb quite finely, and measure packed. Stir all vegetables together in large bowl. Sprinkle sugar, lime powder and salt over top and stir to completely distribute. Use immediately, or let it sit in the fridge for a couple of hours. The first time I made this, I used it as a topping for a barbequed hamburger. Some used it as a relish. I put on about 1/2 cup – it was fabulous. It’s excellent as a side dish to serve with plain taco chips, or with anything else.
Spicy Rhubarb Chutneywith a touch of India I love the sweet spicy smell that fills the house with this gorgeous spiced rhubarb chutney. So delicious, you can eat it straight. Personally, I wouldn’t process it to can, simply because I’d prefer not to cook it that long, but you can always freeze the fresh rhubarb so that you can make this a few times in the off-season, or even freeze small containers of it to pull out for a special dinner. So quick and easy, and the bonus is that your house will smell GREAT! Lovely served over pork roast, beef or chicken– or wherever you typically use chutney.
rhubarb chutney
Ingredients: 1 Tablespoon olive oil 1 small red or white onion, diced (or use freeze-dried onion slices) 2 cloves garlic minced 1 teaspoon ginger powder OR 1 inch fresh ginger, grated *optional: 1 small hot chili pepper finely minced (seeds in or removed, its up to you. It‘s hotter if seeds stay in) 2 teaspoons cumin 1 teaspoon cinnamon 1/2 teaspoon cloves 1/2 teaspoon salt 5-6 cups coarsely chopped rhubarb 1/4 cup brown sugar + 1/4 cup white sugar 1/2 cup apple cider vinegar or your favourite vinegar (a balsamic would be wonderful) 1/2 cup+ raisins
Directions: heat olive oil over medium heat, add diced onion, and saute 1 minute. Add garlic, ginger and finely minced hot chili pepper (if you’re using it). Saute another minute while stirring Add spices and salt. Continue to saute another minute, stirring to prevent scorching. Add sugar and vinegar. Continue to stir, till sugar is completely dissolved. Add chopped rhubarb and raisins; reduce heat and gently simmer till rhubarb is softened and liquid is reduced – stirring every few minutes. This could take 10-15 minutes. When the texture is spreadable, its done – you be the judge, Cool completely. Serve fresh or make ahead to refrigerate a few days.
preserving
Freezing, canning or making jam are the three best ways to preserve rhubarb. I’ve tried dehydrating it – bleh. But adding it to fruit leather is terrific. The nice tart taste is the perfect match for fruit leather – on its own or mixed with any number of other fruits: apples, raspberries, plums . . . . just a reminder: always pull the rhubarb off the plant rather than cutting it. See above if you forget why.
FREEZING Wash and pat to dry freshly picked rhubarb. Cut into 1 inch pieces. Most of the time I just throw the chopped rhubarb into a labelled (name and date) bag to freeze. If I’m planning to use most of it in smoothies – where I want it to come out loosely, then I spread the chopped rhubarb in a cookie sheet, then I freeze in the chest freezer. The next day, scoop the frozen rhubarb into a labelled plastic bag and seal. Frozen fruit is best eaten within the first year of freezing. I know plenty of people who keep their’s in the freezer for much longer than that, and while its safe to do that, the food value diminishes considerably. Not worth it to me. Just USE it.
CANNING Canning is still the most convenient way of preserving high acid fruit. It is easy to do at home with limited equipment: just good quality, CLEAN jars with proper canning lids and rings, and a pot deep enough for at least two inches of water to cover.
Prepare rhubarb by trimming off the leaves, cleaning the stems. The classic method involves macerating chopped (1/2 inch to 1 inch) rhubarb stock with sugar. A good guide is approximately 1/2 cup (on the light side) to 1 cup of sugar to each quart of chopped rhubarb. You know yourself – you can decide how much sugar. Toss to coat rhubarb evenly with sugar, and then let it sit for a few hours to draw out the juice. This is called “macerating”. I most often chop and toss the rhubarb with sugar at night before going to bed. I cover it with a cloth and let it do its thing. By morning, the ‘fresh’ rhubarb is sitting in a pool of terrific rhubarb juice.
At his point, you can choose to cold-pack it into prepared canning jars, or hot-pack. Rhubarb is a high acid food so it can safely be processed in a hot water bath canner.
Canning Cold pack: spoon the fruit into a freshly cleaned pint or quart jar. Top up with juice to about 1/2 inch from the top, leaving this as a ‘headspace’. Add clean lids and rings and gently lower the can into hot water bath in large deep pot – ensuring you have 2 inches or more of water on top of jar. Bring the water to a boil; once its returned to a full boil, set your timer for 15 minutes, keeping the water at a continued soft rolling boil the whole time. Gently remove the jars and place on insulated surface about an inch apart. Allow to cool without disturbing. Can lids should ‘pop’ when they seal, ensuring a good vacuum seal.
You can also pressure can under 10 pounds pressure for 8 minutes. I always prefer hot water bath canning for high acid fruits.
Canning Hot pack: Same preparation as for cold-pack, but once rhubarb has macerated over night and has a good amount of ‘juice’, slowly heat the pot to a slow boil. Simmer only a minute or two, and immediately fill HOT jars with HOT sauce. Leave 1/2 inch head space, wipe the jar mouth with a clean cloth and lower your hot jars into boiling water bath. Return the water to a full rolling boil and set the timer for 15 minutes as above. When the timer goes off, turn heat off, gently remove the jars and proceed as instructed above.
Use your canned rhubarb sauce all winter long as you would apple sauce.
Between the two methods, I prefer the cold pack. I find the rhubarb pieces to be more defined and less ‘mushy’. Hot pack is more of a sauce. Its just a matter of personal preference, but either way, a favourite way to serve it in our house is on top of oatmeal porridge in the morning.
Dehydrating: I don’t recommend dehydrating it, unless its prepared to be a rhubarb leather.
Freeze Drying: I don’t recommend it freeze dried.
I’d love to hear your rhubarb recipes. Please tell me in the comments below how you use your rhubarb.
warmly,
Cindy Suelzle
In cooking, macerate means to soak food—usually fresh or dried fruit—in sugar so it becomes soft, plump, and juicy. The process draws out natural flavours and creates a rich syrup you can use in other things later. ↩︎
at the time of writing this, I am in the middle of RHUBARB Season – first part of July
Rhubarb is my best friend in the early part of the season. And stays my long suffering, generous, faithful friend right through till the cold puts it to bed at the end of the season. I try not to pick too much at the beginning of May when its first coming on, or in September when it’s getting tired, but other than that, the bounty is profuse!
Jam is one of rhubarb’s strengths. It can stand on its own – plain rhubarb jam – and be wonderful. Or when you pair it with strawberries, raspberries, honey berries, saskatoons or plums (or other summer fruits), something magic happens. Rhubarb, that ever generous friend – moves into the background and acts as a flavour ‘enhancer’. The taste of strawberries will prevail. Or raspberries. Or whatever. So why bother using rhubarb, if you can only identify the taste of raspberries?
I hardly ever make pure raspberry jam unless I have such a bumper crop that I don’t know what else to do with them. We use them ‘fresh’ every single day. Out of hand of course, on cereal in the morning, on salads, in desserts, in smoothies, . . . . I love to make a couple beautiful raspberry pies in the summer. I fill my freezer with raspberries to use all winter long. We wait a whole year for raspberries to come on, and there’s nothing quite as wonderful as ‘garden fresh’ raspberries, but their season is only a few weeks long and then they’re done. I am highly motivated to not miss them. Rhubarb on the other hand, just keeps on giving and giving. Rhubarb extends the raspberries. It’s like that. The quiet, subtle friend who stands in the background, making you look good and getting all it’s satisfaction from doing so. How can you not love rhubarb?
The other thing I love about rhubarb jam is that it doesn’t need a lot of sugar, and though it doesn’t have natural pectin, it sets up beautifully, in the consistency you’d want to spread on your morning toast. If you’ve made the typical pectin recipe for any kind of jam, you know there’s more sugar than fruit in it; sometimes double the amount. yikes!That kept me from loving jam, and certainly from making a lot of jam most of my adult life. In fact, the current pectin recipe for rhubarb jam calls for 3 cups chopped rhubarb with 5 cups sugar, a pouch of pectin and even a few drops of red food colouring. yikes again! That’s a LOTTA sugar! And I hate using food colouring. That’s another reason I often pair rhubarb with other fruit for jam. Rhubarb isn’t all red, and when you cook the jam, it can sometimes be a little ‘brownish’ (hence the food colouring in some recipes). Adding other fruits half way through the process adds COLOUR! Compare the typical ‘certo pectin’ ratio above (3:5 / 3 parts rhubarb to 5 parts sugar) to the amount of sugar used in my recipe below (3:1 / 3 parts rhubarb to 1 part sugar).
🌸 Truth is, as sour as rhubarb is, it doesn’t need nearly as much sugar as we usually add.
I know—that sounds completely counterintuitive. But stay with me… and be open to trying something that might not make sense at first.
Trust the process. Give it a taste before you reach for more sugar. You might be surprised.
And if you still feel it needs more sweetness? No problem—you can always add another cup later.
Here is my basic rhubarb jam ‘recipe’. Keep in mind that when preparing it, these amounts are my ‘suggestions’. I am not precise in my measurements, I use them as guidelines. I taste along the way to reach the level of sweetness I desire.
🍓 Rhubarb Raspberry Jam
This recipe yields about 5 pints. I typically can 4 pints for the pantry and keep the remaining jar in the fridge to enjoy right away—or to share with a friend. 12 cups chopped rhubarb 2 cups sugar TO USE TO MACERATE YOUR RHUBARB 2-4 cups raspberries 1-2 more cups sugar (as you decide– taste test it) * 1/2 lemon pureed in blender to use as natural pectin
Put a small lunch plate in the freezer. You’ll need it at the end.
How finely you chop is gonna influence how much rhubarb fits into a cup right? So shoot for about half an inch size pieces. Don’t use a one cup measuring cup. Use a bigger bowl. Pictured above is an 8 cup measuring bowl. Heaping is about 12 cups.
🍃 To macerate your rhubarb Measure your rhubarb and place it into a large Dutch oven or bowl. Sprinkle 2 cups of sugar over the top, then gently toss to distribute it evenly. Let it sit for at least one hour to macerate (see note 1 below). I often leave mine much longer—sometimes I chop the rhubarb in the evening and let it sit overnight. Not because it’s necessary, but simply for convenience. When you’re juggling a few things, it helps to work in stages. By morning, the sugar will have softened the rhubarb and drawn out a surprising amount of liquid. Strain off this liquid before cooking—it makes the process much easier, with less moisture to cook down. Don’t discard that liquid—it’s amazing! Pour it into a jar and refrigerate it for later use.
In a large pot, put the rhubarb on medium high heat and bring it to an easy rolling boil, stirring every few minutes to prevent scorching. You don’t have to stir constantly, but don’t go leaving the room and forgetting about it on the heat. Just try to stay close at hand so you can give it good attention, stirring frequently. I generally use this time to wash the jars, get the hot water bath boiling in another pot on the stove, and other general kitchen clean up. You can expect the process to take up to an hour.
🍋 This is where the lemon comes in.
Citrus fruits are naturally high in pectin—lemons especially so—and most of that pectin is found just under the peel. Adding lemon does more than bring that bright, fresh “zing.” It also helps your jam set beautifully and keeps the colour looking vibrant and appealing. Plums can also contribute pectin (depending on the variety), but lemon is the real star here. Pour the puréed lemon into the jam and stir well to distribute it evenly throughout.
Continue cooking, adjusting heat as necessary. You’re looking for a good steady boil. You’ll see it begin to thicken after the first 15 minutes, continue stirring. As it thickens, the boiling will cause it to spit at you. Nothing you can do about that other than to wear an apron and be prepared to wipe up as necessary. Lowering the heat might help a little, but it will add a few minutes to your time. It’s just gonna ‘spit’. About half an hour in, add the raspberries. Stir well, taste and add another cup of sugar to sweeten. Stir while continuing to boil, and taste again, adding another 1/2 cup sugar at a time (as you decide) till you like the sweetness. You may find during the cooking process that a foam begins to form on top of the jam. With some jams or jellies it can be quite substantial. It shouldn’t be that much with this jam, so I just stir it in. But if you don’t like it, skim it off.
In approximately an hour, perhaps a little less, you may decide it is thickening enough. Test the consistency by turning your spoon and dropping jam back into the pot; you’ll know when you like what you see (not too liquidy). Remember, it will set up a bit more as it cools. Take your small plate from the freezer, and drop about half a teaspoon of hot jam onto the plate. Don’t worry, that amount isn’t gonna break the plate. You’re trying to cool the jam quickly with this process. When the jam has cooled, draw your finger through it. If the two sides of jam stay separated, your jam is a good consistency. Turn the heat off.
Your jam is done.
If you plan to seal it for long term storage, ladle it into clean* (2,3 see below) jars using a canning funnel. Allow plenty of head space in jar.*(4 see below) Wipe with warm cloth to ensure the ridge is perfectly clean. Put a clean lid on, fasten it finger tight with the ring, and lower it on a slant into your boiling hot water bath.*(5 see below) Make sure each jar is covered by at least an inch of water. You may have to add a little water. If you do, pour into the side of the pot, never directly onto the jars. Begin timing when the water returns to a boil. 10 minutes. When the time is up, remove from water with a jar lifter, and place on folded clean tea towel on the counter. Allow air space between your jars. Lightly cover with another clean cloth and let the jars cool. You will hear a ‘pop’ sound as the jars seal.
I made this jam three times in the last week or two. First one, I used 4 cups of sugar total. Second batch, I used 3.5 cups total. Last one, I used 3 cups. It was just enough – deliciously TART without being sour. My personal favourite.
🌿 I hope you’ll try making rhubarb jam this way . . .….
—on its own, or paired with whatever fruit you have on hand. I often reach for raspberries from the freezer—last year’s bounty—and they work beautifully.
When it comes to sugar, you’re the boss. Be brave. Dare to use less.
Taste as you go and adjust along the way—that’s the best way to avoid surprises and end up with something you truly love.
Let me know how you love it.
Warmly,
Cindy Suelzle
footnotes:
Macerate means to soften – in this case, with sugar and time
I recommend using pint sized jars (2 cups), or half pint jars (1 cup)
🫙 A note on jars and sterilizing I don’t pre-sterilize my jars. I wash them thoroughly in hot, soapy water, rinse well, and let them air dry. When I’m ready, I ladle the hot jam into room-temperature jars, then place them into boiling water for processing. Hot jam → hot water. Jars do not need to be sterilized ahead of time if they will be filled and processed in a boiling water bath for at least 10 minutes, or if they’re going into a pressure canner. If your processing time is less than 10 minutes, then sterilizing the jars beforehand is recommended. (Though honestly… what are you canning for less than 10 minutes?)
Headspace is the space between the contents and the top of the jar. You want to leave enough headspace so that the food can swell and move about as it’s heated without boiling up and out of the jar, but not so much that there is an unnecessarily large quantity of air which may interfere with vacuum sealing it. If jam overflows, it will affect the integrity of the seal of the jar. Fill only to the bottom of the jar neck to allow for a vacuum to be created sealing the jar.
If you are using a large pot as a makeshift canner, make sure you have a rack or a folded tea towel on the bottom to keep your jars off the bottom of the pot. Failing to do this may result in jars breaking.
Simple things that can make a difference when its all about what YOU can do at home. An onion chest poultice is an old folk remedy that is often still used, because it is surprisingly effective. Among other good things, onion contain sulfur compounds that help fight mucus and promote the expulsion of mucus from your airways. Onion and its even stronger cousin garlic, are powerful natural antibiotics as well as being antiviral and antimicrobial. This makes them valuable for viral and bacterial infections. So yes make a poultice which will soothe from the outside, and that you’ll be able to inhale, but don’t forget to EAT them as well. Let them work from the inside too.
I love how Wendi talks about using fresh onions, but in the absence of them she shows us how to use dehydrated onions. This is so important and like her, I rarely have fresh onions in my house anymore unless they’re in my garden for the few months I can grow them, and maybe a few months after harvesting. I do keep dehydrated onions, but for the most part – I choose to use THRIVE LIFE freeze dried onions for most of the year. They come diced or sliced, and are always ready to use in all my favourite dishes. As with all Thrive Life fruits and vegetables, they’re flash frozen within only a few hours of harvest, sealing in all their natural nutritional goodness. This is very important to me. All the benefits of ‘fresh’, but easier and much more convenient to use, and with a shelf life of 25 years. That’s very important to me, because I’m all about long term food storage. Even after opening, we have at least a year to use them, depending on humidity in your area.
Wendi Bergin, the Joyful Prepper
These two pungent herbs (onions and garlic) are probably best known for their immune enhancing properties, but that’s another topic for another day. Many folk remedies suggest sleeping with onions wrapped onto the bottom of your feet! Don’t laugh. And don’t be too quick to discount things that seem too simple or even silly at first glance. In fact, garlic and onions contain anti-inflammatory chemicals that have been shown to relieve some forms of arthritic pain. Onions are a rich source of flavonoids, one of which – the antioxidant ‘quercetin’, has been shown to inhibit inflammation-causing leukotrienes, prostaglandins and histamines in osteoarthritis and rheumatoid arthritis. Yeah, I had to look them up too – lol.
Q: What are leukotrienes? A: chemicals your body produces, especially when you come into contact with something you’re allergic to. As a form of protection, they can cause coughing. build up of extra mucus and fluid in your chest and throat, as well as inflammation or swelling in your airway.
Q: what are prostaglandins? A: fatty acids made at sites of tissue damage or infection caused by injury or illness. They control processes such as inflammation, blood flow, the formation of blood clots and the induction of labour.
Q: what are histamines? A: chemicals your body makes to help expel allergens from your body through symptoms such as a runny nose or sneezing.
While we shouldn’t want to get rid of these natural protective functions completely, they can cause a lot of discomfort. Wouldn’t it be nice if there was something natural and ‘normal’ you could eat, that could assist in alleviating the worst of those symptoms though?
Let Food Be Your Medicine
Onions are members of the allium family, which includes hundreds of species, and they are one of the most widely used vegetables/herbs in the world, with some types growing in every climate except the arctic. Ones we’re more familiar with are the ‘onion’ of course, garlic, scallion, shallot, leek, green onions and chives. And even among these, there are many, many different types, each with its own special personality and qualities. In North America, the most popular onion to purchase is the yellow onion, for its long lasting quality. Named for its outside colour, not inside, it is cured (dried outside after harvest). If kept in a dry dark, semi cool place, it will last for months.
there are so many different types of onions, that could almost be a food group unto themselves.
They are a good source of nutrients and are known to offer a plethora of health benefits – many more than what we’ve reviewed here. Onions are a tremendously rich food source of flavonoids, in particular, the antioxidant quercetin (see above), which is known to prohibit the activity or creation of cancer-causing elements. A quercetin-rich diet is a recognized good defense against developing cancer.
Make onions more a part of your life.
– If you’re one of those people who don’t like the texture of onions, use freeze dried – they’re better than any alternative we can buy at the grocery store anyway.
– If you’re one of those people who don’t like the taste of onions, get over it and find a way eat them anyway. They’re really good for you. They’ve proven themselves enough times to be taken seriously, figure out a way to incorporate them into your daily diet. Hide them, disguise them if you must, but definitely EAT onions. Thrive Life’s freeze dried onions will help immensely with that.
– If you’re one of those people who have kids who think they don’t like onions, be the parent and find a way to use them anyway. If you need to hide them, then hide them! But use them! Thrive Life’s freeze dried chopped onions will become your new best friend.
Okay, its not possible for any food to have only good things said about it. I think we all know the one downside, and it has something to do with ‘the smell’. Not just the smell of onions, but the smell of ‘us’ after we eat them. Onions contain organic sulfur compounds, which are the reason onions have such a sharp, strong taste and smell. Yes, those sulfur compounds help reduce the level of cholesterol in our bodies, breaking down blood clots and lowering our risk of heart disease and stroke. BUT, those same sulfur compounds cause the only negative effects from eating onions – irritation to eyes when cutting, and body odor.
When our bodies break them down, those sulfur compounds react to sweat on our skin, creating what is generally considered to be an unpleasant odor. In our society, that’s a considerable downside. And in some individuals with IBS (irritable bowel syndrome), they may increase gas and bloating. Small price to pay in my opinion, but I have found that freeze dried onions do not seem to create the same problems. As far as the tearing up aspect, try rinsing a peeled onion under water or chill it for 30 minutes before cutting. Or of course, you can skip the whole chopping step, and go straight for the freeze dried option.
As far as the onion poultice – this is new to me. I’m happy to know about it and appreciate Wendi’s thorough instructions. I have everything I need on hand and will take her advice to set aside some more clean, white cotton for that purpose.
Have you ever tried an onion poultice? Or any other type of poultice? I’d love to hear your opinion and your experience.
Tomatoes are nature’s most potent source of lycopene. What IS lycopene and why do we care? Lycopene is a powerful antioxidant with many health benefits, including sun protection, improved heart health as in lower risk of stroke and heart disease, as well as a lower risk of certain types of cancer. It is most effective when consumed in the form of lycopene-rich foods like tomatoes and other red or pink fruits. Studies indicate that lycopene reduces bad cholesterol (LDL) while increasing good cholesterol (HDL) levels. This balance is important because high cholesterol develops fatty deposits in our blood vessels, which can clot and lead to a heart attack or stroke. Remember, RED foods are good for the heart.
it is difficult to think anything but positive thoughts while eating a homegrown tomato
And now, you’ve got all that natural tomato goodness in a concentrated form right in your pantry! I know right? Who could have imagined that now you can: STOP buying those little 6 oz cans of tomato paste that you never use all of anyway STOP buying canned tomato sauce (in all their varieties) STOP buying tomato juice Because you’ve got all three of these wonderful foods right here in powdered form (just add water). And its a lot more nutritious because it hasn’t gone through the high temperatures of canning (which only retains 40% at best of the nutritional value). Tomato Powder is a super useful food to have on hand in the kitchen at all times. I can’t speak to all tomato powders, but Thrive Life Tomato Powder has a strong, clear tomato taste, like you just picked a ripe tomato out of your garden! It’s got all that wonderful natural tomato acid, because . . . . . . guess what? The ingredient (yes, that’s singular) is: TOMATOES. That’s it. The only thing in the can – is tomatoes. No salt, sugar, colours, flavour enhancers, or other additives of any kind. You can add your own salt to taste. Or not. You do you.
Making your own TOMATO POWDER
drying your own tomatoes for tomato powder
Making your own tomato powder is pretty straight forward. A little investment in the time department, but easy, and if you’ve got an excess of garden tomatoes, its a great use for them. Best practice is in a dehydrator, but you can dry in a slow oven, and if you live in a hot dry climate, you can dry them in the sun. I don’t – so that’s all I’ve got to say about THAT.
The meatier type of tomatoes is preferable, as they have less water and less seeds – like Romas. Simply slice and lay evenly in your dehydrator. All dehydrators might be different, but select a low setting and expect it to take a full day and night. How long exactly, depends on too many factors to estimate with any precision. Factors like: type of tomatoes you are using, and how much water they contain, how thick you sliced them, even the weather – is it cold and rainy, or hot and dry?
You’ll want to continue to dry them until they are brittle. Ensuring that you have removed all the moisture is critical to give you a good product in the end. Use a food processor or blender to grind the tomatoes into a fine powder. It may be helpful to break the tomato slices into smaller pieces as you add to the blender. You can sift the powder through a sieve to separate the larger pieces, which you can put back into the blender.
Store in an airtight container in a cool, dry place. Nothing lasts forever, so plan to use it up in a year (or two at the most). Nutrition will diminish over time of course. Having it be VERY dry in the beginning is key to it staying dry, and it STAYING dry is key to longer shelf life. Keep it well sealed, as it will want to absorb the moisture from the air.
tomato powder on right, tomato skins powdered on left
10 WAYS TO USE TOMATO POWDER
1. Tomato paste ratio 1:1-2 1/4 cup tomato powder + 1/4 cup water = tomato paste start with the lesser amount of water, and then add a tablespoon more at a time to reach the consistency you prefer
2. Tomato sauce ratio 1:4 1/4 c. tomato powder + 1 cup of water = 1 cup tomato sauce
3. Tomato juice ratio 1:8-10 1 T. tomato powder+ 1/2 cup (8-10 T.) water optional: add your choice of seasoning ie: onion powder, sugar, salt, pepper, to taste
4. Spaghetti sauce ratio 1:4
or use your own Mediterranean seasoning mix: any combination of oregano, thyme basil, rosemary, garlic, onion,
5. Pizza sauce ratio 1:3
or use your own Mediterranean seasoning mix: any combination of oregano, thyme basil, rosemary, garlic, onion,
6. Cream of Tomato Soup ratio 1:16 Prepare a roux from 1/4 cup butter and 1/4 cup flour over low to med. heat Add 1/4 cup tomato powder – whisk in Add 1 T. chicken bouillon – whisk in Slowly stir in 4 cups of milk, whisking all along to prevent lumps from forming. Simmer over low heat, whisking to combine well, heat thoroughly and thicken slightly. Add more liquid if needed. *optional: I like to rub some Freeze dried chopped onions through a sieve to create onion powder. Nice addition to the soup. *optional: add 1 tablespoon of Italian or Greek blend of herbs, or your own combination of oregano, thyme and basil. *optional: add another tablespoon or two of tomato powder if you want it richer
Thrive Life had the best Tomato Powder ever. They no longer sell to individual homes, so I’ve been on a quest to match it with my own tomatoes. Nailed it.
7. Ketchup 1 cup tomato powder and 3 +1/2 cups water 1/3 cup honey or brown sugar 1/2 cup apple cider vinegar 1 t. onion powder or 2 T Freeze Dried chopped onion crushed to make onion powder 1/2 t garlic powder or 1 T Freeze Dried garlic crushed to make garlic powder 1 t salt + 1/2 t pepper 1/2 t dry mustard pinch of allspice and a pinch of cloves Combine all, and simmer over low heat stirring frequently to prevent scorching – till reduced to desired consistency. Expect it to take 30-45 minutes depending on your preference of thickness. Pour into jar and refrigerate. Expect 2 pint jars. Best to let it sit a day to allow flavours to fully blend.
8. Barbecue sauce 1/2 cup tomato powder 1 cup water 1/3 cup brown sugar 2 T. apple cider vinegar 1 T Worcestershire sauce 1 T soy sauce 1 T mustard 1 clove garlic, minced 2 T FD chopped onion 1/4 t Cayenne pepper (or your favourite dash of hot) or NOT Salt & pepper to taste Mix all ingredients in large saucepan, heat over low and stir 15 or so minutes till slightly thickened. Stir frequently to prevent scorching.
9. to add that beautiful rich ‘tomato’ zest concentrated To any tomato based soup, stew, chili or pot roast – add a tablespoon or two of tomato powder just because YOU CAN! You’ll be surprised at how it richens things up.
10. As a garnish Sprinkle tomato powder over top potato salad, deviled eggs, hummus, even a lettuce and tomato salad. Be creative.
I’d love to hear your experiences with Tomato Powder, and your suggestions for recipes, please comment below.