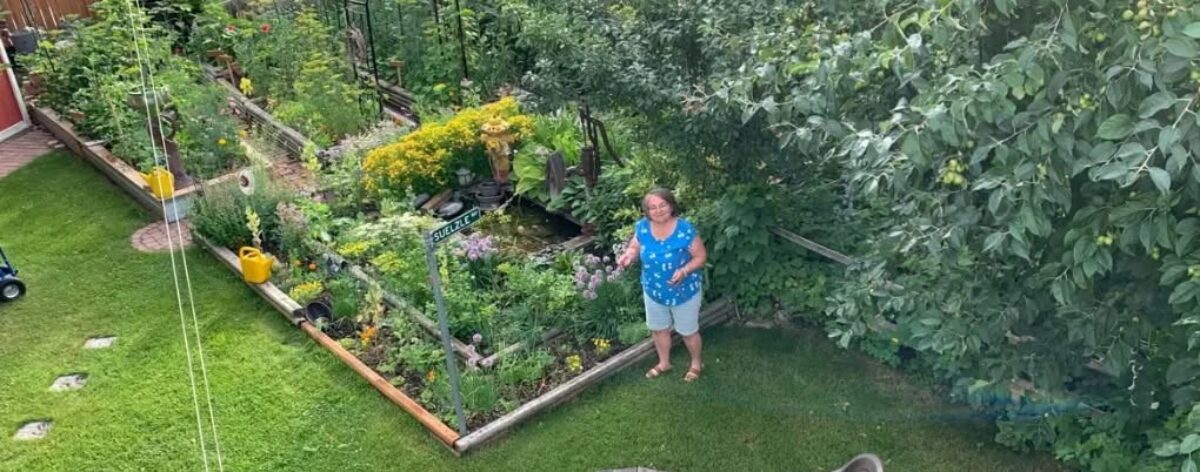
1st Rule of Tomatoes
EAT them! Every. Single. Day when they’re in season. There is NOTHING better than homegrown tomatoes. That is a foundational truth I live by.
2nd Rule of Tomatoes
Don’t waste them!
The end of summer is all about tomatoes ripening daily, counters overflowing with bowls of gorgeous, vine-ripened tomatoes – each one a delicious reminder of the rewards of summer gardening. . . .
Toasted tomato sandwiches (with pesto mayo, of course), fresh tomato salsa, bruschetta made with fresh sourdough bread . . . every day is another tomato day—and that’s awesome!
It’s what we’ve been looking forward to for months.
And I have another personal rule when it comes to tomatoes: I choose not to buy “fresh” grocery-store tomatoes. Honestly, they’re just too disappointing.
I figure that if we’re eating tomatoes every single day when they’re at their freshest, most delicious, and most nutritious—straight from the backyard—we can live without them for a few months when the garden is done.
And you know what?
We do just fine.
In fact, I think it makes that first juicy, sun-ripened tomato of the next season taste even better.
BUT. It. All. Happens. NOW. No stretching it out over the next few months like potatoes and butternut squash.
And if you’re paying attention to the rules, you know better than to waste them.
Okay, relax. I get it. And I’m here to help. There are many things you can do to preserve your ‘excess’ – tomatoes are probably the easiest produce to preserve with incredible variety.
But it all takes time! And there’s only so much of that to go around right? As a young mom, I learned a good lesson from an older lady I used to buy milk from. Her name was Elsie Manchak. It was 40 years ago so I might not be quoting exactly, but in essence Elsie told me “when something in the garden is ready – it IS. READY. NOW! That means you adjust, and you pivot. Whatever you thought you were gonna do today, just got trumped. You take care of the food when its ready, because that is what you’re gonna feed your family with all winter long.”
I absorbed her philosophy. It became formative for me at a very impressionable time in my life. It seems it may even have became part of my DNA. Thank you Elsie.
There are many things you can do with your excess tomatoes (by excess, I mean more than you can eat fresh), and time becomes of the essence. Did you know you can freeze them?
Freezing Tomatoes
Yes! You can freeze fresh, ripe tomatoes to buy yourself some time now – and then deal with them later when things slow down a bit. Whether it is better to freeze tomatoes whole or chopped depends on how you plan to use them later, AND how much freezer space you have. Freezing them whole (or halved) requires the least amount of effort and lets you easily slip off the skins later. Chopping them first saves freezer space and prepares them to go straight into recipes.
Truth be told, I am not a fan of freezing tomatoes as a general rule, but I do it when I have to buy time.
I freeze them whole and store in a plastic bag to come back to later in the season. Just don’t forget they’re there!
You can freeze without blanching or any special preparation. However, freezing changes their cell structure and they will become soft and mushy once thawed. Sometimes its helpful for what your ultimate plan is. Especially if your plan include Tomato Jam (see below for recipe). Also great for soups, stews, chilis or sauce.
How to Freeze Them Safely

- Wash ripe, sound tomatoes and pull off the stems.
- Best to core them even if you intend to freeze whole. Easier to do that while they’re still fresh, than later when they’re ‘squishy’.
- I freeze whole on a cookie sheet, then bag them frozen into a plastic bag later.
- OR you can pack them raw – tightly into freezer bags pressing out the air.
- OR you can chop them unpeeled or peeled and pack in amounts to use in specific recipes later.
- Seal – eliminating as much air as you are able to, and label with date.
*Rookie mistake: you think you’ll remember what’s in the bag and when you froze it. You won’t.
Your thawed tomatoes are squishy when they thawed out?
Yup. Remember that freezing changes their cell structure and they will become soft and mushy once thawed. Nothing you can do to prevent that. They’re still great for soups, stews, chilis and sauce.

Suggested Shelf Life for frozen tomatoes
When I freeze tomatoes it is SHORT TERM, buying me some time at a busy time of year. But if you’re actually planning to STORE them in the freezer, then pay attention to these rules of thumb:
*Optimal nutrition for frozen tomatoes is 6-12 months, when stored properly in airtight freezer bags or containers, though they maintain the best flavour and quality if used within 6 months. If they are vacuum-sealed, they can last up to 2 years.
Chopped or Sliced Pieces: Less time before flavour and texture degrade significantly. Shelf Life is 3-6 months max.
Standard Freezer Bags / Containers: 6 to 12 months (best quality under 6 months).
Vacuum-Sealed Bags: 2 years.
Important Tips for Canning Once-frozen Tomatoes
- Best Uses: Freezing breaks down the cell walls, making thawed tomatoes very soft. This makes them perfect for cooked products like sauces, juices, or crushed tomatoes. They are not suitable for fresh-style salsas or to be canned whole.
- Peeling Trick: When you thaw them, the skins will slip right off easily without needing to blanch them in hot water. Yay.
- Acidify: Always follow tested canning recipes and add the required bottled lemon juice or citric acid to each jar, just like you would with fresh tomatoes.
RULES
For the most part, I am very flexible with recipes and I like trying new things, but when it comes to canning, I have a few “Non Negotiable” rules I follow when it comes to canning

1. Acid foods in hot bath canner – non acid foods in a pressure canner. Period!
2. Processing times must come from a reliable source (not your memory or your gramma’s memory). Get yourself a good book. It might be pricey. It’s worth it. If you’re searching google for information, remember anyone can publish information – go to an official government source.
3. Only use jars that are made for canning. They are tempered glass – intended for repeated use in high heat.
4. Use ONLY proper canning lids, and only use them ONCE. There are plenty of ways you can save money. Re-using lids isn’t one of them.
5. Just DON’T MESS AROUND with SOME THINGS.
Canning Tomatoes
So, about Rule #1 about acid foods vs non acid foods . . . . TOMATOES are considered borderline foods. They can go either way, so pay attention. Don’t skip this information and go straight to the recipe. It’s important.
Probably the most common way of preserving tomatoes is to bottle them and process them in a hot water bath canner. Tomatoes are the ONLY vegetable that can be safely canned in a hot-water-bath canner. (yes I know that tomatoes are technically a fruit – which is why they fit into the safe zone, but we usually EAT them like they’re a vegetable) There is a right way to do this, but there are also a few wrong ways to do it. And it’s all about BOTULISM.
“Botulinum spores are on most fresh food surfaces. Because they grow only in the absence of air, they are harmless on fresh foods.
Most bacteria, yeasts, and molds are difficult to remove from food surfaces. Washing fresh food reduces their numbers only slightly. Peeling root crops, underground stem crops, and tomatoes reduces their numbers more. Blanching also helps, but the vital controls are the method of canning and making sure that recommended research-based process times are used.“1
- Salt or No Salt, and How Much?
Let’s talk about salt first because it’s easy.
Yes. Use it because without salt life is boring.
How much? 1 teaspoon per quart / litre OR 1/2 teaspoon for a pint / 500 ml
What kind? Pickling salt or pure salt of whatever variety you like – as opposed to regular table salt which has added iodine in it – which can make your liquid cloudy or dark. Table salt often contains anti caking agents too. - to ADD ACID or not to add acid; that is the Question. Why and what type and how much?
Experts say that modern tomatoes have lower natural acidity levels than older varieties. Additional Acid is an absolute MUST when canning tomatoes.
WHY IS ACID SO IMPORTANT?
Botulism prevention: Adding acid lowers the pH to a safe level to prevent the growth of dangerous Clostridium botulinum spores during water-bath canning.
See more about botulism here.
- Lemon juice or Vinegar? Which is the recommended ACID for canning tomatoes?
Lemon Juice:
Flavour: Mild and subtle; blends into the tomatoes without altering the overall taste.
Amount needed: 1 tablespoon per pint or 2 tablespoons per quart. Many people prefer to use bottled lemon juice because the level of ph is identified, and consistent. I generally use fresh lemon because its convenient for me and I usually have some on hand because I use it for a lot of other things.
Vinegar:
Flavour: Strong and distinct; can cause noticeable changes in plain tomato dishes.
Amount needed: Requires twice the volume: 2 tablespoons per pint or 4 tablespoons per quart.
Must be standard 5% acidity white or pickling vinegar. Other vinegars such as balsamic, white wine or rice vinegar are not acidic enough. My advice: use lemon juice over vinegar.
To sum up – salt may be optional, but adding acid is not optional. ALWAYS add lemon juice (fresh or bottled) or citric acid to EVERY jar of tomatoes to ensure safety. 2 tablespoons lemon juice per quart/litre, or 1 tablespoon per pint / 500 ml.
- When using a Hot Water Canner, how long should Tomatoes be processed?
Processing begins being timed after the water has returned to a full rolling boil.
40 minutes for a pint / 45 minutes for a quart.
- Is there such a thing as processing tomatoes too long?
Yes you can process them too long. Once the hot water in your canner has returned to a rolling boil, set the timer so you don’t lose track of it. If you’ve left them an extra 5 or so minutes, don’t worry about it. Its not a safety issue, but it will begin to affect the quality, taste and texture of your finished tomatoes. Boiling longer than necessary affects the texture, breaking down cell walls, giving tomatoes a soft, mush consistency. Obviously nutrient loss will become an issue, as will ultimate flavour (and even colour) loss.
the TOMATO CONTROVERSY
Over the last few decades there has been a good deal of controversy about whether or not all tomatoes are acidic enough to be canned in the traditional boiling water bath method. Tomatoes have generally been considered a sufficiently high acid food, but they are border-line in their PH range. Safe PH level is considered anything under 4.4. Over that is considered a low acid food. Tomatoes can range between 4.05 to 4.7 – just under and just over the acceptable level. Pretty IFFY.
Variations can be attributed to:
Tomato Variety
There are many types of tomatoes, some of them sweeter than others. Some more acidy than others.
Stage of Ripeness or damaged fruit
The riper a tomato, the lower the acid level.
As a tomato ripens, the concentration of primary organic acids decreases. This causes the overall pH level to rise slightly. The lower acidity is heavily influenced by a surge in natural sugars in the ripening tomato. Damaged tomatoes can have an even higher PH level.
It is therefore very important to use only prime, properly ripened fruit when canning.
AND, as an extra precaution, add 1 tablespoon of lemon juice per pint of tomatoes, and 2 tablespoons per quart.
The additional acid is not intended to compensate for overripe fruit. It is an extra precaution to take when everything else is right—when you are starting with sound, properly ripened tomatoes and following safe canning practices.
VERY IMPORTANT – Please Click the Link to Read

To can Tomatoes
Properly canned foods retain about 40% original nutritional value – OF WHATEVER THE FOOD WAS THE MINUTE IT WENT INTO THE JAR. This fact was supremely disappointing to me when I learned it, because I raised my family on home canned food. But it shouldn’t come as any surprise, when you remember that those tomatoes were in boiling water for 45 minutes. It is also very important when preserving food, that you attend to it as soon after harvesting as possible. The nutritional value begins to dissipate within the first HOUR of picking.
Canning tomatoes safely as a beginner requires the following:
1. canning jars – pints or quart sizes, with lids and rings to fit. NEVER RE-USE the lids from a previous canned jar. Modern lids are made for SINGLE USE only.
2. Hot water bath canner or a stock pot deep enough for boiling water to cover the tallest jar in use by at least two inches.
3. A rack or something else to keep glass jars from sitting directly on the bottom of the pot. If you don’t have a rack, use a folded tea towel.
4. Another large pot to boil water for blanching tomatoes.
5. Cold water and ice to cool blanched tomatoes fast.
6. Mason jars that are identifiably intended for hot water bath canning. NEW lids and rings for each jar.
7. Jar lifter or a lowering rack for the canner.
8. pickling salt or any salt OTHER THAN the iodized salt (and pepper if desired)
9. Lemon juice
10. Firm, ripe tomatoes in good shape. Plan for approximately 3 pounds per quart jar or 1.5 pounds per pint.
*TIP: when canning in a hot water bath for a minimum of 10 minutes it is not necessary to sterilize your jars. Freshly wash them in HOT water, rinse in HOT water and allow to air dry. Don’t hand dry. Or of course, use your dishwasher.
Directions

1. Freshly wash jars in hot soapy water. Rinse and set aside to drain. Not necessary to sterilize jars that will be processed at least 10 minutes.
2. Wash tomatoes in cool water. Set aside to drain.
3. Heat a big pot of water to boiling for blanching tomatoes.
4. Fill your canner with clean water and begin heating it to a boil. Make sure there’s a rack on the bottom to prevent the jars from touching the bottom during processing. Set a clean thick tea towel on the counter beside the canner to receive the HOT finished jars from the canner.
5. Wash and core the tomatoes. Cut an ‘X’ on the bottom. Set aside.
6. Prepare a sink or plastic tub with ice water – deep enough for all the tomatoes to fit and be cooled.
7. In stages (no more than 8-10 tomatoes at a time), drop scored tomatoes into the boiling water and let sit for a minute or two, until the skins begin to split.
8. Remove tomatoes from boiling water and immediately drop into ice bath to arrest the cooking process.
9. When tomatoes are cooled, peel them with a sharp knife. The skins should slip off easily. (SAVE THE SKINS – see below)
10. Cut the tomatoes into halves or quarters (depending how big they are).
11. Pack cut tomatoes into freshly cleaned jars, pushing down with your hand, to make the tomato juice come to the surface. You’re goal is to cover the tomatoes with liquid from the tomatoes. Leave 1 inch (2 cm) headspace.
12. Add 2 Tablespoons of lemon juice and 1 teaspoon of salt to each quart. Half that amount for each pint.
13. Remove air bubbles with a long table knife. Wipe the top of your jars with a clean hot cloth to ensure they are perfectly clean. Put a clean lid on the jar, and tighten moderately. (Don’t tighten the lid excessively.)
14. Use jar lifter to slowly lower jars into hot water. Bring water to a boil, or if its already boiled, return to a rolling boil. Jars should be covered by water at least an inch. I usually shoot for two inches of coverage.
15. Begin timing once water has returned to a full rolling boil.
40 minutes for pint jars, 45 minutes to quart jars. If water is boiling violently, reduce the heat but keep it rolling.
16. When the timer goes off, remove jars slowly to the prepared clean tea towel. Set jars on the towel, keeping some air space between them. Loosely cover the jars with a thin clean tea towel. Allow to cool undisturbed for at least 12 hours.
17. Canning jars seal because heating expands the air and food inside, forcing excess air out. Subsequent cooling contracts the contents to create a strong vacuum lock.
When the sealing has completed you hear a gentle ‘ping’ as the vacuum pulls the lid down. It’s music to a canner’s ears.
18. When completely cooled, wipe jars with a hot wet cloth and label the lid with date and ingredients.
Once you’ll learned how to peel tomatoes, and how to process them – you can apply the same principles to canning PEACHES, APRICOTS, PEARS, PLUMS, RHUBARB AND APPLES with slight variances that you can work around with a little confidence.
ie:
– Peaches are peeled the same way (by blanching). Be sure to cool immediately after removing from boiling water. Unlike tomatoes however, you’ll add syrup of your own make (light, medium or heavy syrup – your choice).
– Apricots don’t get peeled and neither do plums. Both take a syrup.
– Pears and apples get pealed the same way. Apples often get canned as a sauce. Personally I don’t like this kind of apple sauce. I’d rather make it fresh, and since apples are available all winter long, its easy to do.
– All fruits (including rhubarb) are best cold-packed) when canning.
The Sealing Process:
Heating: As the jars process in a boiling water or pressure canner, the air and food inside heat up and expand.
Venting: This expansion pushes the extra air and steam out from under the flat metal lid. This is why the outer band should only be “fingertip tight” – so the trapped air can escape easily.
Cooling: When you remove the hot jars from the water and let them cool, the food and remaining air inside contract and shrink.
Vacuum Lock: This contraction pulls the lid down tightly against the jar rim. The flexible sealing compound (plastisol) on the flat lid hardens into an airtight vacuum seal.
Roasted Tomatoes
THIS is my favourite way to can tomatoes, and its my favourite way of eating canned tomatoes.
instruction with pictures coming soon
Roasted Tomato Sauce
I make my tomato sauce with roasted tomatoes. Once you’ve tried it, you’ll never go back to the old way of boiling on the stove top.
The instructions are pretty simple and easy to customize.
Put them into your biggest pyrex cake pan, or roaster in the oven at 350F.
OR if you’re making a LOT, use an electric roaster set to 350F. Be creative, use what you have.
15 lb Roma tomatoes chopped
1 T salt and 1 T coarsely ground pepper
dried oregano (big handful)
dried basil (slightly less of a handful)
dried thyme (slightly less than the basil)
1 heaping T garlic salt
Don’t can overripe tomatoes. Eat those today. If you have more than you can eat, make tomato soup for supper tonight and give a jar to your neighbour.
Or use them to make tomato paste and then have pizza for supper tomorrow. But don’t can them because the sugar has begun displacing the acid.

Step 1
Wash tomatoes.
Step 2
Remove blossom/core end.
Chop tomatoes and put them in a large baking pan or roaster at 350F.
Step 3
Be patient. This is gonna take a long time. 2-3 hours. Maybe even more if you have a lot. I’ve got 15 pounds in this roaster.
Stir every 15 minutes or so to keep from scorching.
Step 4
2 hours in. Add salt and pepper.
I added 1 Tablespoon of each for 15 pounds of tomatoes. If you’re doing less in the oven, start with 1 teaspoon salt and 1 teaspoon pepper. Easier to add more later than to take it away lol.
Repeat step 3.


Step 5
Add seasoning of your choice. For this amount, I added
1 big handful of dried oregano
1 medium handful of dried basil
1 slightly smaller handful of dried thyme
a heaping tablespoon of homemade Garlic Salt2
Step 6
I like to add a little tomato powder to most tomato recipes. It adds more Tomato-Zing, and helps to thicken a little. In its place, you can add tomato paste if you have it. Otherwise don’t worry about it.
INSERT:
If you’re planning to can this tomato sauce, get your canner filled with water and on the stove. Bring it to a boil over high heat. Make sure you’ve got a rack in the bottom to prevent the jars from being sitting directly on the bottom.
Have your jars ready with lids and rings handy.
You’ll be hot-packing the sauce so you don’t want to fill the jars until they’re ready to go into hot water. This simply means that you’re packing HOT sauce into the jar, and putting the jar into a HOT water bath canner. Hopefully both jar and water will be in a similar range of HOT.
Step 7
Stir it all in and be patient a little while longer. When most of the water is gone, and the texture is looking ‘saucey’, you’re just about done. At this point, I take about 1/3 of the sauce and zip-zip it for a couple of seconds in the blender, then mix back in.
You can puree all or nothing, depending on your personal preferences. I like the sauce, but I also like some texture.
NOTE: If I intend to can the sauce, I do not add onion or garlic cloves, or any type of vegetable. The only thing I add is seasoning. I don’t want to compromise high acid tomatoes with low acid vegetables. THIS IS VERY IMPORTANT. If you add low acid ingredients, the sauce must be canned in a pressure canner. There are acceptable amounts of certain vegetables that can be added, but generally I choose to err on the side of caution, and avoid adding them – except for seasoning.
For more information, click the image below.

Step 8
Add lemon juice to the finished sauce. You’re going to have to estimate unless you want to measure it out. About 1/4 cup lemon juice for 2 quarts (4 pints or 8 cups) of sauce. Better to put in a little more than necessary, than to be under. Stir to distribute the lemon juice.
By the time you’re to this point, hopefully your water is ready to receive your jars.

Step 9
Using a wide mouth funnel, and using a big scoop begin measuring out into jars. 2 cups into pint jars, 4 cups into quart jars. Leave about 2 cm head space (just under an inch). Adjust by taking away a spoon here or there, or With a clean, hot, wet dishcloth wipe the jar rim to ensure its perfectly clean. Put the lid on, screw the ring on to hold the lid down – snug but not super tight.

Step 10
Put the jars into the canner with almost boiling water.
Make sure there is enough water to cover the highest jar by 1-2 inches of water.
Turn the heat up and start watching for it to reach a FULL rolling boil. When it does, set the timer for 40 minutes for pints or 45 minutes for quarts.
Don’t go too far away. Keep an eye on the boiling water. If its too violent, the jars may bang together – adjust the heat down a bit. If its not boiling completely, turn the heat up and start your timer over again.

Step 11
When the timer goes off, the sauce is finished. Turn the heat off, and one by one remove the jars to set on a clean, thick tea towel. Leave a little space between the jars to cool slowly. I usually drape a clean tea towel over top to ensure they down cool down too quickly.
GOOD JOB! Now you can start listening for that wonderful ‘ping’ sound telling you the jars sealed.
Let the jars sit there at least 12 hours. Then label and put away.
Pesto Mayo
disclaimer: there are no tomatoes in this recipe. BUT it is the foundation for all things good about September eating-of-tomatoes.
2 Tablespoons mayoanaise
2-3 Tablespoons pesto (you decide)
stir to mix.
Use on toasted bread that you are going to lay thick slices of fresh tomato on. Salt and pepper. ENJOY.
This is what Augusts and Septembers are all about.
Salsa
“Salsa is America’s #1 condiment. This popularity has extended to home food preservers who want to make use of a seasonal harvest of garden-grown tomatoes and vegetables. Most salsa recipes mix low-acid foods, such as onions, green peppers, and jalapeño peppers, with acid foods, such as tomatoes. Currently the USDA and the National Center for Home Food Preservation recommends that a boiling water canning process be used only for research-tested salsa recipes that provide evidence of safe acidification to inhibit Clostridium botulinum growth. Only a few such research-tested salsa recipes are available and these must be followed with little deviation.”
For those who want to safely can their homemade Salsa, there are two options:
1. Use a very specific recipe that has been tested for PH3 https://nchfp.uga.edu/papers/2004/04ift-tomatosalsaPoster_combined.html
2. Use your own favourite recipe and go straight to canning with pressure canner.
Sarah’s Salsa
This is my daughter Sarah’s long standing salsa recipe. She takes it from a favourite book of ours – Patti Shenfield’s “Flavors of Home” published 1994.
Sarah has tweaked it a little over the years and she’s flexible with what she has on hand.
15 lb tomatoes, chopped (5 quarts / litres / 20 cups)
5 fresh jalapeno peppers seeded and chopped (save the seed from 2)
10 cups chopped white or yellow onions
2 large green peppers finely chopped
2 cups white vinegar (higher acid than other varieties)
1 cup tomato powder or 12 ounces tomato paste
1 Tablespoon salt (never use iodized table salt for canning)
6-8 large garlic cloves minced
1/2 cup white sugar
1 Tablespoon freshly ground pepper
1 teaspoon cumin
2 teaspoons cayenne pepper
Prepare 14 pint jars or 7 quart jars by washing well in HOT water, rinsing well in HOT water and sitting to drain. Don’t hand dry, just let them air dry.
Blanch and peel all tomatoes using the system outlined above. (Remember to save the skins to dehydrate later.)
Wash, core and chop the tomatoes, placing in a LARGE pot.
Using gloves, dice jalapeno peppers.
Add the seeds of 2 or 3 jalapeno peppers to pot (discarding the rest). Unless you like more heat, then add all the seeds.
Add remaining ingredients, and bring to a boil. Simmer until vegetables are tender (about 15 minutes).
Ladle into hot jars and process in PRESSURE CANNER at 10 pounds for 30 minutes.
~ note ~
Because of the ‘other’ non-acid ingredients, this combination-food MUST be processed in a pressure canner. I know that’s not convenient and I know you may not have a pressure canner, and yes, I know they’re expensive. Sorry about all that inconvenience, but let me clarify:
* because of the large amounts of onions, peppers and garlic used in this recipe – THIS IS A PRESSURE CANNING RECIPE.
In my “reliable source book”, for onions it recommends 10 lb pressure and 30 minutes for quarts.
For peppers, that same source has me using 5 lb pressure.
I take the highest recommended pressure for the additional foods I’ve added – 10 lb for 30 minutes, and apply it.
- If one eliminates those non-acid foods, electing to add them later AFTER canning but before serving, then we would be completely in the safe zone for hot-water-bath canning.
Tomato Juice
Use only the freshest, juiciest tomatoes in your garden for juice. This is one of those times that meaty tomatoes like Romas are not the best choice.
Whichever method you use, wash and core the tomatoes, removing any ugly spots.
Don’t use a steam juicer for tomatoes.

method 1 – if you have a fresh juicer
Once you’ve juiced it, you can freeze the juice or you can CAN it in jars just like tomatoes – adding 1 T lemon juice for a pint or 2 T lemon juice for a quart. See the suggestion for seasoning in method 2.
method 2 – if you do not have a fresh juicer
Chop the tomatoes coarsely.
Add to a large stock pot and add a cup of water to initiate the ‘juicing’.
Bring the pot to a boil and simmer until the tomatoes are softened but not mushy. Mash with potato masher.
Strain the tomatoes through a fine sieve to remove seeds, skins and extra pulp. You can add this pulp to tomato sauce or put it in the fridge to use in dinner tomorrow.
Measure the strained juice and return to the pot.
For each quart (4 cups) of juice, add 1 T lemon juice, plus your choice of seasoning:
1 teaspoon pepper
1 teaspoon celery salt or garlic salt or onion salt or dill salt
– if you’re not using any seasoned salt, add 1 teaspoon of kosher salt
Season to YOUR taste. Stir to dissolve seasonings.
At this point you can pour it into a pitcher and refrigerate it for use in the next couple of days. Or you can process it in a hot water bath canner.
to can:
Heat the seasoned juice to almost boiling. Pour hot juice into clean and prepared quart jars.
Leave the appropriate head space of a 1/2 inch or so. Wipe the jar rim with clean wet cloth, put the lid on, put the ring on – nice and snug but not too tight (air must be able to escape in the process of boiling).
Same timing as for canned tomatoes: 45 minutes for a quart, 40 minutes for a pint. Remember: don’t start timing till the water has returned to a full rolling boil.
method 3 –
My preferred – unless I have so many tomatoes that I’m desperate to use up.
I most often choose to make tomato juice from the tomato powder and cold water.
I use a ratio of 1:8-10
ie: 2 T. tomato powder + 1 cup (16 T.) COLD water
Stir to completely emulsify powder. Season as you choose and ENJOY!
optional: add your choice of seasoning ie: onion powder, sugar, salt, pepper, to taste
click this link to see other ways of using tomato powder
Tomato Butter
A savoury combination of roasted small tomatoes, garlic, basil and butter! Use in place of traditional garlic butter. Spread on toast to serve with eggs, saute vegetables in it, top a quick pasta dish, even spread on your grilled corn on the cob!

It is so-so-so easy to make; start with this basic recipe and then customize to your hearts content. I like to add pepper. A lot of pepper. Like a tablespoon of coarsely crushed pepper. Be brave, be YOU.

Basic recipe:
1 pint (2 cups) cherry tomatoes
2 Tablespoons olive oil
Broil tomatoes till nicely charred. Could take up to 10 minutes – but don’t leave the kitchen. Peek at it every couple minutes. When they start to char, its a fine line to ‘burnt’.
2 garlic cloves
handful of fresh basil
pinch of salt
black pepper – I like coarsely ground and I use a lot. So you do you, measure with your heart. 1 teaspoon – 1 tablespoon
1 cup butter at room temperature (1/2 pound)

Process the whole combination till smooth. Pour into a wide mouth jar and store in the fridge. Can be frozen.

- Tip: in the winter when you don’t have fresh tomatoes, use sundried tomatoes and dried herbs to make tomato butter.
Tomato Jam
Tomato jam was one of those “surprises” that you need to be open minded for. The word “jam” sometimes puts people off, but get over it. It was never intended to be part of a peanut butter and jam sandwich. It is something far different than that; a rich balance of sweet, savoury, complex and tangy flavours.

It is made by slow-cooking ripe tomatoes with sugar, vinegar and warm spices. The slow simmer breaks down the tomatoes into a gooey, sticky and spreadable ‘jam’.
It raises the bar on the traditional BLT, and adds pizzaz to a normal grilled cheese sandwich. A favourite way for us to eat it, is spread over flat bread, put cheese over top and set under the broiler for a couple minutes. Serve with crackers and cream cheese, on a hamburger (it’s the new ketchup), bagels n cream cheese, on top of frittata or quiche, with cheese, on toasted whole what bred with fried eggs, with butter on fresh sourdough bread or on your next charcuterie board.
Basic Recipe:
4-5 quarts of chopped Roma tomatoes (16-20 cups)
1 cup brown sugar
1 cup white vinegar

Add all ingredients together in saucepan over medium heat, or roasting pan in the oven at 350F. Expect it to take 2-3 hours minimum. Stir frequently to prevent scorching. Lower heat as it thickens. Continue to stir frequently as it thickens.
You’ll know its finished when you’ll be able to slide a spoon through it and see the bottom of the pot distinctly before it starts to slowly seep together.
If you intend to can it, I recommend using 1/2 pint jars (250 ml).
Spoon hot jam into jars, affix lid and ring and slowly submerge into a boiling hot water bath.
Process for 10 minutes (as you would any other kind of hot jam). Remember not to start timing until the water has returned to a boil.
Enjoy!
Dehydrating Tomatoes
Properly dehydrated food can retain as high as 80% original nutritional value.
Optimal shelf life is impossible to gage as there are too many factors to consider, like: was it completely dry when you put it into the jar? Storage should be a little on the cool side if possible, and in the dark as much as possible. But if all the conditions are right, you can reasonably expect up to two years.
*Tip: I know you can have dehydrated food stored for YEARS! But just because it doesn’t look disgusting, doesn’t mean there’s any nutritional value in it. Try to keep your ‘stored’ food optimum by rotating it, by EATING it!

You can use any kind of tomato you have, but I find that a ‘meatier’ like a Roma or Romanian Giant work the best because they have less ‘water’ in them, and they hold their body better. But just use what you have. If you’re drying cherry tomatoes, either cut in half or at least puncture them with a knife. The skin protects them well and they’ll take forever to dry otherwise.
*Tip: If your dehydrator has screens for the rack, you’ll want to use them for tomatoes. Not the end of the world if you don’t, they’re just easier to remove from a screen.
directions:
Wash tomatoes and core.
Slice into 1/4 inch (1/2 cm) slices and lay onto the dehydrator rack. If you slice too thinly they’ll dry paper thin and will be very difficult to remove from the rack or screen.
Dry at medium heat. Expect them to take several hours – so many factors will affect the timing: the water level of the tomatoes, the humidity in the air that day, the heat and fan of your dehydrator etc.
Every hour or so, rotate the racks – moving the bottom one to the top. Rotating helps keep the drying even. If you have to go out for a few hours, simply turn the dehydrator off and restart it when you get home.
When you can see them starting to dry, its helpful to turn each one over by hand, and even move some to other screens to fill in the gaps created by them shrinking. This enables you to another rack of fresh tomatoes if you’ve got more waiting for room.
They will not all be ready at the same time. You’ll know they’re completely dry by feel. They should be leathery or even crispy. No soft spots. If in doubt, leave them a little longer. Remove the ones you deem dry and put into an airtight container with a lid. Label your jar with the date.
Continue to add to your jar till all are done. Easy Peasy!
TOMATO SKINS
I know right? Who ever heard of such a thing?
Did you know that Tomato Skins contain a high concentration of the tomato’s key nutrients!?

MORE ANTIOXIDANTS: Up to 98% of the flavonoids found in tomatoes are located IN THE SKIN. Flavonoids are the phytonutrients that give many fruits, vegetables, and flowers their vibrant colours and offer antioxidant and anti-inflammatory benefits.
HIGH LYCOPENE: The tomato skins hold high levels of lycopene, a powerful compound that helps fight cell damage and may lower the risk of heart disease and certain cancers.
DIETARY FIBRE: Leaving the skin on adds extra fiber to your diet, which aids digestion.
BETTER TEXTURE IN COOKING: Unpeeled tomatoes break down more slowly in sauces, adding richness and better body to cooked dishes.
Next time you’re peeling tomatoes to can them, don’t toss the peels into the compost. Save them, and stick them in the dehydrator, or slow bake them in your oven at 250 degrees F until they’re crispy.
They’re quick to dry (by quick I still mean a few hours lol). Once they’re dry powder them. Use in EVERYTHING TOMATO: soups, stews, sauces, up your salsa or bruschetta, even add some to your meatloaf!
Tomato Powder
Put dehydrated tomatoes into a dry blender in small amounts at a time and turn onto high. (a high powered blender is best) Process till they’re powdered. That’s all there is to it. When the powder gets deep enough that its not receiving any more, stop the blender and pour it into a clean air tight container and put the lid on. Repeat another couple of times till you get as much as you want.

You will inadvertently leave quite a bit of tomato powder residue on the inside of your blender. Juice add a little water and blend again. Tomato Juice! Drink it.
*Hint: tomato powder will in time begin to compress and get ‘chunky’ from the moisture in the air. For that purpose, I usually only make a cup or two at a time. No problem when the powder does get chunky, simply scrape it with a fork to loosen. This ‘compacting’ is unavoidable without anti-caking agents, so live with it.
I also powder up the dehydrated tomato skins. It’s really the only way I can think to use them. They’re super easy to ‘puree’ in a high speed blender, and they remain nice and fluffy – not compressing like the tomato powder itself.
For this reason, I often mix the two together in a jar and use them that way.

Pickled Tomatoes
Pickled cherry tomatoes are new to me this year. If you know me well, you’ll know that I make a point of trying at least TWO New things in the garden every year, and I also like to try new ways of using them in my kitchen and of preserving them. This year, one of my ‘new’ things is the whole idea of pickled tomatoes! It literally blows my mind. And they are surprisingly delicious.
Canning pickled cherry tomatoes is not only a delicious way to preserve the harvest, but it adds a wonderful tangy flavour to charcuterie boards, salads, sandwiches and so much more. They are literally bursting with juicy sweetness and a zesty vinegar kick.
method 1 – short term, into the fridge we go
fresh pickled tomatoes to consume this week – 1 quart
4 cups of a mixture of different cherry tomatoes (just for colour)
1/4 T whole black peppercorns
2 cloves garlic sliced
2 or 3 sprigs of fresh herbs: basil, rosemary or thyme
2 teaspoons sugar
1.5 teaspoon salt
Preparing the Tomatoes:
Wash the tomatoes, removing any green stems
Use a toothpick or skewer to poke a small hole in each tomato.
This step lets the hot liquid get inside the tomato so it pickles evenly.
Put peppercorns and garlic in the bottom of wide mouth quart jar. Put tomatoes into jar, tucking sprigs of fresh herbs along the sides. Pack tightly. Set aside.
Preparing the Brine:
1 cup water
1 cup white vinegar
1.5 teaspoons pickling salt
2 teaspoons sugar
dash red pepper flakes
Stir to dissolve sugar, heat liquid till almost boiling.
Pour hot brine over the tomatoes. Put lid on and wait for it to cool. Store jar in fridge for at least 24 hours. Best after 48 hours. Eat within a few days.

method 2 – longer storage, canned
Preparing the Tomatoes for two pints:
4 cups cherry tomatoes
few peppercorns for each pint
2 cloves of garlic sliced. One for each jar
1 sprig of fresh herb in each jar (my personal favourite with tomatoes is BASIL)
Same as for above – wash the tomatoes, removing blossom end.
Use a toothpick or skewer to poke a small hole in each tomato.
Preparing the Brine:
2 cups white vinegar
2 cups water
1 tsp pickling salt
2 tsp sugar
Heat brine on stove and stir to dissolve salt and sugar.
Packing the Jar
Put peppercorns and garlic in the bottom of two wide mouth pint jars. Pack tomatoes tightly into jar, tucking one or two sprigs of fresh herbs along the sides.
(fresh herbs: rosemary, thyme, basil, dill . . . your choice)
Pour the hot pickling liquid over the tomatoes, leaving ½ inch of headspace.
Remove any air bubbles by inserting a table knife along side.
With clean cloth – wipe the jar rims, then put the lids and bands on finger tight.
(tight enough for the lid to stay in place, not too tight for the air to escape during processing)
Place the filled jars into the canner (you’ve got a rack in there right?). Make sure the water covers the jars by at LEAST an inch. When the canning water returns to a boil then start timing. Process the pint jars for 10 minutes, making sure the water covers the jars by at least one inch. Ensure water stays at a rolling boil.
When the time is up, turn off the heat, remove the jars to a folded kitchen towel or rack (prevent them from touching the cool counter top). Throw a tea towel or cloth napkin over top while cooling. Once the jars have sealed, let them sit a good 12 hours or more, before labelling them and putting them away.
ENJOY!
warmly,
Cindy
footnotes:
- National Center for Home Food Preservation ↩︎
- my cousin Kim’s Garlic Salt, made from garlic she dried ↩︎
- What is pH? pH is a numerical measure of how acidic or alkaline (basic) a water-based solution is.
The pH Scale:
Range: The scale normally runs from 0 to 14.
Neutral: A pH of 7 is neutral, meaning it is neither acidic nor basic (like pure water).
Acidic: A pH below 7 is acidic. Lower numbers mean higher acidity (like lemon juice or vinegar).
Basic (Alkaline): A pH above 7 is basic. Higher numbers mean higher alkalinity (like soap or bleach).
What does this mean to me? If you looking for a SAFE level of acid in the food you home can, then pH MATTERS! Anything lower than a pH value of 4.6 (4.4 is better) is considered safe to can in a hot water bath – the lower the better.
Why a low pH Matters
Stops Botulism: Boiling water only reaches 212°F (100°C), which does not kill dangerous Clostridium botulinum spores.
Inhibits Growth: High acid levels with a pH of 4.6 or less stop these spores from growing and producing deadly toxins.
Safe Foods: High-acid foods like fruits, jams, jellies, and properly pickled vegetables fit this safe zone naturally or with added vinegar.
Managing Borderline Foods
Low-Acid Risk: Foods with a pH of 4.7 or higher (like most vegetables, meat, and seafood) are low in acid and require a pressure canner.
Adjusting Acid: Borderline foods like tomatoes need added lemon juice or citric acid to safely lower the pH to 4.6 or below for water bath processing. ↩︎


