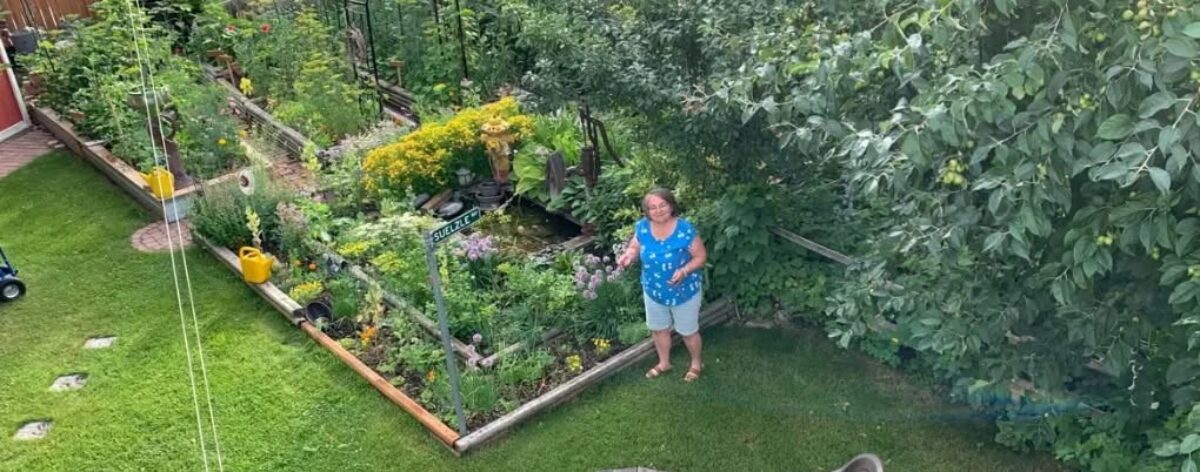
7 Things You Can Do to Help Mitigate Heavy Rain Damage in Your Garden

1. Stay Off Waterlogged Soil
Avoid unnecessary walking on saturated ground. Wet soil compacts very easily, which reduces airflow and makes conditions even harder on plant roots.

2. Improve Drainage (Gently!)
Use a garden fork to lightly puncture the soil, allowing oxygen to reach the roots. If possible, dig small trenches in your pathways to help move water away. Otherwise, disturb the soil as little as possible while it’s still wet.

3. Trim and Tidy Plants
Remove any damaged, yellowing, or diseased foliage. This helps prevent the spread of fungal issues and allows plants to redirect energy into healthy growth.

4. Add Straw Mulch
Mulch with straw to keep leaves from drooping into the mud. Plant leaves should never sit directly on wet soil—it’s an open invitation for disease.

5. Support Heavy Plants
Stake or tie up plants that are drooping or top-heavy. Rain adds weight, and unsupported plants can easily bend or break.

6. Replenish Lost Nutrients
After prolonged rain, it’s almost guaranteed that nutrients—especially nitrogen—have been leached from the soil. Yellowing leaves are a common sign.
I’ve used blood meal at home with good results. It’s a fast-acting, organic nitrogen source that promotes lush, green growth. If it is leaf growth that you’re after, blood meal / nitrogen will help. Not being aware of that, in my younger days I used blood meal too freely one year on tomatoes. The result was big, gorgeous tomato plants that were of fairy tale proportions (Jack and the Beanstalk), but not a single tomato on any of them. It took me years to put that all together and realize what I had done wrong. * It is not for fruiting or rooting crops. It is for LEAFY crops.

organic blood meal fertilizer

* Remember: a little goes a long way—too much can burn your plants. 1

7. Get Ahead of Pests (Especially Slugs!)
Wet conditions are a paradise for slugs2… unfortunately. Set out traps and consider natural deterrents like crushed eggshells around your plants to help protect them.

Gardeners, this too shall pass. Maybe quicker than we might imagine. And with it, perhaps the best learning experience we’ll ever have. There is no end to learning. Keep it up.

I’d love to hear your suggestions. Please leave them in a comment.

Warmly,

Cindy Suelzle

Footnotes:

  1. BLOODMEAL:
    To apply blood meal (it’s a black powder) to already established plants, use 1 teaspoon per plant, working it into the top 2 inches. Water it in. The water will help activate the nutrients and prevent the attraction of animals. 
    I take about a cup of blood meal and mix it into a bucket of good, dry soil.  Then I add a handful of soil to the plants I want to treat.  Try to prevent direct contact with stem and leaves, as it could cause fertilizer burn.
    Blood meal is best for leafy greens like lettuce, spinach, kale and cabbage, swiss chard, Asian greens, etc, and nitrogen-loving heavy feeders like corn and squash. 

    Normally, it’s not recommended for tomatoes, but after a month or record rainfall, my tomatoes had yellow leaves, so I took a chance.  Too much may delay fruit production, just so y’know. …..

    Blood meal breaks down and washes away, so be prepared to reapply in about 6 weeks.
    *Caution: don’t overdo it, too much nitrogen will cause “nitrogen burn”, yellowing or browning leaves. You’ll cause more damage than you’re solving by far.  Avoid using it late in the summer, as it promotes new growth – not what you want when plants are trying to prepare for end-of-season. ↩︎
  2. SLUGS:
    Rain creates a perfect damp environment for slugs to thrive and hunt for young plants.
    Identifying Slug Damage
    Slugs leave behind distinct clues, especially when plants are wet:
    Irregular holes: Ragged, chewed edges on leaves and stems.
    Slimy trails: Silvery, shiny mucus trails left on foliage or pathways as they move.
    Vulnerable plants: Tender new seedlings, hostas, marigolds, and leafy greens are primary targets.

    Effective Control Methods
    Because rain washes away powdery deterrents like diatomaceous earth, you can rely on these highly effective post-rain tactics:
    Board Traps: Place a flat piece of wood or an old tile directly on the soil near your plants or even leaning against the edge or base of your raised bed. Leave it there over night and into the next day. Slugs love to hide under these cool, damp spaces during the day. Simply flip them over in the morning and dispose of them in a pail of soapy water.
    Liquid Traps: Slugs are highly attracted to yeast. Fill shallow containers with cheap beer or a mixture of 1 cup flour, 2 cups water, and standard yeast. Sink them so the lip sits even with the soil.
    Handpicking: Blech. My least favourite. Go out at dusk or early morning with a flashlight and pluck them off your plants by hand. Drop them into a bucket of soapy water.
    Physical Barriers: rough, dry or sharp surfaces like crushed egg shells around the base of each susceptible plant. Slugs cannot traverse these sharp, ‘crunchy’ surfaces. While it may protect the plant, it doesn’t get rid of your slugs unfortunately, so best to use egg shells in addition to a trap idea. ↩︎

Having a Successful Garden after a month of Record Rainfall – can you save it?

Even if you’re a first-time gardener, you’ve likely discovered by now that gardening is not simply a matter of planting seeds and watering them. Nor is it as straightforward as planting in the spring and harvesting in the fall. Gardening asks for patience, attention, and a willingness to adapt—especially when nature has plans of its own.

This year has certainly proven that point. Edmonton has just experienced the wettest June in recorded history. The previous record, set in 1914, saw 217 millimetres of rainfall. That record was surpassed well before the end of the month, reaching 262 millimetres by Sunday, June 28—and that doesn’t even include the additional rain that fell on June 29 and 30. (At the time of writing, the evening of June 30, the final total is still climbing.)

While I’m sure that one day we’ll look back on this and even brag about it, right now it’s a record we would have been just as happy not to set. Everyone knows someone whose basement has flooded. Newly planted trees are quite literally floating. And it has created enormous challenges for farmers and gardeners of every kind.

Challenges We’re Seeing in the Garden:

Root Suffocation and Rot
Edmonton’s clay-rich soil drains slowly. When water lingers, it displaces oxygen in the soil, causing roots to literally suffocate and, in many cases, develop rot.

Nutrient Loss
At best, excessive rain leaches away essential nutrients—especially nitrogen—leaving plants looking pale, weak, and stunted.

Fungal and Bacterial Diseases
Constant moisture creates the perfect environment for disease. Splashing soil can carry fungal spores onto lower leaves, leading to issues like powdery mildew, black spot, and various blights.

Pest Surges when the flood dissipates
Beyond the mosquitoes we’re all battling, wet conditions also invite an increase in slugs and snails, which can quickly damage tender plants. 

Every experience is an opportunity to learn—especially the ones we wish we never had.

Here’s a foundational truth: we will never become good gardeners if the weather is always perfect. And the next truth is just as important: the weather is never perfect.

When I managed our family businesses, and later taught at annual industry conventions, I encouraged people to ask themselves three simple questions after every event—big or small. I’ve found these questions helpful in every area of life as a way to reflect, learn from both good choices and mistakes, from successes and failures, and to continually improve moving forward::

  1. What went well?
  2. What could I have done better?
  3. What did I learn?

So let’s bring these questions into the garden:

  1. Under the circumstances, what am I glad I did? What was working?
  2. Is there something I could have done that would have made this better? What was it?
  3. Where do I go from here? What did I learn—and what will I act on to ensure a better outcome next time?

From this month’s excessive rain, there is much we can take forward—not just for the rest of this season, but for all our gardening seasons to come.

If you and I have ever talked gardening, you’ve probably heard me mention no-till gardening. If you were to look at my plot in the community garden, you’d notice one thing right away: lots of mulch. I admit, in the beginning (several years ago), the appearance took some getting used to. Like most, I was used to seeing the standard black soil. Nice, clean black soil, in a perfectly flat garden. Now I try to have as little bare soil showing through as possible, preferring a generous layer of mulch and no flat ground.
I sculpt out rows that sit noticeably higher than the surrounding ground, using the excess soil from paths that are set much lower. You’d also see that my rows are mulched with straw, while the paths are deeply covered with wood chips.

forgive my very amateur attempt to illustrate this lol

Though this method of gardening is often promoted as protection against drought, it works just as effectively in the opposite extreme.

By keeping the paths lower than the rows, excess water is naturally diverted into these “ditches,” moving it safely away from tender plants growing in raised mounds. These rows—often planted with multiple lines of vegetables—stay elevated and better drained.

Heavy mulching plays a dual role. Straw on the rows helps retain moisture when it’s needed, while wood chips in the paths encourage water to move downward into the soil, where it remains accessible to deep, searching roots. At the same time, both types of mulch help prevent rapid evaporation when the sun finally returns.


Advantages of Raised Rows

  1. Slightly Warmer Soil – Ideal for seed germination, especially in early spring.
  2. Improved Drainage – Plants sit above water collection areas and are never left standing in puddles.
  3. Healthy Soil Structure – Undisturbed soil supports a thriving ecosystem, creating natural air pockets and allowing moisture to move freely.

Advantages of Straw Mulch on Rows

  1. Temperature Regulation – Insulates soil, keeping it cooler in heat and warmer in cold.
  2. Moisture Retention – Acts like a “lid” on the soil, reducing evaporation.
  3. Weed Suppression – About 6 inches is ideal, but in smaller urban gardens, that is sometimes not possible. Less when neccessary, still makes a significant difference. Use as much as you can.
  4. Soil Protection – Prevents “sunburn”1 of the soil and protects the living ecosystem beneath. Yes, ‘sunburn for soil’ is a real thing. See the footnote below.
  5. Builds Soil Over Time – As it breaks down, it becomes compost, creating rich, healthy loam.

Tip: Add straw each fall to build a living, breathing soil system year after year.


Advantages of Wood Chip Mulch in Paths

  1. Water Management – Provides a place for excess water to go, allowing it to spread out and soak in—away from plants, but still accessible to roots.
  2. Moisture Conservation – In dry conditions, wood chips help retain water by reducing evaporation.

At Sakaw Garden, we try to keep extra straw on hand for anyone who would like to use it. Personally, I prefer chopped straw—especially in smaller garden spaces, where it’s easier to handle and apply evenly.

How do we chop it? The old-fashioned way. Dan and I have brought a lawn mower down to the garden, spread out a few bales in the field outside the fence (before the dandelions flowered), and mowed over them. We gathered the chopped straw into a wheelbarrow and brought it into the garden for use. Pretty simple and straightforward.

The first time we did this, Dan mowed many bales and left a generous pile just outside the east fence for others to use. These days, when all I need is to top up, I’ll often just bring a large bag from home that we’ve already chopped.

I strongly and wholeheartedly recommend the no-till method: raised rows, deep paths, and plenty of mulch. It’s a simple, resilient system that works with nature—whether we’re facing drought… or the wettest June on record or something in between.

These three garden plots are side by side in the community garden after a month of record-making rainfall.
All are adversely affected by the rain, but while plots 1 and 3 are flooded, the middle one is not. The difference?
From time to time, over the last couple of years, Gardener #2 has raised her wooden frame just enough to accommodate the additional material she’s been adding: compost, soil and mulch. She’s customized the spirit of no-till gardening and applied it to her 10×10 foot plot. She has a single recessed path in the middle from which she can reach her planted areas. She’s mulched it with straw, diverting all excess water into it. Meanwhile, she’s been gradually adding compost to her growing areas, resulting a garden that is winning in the Edmonton rain-wars of June 2026.

This quote from Maya Angelou is in two prominent spots in my home as a constant reminder to me. It is my personal mantra.

“Do the Best you can until you know better. Then when you know better, DO Better.”

I find its message both liberating and motivating at the same time. The principle is simple: to forgive myself for past mistakes, recognizing that I did the best I knew how at the time—while gently encouraging myself to learn from them and do better moving forward.

Gardeners, this too shall pass. Maybe quicker than we might imagine at the moment. And with it, perhaps the best learning experience we’ll ever have will pass too. Let’s not waste this frustrating experience by NOT learning from it.
There is no end to learning. Commit to ‘keep on keeping on’.

Warmly

Cindy Suelzle

Footnotes:

  1. SUNBURN: The sun’s intense UV rays and heat can heavily degrade soil. In Alberta’s usual dry climate, harsh sunlight and hot temperatures can bake topsoil, kill vital microorganisms, and cause rapid moisture evaporation, which turns exposed dirt into cracked, dusty crust.
    To prevent sun and heat damage to your Alberta soil, use the following actionable tips:
    Apply a Thick Layer of Mulch: Covering your soil with a minimum of 3 inches of organic mulch (like wood chips, bark, or straw) shields it from direct sunlight, insulates it against extreme temperature swings, and protects it from rapid evaporation.
    Add Organic Matter: Incorporate compost into your flowerbeds and vegetable gardens. This improves soil structure and water retention, allowing it to better handle our ‘usual’ blazing prairie sun.
    Water Effectively: By mulching, you will eliminate the need for watering as frequently as you did in the past, but when you do, water your soil early in the morning. This minimizes evaporation and ensures that the moisture absorbs deep into the soil before the peak afternoon heat hits. ↩︎

Soil vs Dirt: Enhancing Soil Quality

Healthy soil produces healthy, strong plants. It’s simple math.
It contains optimal nutrition – rich in microorganisms (bacteria, fungi, and earthworms) that break down organic matter into nutrients that plants can easily absorb.
Healthy soil builds immunity in plants, making them naturally more disease and pest-resistant.
It provides essential air pockets for roots to breathe and grow strong (proper aeration).
Healthy, nutritious soil results in healthy, nutritious vegetables.

What is the difference between SOIL and DIRT?
Soil is a complex ecosystem that supports plant life. Dirt is material that cannot support plant growth. Sometimes we get frustrated and feel that the universe is against us because our ground is full of weeds. We think there’s something wrong with it. Your soil doesn’t know the difference between a dandelion and broccoli. In many cases, weeds indicate that your soil is healthy and nutritious. It’s either a healthy place to grow or it’s not. If it grows healthy weeds, it will grow healthy vegetables. So relax, take a chill pill. If your new backyard, which looked so beautiful when you bought the house last summer, is full of weeds this spring, it’s not a conspiracy. Your soil is healthy. You just need to roll up your sleeves and get to work. But that’s another sermon for another time. The point is: when you don’t have any weeds, just nice clean empty ‘dirt’, you should be worried.

There is much we can do to continually improve the quality of soil in our home gardens.

How

ADDING ORGANIC MATTER by incorporating compost into the planting area, and using mulch all around the planting area not only enhances soil structure but also improves moisture retention and nutrient availability.

REDUCING TILLAGE! A long-term no-till commitment boosts microbial activity, improving soil health. Every time we dig up our soil, we destroy colonies of tiny organisms and critters trying to set up housekeeping. They are not the enemy. They are an important part of the soil ecosystem and critical to healthy soil. In addition, a no-till, mulched method of gardening reduces evaporation, addressing the problem of soil thirst. No more water wasted. Moisture passes through the mulch, where it is absorbed into the soil while being protected from evaporation.

AVOID THE SUNBURN OF BARE SOIL
There should be no bare soil in your garden. Not in the rows where the plants are growing, not in the spaces between the rows, not in the walking paths. Protect your soil from being sunburned.

Seriously? Soil can get sunburnt?
YES! As important as the sun is to life in general and to garden growth, it can harm the very soil in which our plants, which are completely dependent on it, grow. I know it seems like an oxymoron, but soil really does get sunburned. It’s the leaves that need the sun – they are the plant’s vital organs, primarily responsible for producing food through photosynthesis, utilizing sunlight, carbon dioxide and water to create energy. They also facilitate gas exchange (breathing), release excess water through transpiration, and can be specialized for storage or protection.

HOW TO PREVENT SUNBURNED SOIL

1. MULCH
Cover soil with organic mulch like straw, shredded leaves, small wood chips, etc. – but not a combination of these methods. Pick one and stick to it. Mulch creates a barrier (like sunscreen or light clothing for us), that keeps the soil cooler and locks in moisture. I use straw, dry grass clipping, chopped leaves and wood chips, but never together.

* note the straw mulch still in place from last summer, protecting and feeding the soil

Wood chips take longer to break down, so they’re best used in paths. I use lots of it. They are so chunky and loose that they don’t compact down quickly, and are easy to walk on, keeping your weight centred in the paths and away from the delicate root growth area of your plants. Rain water goes right through the wood chips, seeping into the softer rows on either side of the paths.

MULCH prevents MOISTURE LOSS.
High heat causes rapid evaporation, drying out the soil and depriving plant roots of desperately needed water.

MULCH prevents NUTRIENT DEGRADATION.
Intense sunlight and heat can degrade essential nutrients, making the soil less effective for plant growth and health.

MULCH prevents MICROBE DESTRUCTION.
Extreme surface temperature can kill beneficial micro organisms and fungi that are living in the soil and are essential for plant growth and health.

MULCH prevents CRUSTING.
Crusting is when the top layer of soil becomes excessively dry, hard and cracked, reducing it’s ability to absorb and retain water.

The rows in my community garden plot are higher than the paths, and they never get stepped on, so the soil doesn’t get packed down. In it I use straw mulch in the rows around my plants. In my backyard garden – space and sun are at a premium, my plants are close together, mostly in raised beds, so we chop up our straw (with the lawn mower) so it’s easier to spread into small areas. I try to pile the straw no less than three inches deep, providing serious protection from the sun, additional nutrients as it breaks down, and keeping the soil moist.

2. COMPOST
Apply generous amounts of good, clean compost into the rows where you expect to seed. Pat the seeds into it. This will give the seedlings or starter plants, much needed nutrition, in their early life.

3. WATER DEEPLY
Watering deeply and early in the day reduces evaporation and allows water to penetrate deeply, instead of only wetting the surface. The straw mulch protects the moisture from evaporating quickly.

Always water near to the ground, avoiding drenching the leaves. Less of the water will be wasted this way, going directly where it’s needed most.

4. Use GROUND COVER PLANTS when appropriate
If you don’t have enough mulch, it may be helpful to use low growing plants like thyme in an herb garden, and chickweed in a vegetable garden. These offer shade for the soil, keeping it cool. They are both edible, delicious and nutritious, so clip often and bring them into the kitchen.

Keeping your soil healthy is crucial because it is a living ecosystem that is the foundation for all plant, animal, and human life. Healthy soil provides nutrients to plants, filters water, and stores carbon. Unhealthy soil is merely dirt.

Warmly,

Cindy Suelzle