note from Cindy: Let me introduce my friend Sandi. I’ve known her for about 20 years and in the last few years, as I’ve learned more about WHO she really is, we’ve become quite close. I have tremendous respect for her, to the point that I think she’s a real live super hero (not all superheroes wear capes you know). Sandi came to Edmonton from southern BC, as an 18 year old for a job with ETS (Edmonton Transit System) in their book-keeping department. It was an exciting time despite the homesickness that naturally came being so far away from all that was familiar, and though she didn’t know a soul before arriving, she made a life for herself.
Flash forward these many years later, through lots of ups and downs, including a failed marriage that blessed her with two children, now grown up and much loved grandchildren. She raised her kids on her own, a single mother with no local support system, in the days before daycare subsidies. There were often tough, tough choices to make. Sometimes daycare expenses were as high as rent, and some of those choices were between groceries and childcare, but childcare enabled to her go to work, which paid the rent . . . . so food insecurity became a constant companion.
25 years ago, she started a side business helping other ETS employees with their tax returns, to be able to afford necessities that her current income didn’t allow, and to have some needed financial flexibility. To build herself a ‘community’, she volunteered wherever she saw the opportunity – often bringing her kids.
She wears many hats these days: an administrator (City of Edmonton), a personal tax specialist, a Bookkeeper, a chief trustee (Civic Service Union 52), a board member (ABCU Credit Union), a Thrive Life Consultant, an active church member, an active member of her community league, and a VOLUNTEER many times over. She grows a garden at home, and is actively involved in her local community garden. She helps her neighbours. Okay but that’s not what I want to tell you. That’s just all the preface to this: Sandi is out of debt. Now that in itself may not amaze you, but there was a time when she in her own words, ‘had more credit card debt than she earned in two years’. Yikes. I fear there are many who can relate to that kind of bondage. She went from there to being completely debt free other than her mortgage – which is under control and nearing its last days. For this reason, I think most of us can learn a lot from her.
It should be of no surprise to learn that one of her volunteer positions is the Food Bank facilitator in her local Community Garden. In the growing and harvest seasons of gardening, Sandi is regularly delivering produce to homes she’s come to identify in her community with food insecurity.
In our society more of us are IN unmanageable debt, than are out of debt. Did you know that Canada has one of the highest rates of consumer debt in.the.world!?! Not something to be particularly proud of. In this environment, and with every excuse under the sun to BE in debt, she dug her way out of it. Not only that, but she has a respectable start on her family’s food storage. So I asked her to speak at a local event on FOOD STORAGE that I was hosting. I asked her to address the question “How Can I Afford To Build a Storage?”. I asked her to do that because I hear “I can’t afford it” all the time, and I always think of Sandi. – Cindy
So Sandi, How DO you afford to build a food storage? And what suggestions would you have for those who would like to.
Sandi’s words below:
My answer – just do it!
Let me ask you this Question: what is your biggest fear or reason for not having a Food Storage? These are the worries I most often hear . . . . . * I don’t know where to start * I can’t afford it * I have no space to store * I don’t know how to use the stored items to create real meals * I don’t think my family will eat that food
I’ve been a single mom for most of my parenting years. I have two adult children and five grandchildren. They are my life. As a single mom with limited means, I struggled tremendously with providing healthy, nourishing meals for my children on the limited income I earned when they were little. I wanted better for my family and I searched out ways that I could afford better options. Over 25 years ago, I started my home based business of helping people with their taxes, to allow for the extras that I could not afford otherwise. Over time that transitioned into other earning streams and I utilize all my resources to ensure I have what I need for today, tomorrow and next year with the peace of mind that I have the basics covered.
I continue to learn each and every day and I have a wish list always on the go to ensure I keep that peace of mind and better the lives of myself, my children and my grandchildren. Accounting runs in my blood but unfortunately I do not have an accounting designation. Nevertheless most of what I do for work revolves around finances. So it is interesting to me that though finances used to be my biggest worry, my understanding of them became my biggest ally.
I wear many hats in addition to my main jobs of a mother and grandmother. A year ago, I was invited to teach a class in my community about getting out of debt because – other than my mortgage – I AM OUT OF DEBT. It was thought that because I had reached that important goal myself, I might have something to offer people like me – who at one time couldn’t see how getting out of debt was even possible. Some thought that my story might help people feel they could DO IT too. The truth is – it’s been a tough road but I knew I was the only chance my kids had to have a better life than my own. I was their sole provider, their support system, and their example – for good or bad. Remaining in debt wasn’t going to help me be a better mom, and it certainly wasn’t going to help me with any of those priorities.
Our community thought my story provided me with some credibility, and that along with my practical advice, I might be able to provide hope. I don’t know how much influence or credibility I might have in those areas – but I know one thing. I LIVED THE LIFE. I DID IT. I GOT MYSELF OUT OF DEBT. For all those same reasons, I am here to address the problem many people think they have when it comes to Food Storage. The “I CANNOT AFFORD IT” mindset. That is a DEFEATIST statement and I spent my share of time with that kind of defeatist attitude. It got me NOWHERE. Long ago, I decided that I had to be stronger than that. When one really thinks something is important – when it Really IS important, then it’s amazing what you can do to make it happen. You will do whatever you need to!
I admit, when I first became serious about it, Food Storage was not foreign to me, but when it became important to me, it became a PRIORITY. I knew that I would find a way and I found a way. I’ll share my secrets with you. Hopefully you may find some of them helpful.
FOOD STORAGE Rules I live by:
1. Never, EVER buy food storage with money you do not have!
2. Set a monthly budget and stay within it – if you don’t have one yet START now! Keep your grocery receipts for a one month period and write down an itemized list of what you bought. Were those items on your grocery list?
3. Shop the Sales but only purchase what you use – don’t add in exotic or one-of meal add-ons to start off with.
Consider making a multi-family purchasing group so that you can buy in bulk and each family gets a share of the discounted product. ie: I can’t use a case of store bought soup in my food storage but I would like to have 4-6 cans and can share the rest. This could also be preserving equipment that could be shared between a group (ie meat slicer, vacuum sealing unit, pressure canner, etc).
4. Make your money work for you – I purchase on a credit card that gets paid off each month but I earn air miles on my purchases or scene points that I can redeem for other items my family can use during the year: cash back, points, aeroplan miles, store apps for discounted/coupons, etc. WARNING: This only works if you are IN CONTROL of yourself and DON’T GIVE IN TO THE TEMPTATION to overspend.
5. ONLY STORE WHAT YOU EAT. When you do otherwise, it is wasted money that you could have used to buy something more useful. This also includes your grocery store fruits and vegetable purchases – only purchase if you are using it in your meal prep that week. Stats say 47% of food is wasted in Canada. That’s a shocking $47 out of every $100! As a single person I am in a risk category for high food waste, especially when it comes to produce. Because of that, I take precautions to avoid waste. I want to buy food that I never have to throw out. That counts big time in my books.
6. EAT WHAT YOU STORE. You need to be rotating your stock and have confidence that every item is usable to you and your family. Space is at a premium when you are building a 6 month to 1 year food storage – don’t waste that space on something you won’t be using. Make sure your food storage takes many different forms – a single form (ie freezer), may not be that convenient and long lasting if you lost power for a few days. Frozen, canned, freeze dried, cold storage, home preserved – these all have a place in your food storage as they all have varying lengths of storage life and costs.
Slow and Steady wins the race. 7. Be patient, and long sighted. This is a long term goal. You will never reach it if you give up. Dedicating a portion of your budget to Food Storage is moving forward constantly. Use it and rotate it so that it becomes ‘groceries’. When you have extra money – devote it to Food Storage. Those bulk purchases are a GOD-send.
Make it a lifestyle. It is my choice to have a food storage – with all that goes into that choice. With it, comes PEACE OF MIND in a troubling world where nothing is certain. It is worth it to me. In the end, my food storage isn’t quite where I’d like it to be, but I am content with my continued progress.
The average Albertan spends almost $300 per person on monthly groceries. I tend to fall right into that average. In the summer, I garden, which helps with fresh produce; in the winter I purchase more fruits and vegetables so my spending may go up an additional $50 per month. I also buy freeze dried food on a monthly basis, which I use regularly. This keeps my waste to a minimum (wasted food = wasted money).
When I have extra money, I set it aside for the bigger sales (which I’ve learned come every spring and fall). During those bigger sales (for which I budget extra money) I buy more expensive items that get higher discounts at these times. Make no mistake, I eat very well. Nutrition is a priority with me. I have made some big health changes in the last couple of years that I’m very happy about. And I am committed to moving forward with them.
When I started really getting serious about building my food storage, I knew that freeze dried food was where I wanted to focus my energies and resources. I do it gradually, adding to it every month, and so it made sense that I’d want the biggest bang for my buck. I decided if I was going to buy monthly anyway, I might as well get a kickback in the way of commission on my own purchases that I could turn around and reinvest if I wanted to. So I became a consultant. My original intention was not to work the business, just to benefit from available perks, but I found myself dabbling in the business and enjoying the process when I told others about it. You never know where something like this will lead you, and I’ve been around enough to know I enjoy new adventures.
I enjoy sharing my resources as well as my knowledge, but I don’t consider myself an expert at Food Storage. I’m just a mom who wants the best for my kids, doing what I think is the best.
Food does not last forever. It must be properly cared for and rotated or you will lose it. And what a waste of money and resources that is! The idea of permanent food storage – or food that lasts indefinitely needs to be discarded. It’s ridiculous. Food will deteriorate even under the best conditions. The secret to success is to work within the facts, to take advantage of the best storage-ability of nutritious (excellent quality) foods, and to make a habit out of USING it, and continually replenishing – “Rotating” – to keep it at its best. That’s the secret in a nutshell; if you live by it the rest is a breeze.
Our early years of storing food
Shortly after Dan and I were married, we began to give serious attention to establishing our own food storage (such as it was possible in a small 2nd floor apartment). And we took more than our fair share of ribbing about it (especially me), from friends and family. Some family members were like minded, some were not – but respectful, and some outwardly ridiculed. And you know what? That’s just the way some people are – no use losing sleep over, adjusting your priorities for, or being offended because some people see life differently (no matter how rude they are).
“Food Storage was never meant to be an inheritance for your grandchildren.”
What is food storage?
I think a good way to explain what food storage is, is to understand what it is NOT. Food storage does not involve ‘panic buying’, and does not involve ‘shelf clearing’, buying on credit or hoarding. It does involve INTENT, coming up with a plan, working on that plan, priorities, budgeting, strategies, vision, some sacrifice , short term inconvenience in the beginning which transitions into long term convenience, satisfaction, comfort and peace of mind. It also requires some dedicated space. It does not have to be accomplished quickly, in fact it shouldn’t be – for a number of good reasons. It doesn’t have to be a whole lotta money upfront – quite the opposite, it can save you a lotta money. It can be accomplished one day at a time. Starting Right Now.
Food storage is all about preparing for adversity by having a basic supply of food, water and necessities on hand. There are two types: short term food storage – 3 months (which is usually just the first stage of a bigger plan) long term food storage – 1 year+ A critical component of any good food storage plan is WATER – for drinking and also household use. I am not including ‘water’ in this post, but only for the sake of room. It will be its own discussion.
Panic buying is based on FEAR, and it causes us to do things that we later might regret with regards to what we purchased or how we purchased it. When we haven’t planned ahead, and are suddenly faced with an emergency, we can find ourselves being very self centered. In that scarcity mentality, we may buy too much, and we may put our perceived needs ahead of every one else’s. We clear shelves. We think we deserve something more than somebody else might, simply because we got there quicker. When Covid first became a thing, we saw items flying off the shelves, people taking much more than they needed with no regard for others. The behaviour was a symptom of fear, but was completely avoidable with a little forethought and planning.
First of all, we are not the most important person in the world – even though we may think we are. And we are not more deserving than any one else. When we remove FEAR from the equation, it changes everything. That scarcity mentality becomes an abundance mentality. Go ahead and shop the sales as you can afford them – in times of plenty. There really is enough for everyone.
8 Hints for Success
Don’t buy more than you can afford
Start small
Picking up an extra can or two when you’re able (and they’re on sale) adds up soon and is Visibly satisfying
Re-allocate a few dollars where you can. In many cases, saving $ from one impulse fast food stop on the way home could be enough to add a case of some food-storage essential.
Be open to try new things. Open your eyes and you mind.
Rotate items to prevent them from expiring.
The freezer is NOT food storage. It is convenient and important, but not dependable in an emergency. It depends on a resource you cannot control: electricity.
Remember, for the most part, electricity is your best friend, and it will not let you down. But there are times it will.
So WHY food storage? That’s the big question . . . .
It seemed that in 2022 more people have opened their eyes to the idea of food storage. Some who may previously have only given it a cursory thought, and others who have never felt the urge or even saw the wisdom of food storage before now – were suddenly getting on board.
For years, governments on all levels, communities, social agencies and even religious organizations have urged people to prepare themselves by storing extra food, water and other necessities at home. With the recent changes we’ve all seen in these unsettling times, the wisdom of doing so is becoming more and more apparent to many of us. There is no replacing the peace of mind that you have when you know you’re prepared. And that doesn’t have to mean the radical preparations of a doomsday prepper. It can mean something as simple as not having to go out for groceries for a week when you’re sick, or for a month when you’ve been laid off. It can mean something as simple as being prepared to live with less income than you currently are.
The sad reality is that when we receive a few days warning of an impending hurricane or blizzard or other disruption in services, stores are crammed with people trying to get the last loaf of bread, the last bag of apples, the last jug of milk, or that last package of toilet paper because they’re not prepared. Or as we’ve all seen, hoarding those commodities preventing others from buying them – out of some sense that “WE” need it more than “they”. But truthfully, without warning, each one of us may face a personal emergency in our own lives. A job loss. A health crises. A death in the family. A pandemic. Let’s face it, life’s emergencies can be sporadic and unpredictable. Being prepared to weather these storms is not as difficult as you might think. What if you could relax, take that veritable load of worry off your shoulders? You can of course. It simply requires a plan, some focus, and some intentional action working toward the goal.
Food Insurance
Food is usually the second largest expense in any family budget, coming in a close second to the cost of shelter. And I’m sure you figured out that food prices only go up, increasing at a shocking rate these last few years. I can’t see that changing any time soon. Can you?
You’d be hard pressed to find someone without household insurance. Most of us agree that life insurance is important, and it’s mandatory to have car insurance. We buy travel insurance when we travel, and medical insurance. So why not for something as important as food? Food insurance! That’s pretty much what food storage is. But its surprising how many of us fail to protect our family with the most basic insurance of all – protection against an interruption in our ability to buy groceries. And with the recent Covid pandemic fresh in our minds, and subsequent shortages in nearly everything, we’ve all seen first hand, things we didn’t ever think we would.
The big difference of course, is that Food Insurance doesn’t disappear at the end of the month like fire insurance. We eat it. For the cost of “insuring” our family against the unthinkable, or simply against an interruption in our income, we can literally BUY peace of mind in the area of food. “Full Coverage Food Insurance“, ready when we need it. And no insurance broker to deal with LOL.
Building your food storage may seem daunting at first, both in effort required and the financial investment. Here are some steps to get you started.
1. Where to start?
When I was a little girl, fruits and vegetables in food storage were in cans or bottles. They were stored in our cold room and brought up daily for meals. Meat was stored in the freezer. Flour and sugar were stored in pails. And pasta was stored in cardboard boxes. (we always had lots of macaroni). When my kids were little, it was more of the same with the addition of more dehydrated foods (more than just raisins), a lot more home bottled fruits, vegetables and even meats, and a bigger variety of grains and beans. These days, I keep some of those same foods, with a few adjustments, improvements, additions and editions I’ve learned over the years.
When you’re just starting out with Food Storage, there is always the question of *Where on earth do I begin(?). And then the follow up questions of *What to get? *How much to get? *Where to get it from? *How to afford it? *How to store it? *Where to store it? *How long will it last? *How to prepare it? *Where to find the time to prepare it? *How to rotate it to keep it ‘fresh’? *How not to waste it? *And will my family eat it?
Nowadays, we have a new player in the food storage game. Ironically, it is not so new, its more a matter of more people becoming increasingly aware of it. And its the answer to all the above questions. FREEZE DRIED FOOD. Nutritious. Convenient: easy to use. Tasty. And get this – shelf life of 25 years. It adds “SMART” to traditional food storage of cans and bottles.
STORE WHAT YOU EAT.
Having a Food Storage may be one of the smartest things you do for your family. But there is one very important rule that everyone must follow. Your Food Storage may not look like mine or anyone else’s, and it shouldn’t. You need to Store what your family eats! Foods you like, that are easy to prepare but more importantly, that your family is used to, and will enjoy. In our younger years, there were often times that we relied on our food storage. Groceries were the only flexible thing in our tight budget, but I never wanted my children to feel that life was harder this month than last month. I wanted every day to be comfortable and normal. So we ate the same way, in good months and difficult months. If I could not buy groceries in any given month, or my budget was reduced for some reason, I didn’t want my kids to notice. I cannot emphasize the rule of “storing what you eat and eating what you store” – enough. When life is hard on so many levels, it is soothing to know that your family has good food that they’re accustomed to, on the table. Store what you eat, but then EAT what you store.
MAKE room.
That’s different that having room. Most houses these days offer no accommodation for food storage, but they’re also bigger than houses of yester-year. Ironic isn’t it? If you can’t find room, then MAKE it. Be creative. You’re the boss. Ideally it should be in the basement where it is cooler, but if you don’t have a basement, convert a bedroom, or a storage room or a portion of your garage if you must, or even a closet. Think outside the box. If possible, keep everything together. When we moved into the house we currently live in, it took us a few years of experimenting with where to put our food storage before we finally ‘found’ the room. We had to put up a wall and create a small room where there wasn’t one.
AFFORD. Never, ever ever EVER invest in something as important as food storage with money you don’t have. It doesn’t matter how good that bargain was, if you’re paying 25% interest on it, its a bad deal. Shift your budget if you need to, do without something else if needed to add $100 a month to your food storage, but do NOT buy it on credit. Debt is contrary to the principle of being prepared. Debt is the quickest way to either lose everything you’ve got, or to be held hostage by it. Preparation can be accomplished on a budget.
ROTATE. Everything has a shelf life, even you! Trying to stretch food too far past it’s recommended shelf life will result in an inferior product – especially in its nutritional value. An important part of using the food in your storage is ‘rotating’ it. First in, first out. Replacing it as you use it keeps it current and puts your ‘food storage’ into the same category as ‘groceries’, which normalizes it. Rotating also gives you experience using the food you’re storing, and lets face it, sometimes we can use the practice right? The shelf life of food varies widely, but here are some basics that might help you estimate.
CANNED FOOD (home canned or commercially canned) has a shelf life of up to 2 years. If your canned food gets too old, you’ll end of discarding it, and that is a sad waste of money.
FROZEN FOOD has a shelf life of 3 months to one year – depending on what it is. So yes, its convenient, but don’t count on it for the long term. And of course we all know that frozen food is 100% dependent on our access to electricity – which may be disrupted without notice. DEHYDRATED FOOD has a shelf life of up to one or two years. If you’ve ever kept raisins longer than two years, you know they’re not very good. Too dry and crystalized.
FREEZE DRIED FOOD has a shelf life of 25 years (sometimes more). Not sure how anyone can beat that, but even 25 years doesn’t mean forever. You’ll be surprised one day to find out how quickly that time has slipped by. But when you’re using the food, and constantly replenishing – it is completely without the stress of worrying about its shelf life. Once you open it, most freeze dried foods will last a year if properly sealed and protected from the moisture in the air.
TODAY. It’s true that those who began investing in Food Storage many years ago, are advantaged. They simply maintain what they’ve been doing all along. But as Maya Angelou once counselled “Do the best you can until you know better. Then when you know better, DO BETTER.” I love this simple piece of advice. It is wisdom to me, and I have adopted it as my personal motto. It reminds me not to beat myself up for mistakes I made in the past, and opportunities I’ve neglected. I did the best I knew how with the resources I had at the time. But now, I know better. And my obligation is to act on my new knowledge and awareness. I am accountable for my actions based on what I understand. Truly the best time to get my food storage together was a long time ago. But if I didn’t, I didn’t. It can’t be changed. The point is, that I can start NOW. The next Best time to do better is always right now. TODAY.
2. What to get?
When I was a young girl, my mother answered that questions with the same answer my grandmother gave – “whatever fills the hollow spot“. She gleaned that philosophy from being a child of the depression and war years. While I respect the practical experience, I’d like to think that we have a more enlightened perspective of nutrition nowadays that would influence the question of what to invest in.
When you’re in a situation where you’re living on your food storage, you want the best nutrition for your family. In fact, if letting “food be thy medicine” was ever important, it will be critically important in times of need. Nutrition is key. Make sure the food you buy has something more to offer than calories. Having said that however, calories will be very important too. Calories are where energy comes from, just make sure they’re super nutritious calories.
All produce (fruits and vegetables) begins to deteriorate in the hour it is harvested, so eating fresh from the garden is of course optimal. But as lovely as that is, most of us cannot do it consistently, at least not all year round. And food storage generally consists of preserved food, so lets look at options. Rule of thumb to remember when choosing the type of food for your food storage: * Canned food (whether home canned or commercially canned) retains about 40% of it nutritional value. This is not the original food value of what it was in the hour it was picked. It represents 40% of the nutritional value of the food when it was put into the can or bottle. When I first learned this, I was very disappointed because I canned fruit all my parenting years, and we relied on canned fruit all winter long. But I was not surprised.
If you’ve ever canned peaches, you know that those peaches are in a hot water bath of 212 degrees for 40-45 minutes. Of course nutrition is going to be affected. And of course, when we buy those peaches (that were picked green before all the nutrients were fully developed), we usually have to wait a few days till they’re fully ripened and perfect for canning. This time means further nutritional loss. Still 40% is better than no peaches in February right? And home canning is still the easiest and most reliable way to preserve food long term at home. So let’s just be mindful of its pros and cons. * Frozen food retains about 60% of its nutritional value and is generally flash frozen very quickly after harvesting. It’s biggest draw back is the limited shelf life. * Dehydrated food is difficult to pin down for nutritional retention, as there are so many factors involved in dehydration. Was it commercially dehydrated? Or dehydrated at home? Sulfur dioxide is a preservative often used in commercial dehydrating. Most raisins, prunes and apricots contain it, and while this sulfite extends the shelf life of dehydrated food, but it is very bad for us. Generally you can count on dehydrated foods having close to 80% original food value, but for how long? And dependent on so many factors, it is difficult to have confidence in it. * Freeze dried foodretains up to 95% of the original food value. This is astounding, especially when considering its exceptionally long shelf life. Look for brands that guarantee their produce was picked RIPE and flash frozen within hours of harvest. This ensures the best possible nutrition right from the beginning. How is this possible? Here’s a good explanation in a nutshell . . . .
3. How much to get?
Following the SMART rules above will help you with most questions you might have, but . . . how much? How much is enough? And how much should you start with? My strong suggestion is to not bite off so much that you are overwhelmed and give up. There are two ways to start slowly:
Add extra Simple adjustments like – if you would normally buy two cans of tomato sauce, buy four. If you would normally buy three cans of tuna, buy six. If you would normally buy a box of cereal, buy two. And so on. Focus on non perishable items. Put them away, in your pantry or in your new ‘food storage’ area. Next time you go shopping do the same thing. Gradually these extras add up and you will be amazed to see the results after only a few months. *hint: always write the date you buy it in permanent marker on the package. This is a loud reminder of keeping it properly rotated.
Two weeks Think of seven meals your family enjoys – one week’s worth. Easy ones, with non-perishable food in them. Perhaps your list is something like this: spaghetti, chili with cornbread, potato chowder, chicken parmesan, lasagna, cheesy chicken and rice, sloppy joes, Italiantuna salad with orzo, refried bean burritos, Indian dahl . . . . whatever your family enjoys. SEVEN meals. Multiply by two – to make fourteen meals. Break each meal into a recipe shopping list like for instance, your recipe for spaghetti might call for one package of spaghetti, two cans of tomato sauce, a pound of ground beef, an onion and some herbs – write it down. Multiply that by two. Add double of each of those ingredients to your shopping list. Go to your next meal. Perhaps your recipe for lasagna calls for one package lasagna noodles, one large can of tomato sauce, one pound of ground beef, one onion, garlic, one pound of mozzarella cheese, one container of cottage cheese and some spinach. Multiply that list by two. Two meals down.
What other meals does your family enjoy? Write up your shopping list, and as you can afford those ‘extra’ items necessary to make the meals, purchase them. Easy peasy. You’ve got two weeks worth of dinners stored. Add breakfast items like porridge, pancake ingredients, juice, etc.
Either of those methods are a great place to start small. But don’t stop there. Once you’ve got two weeks packed away, reset your goal to one month, Then three months. Then six months. Then one year. It’s a process. Celebrate each milestone, and then push toward the next goal. I promise, you’ll feel great about your progress and success. This is easier than you thought.
4. Where to get it from?
For the most part, you’ll want to buy the majority of your food storage items wherever you normally buy your groceries. That is where you’re comfortable. You know what they have, and what you like. Bulk stores or wholesale outlets are good resources for those items you want to buy in larger amounts.
Ask around. There might be places around that you don’t necessarily frequent. Open your eyes and your mind to try new things and new sources. You might find some great resources on line, to have delivered right to your door. While I am all about shopping locally, there are some food items I cannot buy locally. Those, I am happy to be able to order them in.
The industry leaders in the freeze dried world is undoubtedly THRIVE LIFE. They are the largest company in North America, with the biggest variety. Available in United States and Canada at this time.
5. How to afford it?
You afford it by starting small. You buy when you’re shopping already, a little here and a little there, just add a few more cans. Make whatever sacrifices you need to in order to ‘afford’ it. If you’re eating out once in a while, consider how much you could have added to your food storage with what that meal cost you. If you’re in the habit of buying junk food, consider how much real food that bag of chips or candy could have been converted into. Affording important things sometimes requires adjustments. Do what you need to do to accomplish your goal.
Investing large chunks of money will bulk up your food storage of course, but you don’t have to spend a lot to build it up. Just spend with a purpose, and spend differently. Using the illustration above, let’s assume my food budget was $600 a month. By re-allocating 1/3 of that budget into freeze dried foods (beginning with those I often waste), and continuing to spend the remaining 2/3 in my usual way, I slowly begin to introduce food that has zero waste, and long shelf life. As I began substituting the food I used to waste for freeze dried food that I will never waste, my grocery dollar started going a lot further. Within only a couple of months I noticed that by no longer wasting food, I actually saved money. No trim, no spoilage, no waste = saved money. More to invest into more food storage.
Having said that, for most of our parenting years we received tax refunds in the spring. We most often used those lump sums to bulk up on food storage – always watching the sales of course.
6. How to store it? and Where to store it?
Ideally, most foods should be stored in relative cool, with little temperature fluctuation. A shed outside? Absolutely NOT! Unheated garage? Depends where you live. If you can find a place where you can SEE what you’ve got, it will be a lot easier to use it, keeping it properly rotated. Underneath your stairs? Convert a closet?
Frozen food is not food storage. Yes, it is convenient and I wouldn’t want to do without my freezer, but anything that is as dependent on something completely beyond your control – like a freeze is dependent on power, is not something you can count on. Resist the temptation to invest a lot of money in frozen food.
*for more information on storage ideas, click here
7. How long will it last?
Go with accepted shelf life recommendations, and yes, I know you can push them a bit when they’re “best before” dates. But use those dates as a good guideline for trying to consume the food within. Frozen food – 3 months – 6 months – up to a year at most for some items. Canned food – 2 years. Dehydrated food – 1 to 2 years. Freeze dried food – 25 years.
8. How to prepare it? and Where to find the time to prepare it?
If you’re using food you generally use every day, you’ll have that pretty well sorted out. If you’re trying to incorporate some more shelf stable foods, then I highly recommend you start using them today to have all that figured out before a time of need. Remember – Store what you eat, and EAT what you store.
If time is an issue for meal prep now, welcome to the club. Preparing a meal with traditional food storage items like wheat and dried beans can be difficult when utilities may not be available. Using canned and dehydrated foods may be easier and less time consuming. Freeze dried foods are very quick to refresh and to prepare. Freeze dried meals that require only water to prepare, can be ready in about 10 minutes. That’s NO cooking. Very convenient in emergencies.
* a little about Freeze Dried Food It wasn’t that long ago that it was so new most people had never heard of it. Today it is readily available, being a fast growing industry in the food world. It IS the future. I firmly believe it is the answer to the problem of food waste in North America, and it is the vehicle people can use to secure a high quality, nutritious, long term food storage.
9. How to rotate it to keep it ‘fresh’? and how not to waste it?
Proper rotation is critical to a good quality food storage. So many buy food storage specifically for “food storage”, never intending to eat it. They say “Food storage is food storage and groceries are groceries.” The problem with that philosophy is, that your food storage gets dated while you’re not paying attention. And pretty soon, its nutritional value is questionable. You must pay attention. And using the food regularly ensures you stay on top of it. Storing it in the boxes, under beds and tucked away in closets makes rotation difficult. Remember the rule – Store what you eat, and EAT what you store. Abiding by that rule will keep your food fresh, and reduce any potential for waste.
Buying emergency food with the intention of sticking it in a hole in the ground in case of some zombie apocalypse is a good way to waste a lot of food, and a lot of money. No food will last forever. And there are a lot of real life emergencies that happen in the process of living, that can be relieved by a simple, well managed food storage. Imagine not having to worry about buying groceries for a week, or a month! Wouldn’t that take a lotta stress out of an already difficult situation?
10. Will my family / children eat it?
Some believe that when our kids are hungry they’ll eat anything. I suppose if they really are THAT hungry. But let’s hope we never get there. What about when you’re just trying to navigate a temporary interruption in income? Trying to make the best of a less than ideal situation? Familiarity is precisely why we should incorporate food storage items into our daily meals.
I discovered freeze dried foods when most of my children were already grown and gone, so most of them learned about it from an arm’s length distance. Some of my grandchildren however, have learned more up close and personally. My favourite example of this is my grandson Charlie.
When Charlie was a year old, he began spending a few days a week at our house while his mom worked. As he began eating finger foods, freeze dried blueberries were a healthy and delicious food to start out with. He loved them, and ate a lot! At one point, his parents wanted to increase the amount of calcium in his diet so they asked me to give him a glass of milk with lunch. One day while I was feeding him – with a glass of milk nearby, I thought about other excellent sources of calcium. Foods like fish, nuts, kale, eggs, broccoli . . . BROCCOLI. I had some freeze dried broccoli in my pantry. Whether he would like it or not remained to be seen – its a far cry from tasting like blueberries.
I retrieved the broccoli and showed it to him. I opened it up and took a piece out, ate it while he watched, then showed him the contents of the can and offered it to him. He took one and put it in his mouth. As he chewed, I half expected him to spit it out – I wasn’t even sure how many teeth he had. But he did not. When he finished it he asked for more. I gave him more, and he asked for more. And then more. And more. It was the beginning of a good thing. I encouraged his appetite for freeze dried broccoli, including it with every meal. I began calling him “Broccoli Boy”, and I even gave him small cans of it to eat in the car and at home. Those early exposures helped him develop a taste for freeze dried food, which is perfect, because its here to stay.
The point is, that Broccoli Boy wasn’t born on a different planet, transported here to become Broccoli Boy. He was molded and formed to become one, right here on earth. I created that alter ego, by introducing him to that wonderful, crunchy source of calcium early on. It made the perfect companion to his enjoyment of other ‘crunchy’ freeze dried fruits and vegetables.
Will your kids like the food? I think you can take it from Broccoli Boy. They will.
Learning to use foods that are less familiar to you – like freeze dried food, will make all the difference. Your family will be surprised to find out how delicious and satisfying it is. Exposing your kids to it early is very helpful. They get used to it. Again, its that ol’ familiarity thing right? Freeze dried food is easy to use, but it does require you to flip a switch in your brain. So flip the switch! Get used to it. It is the perfect food to insert into your Food Storage.
I’d love to hear ideas that worked for you when you first started out with your Food Storage. Or some of your favourite food storage items and or recipes. Or if you haven’t started yet, I’d love to hear about your journey. You can comment below.
Two of the most important things to remember about gardening is that 1) there are a lot of ‘rules’ 2) some of those rules should be broken
There are many things about gardening that one has to experience to understand what the rules are there for. There are the things we must learn through experience – but they don’t always have to be your own, we can learn from each others’ experiences too. One of these age old rules in my part of the world, says that we should plant our gardens on the May long weekend (3rd weekend in May). But statistics say that the expected last frost is anywhere from May 1-10. Obeying that rule straight across the board, amounts to a week or more of lost growing time – when there are only an average of 120 (give or take) frost free days in the Edmonton area.
I don’t pretend to be an astronomer or any other kind of expert, but there are some things that simply make sense to me. Consider this: The summer solstice in is between June 20, 21, 22 (so lets just say the 21st). It is longest day of the year – more daylight than any other. The center of “BEST SUN” days. Count back 7 weeks to May 1, and forward 7 weeks to August 9. Those days are going to be the BEST Sun days of the summer right? A reasonable assumption to make. In fact, in Edmonton, on May 1 – 2022 the sun rose at 5:57 AM and set at 9:05 PM = 15 hr 8 min of sunshine. On August 9 – 2022 the sun rose on 6:03 AM, and set at 9:14 PM = 15 hr 11 min of sunshine.
My point? My point is that after August 9, the sun is not as high, and not as present. In fact only one month later, September 9, the sun rose at 6:57 AM (54 minutes later than Aug 9), and set at 8:04 PM (70 minutes sooner than Aug 9). That is 2 hours and 4 minutes LESS sun-time – in ONE MONTH! So yes, those may be frost free days, good time for things to ripen, but the ideal growing time has passed. If we’re planting on May 24, that gives us only two and a half months of best sun days to grow. When we could easily have another month or more.
So, how does one make the best of those high sun, but possibly NOT frost free days of early spring? Answer: Plant earlier. The next obvious question then is this: what can we plant earlier that will not be killed or stunted by those chilly mornings of early spring? Answer: There are many hardy and semi hardy cool weather vegetables that thrive in our growing season. We just need to get to know them and learn to appreciate them. Here are some ‘hardy’ and ‘semi-hardy’ vegetables (and some notable fruits) that you can be growing in the average backyard garden in and around the Edmonton region, and planted much earlier than the May long weekend.
HARDY VEGETABLES can tolerate a hard frost and temperatures between -5 and -10 Celsius
If you haven’t made friends with some of these yet, then open your mind and introduce yourself. They’re not only anxious to make friends, but are extremely forgiving and loyal. Hardy Vegetables include: Brassicas like Broccoli, Brussels Sprouts, Cabbage, Collard Greens, Kale, and Kohlrabi, as well as Leeks, Parsley, Radishes, Spinach, assorted Asian Greens (like mustard greens, bok choi and tatsoi) and Rutabaga. THAT is a lot to choose from, and ALL of them can be planted as soon as the ground is dry enough to work in. If it snows again after planting – no worries, they laugh at snow. I have planted my Spinach seeds the beginning of April, but depending on the type of spring we’re having, I could easily have planted them a week or two early. Its not simply a matter of spinach tolerating the cooler weather, it thrives in it. I’m sure you’ve noticed that as soon as the weather warms up in June, your spinach bolts (goes to seed). These cooler crops don’t like the heat, and they don’t do well in it at all. They are best grown in the earliest parts of spring. In some climates they are winter crops, but not for us in Edmonton LOL. See below for some advice on ‘some’ of these hardy vegetables. I don’t have experience with all of them, but maybe you do. I’d love to hear your opinions and suggestions from your own experience. Please share by commenting below.
KALE: Personally, I am not a fan of growing most brassicas because I’ve lost too many battles with the caterpillars that like them so much, but I make an exception for KALE. Knock on wood, I’ve never had a problem with kale (so far). It’s easy to grow, doesn’t attract pests, and it toughs out the cold weather in both spring and fall. It was a no brainer that we should become fast friends, I just needed to get to know how to use it more in the kitchen. That was the easiest part of all. I pick kale from May through September – a whole season of wholesome green goodness in salads, green smoothies, and everything in between. And it dehydrates beautifully for winter use. What else could I ask for? Depending on the weather, and the the type of spring we’re having, they can be planted outside by seed, as soon as the ground is dry and warm to the touch (anytime from April 1-30). And don’t worry if it snows – they won’t care. You can get a jump on the season by planting young seedlings outside around the 1st of May.
MUSTARD GREENS and other Asian Greens: One of my personal garden rules is to try growing at least one new vegetable every year. I am SO glad I decided to do that many years ago, as I have learned to appreciate all sorts of great vegetables that I never would have any other way. In 2022 I grew Mustard Greens for the first time, 2023 I grew Tatsoi, which I have grown every year since. In 2025 I added Bokchoi. Several years ago I grew ground cherries and tomatillos (both warm weather vegetables) – huge win! I’ve grown them ever since too.
PARSLEY: has been a favourite herb in my garden for years, and occasionally even comes back in the spring – though at best it is still only a biennial, so its best to count of replanting seedlings every spring. But no need to wait till late May, parsley plants can be planted by May 1st for sure. Don’t bother planting seeds outside. They take too long to germinate for that. Either start them indoors in February or early March, or buy your plants from a greenhouse.
SPINACH: is wonderful, and one of the healthiest plants when eaten FRESH (within a couple hours of harvest). It’s leaves are tender and perfect for salads. I used to buy a lot of ‘fresh’ spinach from the grocery store, all year long, but I very rarely do anymore. We know that all produce begins deteriorating nutritionally within the first hour of harvest, and the sad new about spinach is that within four days – it has lost 100% of its vitamin C. I don’t know about where you buy yours, but I can pretty much guarantee that the spinach available in my local grocery store was NOT picked within the last 96 hours! So the very best source of spinach is the one that can it get to your table within only a few hours of harvest. That means its either grown in my garden, or its THRIVE LIFE Freeze Dried Spinach.
The tricky part about growing spinach is that it LIKES COOL WEATHER. That is its great strength as a garden vegetable in Alberta, since we specialize in ‘cooler’ weather. But wait. The convers of that fact implies that it hates hot weather. And it does. When the sun gets real hot, spinach goes to seed (it ‘bolts’ – see below). If you plant spinach around May 24, it will bolt in the heat of late June, and you are very likely to be disappointed. What to do? Plant it earlier.
Its good to know bytheway, that there are several other greens that grow well all summer long without bolting, so it doesn’t have to be “spinach or nothing”. But, back to spinach. Because it’s a cool weather crop, we can plant spinach in the early spring (early to late April depending on the year), when we can take advantage of the long ‘sun’ days that come with the cooler weather of April and May. Ironically spinach wants a nice sunny location, but doesn’t want the heat that comes with the sun, so its the perfect plant to extend your growing season. By the time your spinach has given up in the heat of summer, your swiss chard and other greens are ready to eat!
Is it worth it? Absolutely. If you can get your spinach planted early enough in the spring, you’ll get a beautiful crop that will flourish. Its the perfect opening act to your summer garden. And its a great source of iron, calcium and vitamins A, B, C, and K.
what is “bolting” and what causes it? Bolting is a common response of cool weather vegetables to stresses of summer – temperature stress, day length stress, or water stress. When the plant is in distress, it hastens it’s purpose in life – which is to go to seed. Long spells of hot dry weather may be good for peppers and tomatoes, but NOT good for spinach. Many other leafy vegetables do the same thing. Not much you can do about the weather in summer, so just work with it. Spinach doesn’t want what tomatoes want. So planting it when the days are cooler, and giving it as much cool time to grow as possible will make it happier.
In some zones, spinach might be a good fall crop, but I’ve found that the end of our growing season is too fickle. In Edmonton, the sun is less by the end of August, but the days are still very warm and dry. We could just as easily have snow in October as not, and if we do, temperatures could drop quickly. I’ve tried extending my growing season by planting spinach at the end of August, but experience has shown me I’m gonna have more success in the early spring.
Plant your spinach in rich soil – amended with old manure and/or compost. Keep it consistently moist, but not soggy. Water deeply and regularly. Spinach is a heavy feeder, so sprinkling blood meal around the plant mid growing season will encourage rapid growth of continuous new, tender leaves. Once you see five or six nice healthy leaves on a plant, go ahead and start snipping the larger ones off for spinach salad.
RADISHES and TURNIPS/Rutabagas: I am not a fan of radishes for their roots, but I absolutely AM a fan of their greens! I grow them, but only for their tops. They have a little zip that is great in a fresh garden salad when they’re young – super nutritious – SO worth it. They’re best when they’re young, so start picking early while you’re thinning them out. Once the roots get big, the leaves are not as tender and suitable for salads, but they make a great Pesto. (click here Radish Green Pesto for the recipe)
SEMI HARDY VEGETABLES will tolerate light frosts and temperatures around freezing (0°C)
Semi-hardy vegetables can be planted quite a bit earlier than the May long weekend, but maybe don’t push it too far into April, unless its an especially warm spring. Some great Semi-hardy Vegetables include: Beets, Carrots, Cauliflower, Celery, Chinese Cabbage, Endive, most kinds of Potatoes, all kinds of Lettuces, Radicchio, Rutabaga, and Swiss Chard.
BEETS: good for the tops as well as the roots. Plant at the beginning of May.
young carrot tops are delicious as well as nutritious
CARROTS: for example, take up to 3 weeks to germinate, so getting a heads start on them is important, but planting them too early, when the soil is still cold won’t help. The first days of May should be early enough for carrots. If you haven’t discovered making your own SEED TAPE, then you are in for a treat. Super easy to make yourself, and prevent wasting a ton of carrot seeds.
Did you know that carrot greens are not only good to eat, but super nutritious? More vitamin C than the actual ‘carrot’. I use them lightly chopped when they’re young and tender (the thinnings) in garden salads and in smoothies. If I have more than I can use, then I lightly chop and freeze for later. They make a fantastic Pesto!
LETTUCE: of all kinds is fine with cooler temperatures and even the odd light frost in the beginning. They’ll germinate in a few days and will thrive in the bright light.
POTATOES: could have an entire blog post devoted to growing them, but don’t wait till the long weekend in May to plant them. Shoot for the end of April / beginning of May, depending on the spring, when your soil is nice and warm. You don’t want them to pop up before the last frost, so don’t push your luck toooo far, but two or three weeks before last expected frost should be fine. You can expect them to be ready to harvest in 120 days, but you can begin ‘stealing’ young potatoes in early to mid August (depending when you planted them of course). The best potatoes I ever grew were hilled completely in hay. An experiment that I am trying to recreate this year. Stay tuned.
RUTABAGAS: not to be confused with turnips. They are both root vegetables and have similar shape and appearance, but they are not the same. Turnips are usually harvested young – only 2 or 3 inches in diameter, and are a summer vegetable. Rutabagas are harvested closer to the end of the growing season, and are usually bigger. Turnips are white with a purplish top, rutabagas have a yellowish flesh, also a purplish top. Turnips taste a little like radishes to me, while rutabagas are a little milder and maybe even sweeter. Both can be eaten raw, steamed, boiled, roasted or stir fried. Its all about personal preference when judging between the two, and tastes change over time, so I think its a good idea to come back to certain foods that we may not have liked in younger years. Turnips and rutabagas are the perfect example of that.
Rutabagas was one of my ‘new’ vegetables a few years ago. I had tried growing turnips the year before and discovered that my vague childhood memories of not liking them was very much true, and that I still didn’t like them. So the next year I grew rutabagas for the first time, and I’m a much bigger fan of them. I do like to oven roast them, by themselves like sweet potato fries, or with other roasted vegetables.
swiss chard early afternoon, destined to become spanakopita for dinner
SWISS CHARD: is one of my best friends in the garden. Fast Growing, Forgiving and Fabulous it is delicious, nutritious and very flexible in the kitchen. It is a staple in my summer kitchen, and the most important ingredient in my SPANAKOPITA. In fact I grow swiss chard especially for this summer delicacy.
Chard will tolerate the heat of summer much better than spinach, but hot dry days will still cause it to bolt. Watering well when its dry will help cool it down, but its important to pick continuously throughout the season.
Planting Non Hardy Vegetables must wait
Rushing the season with tender plants like tomatoes and peppers, is asking for trouble, so yes, for them – stick to the age old rule of May long weekend. For the others mentioned above, a little frost, a little snow – pshaw, we’re talking about SUPER HEROES here! They’re not afraid of cold. A late, cold spring, doesn’t have to shorten our season, or decrease our harvest, in fact, cooler temperatures are best for these cool weather vegetables. Be brave, and Be positive. You’re the boss of your garden. Begin looking at cold rainy spring days as SPINACH DAYS. And there’s other good news – in the early spring, there are fewer pests around to damage plants. It’s a total WIN!
Whether you’ve been around the block a time or two, or you’re just getting your feet underneath you in the garden, cool crops are a bountiful way to extend our season. And because they’re so forgivingly easy to grow, they are encouraging plants to start off with. Success means starting with winners. And the key is to EAT them. Broaden your horizons. Commit to experiment every year, with something new to you. Learn about one more vegetable that you never knew before. Plant it. Make friends with it, and learn ways to enjoy it.
SPANAKOPITA is why everyone should always plant Swiss Chard! There is no question that the world would be a happier place if we all did. see full recipe HERE
Hardy fruits:
There are many fruits we can grow in and around Edmonton, most notably – BERRIES. I hope you love berries because we grow awesome raspberries around here. And great red and black currents. And terrific honey berries (haskaps). And saskatoons. And plums and sour cherries. And rhubarb and apples. And all of these come back every year! We also grow excellent strawberries and even some types of grapes. So don’t limit your gardens to annual vegetables, open your mind and your arms to perennial fruits. But that’s another blog post for another time.
The one cardinal garden rule that everyone should obey is to: GROW WHAT YOU EAT, AND EAT WHAT YOU GROW. Otherwise, you’re just wasting your time and space.
Have fun in your garden this year, and have fun planning and planting it. Don’t wait till all the stars align, the sun is warm and everything else is perfect. You’ll have wasted valuable growing time. Embrace the hardy vegetables of cool weather. Put your jacket and garden gloves on and get out there!
I’d love to hear your thoughts on extending your gardening season. Please comment below.
At the time of this writing it is mid April 2022. We’ve had an unseasonably cold early spring. Snow has not completely melted. The world is in turmoil. War is raging in the Ukraine as they fight to remain autonomous from Russia. This is affecting food supplies all over Europe, and the fallout will be felt worldwide. We in the west, are still recovering from droughts, floods, fires, storms, and labour shortages. Food prices have skyrocketed along with fuel and energy prices, and everything related to them (which is pretty much everything). If ever there was a good time to plant a garden to supplement our grocery dollar, this year would be it!
Oats are a staple food in my house for many reasons, and in all the variations. Although I usually prefer the nice thick rolled oats, and even the oat groats, quick oats have a firm place on my list of favourites too. Quick oats are where wholesome goodness and convenience meet, and because of that they’ve earned their spot in my pantry. Adding a little quick oats to baby food helps provide well balanced protein, good representation of vitamin B, and a sustainability that will help baby feel satisfied longer. Keep some handy to add a tablespoon to pureed fruit, soups and yogurt.
I grew up on oatmeal porridge, and oatmeal raisin cookies. Moms for generations instinctively knew that oats were ‘good for you’, and since they’re relatively inexpensive, they were the perfect choice. Good and affordable. Oats had the reputation of “sticking-to-your-ribs”, so were a popular choice for breakfast. But what does that even mean? They are actually, a great source of dietary fiber, (both soluable and insoluable). The primary type of soluble fiber in oats is beta-glucan, which is slow to digest (hence they stick-to-your-ribs), and YES, this is a good thing, as it increases satiety, and suppresses appetite. In short, it is satisfyingly filling, and keeps you comfortable for longer.
But did you know that oats are even better for you than your mom and gramma understood? In fact, oats are among the healthiest grains on earth! They are a gluten-free whole grain and a great source of important nutrients. Although delicious and nutritious, most people are unfamiliar with the whole grain – groats: the hulled, whole seeds of the plants. We’re more familiar with rolled oats.
Oats are a great source of important vitamins, minerals, fiber and antioxidants, like potassium, calcium, magnesium and several B vitamins and Vitamin E, as well as trace minerals: manganese, copper, iron, phosphorus, selenium and zinc, AND – big bonus . . . Oats are a good source of protein. One of the richest sources of protein in the grain family: 11-17% dry weight. Truly, the humble OAT is a grain that deserves a place in your kitchen and in your family’s daily diet.
Groats: All oats start off this way: the whole, unbroken grains. Before being processed into any other form, groats are usually roasted at a very low temperature. This not only gives the oats their nice toasty flavor, but the heat also inactivates the enzyme that causes oats to go rancid, making them more shelf-stable. If you have never cooked up groats, then you owe it to yourself to give them a try. Because they are the original source of oats, they should always be the first “go-to”, but admittedly, they take a little longer to prepare (which is still worth it bytheway), so in our fast passed society, they often get sidelined. Cooked groats have a beautiful chewy texture that retains much of its original shape, and more of a nutty, earthy flavour than regular rolled oats. – see recipe below –
Steel Cut Oats: are simply groats that have been cut to make them quicker to cook. Sometimes referred to as Irish oats, these oats look similar to rice that’s been cut into pieces. Chopping them makes them easier to cook and exposes the starches inside to the water. These starches dissolve during the cooking process, creating a thickened, creamy porridge. It takes a little less time to cook than the whole groats, but has that same beautiful chewy texture. True Scottish oats are ground on stone mills from whole oat groats. They are not rolled, nor cut; they are ground. The texture of Scottish oatmeal is fairly fine.
Steel cut groats are more than porridge: add to stuffing, and even made a savory congee. – see recipes below –
Rolled Oats (or Old Fashioned Oats) These are the oats I grew up with, but in those days we mostly used them for porridge and cookies. My mom also used them in meatloaf.
I’ve since, taken oatmeal to a whole new level and I think I make the best in the world. (only slightly kidding). See recipe (such as it can be) below.
When I was a young mom, my mother in law introduced me to OATMEAL SOUP. The name is not very inviting, but it became a family favourite in our house. I’ve often made it for others, but I never call it by that name because of the images it conjurs up lol. – see recipe below –
My first experiments with Muesli were with the old fashioned rolled oats, which I started the night before. It was pretty much rolled oats and chopped dates in milk, soaked over night. I liked it, but my daughter disliked dates. Immensely. The concept of an uncooked ‘oatmeal’ intrigued me though, so I determined to keep it up, with some necessary adjustments. See below for more on Muesli.
Quick Oats Oat groats that are steamed for a longer period of time and rolled into thinner pieces so that they can absorb water easily and cook very quickly, or not even at all. NOT to be confused with the boxed “instant oatmeal”, available in stores now which contains quick oats plus a lotta sugar and artificial flavours. Instant oatmeal does not deserve a spot in my pantry.
For porridge, I never use quick oats, but they do come in handy for other things. Their convenience justifies their position in my pantry, and I though I rarely used them when my kids were younger, I wouldn’t want to be without them now. They are the base for my Muesli recipe (below), and I often add quick oats and blueberries to yogurt.
the flexibility of oats Truly, I do not know why oats are not more of a common food in most households. They are SO much bigger than the porridge of our childhoods.
Oatmeal: Yes, that generational breakfast favourite – cooked rolled oats. I have fond childhood memories of oatmeal on winter mornings before school, and I hope my kids have those same memories. I’m doing my best to make sure my grandkids do. – see recipes below –
Oat Flour: Your can buy or grind your own oat flour. Throw a little into cookies or bread for a boost of nutrients, and added chewiness.
Oat Bran: Oat bran comes from the outer part of the groat. If you grind your own flour, you can get oat bran by sifting coarsely ground groats. Or you can buy it. When oatmeal is processed, the bran (outer layer), is removed. Oat bran is a good source of protein, B vitamins, iron and soluble fiber. It is used to make porridge, and as an ingredient in a variety of hot and cold cereals, as well as in breads, cookies and muffins. Fiber adds bulk (not calories) to foods, so it helps “fill you up without filling you out.” Oat bran is particularly rich in a type of fiber called soluble fiber, which turns into a gel-like substance in your stomach. This helps you take in fewer calories overall.
Oat Risotto: Simply replace oat groats in your favourite risotto recipe. Easy peasy.
Oat Congee: Congee is a thick Asian comfort food, traditionally made with rice in a meat broth. Simply substitute in oats. Because it uses more water and is cooked longer, congee began as a way to stretch the rice in hard times. Usually a thick stew, or even a porridge (or gruel) type of dish. From its humble beginning, who knew it would turn into a favourite food of so many, and even find its way onto restaurant menus? I guess that’s the way with most comfort foods, they start out as necessities: poor people’s food. Adding rice to a brothy soup and simmering it till the rice actually thickens the soup, essentially IS ‘congee‘. Well you can do the same thing with barley, so why not oats? Remember, you’re the boss. You can add it to any soup recipe that calls for rice or barley. And you can flavour it any way you like. – see below for sample recipe –
Muesli
Let’s talk about Muesli, because it really does deserve more attention than it gets. Developed in the early 1900’s by pioneer nutritionist, Swiss physician Maximilan Bircher-Benner, he used it for convalescing patients in his private hospital. It was not originally intended as a breakfast, but more of an appetizer. Bircher-Benner’s focus was a diet rich in fresh fruit and vegetables which he used as an essential part of his nutritional therapy. Truly, he was ahead of his time. Who knew that over a hundred years later we’d finally understand how important a focus on fruits and vegetables is to our health. And Muesli has stood the test of time, as it is ever growing in popularity.
The original 1900 Bircher-Benner recipe consisted of : apples and nuts in a base of rolled oats, with lemon juice. The oats were pre-soaked water for up to 12 hours, then mixed with grated apples (the most readily available fresh fruit in Switzerland at the time). They were served with milk or cream, sweetened with honey or a small amount of sweetened condensed milk. The lemon juice helped keep the apples from browning. The idea was to serve a small amount of muesli immediately before every meal, as an appetizer of sorts. Modern adaptations of Bircher-Benner’s recipe includes more fresh fruit.
Years ago, when my older kids were little, I came across what was referred to as a traditional Swiss Muesli recipe: large flaked oats, dates and other dried fruit and topped with yogurt and toasted almonds. It was delicious and nutritious. Soon enough I realized the potential for flexibility, and muesli progressed to include whatever fruit was fresh in the summer, or whatever home canned fruit I had on hand in the winter. Some things were constant: usually shredded apples and raisins. Some things varied: sometimes apple juice, sometimes milk. Muesli is like that. Flexible and wonderful.
Though my recipe has evolved over the years, I’ve generally depended on apples as the fruit base, mostly because they were so readily available throughout the year. Other fruits I added depended on the season. As time went on, and freeze dried fruit became more available, my dependence on seasonally available fruit lessened. And less nutritious canned fruit became a thing of the past. The base is still oats, but it fluctuates between rolled oats or quick oats. Rolled oats if I start the night before, quick oats if I decide at the last minute (which is more often these days). Its a breakfast for us, or a lunch, or even a late day snack. – see recipe below –
RECIPES
Oat Groat Porridge ready to go!
Oat Groat Porridge(for two servings) remember, you’re the boss. If you prefer all water, or all milk, or all another type of milk – you do you. This is just how I do me.
1/2 cup oat groats 1 cup water pinch of salt (not more than 1/8 t) 1 cup milk I T maple syrup or brown sugar or honey
Because groats are a whole grain, they take longer to cook, so I find it helpful to give them a little head-start. 1/2 cup whole groats in 1 cup water, bring to a boil, stir, then turn heat off. Let sit overnight (8 hrs-ish). In the morning, t will already be tender and chewy, turn the heat back on and stir, bringing the groats to a boil again. Add a cup of milk and lower the heat a little to bring it back to a slow boil, stirring frequently to prevent sticking. Reduce to low, cover and let simmer gently for about 15-20 minutes, stirring once in a while to prevent sticking. The texture will be gently soft, but still chewy. If desired, sweeten with your choice of sweetener. I like maple syrup. Serve and Enjoy.
Steel Cut Oat Porridge A basic ratio for making steel-cut oat porridge is 1 cup of oats to 3 to 4 cups of water. Less water keeps the oats more intact and chewy. More water makes a silkier porridge. Try it a few times to nail down the way you prefer it. I like to start with 3 cups water, and then add the last cup in milk toward the end. Or use all milk. You’re the boss. Add a pinch of salt of course.
Cooking steel-cut oats is easy. Simply boil water, add oats, reduce heat, and simmer. But give it ‘time’, like 20 to 30 minutes to become tender. Start testing your porridge around 20 minutes, and continue slow cooking, testing every few minutes till its perfect. If the oats are tender at 20 minutes, it will still thicken up a little to leave it on heat for a little longer. Try it a few times to find your favourite way. To serve, pour a little more milk over top, and add a spoonful of brown sugar. Try using maple syrup to sweeten instead of sugar. I like putting raisins, or dried or freeze dried apricots on the top.
Because groat porridge takes so long to prepare, you might want to cook a little more, and refrigerate some for tomorrow. It will get dry in the fridge, but don’t despair, just add a little more milk and warm it up. Problem solved.
If you’re the type of person that must see an actual recipe, then see below, but remember, you can edit the details to your heart’s content.
1 cup steel cut oats 2 cups of water and 2 cups milk a pinch of salt (about 1/8 teaspoon) Bring 2 cups of water to a boil. Add the salt and groats, stir well to prevent sticking on the bottom. Return water to a boil, stirring. Reduce heat to low, add 1 cup milk, stir again and cover. Allow to gently simmer for about 10 minutes, checking every once in a while and stirring to prevent sticking. Cover again, and continue to simmer for another 10 minutes. Add that last cup of milk if you want and simmer another 5-10 or so minutes. That’s where personal choice comes in. When it is the way you want it, spoon into bowls and serve with a little more milk over top and a little brown sugar. Serves three or four depending on how much milk you added at the end.
Cindy’s Oatmeal: I cook mine as little as possible. Bring 2 cups water (with a dash of salt added) to a boil. Add 1+1/2 cups rolled oats. Return to a boil, stirring to prevent clumping. Add 1 cup milk and a little sweetener (usually brown sugar). Gently simmer a few minutes and serve. I occasionally add raisins to the boiling water (just before the oats), as a special treat. Or maybe some freeze dried fruit at the end: blueberries, raspberries, apricots. To me, oatmeal is great with several different fruits like apples, peaches, pears and cranberries. I never use Quick oats for cooked porridge (too mucky, I like the integrity of whole rolled oats). I do however, use them for Muesli, or to add to yogurt bowls.
Overnight Oats: a quick, easy no-cook option. For one person use a pint sized jar: put ½ cup rolled oats + 1 cup milk of your choice + ½ cup fruit of your choice (banana, apple, peaches, etc). Add 2-3 T Greek yogurt + 1 T brown sugar or maple syrup. Put lid on, and shake vigorously till all is incorporated. Refrigerate overnight. The oats will soften and the mixture will thicken. Optional: sprinkle toasted nuts or seeds over top in the morning. Ready to “Grab n Go”.
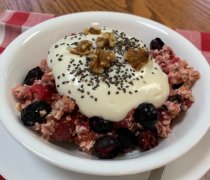
fresher than fresh muesli made with freeze dried fruit
FRESHER THAN FRESH MUESLI serves 2 or 3, uses mostly freeze dried fruit and takes five minutes to prepare. It doesn’t get any easier than this. 1 c. Quick Oats 1/2 c. dehydrated Applesauce 1/2 c. freeze dried Blueberries 1/2 c. freeze dried Raspberries 1/2 c. freeze dried Strawberry Slices 2 c. Apple Juice (approx)
Lightly stir to moisten completely, and let sit for 5 or so minutes to absorb juice. Add more juice as desired to keep it the texture you want. Serve. That’s it. It really IS that simple, and that quick. And that delicious. NO fat, NO sugar, NO dairy, NO wheat, NO additives of any kind. Super Nutritious and Delicious. Remember, you’re the boss. If you don’t have or want berries, then use what you have or prefer. Option 1: use any kind of fruit, substitute your faves or what you have on hand Option 2: use any kind of juice or milk, substitute your fave or what you have on hand. I prefer apple juice because is mild tasting allowing the other tastes to come through. Option 3: top it off with added nutrition in your bowl: a scoop of plain yogurt, a sprinkling of toasted nuts, or seeds: sesame / chia / hemp seeds. Be creative. Muesli is flexible.
Muesli takes on a whole new world of possibilities with freeze dried fruits. Always ‘fresh’ and always at their nutritional peak, you can have any kind you want because you have all-the-fruit all-the-time in your home-store. No matter what time of year, THRIVE freeze dried fruit is “fresher-than-fresh”.
basic recipe for a Greek Lemon Chicken Soup. Instead of using rice, use groats
Oat Congee first of all, don’t get tied up in using a specific recipe like this one. Congee is simply adding the rice (or groats) to more liquid than usual and slow cooking it till they come to a very soft stage where they thicken the broth. 1 cup steel cut oats 4-6 cups vegetable or meat broth 1/4 teaspoon salt 1/4 cup minced onion (I use chopped freeze dried onion) 1/4 cup finely chopped carrots (I use Thrive Life dehydrated carrots that are diced) 1/4 cup chopped mushrooms (I use freeze dried mushroom pieces) small amount of diced meat (leftover meat of your choice, or use diced freeze dried beef) 1 T freshly grated ginger, or 1 teaspoon fresh ground ginger 1 teaspoon soy sauce 1 teaspoon rice vinegar Bring the broth to a boil and add everything in. Reduce to a simmer and gently cook for about 30 minutes, stirring occasionally to prevent sticking. If it starts to get a little ‘thick’ add more liquid.
CINDY’S OAT SOUP (serves 6) 1 cup rolled oats 1/3 cup butter + 2 Tablespoons 1 onion chopped 3 cloves garlic, minced 8 cups chicken broth (or bouillon) 1 or 2 bay leaves 1 quart home canned tomatoes, or equivalent in canned or ripe tomatoes (3-4 peeled and chopped) 1T dried oregano crumbled salt and pepper to taste later Melt butter in large heavy skillet, over medium low heat. Add oatmeal and brown slowly, stirring constantly to prevent burning. It will burn suddenly, so be watchful. When nice and toasted, and smelling good, remove from heat and set aside in a bowl. In soup pot, use remaining butter to saute onions and garlic. Add stock, tomatoes, bay leaves and oregano. Bring to a boil and add toasted oats. Reduce heat. Simmer covered for about 45 minutes, stirring once in a while to prevent clumping or scorching. Taste and adjust seasoning if needed. Turn heat off and allow to sit for 15 minutes to thicken before serving. This is a soup that is just as good on the second day, and will have thickened even more. And yes, this is a type of ‘congee’.
PATTI SHENFIELD’S OATMEAL RAISIN COOKIES (our family’s favourite cookie) 1 1/2 cup butter or margarine 1 1/2 cup white sugar 1 1/2 cup brown sugar 3 eggs 2 t vanilla 1/4 cup milk 3 cup flour 1 1/2 t baking soda 1 T baking powder 1/2 t salt 3 cups rolled oats 3/4 cup coconut (optional) 3 cups raisins (or chocolate chips or both) In large bowl cream butter and sugars. Add eggs one at a time, vanilla and milk – beat until fluffy. Combine dry ingredients separately then add to creamed mixture one cup at a time. Mix until well blended. Stir in oats and raisins and coconut if you’re using. Preheat oven to 350 F. Drop by teaspoon onto ungreased baking sheet. Bake 10-12 minutes. Yield 7 dozen cookies.
* Are oats gluten free? Yes, oats are gluten free, but many commercial brands are processed in facilities that also produce gluten grains like wheat, rye, and barley. Since cross-contamination is common, many GF people feel the need to avoid oats altogether. Big fat shame, and big loss to the individual. If you’re a gluten free person, you don’t have to miss out on oats. Simply look for the “gluten free” label signifying that they’ve been protected from contamination.
We’ve all seen things this year, we thought we’d never see. We can no longer say “it’s never gonna happen”. It already has. It still is. It will again. And again! Stores running out of necessities. Supply chain issues that backlog commodities for weeks or even months, or in some cases – remove them completely. Panic buying which leads to even more shortages, and finally rationing. Not that long before, we couldn’t even imagine it. Now most of us have seen it with our own two eyes. The year 2020. Never to be forgotten. A year full of uncertainty and constant upheaval, where nobody had 20/20 vision.
During much of 2020, empty shelves became common place all over the world.
All of us were affected. All of us were at least inconvenienced, by not being able to get the things we wanted or needed in a reasonable time – if at all. Some of us lost income. Some lost jobs. Some lost businesses. Some lost lots more. The businesses who survived, had to figure out how to reinvent themselves. Some did it really well. Some thrived. Some were so well suited to the new way consumers had to buy, that they had a stellar year. Every one of them adjusted in some way. If they didn’t, they probably didn’t survive. Most will never be the same again.
The question is: “if 2020 didn’t wake us up, what’s it gonna take?” What’s it gonna take to convince us that being prepared could make a repeat of that whole experience so much easier? Look at it as the best dress rehearsal ever! The whole world joined in. It revealed to us our weak spots – things we can improve on. I hope we learned some valuable lessons.
As we strive to care for ourselves and our families, one of our greatest challenges is to find peace in the midst of an uncertain future. Never has our future been as uncertain as it is now. Though we may have the basic necessities of life today, what about tomorrow? Psychologists explain hoarding and panic buying as expressions of the need for “taking back control in a world where one feels out of control”. It leads to “me-before-you” thinking, and disregards the basic needs of everyone else. Experts say that when people are stressed, their ability to reason is often hampered, and they look at what others are doing for guidance. They will likely follow the crowd – engaging in the same behaviour. The great toilet paper shortage in 2020 is the perfect example of this, and has become the “icon” of mass panic buying.
The sad truth is, that none of it was necessary. And it still isn’t. Not because I don’t believe shortages will happen again, but because with a little bit of foresight and planning, we can all be prepared. With preparation comes peace of mind, and there is no price on “peace of mind”.
For over a century the Church of Jesus Christ of Latter-day Saints has counselled its members to be prepared in all things. “If ye are prepared, ye shall not fear” is a basic tenet in the religion. Preparation in all things, not just food. In 1977, then leader of the Church – Spencer W. Kimball said “We have placed considerable emphasis on personal and family preparedness. I hope that each member of the Church is responding appropriately to this direction. . . . This implies the [prudent managing] of our resources, the wise planning of financial matters, full provision for personal health, and adequate preparation for education and career development, giving appropriate attention to home [food] production and storage as well as the development of emotional resiliency.” These were strong words to the members of the Church at the time, and many took them very seriously. The wise counsel was considered “Direction”, and it certainly shaped the direction I took as a young adult, influencing many choices I made then, and in my future: primarily my choice to establish a serious FOOD STORAGE. I guess you could say some of us were “preppers” long before prepping was cool. LOL.
We don’t have to wear a long pony tail and live in a mountain cabin to be prepared. The term “prepper” may be a fairly current term, but there is nothing new about the concept of preparedness. So how does an urbanite prepare themselves and their family for the inevitable empty shelves and high prices of the future? I’ll tell you how. They begin by storing a modest supply of food. And they go from there.
HOW do you start a serious Food Storage?
It is actually really simple. Embarrassingly simple, however, don’t confuse the word “Simple” with easy, it’s about DOING. But with a clear mind and a good plan, we can move forward, beginning right here, where we are today. Below is counsel the Church’s governing body gave to its members worldwide in 2007.
Note that there is no incitement of panic in this loving counsel. It is reminiscent of the counsel a kind and wise parent might give to a child. And therein lies the simplicity of it. While worldwide circumstances and laws may alter drastically, the direction is still clear: to “store as much as circumstances allow“. What members do with that direction of course, is up to them – but if society as a whole followed it, we would never again have to live through the panic buying of 2020.
WHAT TO STORE?
Advice from the Church of Jesus Christ of Latter-day Saints, – long recognized as experts in the area of preparation says: “It is important to remember that you should not go to extremes when establishing your food storage. For example, it is not wise to go into debt to establish your food storage all at once. Develop it gradually so that it will not become a financial burden.”
hymn: Come Ye Thankful People by Henry Alford
There are three main components of food storage: *short term, *long term, and *water. Taking on the project of establishing a full year’s supply of food and necessities is huge, and for many – price prohibitive. But breaking it up into bite size, manageable pieces, removes the overwhelming immensity of it, making it feel less daunting, and more realistic; making it Do-able.
Start by setting a goal to store a THREE month supply, and divide that into months, beginning with ONE week: seven days of breakfast, lunch and supper. You know what is normal for your household. Start there. It is very important that you “STORE WHAT YOU EAT, AND EAT WHAT YOU STORE“.
Think of seven family favourite recipes for main dish meals. Write them down, with a list of ingredients for each. Begin your journey by buying what you need for those seven meals.
Now think of seven breakfast meals that are not dependent on fresh ingredients. Write them down, with a list of ingredients for each.
Fill the week’s menu in, with a list of seven lunch ideas, and write them down with a list of ingredients.
This exercise becomes a little more elaborate as you go through it, and it requires serious contemplation to make sure your choices are manageable for YOUR particular circumstances, especially if you have children in the home. Remember, it MUST be liveable. People say to me all the time “if I’m starving, I’ll eat anything“. Okay, I get that, and I might not even disagree with it in theory, but framing it with such extreme adjectives as “starving” is what panic thrives on. Calm down, and try to reframe your preparation in terms of “normal”. In times of stress, you want as much to remain comfortable and normal as possible. THIS is a huge step in the “peace-of-mind” department. An adequate food storage is not simply for some future ‘zombie apocalypse’, it is for those times when life throws you curveballs and you cannot get out to shop; it is for times of illness, disruption in employment, or – as we all saw in 2020, when the stores themselves cannot supply the general public. An adequate food storage removes the feeling of losing control over one’s own environment.
Once you have your week’s menu written down, go out and begin purchasing the ingredients for it – as you can. Make it a priority, pushing less important things to the side for now. Then, when you have those supplies firmly in-hand, repeat it. Or better yet, create another week’s menu.
Think of seven MORE family favourite meals. Repeat all the steps above. And then repeat again. And repeat again.
Now comes a new way of thinking, that is key to making this whole thing work. Avoid the scarcity mentality that “food storage” is food storage and “groceries” are groceries and never the twain shall meet. Don’t buy into that idea of “protecting” your food storage from yourself. That is where the scarcity mentality comes in and starts to mess with you. I have friends who absolutely will NOT touch their food storage. They’ve developed such a mental block against using it because of their belief that it is for emergencies only. But what constitutes an emergency? And when is it big enough? Some of them tell me they’ve got freeze dried food in their storage, and knowing that it has a shelf life of 25 years, they can just forget about it, knowing they’ve done due diligence.
The problem with this thinking is multifaceted. Firstly, they never learn how to use it, so the learning curve never goes away – making using the food seem more intimidating than it ought to be. And nothing ever gets resolved. Secondly, time slips by – and pretty soon 25 years has come and gone. Some of my friends admitted they’ve had their food storage well in the excess of 30 years! The natural question should be “So, WHEN were you gonna get around to using it?” They spent thousands of dollars, on this food insurance – only to have it now, decades past the expiry date. What a waste of a LOTTA money!
I am not speaking against long shelf-life foods. I am speaking against wasting them. Spencer W. Kimball emphasized – and I can hear his gravely voice even still say “We encourage families to have on hand this year’s supply; and we say it over and over and over and repeat over and over the scripture of the Lord where He says, “Why call ye me, Lord, Lord, and do not the things which I say?” [Luke 6:46.]”
USE the food you’re acquiring, and replenish continuously. This prevents food getting stale and outdated, and saves you money. The key to making the whole FOOD STORAGE thing work, is to normalize it. This is food that you EAT, remember? So eat it. These are your family’s favourite meals right? They’re comfort foods. You’re used to buying these groceries. So keep buying for them.
Put USING it, into your plan. As you work toward your goal of acquiring ingredients for a week’s meals, . . . . simply add more. You should be in a constant state of replenishment: replenishing more than what you’re consuming. As you can afford it! Never, ever, ever go into debt to buy food storage. That is flawed thinking, and completely polar to the whole principle of self sufficiency behind it. Perhaps you’re replenishing with a little bit more than what you’re eating, perhaps with a lot more. Follow the good advice to “store what your circumstances allow”. In the example of my friends with the expired food: they could have saved a whole lotta money if they had been regularly using and regularly replenishing their food storage. You don’t have to worry about buying two sets of groceries every month: one for the kitchen pantry, and the other for your “food storage”.
SHOP THE SALES We all look for bargains when we go into grocery stores. When something we like is on sale, we try to pick up extra. With the food storage mentality, pick up a little MORE than extra. Gradually your week’s supply will expand to a month’s supply, and eventually to three months. This is where you start enjoying the sense of peace that comes with preparation.
NORMALIZE It is critical that the meals you are planning, are as ‘normal’ as possible, because it is also critical that you rotate them: first in, first out. Doing so keeps your food items current, avoiding spoilage. When my family was young, I had an added motivation to ‘normalizing’ our food storage. I didn’t want my kids to ever feel ‘hard-done-by’, if and when we ever relied on our food storage (which we did for short spurts from time to time). No matter how difficult things might be for us, I wanted life to be as ‘normal’ as possible for our kids. That meant that we couldn’t be eating completely one way in the good times, and completely another way when things got hard. That simply meant we stored what we ate, and we ate what we stored.
*hint: You should also have a short-term supply of medications, hygiene items, and any other necessities of your family.
There are lots of resources about storing food, and quite simply – there isn’t ONE way to do it. We all have circumstances unique to us that make our stories a little different. But there is lots we can learn from our own experience and the experiences of others. I intend to create future posts answering questions I have heard, that may hopefully give you some suggestions for how you can work things out in your own home.
Watch for future posts on: what to store, including personal recommendations *where to store it – including to freeze or not to freeze *home canning and other skills for food storage *how to use *water storage *seed storage – and more . . . .
In the meantime, I’d love to hear your comments about what works for you.
“Grow old along with me! The best is yet to be, the last of life, for which the first was made. Our times are in his hand who saith, ‘A whole I planned, youth shows but half; Trust God: See all, nor be afraid!” – Robert Browning, a 19th century British poet, and famous for the poetry he and his wife Elizabeth Barrett Browning wrote together, still often quoted today.
Many things he wrote touch my heart. But this: “Come grow old with me. The best is yet to be . . .” this one is my mantra. I first heard it when I was 17, recited by a television character in an episode of “Marcus Welby MD”, and it imprinted in my brain. I thought it was the most wonderful and idealic expressions of love I’d ever heard. Although I couldn’t really visualize a life that wasn’t youthful, I knew already that I wanted to grow old with Dan. And I completely trusted that “the best was yet to be”.
Robert Browning
Well, over 45 years have come and gone – nearly half a century. (Sheesh right ). And I have realized for years that I am living my dream. Although it hasn’t always been a picnic, and we’ve certainly waded through much struggle over those years, I am indeed growing old with Dan. Ironically, Robert Browning outlived his wife Elizabeth by 28 years, never remarrying. He grew old without her, dying at the age of 77. How very, very sad. But not sadder than the hundreds of similar stories we see unfold all around us. Loving marriages, cut short here on earth by the passing of one. How grateful I am for the promise I have absolute faith in: that families are forever. Because of the atonement of Jesus Christ, families can be sealed together for eternity, and live together in family units forever.
Dan and I are approaching retirement. We hope and we pray for, and we truly look forward to the time to finish growing old together. We have many productive and wonderful years ahead, to spend together and to enjoy our family as they grow old too. But if not. If, for some reason that neither one of us will understand, that is not to be – then we can lean on the knowledge that we have chosen to seal ourselves to each other, with our family, and that we will be reunited in due time, and continue our life together in another place.
In our goal to care for ourselves and our families, there are many challenges. Some more practical and some more emotional. But one of those practical challenges is to find ROOM!
Room to store food that will be accessible enough to our day-to-day living, so as to allow us to not only “Store-what-we-eat“, but to actually “EAT-what-we-store“. When I was a child, it seemed that most houses were built with a cold room. Ours was for sure. And it was COLD, all year round. All our non-frozen food went in there, the boxes of fruit my mother bought, and everything else that needed to be kept cold but not frozen. Twenty years later, by the time Dan and I were looking at houses to buy, the fashion was very different. There were fewer cupboards in kitchens, no (or very small) pantries and zero additional space to store food – especially if you wanted it cold. What the heck? Another twenty years later, with the homes my kids have purchased, I am noticing some common trends. The newer homes have fairly nice sized pantries, but virtually NO available space for additional storage. It seems that for the last several decades, storing more than a few week’s worth of food requires considerable creativity. And being creative is important, because where we store our food storage is a big factor in *how long we can expect it to last, *the quality that it will retain, and more importantly *how accessible it is to us to be able to USE. Types of containers, and conditions in the space we store it will impact its shelf life.
FINDING SPACE WHEN YOU’RE PRETTY SURE THERE ISN’T ANY
After we bought the house we are currently in, it took us a few years of trying this and that before we settled on not one area that worked for food storage, but a combination of three areas. A little over a decade ago, we made some big changes in what we were storing, which influenced of course, how we stored it. Although I still do home canning and I still dehydrate when its suitable, and yes, we still have a freezer, about ten years ago we began to incorporate FREEZE DRIED Food into our food storage. The exceptionally long shelf life was the initial attraction – twenty five years, as opposed to the suggested two years of canned food (whether home canned or commercially canned), and the one year or less recommended for frozen food. That’s a BIG Plus! But it was also the variety that appealed to me. Everyone knows that the weak spot of any food storage program is VEGETABLES. Eating canned fruit isn’t bad, but who really likes canned vegetables? canned peas? or green beans or beets? When I was a child, Popeye tried to convince us that canned spinach was desirable. It would make you strong! he said. And although he did a good job convincing me it would make me strong, even Popeye couldn’t make canned spinach taste good. Suddenly with freeze dried food, one could have spinach, broccoli, cauliflower, green beans, celery, onions, and a whole lotta other vegetables – that tasted like they had just been picked, and which were FULL of important nutrients! And not just vegetables. Fruits, dairy products and even meats!
When considering where to store food storage, it is important that you find a place that is dry, dark and cool. Wouldn’t it be nice to have those cold rooms of yester-year? But even though most modern houses don’t plan for that sort of thing, those three factors of *dry, *dark, and *cool, must be our focus when looking for a suitable place. All other factors are secondary to moisture and temperature.
CONTAINERS
Common containers for food storage are: *paper – such as sacks of flour and sugar, or cardboard pasta boxes – short term only. *plastic or cellophane – such as pasta bags, raisin bags etc – short term only. *plastic buckets with air tight lids – suitable to pour from, or place bagged foods into. Practical for holding large amounts of food while keeping smells in or out, air out, and light blocked. Shelf life is completely dependent on what you put into them. *glass – mostly used by home canners, this is as effective as metal cans except for the obvious need to keep in the dark. Food exposed to light will react to it. Shelf life is recommended to be two years or less. *metal cans – of wet food such as fruit, cans of soup etc – like jars, recommended shelf life is two years. Metal cans – of dried food extends the shelf life considerably. It is the absence of moisture and the absence of oxygen that is so beneficial, but of course, it depends what is in the can, and how dry it was when sealed.
In all cases, moisture in the #1 enemy, It is imperative that we protect food from moisture which creates a perfect environment for harmful micro-organisms to thrive in. *hint: moisture doesn’t always mean liquid. Be mindful of moisture in the air that dry food will absorb when exposed to it.
CREATING ROOM
When you invest in food storage, “where am I gonna put this?” has got to be a question we ask ourselves. We can’t just keep buying food without a proper place to put it. We need shelves of one sort or another. And we need some kind of dedicated space.
underneath our stairs we created a spot that promised to work just fine. The shelves are deep enough to hold #10 cans three deep.
The space underneath stairs is often awkward and poorly used. Its generally an unfinished area, without heat, and If its in the basement, the cement floor helps it to be cool. The absence of a window keeps light to a minimum. Building some sturdy shelves can take best advantage of the space. Make sure the shelves are high enough for large #10 cans and deep enough for 3-4 of them or 4-6 quart jars.
The incorporation of freeze dried food into our family food storage meant that our storage situation needed to be adjusted. Frankly, it made it a lot easier. We had already invested in a shelf rotation unit. The company was then called SHELF RELIANCE (changed their name in 2013 to THRIVE LIFE). We opted initially, for the variety unit which held small cans like tuna sized, right up to the large number 10 sized cans, and everything in between. Seriously, it was one of the best investments we ever made in the area of food storage. It made rotating the cans so easy, and rotation is a major consideration when managing long term food storage. First in, first out. No more wasting food because it gets forgotten behind something else. The shelf rotation system was simple and brilliant.
For those like us, who needed some serious organization and to maximize storage space, this can-rotation system was the cat’s meow. It holds more cans than I could have imagined – up to 300 cans of varying sizes. No more stacking boxes and searching for what you’re pretty sure you have somewhere. And more importantly, no more forgetting about cans that remain tucked away until way past their expiry date. They are suitable to set up in a pantry, in a closet, in a food storage room, tucked into some corner in the basement, or in whatever available space you have – it keeps food uncluttered, visible and accessible.
In time, we bought another unit to accommodate some of our growing supply of large family sized cans of freeze dried food. But still, where to put them? and where to create more storage space? When we first got them, we kept them both in the laundry room which wasn’t ideal for a number of reasons, so we kept our minds open to other possibilities.
two rotation units side by side. One is for larger cans only, the other is for a variety of sizes.
At the time, we had an exceptionally long family room in our basement. We measured off a few feet at the back and Dan built a wall, instantly creating a new room, narrow but sufficient for our needs. We put our rotation units into it, adding additional shelves as were appropriate. Having two rooms for food storage might not have been our initial preference, but one must make the best of one’s situation right? It does allow us to diversify and organize better. And it allows for easy access.
TEMPERATURE
When dealing with food that has such an exceptionally long shelf life as freeze dried food, it is tempting to assume that shelf life is unconditional, Make no mistake – there is no such thing as unconditional. Fluctuating temperatures of summer highs and winter lows undermine the integrity of any food, no matter how dry it is stays. That 25 year shelf life is dependent upon ideal conditions. Q: What is the ideal temperature condition? A: Consistent temperatures below 70 degrees Fahrenheit (or 20 degrees Celsius) with the most important part being “CONSISTENT”.
Yes, we all know people who store their food in an unheated garage, but in that condition (at least in the climate I live in) it is impossible to avoid drastic fluctuation of temperature. However, if that is your only option, all you can do is make the best of it. Do you best to keep the temperature as consistent as possible, and know that your 25 year expectation should unavoidably be adjusted. I have even known some who store their freeze dried food in an outdoor shed! Though it may offer shelter from the rain, shed, temperatures can easily dip below -40 C in winter and rise to almost +40 C in the summer, with everything in between. This is extremely undesirable, and will most assuredly affect the stability of your food. It is not necessarily cold or heat that causes the damage, as much as the continuous fluctuation between the two extremes.
In the end, all we can do is the best we can do. I am of the firm belief that FOOD STORAGE is very important. I believe it should be food of the highest quality possible, and that all precautions should be taken to ensure it stays healthy. Where to start? That is a discussion for another time, but it is critical to start somewhere. Better to have some than none. Better to start! Don’t wait for a location to suddenly appear. Take charge and carve out a spot that is dark, dry and maintains a temperature as consistent as possible. Build or buy some shelves to store it, and GO FOR IT. You’ll never regret it.
Where have you found the best place to store your food storage? I’d love to hear your creative solutions when space was limited.
“Compost is a product that results from the slow decomposition of plant and animal material by living organisms. It is nature’s way of recycling the nutrients that exist in all living things and returning them to the soil to enrich and feed further generations.” – Pauline Pears in Organic Book of Compost.
40% of all household waste is compostable.
So WHO should be composting? And WHAT should we compost? And WHERE would one set up a compost? And WHY would we bother? And HOW do we go about it? HOW does it all work? Lets go through those valid questions.
WHO?
Everyone! You do not need a large yard. You do not need a science degree or expensive equipment. And yes something as simple as kitchen and yard waste can make a difference. Turning what would otherwise be wasted into something valuable is somehow empowering. You are taking control of another area in your life. You are in fact, taking responsibility for managing a good part of the waste you produce, instead of making it someone else’s problem. It is the responsible thing to do. When we look at the big picture, it’s hard to believe that our pitiful contribution can have much environmental impact, but the small project of household compost means we are part of a solution, NOT the problem.
What is the personal benefit our of compost? As in why bother?
Using the compost you produce, helps your future garden grow. It in fact becomes rich, loamy, dark brown soil , “whole food” for plants, providing nutrients and fiber. The more it breaks down the more it improves, making nutrients even more available.
Compost increases your soil’s ability to absorb and retain moisture, which naturally wastes less water, and reduces the need for water.
A natural fertilizer, compost contains balanced amounts of nitrogen, phosphorous, potassium and other important minerals.
Improves the composition and texture of the soil, making heavy clay soil lighter so it drains better, and adding body to sandy soil so that it holds water and nutrients better.
WHAT
What you compost is categorized into two simple groups: GREENS and BROWNS.
GREENS = wet, sappy material that breaks down readily BROWNS = dry fibrous material that is slower to decompose.
A good compost needs a balance of both. Too many greens will make your compost too wet and too many browns will make it too dry. Both conditions will impede proper decomposition and progress. Greens are nitrogen rich, and often referred to as HOT. Hot means they have the ability to burn plants if used in too high of concentrations, or too ‘raw’ – like chicken manure. It also means that it creates heat in compost that is necessary for the breakdown of material.
There is no BEST way to compost. What works best for me, might not work for you at all, and vice versa. What worked for me years ago, doesn’t work anymore. The BEST way for you to compost is the way that’s going to work best for your situation right now. Do you have a big garden? a big yard? so that you can afford more space for your compost? Do you have a small yard? maybe even a town house? perhaps an apartment? When space is limited, naturally you have fewer options for space, but that doesn’t exclude the possibility of having a compost. Don’t make excuses for why you canNOT have a compost. Find ways you can make it work. The secret is to mesh your compost with your lifestyle. If its to inconvenient, good intensions are soon abandoned.
FROM THE HOUSE – I use ALL fruit and vegetable trimmings, scraps and leftovers for compost. I also use paper and cardboard. I do not use meat trimmings or scraps of any kind. (see below)
Citrus – Worth mentioning separately, because there are different schools of thought that warn against using citrus. Evidently, citrus peels take a long time to break down due to the natural chemicals and acidity which repel worms and other microorganisms, sometimes even killing them. Personally, I add citrus and onions (which some also warn against). My thinking is that in the big picture, citrus makes up such a small percentage of my total composting material, that I simply don’t have time to fuss about it. On the other hand, if I had a LOT of citrus, or if I was composting on a very small scale – like in an apartment using worms, I would probably avoid citrus peels because I don’t want to risk hurting my worms. But in a normal household compost, don’t worry about that. Just how many oranges do you eat anyway? I use ALL produce.
Coffee grounds – improve soil looseness. They are a good nitrogen source for composting, but use with moderation as they are acidic and excess acid prevents the compost from heating up. Adding them directly to the garden may be too much direct acid for the novice gardener, but blending them with everything else in your compost is perfect. We don’t drink coffee in our house, so once or twice a year we’ll go to our local Tim Hortons with a pail and ask for their day’s left over grounds. They don’t save them usually, so we leave our pail and pick it up the next day. I remove the paper filters when I dump the pail into our compost bin. In a normal household I wouldn’t hesitate to use whatever coffee grounds are produced. I’d totally call that moderation. Again, how much can one normal household produce?
Meat, fish, fats, oils and dairy – Can these protein foods be composted? Of course they can. Everything that ever lived is compostable. With meat, fish and dairy however, you risk attracting unwelcome pests like flies, mice, and cats, even skunks, racoons and coyotes if you live in an urban area, or bears if you live in rural areas. Its the smell of rotting meat that is offensive to humans but attractive to animals. There are many composters however, who do compost meat, being careful to cover it with a layer of sawdust or other dry material to minimize odours. There are others who say that decomposing meat contains bacteria you don’t want, while others say the heat generated takes care of it. In the end, you-do-you. I prefer not to deal with it.
Paper products – Most paper products are great for composting. Thin printed paper like newspapers are perfect. Help speed up the process by shredding them or ripping them up when you throw them into the bin. Also paper towels and tissues and even shredded cardboard. They are from trees, after all! Avoid coloured glossy paper like magazine pages as they have been treated with coatings to make them so bright. Not only do they not break down well, they contain toxins that are best left avoided. I also add paper towel rolls, toilet paper rolls, paper egg cartons, newsprint flyers that come to the door, some packing papers, as well as many brown cardboards. Just rip them up and add them to your compost bin.
Egg shells – are a rich source of calcium and other essential nutrients that plants need. Not only are they excellent for your compost, but many people also add them directly to the soil they are transplanting vegetables seedlings into. If you throw eggshells directly into your kitchen pail and then transfer it directly to your garden compost, you may find some undecomposed egg shells the following spring. Not to worry, they’ll finish decomposing. But if you take the time to dry your shells, and then crush them before adding them to your compost or garden, you’ll speed up the process, and reduce the inconvenience.
Walnuts – NO. Walnut shells, nuts, leaves and bark should not be used in compost destined for a vegetable garden. Walnut trees release a chemical called juglone which occurs naturally and is toxic to some vegetables and plants. Some say that the leaves can be composted because the juglone toxin breaks down when exposed to air, water and bacteria, with the toxic effect degraded within a few weeks, but to me – why take the chance? In my part of Alberta, walnuts don’t grow anyway, but if you’re in southern BC or the western states, then you already know that walnut trees are not a gardener’s friend, and you already know what to avoid. Apparently, compost containing walnut residue is excellent for lawns. For the rest of us – I choose not to put walnut shells in my compost. Its an easy choice.
Old straw or wood shaving bedding from small pets like hamsters– Yes. Just dump the soiled bedding into your compost bin and let it age like everything else.
Indoor plants that become infested with bugs or disease – NO. Get rid of them. In a bag, into the trash. Don’t risk spreading disease or pests.
FROM THE YARD
First spring mowing – will include a lot of great brown material like dead grass, snow mold, dead leaves etc. HOLD ON! Don’t bag it all up and haul out with the garbage. Mow them up and use as the base of a new compost pile.
Grass clippings throughout the year – Yes – But! Grass clippings are usually green and moist. They matt and break down, but prevent moisture from getting through them when they matt. For this reason its not a good idea to use as plant mulch fresh from the lawn mower. Best to spread them out and maybe even toss them with a fork the next day or two to prevent that matting, and let them dry a bit. I have an area that I have Dan dump the clippings, them I spread it out with a rake. A couple of days later I spread it out again, and that should do it. I don’t want to miss out on their goodness. For the compost bin – absolutely. Green grass is quick to decay, adding nitrogen which helps everything around it decay.
NO – when you’ve recently treated your lawn with weed killer or fertilizer. Give it a mowing or two before adding to your compost.
Garden waste and weeds – Another Yes But! Anything organic from your garden is fabulous and is best returned to it. Some weeds like dandelions, thistles and quack grass, spread through root cuttings, so be prepared that you might be creating more by recycling them. Also, some weeds spread through seeds, so it they’re already gone to seed, you may be recycling those weeds again the following year. If seeds are tough enough to get through a 40 below winter, they’re probably tough enough to make it through the decomposition process of a typical compost.
If you’re weeding before the weeds go to seed, you should be fine to use them. Most weeds that I pull from my garden go straight into the compost.
Wood – Small pieces of wood scraps and small branches are perfect additions to your compost bin. All untreated wood will decompose, but obviously bigger pieces like logs or big branches are going to take a lot longer. Breaking down large branches through a wood chipper will make all the difference.
Sawdust – is another great addition in moderation, but not all sawdust is equal. If the wood has been pressure treated, varnished, stained or painted, the toxic compounds in those chemicals will not break down, and can negatively affect the microorganism activity, and ultimately the health of future plants. This is totally logical, as those chemicals are used to protect the wood from decay in the first place. Not something you want in your garden.
Dog or cat waste – NO! Not in a normal compost as it is yucky, stinky and has bad bacteria. However, there are many who have specific compost containers for it. More power to them. I’m not of that persuasion. That’s all I have to say about that.
Rabbit or Chicken bedding / droppings – *Rabbits: Unlike the droppings of other animals, rabbit pellets are a great addition to any compost and even straight into the vegetable garden at the end of the year. It is generally considered that after six months any pathogens that survived the heat of the compost are sufficiently broken down. Rabbit manure is considered GREEN – so add equal amounts of straw, wood shavings, leaves or other BROWNS to balance it out. It is rich in nitrogen, so is a great way to give your plants the boost they need for strong, healthy growth. If you or your friendly neighbour have rabbits, you’ll always have an excellent source of nitrogen for your compost pile. Yay for Rabbits!
*Chickens: Chicken manure is an excellent addition to your compost. It increases the water holding capacity and beneficial organic makeup of your garden, contributing more of the critical elements – nitrogen, phosphorus and potassium (by about three times!) than horse, cow or steer manure! (particularly good for tomatoes bytheway) It is so high in nitrogen (GREENS), you’ll want to be sure you’re adding sufficient BROWNS to balance it, but the way I look at it, I am usually adding chicken manure WITH the straw bedding anyway – so, problem averted.
Don’t be tempted to use it ‘raw’ – straight from the chicken coop. It can burn and damage your plants, as well as potentially carrying pathogens that can harm people. As with other manures, it really should be composted / aged before using. Six to nine months is plenty of time, and since in our climate, your compost is likely frozen much of November through mid April, count one gardening season to the next gardening season. If you use that as a safe rule of thumb and you cannot go wrong.
Ash – Wood ash is great to add IF it is clean ashes. Dan used to use diesel to start his fires in the firepit, but even months later when you shovel out the fire pit, you can still smell the diesel. Bad sign. We also used to burn a lot of scrap wood that was often varnished or otherwise treated. I have made a concerted effort the last few years, to clean up out fire pit burning so that I can use the ashes in the garden. No gas or diesel. No treated wood, including varnished or oil based painted wood. No coal or charcoal ash, as they contains enough sulfur to make the soil excessively acidic, and harmful to plants. Many charcoal briquets are treated with chemicals. When you’re burning old tree logs, leaves and other brown garden waste, your ashes will be a welcome, moderate addition to your compost bin. As with most things in life, moderation is key.
Diseased or pest infested outside plant material – NO. Get rid of them. Once in a while I might lose a Delphinean to some kind of infestation. I cut if off, put it into a plastic bag and dispose of it. I do not want to keep it on the property and risk re-infecting a different area. If you have a plant that died inexplicably, don’t risk passing that disease on. Get rid of it. Remove it completely from your property, in a plastic bag.
WHERE?
Where is it going to work for you? Sometimes you don’t have a whole lotta choice. Ideally, you want it in the sun to keep it warm. Ideally, you want it close to your garden so transferring the finished soil is easy. Ideally, you want it away from your sitting area – for obvious reasons. But ‘ideal’ is not always possible. Sometimes, you just have to put it where it fits. And its not like you’re putting in a foundation. If, in a few years, it needs to be moved, then move it. Don’t fret about the perfect spot for now. Just get it ‘somewhere’ so you can find out if its gonna work there or not. Next spring, you may change your mind if you want.
WHY?
Your compost pile will turn once living matter from your yard and your kitchen into rich, dark, wonderful, soil. Combine yard waste like grass clippings, leaves, and garden weeds with kitchen waste like fruit and vegetable trimmings, even leftover yesterday’s dinner, and you’re good to go. Essentially you’re taking what cannot be used and making it useable. The real question is “WHY NOT?”
Is compost the same as fertilizer?
I like to compare fertilizer to vitamins. For all intents and purposes, it is the same thing: vitamins for plants. Fertilizer feeds plants in a similar way to how vitamin supplements ‘feed’ us. For the record, I am not opposed to vitamins, but they are not ‘food’. And fertilizer is not ‘food’, it is not intended to feed the soil, it is intended to meet the need of specific plants. Rather short term. Compost on the other hand, is food for the soil. It amends the actual composition of the soil, making and keeping it a healthy home in which healthy plants flourish, Compost and organic fertilizers can work together in the same way that nutritious food and good supplements can work together for our body’s health. The organic matter in compost not only increases fertility by providing trace nutrients that plants need, but also increases its ability to hold moisture, which helps release the nutrients in organic fertilizer. Soil that is regularly amended with aged manure and compost is soil that will stay healthy, providing a healthy environment for plants.
HOW?
How do you go about creating your first Compost? or How do you resurrect a compost that wasn’t all that successful?
How does Composting work? Composting will happen with or without you. It is the natural process carried out by millions of tiny creepy crawlies, all uniquely organized for this purpose. Most are microscopic, while others such as worms and insects, you can see. Its that great circle of life. All you have to do is to keep things natural enough that those creatures are welcome and safe in your compost yard.
Different methods There is no end to the different bins/containers for composting you can employ . From big to small, from free to expensive, from an eyesore to fitting right into your garden – and everything in between. If you’re handy and like the DIY thing, you can make make your own with wood, or a garbage can, or buy one already to go. Your available space will likely be the biggest influencer in your options and will ultimately determine your decision.
Our first attempts at composting were with varying degrees of success.
#1 was just a wooden frame and we put everything in it with no idea of how to layer, what not to add, how to toss and even what to expect. To sum it up, it was pretty much an organic garbage pile and very unsightly. It was also in a spot visible from the alley, which didn’t endear us to our neighbours I’m sure. And because we didn’t have an end goal, we never really knew when it was ‘done’. I’d like to forget about that one, and my apologies to all our former neighbours, who for the record, were all kind and patient with us. We were young, and most of them were considerably older. I think they thought our efforts were ‘cute’ and they were just glad someone was taking care of the property .
Our #2 was slightly better. Another house. We dug a hole in the far corner of our garden and we tossed everything into it. We had a better idea, but a marginally better plan. In the early spring, we forked it out and spread the resulting rich soil, but other than that, we hardly ever paid attention to it. Unfortunately, on the other side of the fence our neighbours had a nice tidy sitting area. Our compost attracted flies and apparently had an odour we hadn’t made note of. Our neighbour was kind, but asked if we could cover it for his benefit. Sorry again.
the UPRIGHT plastic bin
Our #3 was the purchase of a black upright bin. It cost about $100 which was really pricey for us in those days, but at least it was contained. We filled it up throughout the warm months, let it sit for the winter, and tipped it over in the spring to fork out the resulting soil. There was always a upper layer that didn’t break down, so we put that in the bottom of the current year’s collection. It was more successful. And tidier. The black colour kept it warm in the summer, which helps. My one criticism was that it didn’t allow for much air circulation. That perhaps affected the final result, but it was still adequate for our needs.
Over the years, I paid a little more attention to layering better with greens and browns. Dan and I had different expectations from our compost, and different opinions about what should go into it. *For instance, he didn’t like putting corn husks or cobs into the compost because there were always rogue ‘undigested’ cobs (and egg shells) the following spring. I on the other hand, didn’t mind that. They just got mixed up with the rest of the soil in the spring, and soon enough ceased to exist. That was good enough for me. And in corn season, corn on the cob is a family favourite, so we always had plenty of corn compostables in August. I couldn’t bear to waste them. *Dan always put the first spring yard mowings into bags and hauled them out to the garbage cans for pick up. He was all about ‘tidy’. If I saw them in time, I’d haul them back into the yard and dump them in the compost ‘area’ as my bin couldn’t handle it all. I am all about ‘compost’. We’re not always on the same page lol. *If there was anything identifiable left in the compost bin when we emptied it in the spring, Dan felt that it was a failure and we should stop doing it because clearly we don’t know how. I on the other hand, didn’t expect everything to have disappeared, and I didn’t mind those last contributions from the year before still looking like their former lives. So we just agree to not talk about it, and I take care of the compost. It works. We’ve found our peace.
When we moved to our current house, we brought our black upright bin with us, where it served us well for many years. But it began showing its age, and last spring, died. I threw the top half in the garbage and continued using the bottom half till it didn’t suffice anymore. I gave it a proper funeral, and we came up with another style that so far is working beautifully. See below.
the TUMBLER:
A tumbler is a bin designed to turn on an axle or to roll, allowing the ingredients to mix as it is turned. If you have a small yard and garden which is visible to your back deck, then a tumbler may be a good fit. It is neat and tidy, rotates easily – keeping the compost itself tossed and aerated. As it is a closed unit, you don’t have to worry about a bad smell or animals getting into it, and its easy to dump out. It speeds up the process from the whole season, to about half the time.
A tumbler is limited in size and so you’re restricted in the amount you can compost – which may suit you just fine if you don’t have a big yard anyway. They can be kinda pricey, but there are always options to maybe pick one up second hand, or to make one yourself. You will need to make sure you balance your contents out by putting in brown material or you could end up with a stink slimy mess of rotten kitchen produce. They generally have a trap door for adding material, adding water if needed and from which to dump the finished product.
homemade wooden bin with wire netting
I love this style. It is compact, but big enough to last a typical backyard garden all season.
The wire allows for air circulation. The lid can be closed if there is a lot of rain, but still allows the sun to still do its magic. I love the trap door in the front which makes it accessible to fork out the bottom next spring.
If its made with cedar it could be a little pricey, but will last a long time, so it will be worth it in my opinion. I’ve seen this same style made with three compartments, allowing for bigger yards, bigger gardens, more material.
Repurposed plastic garbage can
This is our #4 Compost bin, and it is perfect for us right now. It is an extra large garbage can turned upside down. Dan cut the bottom out for me to make a new ‘top’. He drilled lots of holes around the main body to allow for air. I filled it last summer so we added a second toward the end of the season. The idea is to simply tip it over in the spring, like I did for years with the black one, then fork out the new soil. Because our compost area is in the very back of our garden, it is rarely visible so it doesn’t need to be ‘pretty’. It is surprising how ‘full’ a compost bin can get and how much it compacts. This can was full to overflowing more than a couple of times during the season, and things would settle as it decomposed, always making room for other material. When I went out to have a look at it recently, it is only about half full, although I know that at the end of the season last fall, I couldn’t put anything else in it.
This image is from a reader – Meagan Kessler, and I am using it with her permission. Look in the upper left of center, about 11:00, to see a garbage can painted the same colour as her fence (brilliant bytheway). It has the bottom cut out of it, and several holes drilled into the body of it to all for more airflow and therefore, better composition. It is the perfect solution for her small townhouse lot. Meagan said she would did a hole in the spring and empty its mostly composted contents into it, where it would finish the process. Though Meagan says it was less than ideal, it worked well for her over 14 years. At the end of the day, you’d still end up ahead by repurposing all those food scraps and putting them back into your soil. I think its a great example of using what you have, and making what you have work. Thank you Meagan.
Basic Needs
There really is no ‘right’ container, and no ‘wrong’ container. It is completely about what’s gonna work for your situation: your garden/yard size, your budget, your skill level, your level of commitment to composting, your preferences. – Your compost needs a healthy place to BE. – It needs a good balance of greens and browns. Browns like sticks and cardboard etc, give the compost structure and provide air pockets. – Your compost needs air. – Greens give it nitrogen which speeds up the decomposition. – It needs moisture, but we all know, that too much ‘wet’ is not good either. If it is pouring rain for days, its good to have a lid to keep your compost from flooding and drowning the tiny creatures that live there. You’ll know if its too wet, it will be slimy and mucky and may begin to smell bad. – There should be good drainage so that water doesn’t build up in the bottom. Normally, mine just sits on the ground. Sometimes I have small branches and twigs in the bottom, sometimes I’ve even raised the black upright container a little off the ground with bricks or logs. – Warmth keeps a compost happy. It can’t always be in a sunny spot – we all know there are only so many of those to go around, but try to at least situate it in a warm spot.
Compost is Ready
In the central Alberta climate I live in, (zone 3A), traditional composting season is generally from May through September. I start mine as soon as it is warm enough to dump out last year’s compost – and that is usually further into May than I think it should be. That big clump of compost sometimes takes an extra week or two to thaw – depending on the spring, and how much sun gets to it. But as soon as it has warmed up a bit and I can pull the bin off of it, then its ready to use. It will be dark brown in colour, and look suspiciously like ‘soil’ lol. It will have a pleasant ‘earthy’ smell. Don’t expect it to look like a bag of purchased compost, it’s not likely to be ready all at once. Some of it had most of the summer to decompose, while the last of it was added at the end of the season just before the cold weather hit. There will still be lumps in it, perhaps some egg shells, a few corn cobs, twigs etc. If you’re like me, you likely have some leftover brown material on the top. Don’t worry about that. Just put it in the bottom of your new season’s compost and build on top of it. It can show the new stuff how to do it right.
I use it right away, and I always wish I had more. This year, I’m starting out with two big cans, so I’m hoping to have lots. Use it on top of your garden beds. It’s actually better to leave it on top rather than work it in. That way, the rain will help break it down, and bring the nutrients down will it, into the soil. Use it in your vegetable garden, as mulch around your flower beds, and tomato plants, or mixed with your potting soil. Use around your fruit trees and current bushes.
GREEN MANURE or COMPOST
Comfrey is a perennial herb that has a very deep tap root which draws minerals to the surface and into its large fuzzy leaves. It grows fast and tall, and can be cut a couple of times during the growing season to make a compost activator or to use as a green mulch. Sometimes I chop it down while Dan is mowing the lawn. He mows over top of the comfrey pile, chopping the leaves into mulch, so that I can remove the mower bag and use the mulch wherever I decide I need it.
Another excellent green compost are pea vines. Pretty much do the same thing I do with comfrey. Throw them on the lawn and mow them up. Then throw them into the compost or use as mulch in the garden.
TRENCH COMPOSTING
Early in the spring I am usually ready to start composting before my compost bin from last year is ready to be emptied. I don’t want to add ‘fresh’ kitchen scraps on top of last year’s compost. Sometimes the compost isn’t even completely thawed yet. So what to do? Trench compost. I dig a hole in a part of the garden I am not going to grow root crops. Perhaps zucchini, butternut squash, lettuce, swiss chard, beans, etc.
If its a one time thing, dig a hole and bury it. Simple as that. If you plan to use the method for a week or two, dig narrow trenches, about a foot deep and the width of your shovel. Heap the soil along side of the trench. Then, as your kitchen scraps become available, dump them into the trench, spreading dirt over each section as you fill it. When your real compost bin is ready, cover it over with 4 or more inches of dirt and pretend its not there. Plant your seeds and enjoy knowing that you have buried treasure in your garden.
I’d love to hear of your adventures with composting, your opinions, and your feedback.
Many years ago I happened upon this little poem, and I wrote it down. Where? or when? or from whom? I cannot even venture a guess at this point in time, but it has been in my collection for decades – and I’ll have to leave it at that. When my mom was a little girl she promised herself that when she grew up to be a ‘mommy’, she would ALWAYS have a cookie jar that was full of cookies. I can attest that we had a cookie jar when she was momming, and occasionally it had cookies in it. I on the other hand, made no such promise.
“A house should have a cookie jar for when its half past three and children hurry home from school as hungry as can be there’s nothing quite as splendid as spicy, fluffy ginger snaps and sweet milk in a cup.
A house should have a mother, waiting with a hug. No matter what a child brings home, a puppy or a bug for children only loiter when the bell rings to dismiss if no ones home to greet them with a cookie and a kiss. “ – annonymous
And that’s all I have to say about that.
But I’d love to hear your experiences with a cookie jar.
All things which come of the earth, in the season thereof, are made for the benefit and the use of man, both to please the eye and to gladden the heart. (D&C 59:18).
Gardening is a lot about preparation. And waiting. You clean up, rake out, dig up, move around, plan for, mow, chop, burn, haul here and haul there for days and days. It means dirty hands, dirty-all-over, and sore muscles. Then you wait till the forecast is favourable and finally you plant! If you’re like me you plant in stages. Spinach first, assuming it’s bed is ready. Then potatoes and peas, carrots and beets and so forth. Lastly are the delicate bedding plants like tomatoes, hoping that you’re not jumping the gun. And very lastly is basil (persnickety little princess that it is). Its a happy day when everything is looking your way, and the sun appears to commit to a lengthy stay – the tomatoes are finally into their summer home. And then! . . . you wait. . . . sigh . . . .
I cannot be the only gardener who wishes things would grow a littler faster. We can prepare the beds, fertilize, water, mulch, weed and water some more, but I’ve never met a seed in a hurry. Every year I try to be more realistic. “Get real!” I tell myself. “Stop peeking.” I tell myself. And I do. For maybe a week. Then we get a good two day rain, and I cannot help but take the inevitable day-after-the-rain-garden-tour, looking closely for any shoots of . . . anything. If I was honest, I am always disappointed. Having said that however, I am still utterly amazed at the difference two weeks in May can make to a garden.
May 1: my world is brown. A few hearty weeds starting to unashamedly show themselves, and the promise of buds on a few early trees.
May 15: The trailing bell flower (I call it devil-weed) is the most hardy green thing in the yard and it’s happy to be alive. (I’m not happy its alive) Dandelion leaves are beautifully tender in texture and taste. More buds on more trees. Most perennials are up, even the hostas have started poking their pointy heads through. Leaves have budded out on the chestnut tree. Blossoms on the Mayday tree, and the scent of them on the breeze. Tulips are blooming. Things are starting to green up.
May 21:
The stupid red lily beetles have sprung out of NOWHERE and are eating every relative of the lily family for miles around. Pink blossoms on the crabapple trees, and white blossoms on the cherry tree. Popcorn literally popping on trees all over our yard. The Delphiniums are two feet high. Mint is poking through the soil. Borage is in the four leaf stage. Mullein is nice and big and fuzzy. Lovage is already three feet high. The bright cheery yellow daisy-like flowers of Leopard Bain are in glorious full bloom. The world is suddenly every shade of green!
June 1: The garden is full of promise and hope! Above all, hope. When all is said and done, after all is said and done – there is nothing one can do to rush the outcome. What if the carrot seeds don’t germinate? What if that one time I let it go dry was the critical time when they were their most vulnerable? What if stupid idiot cutworms cut the cucumbers off again? (stupid idiot cutworms) What if it hails? I hate hail.
faith vs hope
“One of the most delightful things about a garden is the anticipation it provides.” – W. E. Johns
I do not have faith that my seeds will germinate. That would be a misplacement of my faith, as I have seen times that seeds have not germinated. Many factors influence that outcome. Of course, I HOPE they will, and I water them as if they will, and I keep hoping till I see it actually happen.
I don’t even have faith that I will have a harvest. Again I hope every year for a good harvest, but my faith is reserved for something much more dependable than the weather, or the fickle nature of ‘nature’. I have faith in God, and in His Son Jesus Christ. I have faith that He will answer my prayers, and that He will bless me according to my diligence and obedience to the laws and principles upon which those blessings are predicated, and of course those He desires to bless me with. I have faith in His promises; promises like families are eternal and that I will see my dad again. Other things I don’t have faith in.
For my garden, I hope the weather will be good. I hope that the sun will be hot. I hope that we’ll get enough rain and that our rain barrels will refill frequently. I hope that day will follow night, and that night will follow day again the way I’m used to. The way I like it. But this year of Covid19 has taught me that even the things I thought were constant and dependable, are volatile and removable. Do I have faith that life will always be what it is right now? Absolutely not.
If there was no hope in a harvest why would we plant a garden?
our city backyard family garden cc 1988
I love garden fresh carrots. Crunchy and juicy at the same time, there is nothing quite like them. But carrot seeds are very small and they take forever to germinate, and keeping them moist while they germinate is critical and truth be told, . . . . . I’m not always on top of it. Watering them can cause a flood and push them all into one area leaving another area empty. You could easily have 8 billion carrots growing so closely together that you must thin them out or they’ll be puny, spindly, little things.
This year I hit upon two reeeeeally good ideas for growing carrots and I happily carried them out. One was to soak the seeds for four days till they begin to sprout, then suspend them in a cornstarch slurry inside a small ziplock bag. You plant them through a small hole snipped in the corner of the bag, squeezing the slurry of seeds into a pre-watered trench. The other idea was to sprinkle the seeds into a pre-watered area and then keep them under a board to protect them from drying out or from being washed away by water. Both hacks required constant moisture of course. I used the best of both ideas and was ‘hopeful’ (even giddy) for excellent results, reasonably certain of a positive outcome. Between hand watering and the rain, I was confident the row never dried out. After about a week I allowed myself to peek, and thereafter peeked almost daily. Carrots can take an easy twenty plus days to germinate (I told you they took forever), but I was delighted to see little white spears poking out of the ground in less than two weeks. I gingerly lifted off the boards to let the sunlight start greening them up. The ground seemed moist enough but I soon got distracted and didn’t get back to them till the next day. Bone dry with not a sign of seedlings I saw the day before. (sad face) I was certain I had killed the tender startlings by uncovering them too soon. I hoped I hadn’t. I watered gently and often, continuing to ‘hope’ for the best but I had lost my prior confidence. I was just considering taking next year’s seeds (I always buy one year in advance) to begin soaking them. Our season is short enough, that every day that goes by gets closer to being too late to start seeds in the garden, so I didn’t have a lotta flex time to weigh it out. I continued to hope, watering daily for the best possible scenario, and checking daily. A few more days and I saw those wonderful grassy-looking tiny bright green speers poking through the dirt along the carrot trails! I am SO glad I didn’t give up.
If hope hadn’t existed I would have ceased to water, ceased to check daily, ceased to expect the best, and consequently I would have sabotaged potential, losing any chance of carrots in my garden this year.
“When the world says give up, hope whispers ‘try it one more time.‘” – anonymous
Hope is a choice. It doesn’t just happen to us; we consciously and intentionally choose it. Hope strengthens us mentally and emotionally. Hope provides a positive outlook on life. It literally makes us happy. Hope reduces stress and anxiety. Hope improves our general state of health and boosts our immune system. Hope is essential to our feelings of self worth. Hope moves us forward and makes the future look like a brighter place, one in which we’d like to live. Hope energizes us. When we are positive and cheerful it is easier to have energy. Hope increases faith. And faith increases hope. They are very closely tied together Hope is healing. Depression is a state of hopelessness, and the opposite is true. Hope is not stagnate, it is all about ‘doing‘. Acting on hope yields more results than sitting on hope. Hope is infectious. Just like laughing makes us laugh and smiling makes us smile, hope in another inspires hope in ourselves. Hope is realistic. Hope in a fairy tale world is not hope, its fantasy. Hope for a pony while you live in an apartment is not hope, it is pleasant musing.
“Every thing that is done is this world is done by hope.” – Martin Luther
The truth is, hope may let you down. It seems cruel but sometimes even those things we have the greatest amount of hope for, don’t happen. Its at those times we wonder why we ever invested in it. It seems briefly that had we not hoped, we wouldn’t have fallen so far, and wouldn’t hurt so much. But for the most part, hope is such a pleasant companion while we’re walking with it, that at the end of the journey, we decide it really was worth it, and we yearn to walk with it again, because with hope everything looked brighter, and our days were better. I wouldn’t ever want to live without it. No matter what happens, I hope ‘hope’ and I can always be friends.
“Do not spoil what you have by desiring what you have not; remember that what you now have was once among the things you only hoped for.” ― Epicurus
~
The next few blog posts will follow the theme of Lessons I learned from my Garden. I hope you’ll join me. I would love to hear your comments, and your own experiences about lessons learned in your own garden.