OATS: Where Healthy Food and Convenience Meet

Oats are a staple food in my house for many reasons, and in all the variations.   Although I usually prefer the nice thick rolled oats, and even the oat groats, quick oats have a firm place on my list of favourites too.   Quick oats are where wholesome goodness and convenience meet, and because of that they’ve earned their spot in my pantry. Adding a little quick oats to baby food helps provide well balanced protein, good representation of vitamin B, and a sustainability that will help baby feel satisfied longer. Keep some handy to add a tablespoon to pureed fruit, soups and yogurt.

I grew up on oatmeal porridge, and oatmeal raisin cookies. Moms for generations instinctively knew that oats were ‘good for you’, and since they’re relatively inexpensive, they were the perfect choice. Good and affordable. Oats had the reputation of “sticking-to-your-ribs”, so were a popular choice for breakfast. But what does that even mean? They are actually, a great source of dietary fiber, (both soluable and insoluable). The primary type of soluble fiber in oats is beta-glucan, which is slow to digest (hence they stick-to-your-ribs), and YES, this is a good thing, as it increases satiety, and suppresses appetite. In short, it is satisfyingly filling, and keeps you comfortable for longer.

But did you know that oats are even better for you than your mom and gramma understood? In fact, oats are among the healthiest grains on earth! They are a gluten-free whole grain and a great source of important nutrients. Although delicious and nutritious, most people are unfamiliar with the whole grain – groats: the hulled, whole seeds of the plants. We’re more familiar with rolled oats.

Oats are a great source of important vitamins, minerals, fiber and antioxidants, like potassium, calcium, magnesium and several B vitamins and Vitamin E, as well as trace minerals: manganese, copper, iron, phosphorus, selenium and zinc, AND – big bonus . . . Oats are a good source of protein. One of the richest sources of protein in the grain family: 11-17% dry weight. Truly, the humble OAT is a grain that deserves a place in your kitchen and in your family’s daily diet.

Groats:
All oats start off this way: the whole, unbroken grains. Before being processed into any other form, groats are usually roasted at a very low temperature. This not only gives the oats their nice toasty flavor, but the heat also inactivates the enzyme that causes oats to go rancid, making them more shelf-stable. If you have never cooked up groats, then you owe it to yourself to give them a try. Because they are the original source of oats, they should always be the first “go-to”, but admittedly, they take a little longer to prepare (which is still worth it bytheway), so in our fast passed society, they often get sidelined. Cooked groats have a beautiful chewy texture that retains much of its original shape, and more of a nutty, earthy flavour than regular rolled oats.
– see recipe below

Steel Cut Oats:
are simply groats that have been cut to make them quicker to cook. Sometimes referred to as Irish oats, these oats look similar to rice that’s been cut into pieces. Chopping them makes them easier to cook and exposes the starches inside to the water. These starches dissolve during the cooking process, creating a thickened, creamy porridge. It takes a little less time to cook than the whole groats, but has that same beautiful chewy texture. True Scottish oats are ground on stone mills from whole oat groats.  They are not rolled, nor cut; they are ground. The texture of Scottish oatmeal is fairly fine.

Steel cut groats are more than porridge: add to stuffing, and even made a savory congee.
– see recipes below –

Rolled Oats (or Old Fashioned Oats)
These are the oats I grew up with, but in those days we mostly used them for porridge and cookies. My mom also used them in meatloaf.

I’ve since, taken oatmeal to a whole new level and I think I make the best in the world. (only slightly kidding). See recipe (such as it can be) below.

When I was a young mom, my mother in law introduced me to OATMEAL SOUP. The name is not very inviting, but it became a family favourite in our house. I’ve often made it for others, but I never call it by that name because of the images it conjurs up lol.
– see recipe below –

My first experiments with Muesli were with the old fashioned rolled oats, which I started the night before. It was pretty much rolled oats and chopped dates in milk, soaked over night. I liked it, but my daughter disliked dates. Immensely. The concept of an uncooked ‘oatmeal’ intrigued me though, so I determined to keep it up, with some necessary adjustments. See below for more on Muesli.

Quick Oats
Oat groats that are steamed for a longer period of time and rolled into thinner pieces so that they can absorb water easily and cook very quickly, or not even at all. NOT to be confused with the boxed “instant oatmeal”, available in stores now which contains quick oats plus a lotta sugar and artificial flavours. Instant oatmeal does not deserve a spot in my pantry.

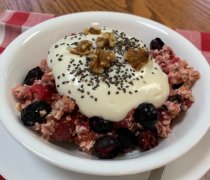
For porridge, I never use quick oats, but they do come in handy for other things. Their convenience justifies their position in my pantry, and I though I rarely used them when my kids were younger, I wouldn’t want to be without them now. They are the base for my Muesli recipe (below), and I often add quick oats and blueberries to yogurt.

the flexibility of oats
Truly, I do not know why oats are not more of a common food in most households. They are SO much bigger than the porridge of our childhoods.

Oatmeal:
Yes, that generational breakfast favourite – cooked rolled oats. I have fond childhood memories of oatmeal on winter mornings before school, and I hope my kids have those same memories. I’m doing my best to make sure my grandkids do.
– see recipes below –

Oat Flour:
Your can buy or grind your own oat flour. Throw a little into cookies or bread for a boost of nutrients, and added chewiness.

Oat Bran:
Oat bran comes from the outer part of the groat. If you grind your own flour, you can get oat bran by sifting coarsely ground groats. Or you can buy it. When oatmeal is processed, the bran (outer layer), is removed. Oat bran is a good source of protein, B vitamins, iron and soluble fiber. It is used to make porridge, and as an ingredient in a variety of hot and cold cereals, as well as in breads, cookies and muffins. Fiber adds bulk (not calories) to foods, so it helps “fill you up without filling you out.” Oat bran is particularly rich in a type of fiber called soluble fiber, which turns into a gel-like substance in your stomach. This helps you take in fewer calories overall.

Oat Risotto:
Simply replace oat groats in your favourite risotto recipe. Easy peasy.

Oat Congee:
Congee is a thick Asian comfort food, traditionally made with rice in a meat broth. Simply substitute in oats.
Because it uses more water and is cooked longer, congee began as a way to stretch the rice in hard times. Usually a thick stew, or even a porridge (or gruel) type of dish. From its humble beginning, who knew it would turn into a favourite food of so many, and even find its way onto restaurant menus? I guess that’s the way with most comfort foods, they start out as necessities: poor people’s food. Adding rice to a brothy soup and simmering it till the rice actually thickens the soup, essentially IS ‘congee‘. Well you can do the same thing with barley, so why not oats? Remember, you’re the boss. You can add it to any soup recipe that calls for rice or barley. And you can flavour it any way you like.
– see below for sample recipe –

Muesli

Let’s talk about Muesli, because it really does deserve more attention than it gets. Developed in the early 1900’s by pioneer nutritionist, Swiss physician Maximilan Bircher-Benner, he used it for convalescing patients in his private hospital. It was not originally intended as a breakfast, but more of an appetizer. Bircher-Benner’s focus was a diet rich in fresh fruit and vegetables which he used as an essential part of his nutritional therapy. Truly, he was ahead of his time. Who knew that over a hundred years later we’d finally understand how important a focus on fruits and vegetables is to our health. And Muesli has stood the test of time, as it is ever growing in popularity.

The original 1900 Bircher-Benner recipe consisted of : apples and nuts in a base of rolled oats, with lemon juice. The oats were pre-soaked water for up to 12 hours, then mixed with grated apples (the most readily available fresh fruit in Switzerland at the time). They were served with milk or cream, sweetened with honey or a small amount of sweetened condensed milk. The lemon juice helped keep the apples from browning. The idea was to serve a small amount of muesli immediately before every meal, as an appetizer of sorts.
Modern adaptations of Bircher-Benner’s recipe includes more fresh fruit.

Years ago, when my older kids were little, I came across what was referred to as a traditional Swiss Muesli recipe: large flaked oats, dates and other dried fruit and topped with yogurt and toasted almonds. It was delicious and nutritious. Soon enough I realized the potential for flexibility, and muesli progressed to include whatever fruit was fresh in the summer, or whatever home canned fruit I had on hand in the winter. Some things were constant: usually shredded apples and raisins. Some things varied: sometimes apple juice, sometimes milk. Muesli is like that. Flexible and wonderful.

Though my recipe has evolved over the years, I’ve generally depended on apples as the fruit base, mostly because they were so readily available throughout the year. Other fruits I added depended on the season. As time went on, and freeze dried fruit became more available, my dependence on seasonally available fruit lessened. And less nutritious canned fruit became a thing of the past. The base is still oats, but it fluctuates between rolled oats or quick oats. Rolled oats if I start the night before, quick oats if I decide at the last minute (which is more often these days). Its a breakfast for us, or a lunch, or even a late day snack.
see recipe below

RECIPES

Oat Groat Porridge ready to go!

Oat Groat Porridge (for two servings)
remember, you’re the boss. If you prefer all water, or all milk, or all another type of milk – you do you. This is just how I do me.

1/2 cup oat groats
1 cup water

pinch of salt (not more than 1/8 t)
1 cup milk
I T maple syrup or brown sugar or honey

Because groats are a whole grain, they take longer to cook, so I find it helpful to give them a little head-start.
1/2 cup whole groats in 1 cup water, bring to a boil, stir, then turn heat off. Let sit overnight (8 hrs-ish). In the morning, t will already be tender and chewy, turn the heat back on and stir, bringing the groats to a boil again. Add a cup of milk and lower the heat a little to bring it back to a slow boil, stirring frequently to prevent sticking. Reduce to low, cover and let simmer gently for about 15-20 minutes, stirring once in a while to prevent sticking.
The texture will be gently soft, but still chewy. If desired, sweeten with your choice of sweetener. I like maple syrup. Serve and Enjoy.

Steel Cut Oat Porridge
A basic ratio for making steel-cut oat porridge is 1 cup of oats to 3 to 4 cups of water.
Less water keeps the oats more intact and chewy. More water makes a silkier porridge.
Try it a few times to nail down the way you prefer it.
I like to start with 3 cups water, and then add the last cup in milk toward the end.
Or use all milk. You’re the boss.
Add a pinch of salt of course.

Cooking steel-cut oats is easy.
Simply boil water, add oats, reduce heat, and simmer. But give it ‘time’, like 20 to 30 minutes to become tender.
Start testing your porridge around 20 minutes, and continue slow cooking, testing every few minutes till its perfect. If the oats are tender at 20 minutes, it will still thicken up a little to leave it on heat for a little longer. Try it a few times to find your favourite way.
To serve, pour a little more milk over top, and add a spoonful of brown sugar.
Try using maple syrup to sweeten instead of sugar.
I like putting raisins, or dried or freeze dried apricots on the top.

Because groat porridge takes so long to prepare, you might want to cook a little more, and refrigerate some for tomorrow. It will get dry in the fridge, but don’t despair, just add a little more milk and warm it up. Problem solved.

If you’re the type of person that must see an actual recipe, then see below, but remember, you can edit the details to your heart’s content.

1 cup steel cut oats
2 cups of water and 2 cups milk
a pinch of salt (about 1/8 teaspoon)
Bring 2 cups of water to a boil. Add the salt and groats, stir well to prevent sticking on the bottom. Return water to a boil, stirring.
Reduce heat to low, add 1 cup milk, stir again and cover. Allow to gently simmer for about 10 minutes, checking every once in a while and stirring to prevent sticking. Cover again, and continue to simmer for another 10 minutes. Add that last cup of milk if you want and simmer another 5-10 or so minutes. That’s where personal choice comes in.
When it is the way you want it, spoon into bowls and serve with a little more milk over top and a little brown sugar.
Serves three or four depending on how much milk you added at the end.

Cindy’s Oatmeal: I cook mine as little as possible.
Bring 2 cups water (with a dash of salt added) to a boil.
Add 1+1/2 cups rolled oats. Return to a boil, stirring to prevent clumping.
Add 1 cup milk and a little sweetener (usually brown sugar).
Gently simmer a few minutes and serve.
I occasionally add raisins to the boiling water (just before the oats), as a special treat. Or maybe some freeze dried fruit at the end: blueberries, raspberries, apricots. To me, oatmeal is great with several different fruits like apples, peaches, pears and cranberries.
I never use Quick oats for cooked porridge (too mucky, I like the integrity of whole rolled oats). I do however, use them for Muesli, or to add to yogurt bowls.

Overnight Oats:
a quick, easy no-cook option.
For one person use a pint sized jar: put ½ cup rolled oats + 1 cup milk of your choice + ½ cup fruit of your choice (banana, apple, peaches, etc). Add 2-3 T Greek yogurt + 1 T brown sugar or maple syrup. Put lid on, and shake vigorously till all is incorporated. Refrigerate overnight. The oats will soften and the mixture will thicken. Optional: sprinkle toasted nuts or seeds over top in the morning. Ready to “Grab n Go”.

fresher than fresh muesli made with freeze dried fruit

FRESHER THAN FRESH MUESLI
serves 2 or 3, uses mostly freeze dried fruit and takes five minutes to prepare. It doesn’t get any easier than this.
1 c. Quick Oats
1/2 c. dehydrated Applesauce
1/2 c. freeze dried Blueberries
1/2 c. freeze dried Raspberries
1/2 c. freeze dried Strawberry Slices
2 c. Apple Juice (approx)

Lightly stir to moisten completely, and let sit for 5 or so minutes to absorb juice. Add more juice as desired to keep it the texture you want. Serve. That’s it. It really IS that simple, and that quick. And that delicious. NO fat, NO sugar, NO dairy, NO wheat, NO additives of any kind. Super Nutritious and Delicious.
Remember, you’re the boss. If you don’t have or want berries, then use what you have or prefer.
Option 1: use any kind of fruit, substitute your faves or what you have on hand
Option 2: use any kind of juice or milk, substitute your fave or what you have on hand. I prefer apple juice because is mild tasting allowing the other tastes to come through.
Option 3: top it off with added nutrition in your bowl: a scoop of plain yogurt, a sprinkling of toasted nuts, or seeds: sesame / chia / hemp seeds.
Be creative. Muesli is flexible.

Muesli takes on a whole new world of possibilities with freeze dried fruits. Always ‘fresh’ and always at their nutritional peak, you can have any kind you want because you have all-the-fruit all-the-time in your home-store. No matter what time of year, THRIVE freeze dried fruit is “fresher-than-fresh”.

basic recipe for a Greek Lemon Chicken Soup.
Instead of using rice, use groats

Oat Congee
first of all, don’t get tied up in using a specific recipe like this one. Congee is simply adding the rice (or groats) to more liquid than usual and slow cooking it till they come to a very soft stage where they thicken the broth.

1 cup steel cut oats
4-6 cups vegetable or meat broth
1/4 teaspoon salt
1/4 cup minced onion (I use chopped freeze dried onion)
1/4 cup finely chopped carrots (I use Thrive Life dehydrated carrots that are diced)
1/4 cup chopped mushrooms (I use freeze dried mushroom pieces)
small amount of diced meat (leftover meat of your choice, or use diced freeze dried beef)
1 T freshly grated ginger, or 1 teaspoon fresh ground ginger
1 teaspoon soy sauce
1 teaspoon rice vinegar
Bring the broth to a boil and add everything in. Reduce to a simmer and gently cook for about 30 minutes, stirring occasionally to prevent sticking. If it starts to get a little ‘thick’ add more liquid.

CINDY’S OAT SOUP (serves 6)
1 cup rolled oats
1/3 cup butter + 2 Tablespoons
1 onion chopped
3 cloves garlic, minced
8 cups chicken broth (or bouillon)
1 or 2 bay leaves
1 quart home canned tomatoes, or equivalent in canned or ripe tomatoes (3-4 peeled and chopped)
1T dried oregano crumbled
salt and pepper to taste later
Melt butter in large heavy skillet, over medium low heat. Add oatmeal and brown slowly, stirring constantly to prevent burning. It will burn suddenly, so be watchful. When nice and toasted, and smelling good, remove from heat and set aside in a bowl.
In soup pot, use remaining butter to saute onions and garlic. Add stock, tomatoes, bay leaves and oregano. Bring to a boil and add toasted oats. Reduce heat. Simmer covered for about 45 minutes, stirring once in a while to prevent clumping or scorching. Taste and adjust seasoning if needed.
Turn heat off and allow to sit for 15 minutes to thicken before serving.
This is a soup that is just as good on the second day, and will have thickened even more.
And yes, this is a type of ‘congee’.

PATTI SHENFIELD’S OATMEAL RAISIN COOKIES
(our family’s favourite cookie)
1 1/2 cup butter or margarine
1 1/2 cup white sugar
1 1/2 cup brown sugar
3 eggs
2 t vanilla
1/4 cup milk
3 cup flour
1 1/2 t baking soda
1 T baking powder
1/2 t salt
3 cups rolled oats
3/4 cup coconut (optional)
3 cups raisins (or chocolate chips or both)
In large bowl cream butter and sugars. Add eggs one at a time, vanilla and milk – beat until fluffy.
Combine dry ingredients separately then add to creamed mixture one cup at a time. Mix until well blended. Stir in oats and raisins and coconut if you’re using.
Preheat oven to 350 F. Drop by teaspoon onto ungreased baking sheet. Bake 10-12 minutes. Yield 7 dozen cookies.

* Are oats gluten free?
Yes, oats are gluten free, but many commercial brands are processed in facilities that also produce gluten grains like wheat, rye, and barley. Since cross-contamination is common, many GF people feel the need to avoid oats altogether. Big fat shame, and big loss to the individual. If you’re a gluten free person, you don’t have to miss out on oats. Simply look for the “gluten free” label signifying that they’ve been protected from contamination.

Blueberries

Super foods do not have to be exotic, and blueberries are the perfect example. These sweet, nutritious and wildly popular berries are NATIVE TO NORTH AMERICA. Yay! They are low in calories and incredibly nutritious, and so convenient to eat by the handful. They are primarily a northern fruit, and as a northerner, I am pretty happy to lay claim on these hardy, dark blue berries.

The list of the health benefits of Blueberries is almost too good to be true. And far be it for anyone to exaggerate those kinds of things right? But a little research should help disperse the nonsense from the credible. You’d be surprised at how many credible and documented benefits there really are. We don’t need to exaggerate. For example, its been well documented for decades that blueberries are good for your eyes, and health periodicals have sang their praises my whole adult life. Nevertheless, I was a little surprised when my eye doctor advised me to eat 1/2 cup of blueberries a day as part of a preventative regime for two genetic eye diseases I am in line to inherit: macular degeneration and glaucoma. I believed it before, but it felt good to have her further testimony. And yes, I try to eat a few handfuls every single day.

But wait, there’s more! Blueberries help lower your cholesterol, reducing your risk of heart disease. Packed with antioxidants and phytoflavinoids, blueberries are high in potassium and vitamin C. They are also anti-inflammatory. Since inflammation is a key factor in all chronic diseases, blueberries can and should be your personal BFF (best friend forever).

Blueberries have been the subject of medical studies related to vision for over a century, and blueberry extract, (high in compounds called anthocyanosides), is found to slow down visual loss. (hence my doctor’s recommendation) The anti-oxidant properties prevent or delay all age related ocular problems like macular degeneration, cataract, myopia and hypermetropia, dryness and infections, particularly those pertaining to the retina. Imagine a superFOOD — not a drug — powerful enough to do that! Truly, “Let food be thy medicine, and let medicine be thy food.

inside colour of a ripe blueberry

If you are among the few not familiar with the taste of blueberries, this is my best description: small, but juicy. Mild, slightly sweet with a tiny bit of acid. Unripe, they’ll be a little sour. And they aren’t actually a true blue, but rather more of a deep blue/purple, which is the colour of the antioxidant “anthocyanin” found especially plentiful in them. The inside however, is a light greenish yellow. A good rule of thumb is, the darker the berry skin, the richer the antioxidants.

So that brings us to their availability. Fresh, I can find them in local grocery stores in 10 pound boxes for about six weeks in the summer; and in the off season, they are often available trucked in, in smaller clam-shell containers. Kinda pricey in the winter, and if you know me at all, you know that I am a big proponent of seasonal eating (mostly for nutrition’s sake). Just because we can buy it, doesn’t mean we should. Personally I don’t buy ‘fresh’ blueberries in the winter. The use of the word ‘fresh’ in the off season, is misleading at best. Frozen blueberries are an excellent alternative, and are even more nutritious than produce section options in the off season. Why? Because produce destined for the freezer, are frozen QUICKLY, sealing in valuable nutrition. But as you know, frozen blueberries are not so convenient to consume. Who wants to eat them frozen? And worse, who wants to eat them thawed and soggy? I take it one step further, and buy only FREEZE DRIED BLUEBERRIES for those other ten months of the year.

How is that possible? Well, for one thing, the word “fresh” is a relative term. Fruits and vegetables begin to deteriorate in the hour they are harvested, so getting them from field-to-table as soon as possible is very important. By the time our “fresh” fruits and vegetables are picked, packed, shipped, distributed and shelved, several days have elapsed. Nobody’s fault. Its just part of the process that allows us the great privilege of food variety we enjoy. But, the reality is that it is no longer at its best by the time we see it. Then we buy it, and put it in our fridge for several more days. . . . . . . I think we get the picture.

 Introducing FREEZE DRIED BLUEBERRIES

As it implies, freeze-drying is a two step process. It is flash frozen, then transferred to a facility where it can have all the remaining moisture removed through a vacuum-like process. While the two step process is pretty standard, producing a higher quality product, there are additional steps that can be taken to further ensure the highest quality result.

– It is critical that the fruits or vegetables be the highest quality to start out with.
– It is critical that they be flash frozen quickly after picking.
– It is also critical that those fruits and vegetables be picked ripe, with all the nutrients that nature designed present and fully developed.

The result? Beautiful crunchy blueberries! That can be eaten out of hand, over top cereal or yogurt, in smoothies, baked in pies or muffins, . . . . . . any way a fresh blueberry can be eaten. Any. Day. Of. The. Year! And get this: they have a shelf life of over 25 years! How is that even possible?
Zero moisture, packed into a sealed zero oxygen container = no way to decompose.
So not only is the nutritional value an unprecedented 95+% of the original freshly picked value, it has a completely stable shelf life. You can enjoy that kind of quality today, tomorrow, next year, in ten years, and so on. Once you open the can, simply keep a tight seal on it, and you can expect it to last a good year in most climates. (not that there will be any left in a year, but that’s not the point lol)

There is a North American company that stands out from the rest when it comes to the highest quality of freeze dried food. THRIVE LIFE operates by a self imposed list of requirements they call “The Nutrilock Promise“. By adhering to these requirements, they have raised the industry standard to new heights that no other company has been able to come close to. There are over 40 steps in the process, and compromises are never made.

Other Health Benefits of Blueberries:

– A bowl of blueberries can help in boosting immunity and can reduce the risk of diabetes, obesity and heart disease.
– Consuming as little as 1/2 cup of blueberries daily helps strengthen your metabolism and prevent any kind of metabolic syndrome and deficiency.
– It has been observed that daily intake of blueberries can help reduce hypertension, inflammation, high cholesterol, glucose intolerance and insulin resistance.
– Blueberries are also known for improving cognitive skills such as attention, memory, and information organization.

Where do they grow?

Blueberries typically grow in humid, northern climates that have cold winters and mild summers. They prefer slightly acidic soil. This makes them the perfect northern berry, and it is not surprising that they are native to North America. They are also successfully grown in the more temperate areas of North American, including coastal regions, and have been introduced to several European countries as early as 1940.

Canada is the world’s largest producer and exporter of both wild and cultivated Blueberries. The majority of Canadian blueberry production is in British Columbia, where water and soil seem to be perfectly suited. Most of that is exported. New Brunswick is Canada’s second largest blueberry producing province, accounting for 30% of the country’s total production.

in varying stages of ripeness

They grow on dwarf shrubs of the heath family, with small, whitish drooping flowers that turn into the beautiful dark blue berries we know and love so much. I grew up picking wild blueberries in the summer, and though those days are over for most of us, market-garden-blueberries are very available. Having said that, if you live in rural areas, wild blueberries can still be found in abandoned fields, along roadsides, in forests and on mountains. They spread through seeds and the development of rhizomes, (underground stems). They are becoming more available in garden centres for those adventurous gardeners who want to have them closer to home.

Ways to Use Blueberries

#1 is FRESH out-of-hand of course. When that is not possible, freeze dried out-of-hand is a very close second.
A new favourite way for me to enjoy them in the winter time, was introduced to me by my friend Reese Wolsey. Blueberry tea. Simply pour boiling water over a handful of blueberries in your mug. Let steep for a few minutes and drink. SO good. And when the cup is drained, eat the blueberries.
Blueberry preserves for pancake and waffle topping. I just add a little water and simmer gently, mashing with a potato masher. Add a little sugar if desired, but not necessary. If you want to make more of a syrup, add a little more water and thicken with cornstarch. Also great for ice cream topping.
Fresh over top of cereal. Blueberries in your oatmeal. Blueberry cheesecake. Blueberry muffins. Blueberry pancakes or waffles. Blueberry pie. Blueberry cobbler. Blueberries in your coffee cake, and added to lots of other baking too. Blueberry yogurt bowl. Blueberry ice-cream. Blueberry jam. Blueberries in your green salad with a little crumbled feta. Oh my goodness, there is no end to the ways you can incorporate them.

Blueberries have been my husband’s favourite fruit for as long as I’ve been married to him, but up till recently we could only enjoy them for a relatively short time in the summer. Now that we can enjoy them ‘fresh’ in the summer, AND freeze dried (in most cases, fresher-than-fresh), all the rest of the year – they have become an important (and welcome) part of our household diet. They are the #1 Fave Snack of ALL our grandchildren, and I’m totally okay if some of their best childhood memories involve eating freeze dried blueberries at Gramma’s house. Even if I do have to limit them most of the time. Seriously, they inhale them if left unsupervised.

I’d love to hear your thoughts on blueberries. And different ways your household enjoys them.

Warmly,

Cindy Suelzle

Sauerkraut

Sauerkraut – literally translated, means “sour cabbage”, and that is exactly what it is. I’ve heard some refer to it as ‘pickled’ cabbage, but to be clear – it is fermented, not pickled. What’s the difference? Well, I’ll admit they may be similar in taste and features perhaps, but it is in the process by which that sour taste is achieved, that we find the difference. Pickling for example, is a method of preserving foods in acidic liquid like vinegar. One type of fermentation is the process of using naturally occurring good bacteria to produce lactic acid, which in turn breaks down the sugars or starches in a food turning them into acid. This is the fermentation used in common foods such as sauerkraut, kimchi, yogurt and even sour dough bread.

sitting on the counter to ferment

Why do we care? Fermentation produces PRObiotics, which support the body in building and maintaining healthy bacteria and other helpful organisms in the intestinal tract. This beneficial bacteria promotes a healthy gut and good digestion, which ensures we get the best from the foods we consume. PREbiotics are a source of food for your gut’s healthy bacteria. Both are necessary for good health. It starts to get very complicated but the process of making sauerkraut is super easy, and since the benefit of eating fermented foods is good health, we really should try to add more of them to our diet.

Although one most often thinks of sauerkraut with eastern European foods like Ukrainian, Russian or German, the process of fermentation actually originated in Asia with something very similar. It is believed the Mongols brought the preservation process with them to eastern Europe during the conquest of the 13th and 14th centuries. As a cold weather crop, cabbage does well in northern climates, and fermenting it is a brilliant food preservation technique. It was readily adapted by those eastern European countries we associate it with.

When we (in my house), first made sauerkraut many years ago, we followed a process of layering finely shredded cabbage with pickling salt and pushing it down to produce liquid which the salt drew from the fresh cabbage. I have since learned that a little bit of patience mixed with the same ingredients, allows the salt to do its thing with a lot less manpower. And when we first made sauerkraut we did a big batch – like we did everything in those days. When you have a big family, big batches of everything becomes the habit. But as life went on and family dynamics have changed, I’ve fallen in love with small batch preserving when its to my benefit. Since cabbage is in season from late summer through early winter, it is easy to make up a single quart here and there. The key is ‘patience’. The #1 rule with sour dough is “don’t try to rush the sourdough“. And the same principle applies to fermentation of any type. Don’t try to rush it. Don’t forget about it, but don’t rush it.

Health Benefits

Fermentation multiplies nutrition and health benefits far beyond those of fresh cabbage. Cabbage is already a good source of vitamins C and K, but the fermentation which transforms it into sauerkraut increases the bioavailability of nutrients, making it even more nutritious than the original cabbage. Fermentation is a process during which microorganisms on the cabbage digest its natural sugars, converting them into carbon dioxide and organic acids. It starts when yeast and bacteria that are naturally present in the air, the cabbage itself, and even your clean hands, come into contact with the sugars in the cabbage. Sauerkraut fermentation creates conditions that promotes the growth of probiotics (good bacteria). This helps make foods more digestible, increasing your gut’s ability to absorb vitamins and minerals.

Maintaining a healthy gut helps prevent the growth of harmful bacteria, improving our immune system. Its a natural way of putting your body in the best position possible to fight disease.

It is a good source of Vitamin C, calcium and magnesium and an excellent source of dietary fiber, folate, iron, potassium, copper and manganese.

Top reasons to eat Sauerkraut
1 – improves digestion by introducing healthy bacteria important to proper gut function
2- excellent source of vitamins and minerals including fragile ones like Vitamin C
3 – low in calories
4 – high in soluble fibre
5 – it tastes great and is very versatile to incorporate into meals

How to Store Sauerkraut:
Although you can preserve it in a hot water canner, the heat damages the vitamin C and naturally occurring enzymes as well as the live lactobacilli. Since it will last months in the fridge – it is my preference to simply refrigerate it and use it throughout the winter.

Store bought vs homemade:
Now don’t get me wrong. I appreciate having healthy foods available commercially. And certainly, store bought versions are often the only way many people will get them. But, as with most things, store bought sauerkraut is considered to be less nutritious compared to homemade sauerkraut – mostly due to the necessary processing. Store bought sauerkraut has to be preserved somehow of course, and so must undergo a pasteurization during canning. This eliminates live probiotic content – which is one of its main benefits.

Store bought benefits: availability, shelf stable, still low calorie, still a good source of soluble fibre and non water soluble vitamins and minerals. Tastes good.
Homemade benefits: easy to make, will last in fridge for a long time, still low calorie, still a good source of soluble fibre and ALL original vitamins and minerals (including VC). Rich in antioxidants and live enzyme probiotics. Tastes better.

Having said all that, I was in the Maritimes recently – in a grocery store, and saw some ‘fresh’ sauerkraut in the refrigerated part of the produce department. Did my heart good. If you’re gonna buy sauerkraut, look for this HIGHLY better option.

history

Eating sauerkraut played an important role in preventing scurvy in the early days of sea travel. Scurvy – the scourge of the seas in its day, resulted from an absence of vitamin C in the diet. Symptoms begin after a month, and the only prevention and cure for it is Vitamin C. It was the primary cause of deaths between 1500 and 1800 — on sailing ships around the world. It was so common, that a 50% death rate on every voyage from scurvy was assumed and planned for.

Long before it was understood ‘why’, it was discovered that sauerkraut prevented scurvy. Scottish naval surgeon James Lind noticed that scurvy was linked to a diet which was severely limited. He began testing various foods and noted that citrus fruits provided the quickest and most effective cure for the disease. However, citrus fruits were not readily available in Europe, and it was impossible to keep fresh fruit on a sailing ship for months at a time.

Experiments using different types of food on sailing expeditions began in earnest, and famed Captain James Cook drew the lucky straw with sauerkraut in 1768. He was outfitted with almost 8000 pounds of the fermented cabbage, each man being rationed two pounds a week, and at the end of his three years’ journey, returned without a single death attributed to scurvy. An incredulous first! It literally changed the world! The number of lives that were saved with this discovery is unimaginable. A century later, during the American Civil War, physician John Jay Terrell began using sauerkraut to treat the same disease. In times when Vitamin C – the “fresh fruit vitamin”, is not so easy to come by, sauerkraut is a practical and healthful solution.

Let me just stop here for a moment and bask in the wonder of all this. It is amazing to me that ancient people could figure out how to harness the fermentation process and make it work for them. Without the knowledge of vitamins, bacteria or gut health, they came across a food that quite literally not only preserved their lives in winter times of no fresh fruits or vegetables, but preserved their health, enabling them to better digest foods, increasing their body’s ability to absorb important nutrients. And this, in a common farm house of illiterate people. If you are a believing person as I am, this is nothing short of a miracle – Evidence that a loving Father in Heaven cares intently about the affairs of his children.

making it

Making sauerkraut is embarrassingly easy, and I’m convinced when you discover just HOW easy it is, you’ll be making it frequently. It requires no special equipment. Yes, there are things traditionally used, like a crock and a wooden pounder, but you can also make it in a bowl with a potato masher, and stuff it into a glass jar with a lid. And yes, you can use a food processor, but I do not. I prefer to use a large knife and slice it thinly myself. And yes, if you make a lot, you might want to can it, but if you make less, you can still store it for months in your fridge, so I prefer not to can mine – but to take advantage of the full nutritional benefit of raw. Its another example of how eating seasonally is best.

Equipment: Okay I lied, you do need some things.
Get a large, sharp knife for slicing the cabbage.
A cutting board on which to cut it. A large enough bowl to hold the shredded cabbage while you toss it. A container to store it in: wide mouth glass jar or a crock of some sort . . . . I prefer glass or pottery. EVERYTHING SHOULD BE VERY CLEAN OF COURSE. I do not sterilize everything I use, but it is very clean, and cleaned continually as needed, throughout the process.

1. necessary: cutting board, sharp knife,
container to store – jar, corning are with lid, crock …
2. necessary: large bowl or tub to mix the cabbage with salt
3. optional but handy: some kind of tool to push cabbage down with, scraper to help transfer it from board to bowl, canning funnel to help put cabbage into jar

Ingredients:
cabbage and salt. That’s it! Really. That’s it.
For a large head of cabbage – (approximately 5 pounds), you’ll use 3 heaping tablespoons of salt. NOT table salt which contains iodine, but pickling salt, or sea salt. I prefer coarse salt.

The SALT has a very important job – it draws the moisture out of the cabbage, helping to form the BRINE, it causes the cabbage to release fermentable sugars. Salt is also a natural preservative, inhibiting the growth of undesirable yeasts, molds, and bacteria. Through the miracle of nature, the bacteria needed for safe fermentation tolerates high concentrations of salt. Submerged in this brine for a week or more, the cabbage slowly ferments into the crunchy, delightfully sour – sauerkraut.

Some people add dill seed or caraway seed or even use purple cabbage. I think these are great ideas, and one day I might try a single jar of purple cabbage or even dill seed. But I hate caraway seed so that’s never gonna happen.

What causes this transformation called lacto-fermentation?
There is beneficial bacteria naturally present on the surface of all fruits and vegetables.  Lactobacillus is one of those bacteria, which bytheway, is the same bacteria found in yogurt. When submerged in a brine, the bacteria begins to convert sugars in the cabbage into lactic acid; this is a natural preservative that inhibits the growth of harmful bacteria.

Since this process is anaerobic – which means ‘without out oxygen‘, the cabbage must remain completely submerged in its liquid during fermentation. This is accomplished by packing it down firmly, and then placing some kind of weight on top. I have used a heavy rock (cleaned and in a plastic bag), plates, smaller glass jars . . . be creative. Find something that you can sufficiently clean, to set on top of your sauerkraut to keep it submerged. The cabbage near the surface wants to float, so I find it useful to place a large outer leaf of the cabbage over the surface to hold it down. Of course you want to ensure the jar or crock is covered at all times with a clean cloth. This allows airflow, and protects the surface.

the glass jars allow you to see the three layers beneath the weight:
1. tightly packed cabbage mixture on bottom
2. folded cabbage leaf to cover cabbage and prevent any
from floating to surface
3. natural brine which is produced from pushing cabbage salt mixture
4. weight of some kind to keep everything safely below the surface
5. cover to protect from evaporation and contaminants,
but not completely airtight

How long does it take?

It could take days or weeks – depends on you, your personal preference, and the temperature of the room you’re storing it in. The cooler the room, the longer the time. I suggest tasting it anytime after the first week. I expect my sauerkraut to be ready in about a month, but testing it weekly will let you know. When you like it, simply put it into the fridge. It will continue to ferment in the fridge too, but at a much slower rate.

In a glass jar, you may see bubbles, foam, or white scum on the surface of the sauerkraut. You won’t see them in a crock, but they’ll be there. All signs of normal, healthy fermentation. The white scum on top can be skimmed off as you see it, in both glass jar or crock. It’s possible that the brine might bubble over during the fermentation process, so best not to pack your containers too full, and have them sitting on a cloth to absorb excess moisture, or a plate to catch it. You should be checking the progress every couple of days anyway. This helps you trouble shoot. If you see white scum, remove it. Taste it frequently with a clean fork to test for doneness. NEVER RETURN THE FORK TO THE SAUERKRAUT ONCE YOU’VE PUT IT IN YOUR MOUTH. GET A CLEAN ONE. Ensure the cabbage continues to be covered by the brine.

image on left: 5 gallon crock free from cracks, filled 2/3 – 3/4 with tightly packed cabbage (approx 3 1/2 cabbages).
Covered loosely with plastic wrap to reduce evaporation and clean cloth.
image on the right: large stone in plastic bag weighing down plate. Beneath plate is cabbage leaves protecting the sauerkraut and preventing any from escaping to the surface.

Troubleshooting

Mould:
We have in the past found mold growing on the surface of the sauerkraut. Don’t panic. This is not rare, as mold typically forms when the cabbage isn’t fully submerged. Simply remove the offending pieces and re-ensure the rest is submerged. The sauerkraut is still fine being preserved by the lactic acid. Be smart though. Yes, a little mold that you can easily remove is not bad news, but a lotta mold that is affecting an inch or more into your sauerkraut IS bad news. That would only happen if you’ve run out of brine. Perhaps your container was too full and the bubble-over, took away too much of the liquid to keep the cabbage completely covered. Or perhaps it evaporated. Be proactive, if you’re running out of liquid you need to address it sooner than later. Better to remove some cabbage to allow the remaining cabbage be fully submerged. You can always eat the mild sauerkraut you’ve removed. Better that, than to risk harm to the batch with reduced liquid.

Adding more liquid:
If you must add more liquid DO NOT add vinegar. I know its tempting because it seems to make sense, but don’t. The sour flavour of fermented sauerkraut comes from lactic acid produced by the bacteria, not from vinegar. NOT the same thing. Vinegar will kill the beneficial bacteria needed for fermentation. On the other hand, a salt water brine will maintain it.

The cabbage will produce its own liquid when salt is massaged into it. As it releases liquid it becomes more limp and able to be compacted down into the jar – squeezing more liquid out of it. You want the cabbage submerged, ideally by at least 2 inches of brine (5 cm). In time, some liquid may evaporate. You cannot allow the cabbage to become dry on top or it will begin to mould.
I don’t recommend using plain tap water, but if that’s all you’ve got, boil it ten minutes first, then cool it. I prefer to use distilled water. Whichever you use, dissolve 1 teaspoon of salt in 1 cup of water to keep from diluting your salty brine. Add enough to re-submerge the cabbage, but don’t use more water than necessary.

Recipe:

1) Remove the ugly outer leaves and discard into the compost. Remove another leaf or two and set aside to use later. I begin by cutting the cabbage in half, then in half again. Remove the core from each quarter, and slice. Slice thinly as you would for coleslaw. Scoop all the sliced cabbage into a large bowl or kitchen tub.

1. choose a beautiful cabbage 2. chop it up
3. sprinkle pickling salt over top 4. toss to coat completely, then set aside

2) Salt: 3 Tablespoons for a large cabbage. Adjust as needed for smaller cabbage. Its not an exact science so don’t stress about it.
Sprinkle salt over top and gently toss to fully incorporate. I use my hands, its just easier.
Massage the cabbage for about five minutes.

It seems like it won’t be enough salt, but trust me, it is. As you toss the cabbage, you’ll see within the first minute that moisture is already beginning to be drawn out of the cabbage. Gently squeeze handfuls of cabbage as you’re massaging it.

pushing the shredded cabbage down with a pounder is very effective. You can watch the liquid rise.

3) At this point, you can cover the cabbage loosely with a cloth and set aside for an hour or more. This gives the salt time to work. When you come back, gently toss it by hand and again, and you’ll be surprised by how much liquid you’ll see. You can even do this the night before if you want. Don’t wast a drop of that liquid, you’ll need it all.

4) Begin packing the cabbage into your jar (or other container) by the handful. I use a canning funnel to make this less messy. If you’re using a jar, this is when you’ll be glad you chose a wide mouth jar, because you may want to put your hand in to tamp down the cabbage with your fist. Pour whatever liquid was produced into the jar with the cabbage.
If you have a wooden pounder (isn’t that a descriptive name?) it will come in handy now to pack the cabbage in easier. Don’t take the name literally and go pounding it – you’ll damage the cabbage. Treat it as gently with the wooden pounder as you would using your own hand. You’ll see more liquid start to form throughout this process. Keep it up till you’ve got at least two inches covering the cabbage. Don’t fill your jar too full. Give it plenty of space to bubble-up in the next couple days.

If you’re using a large crock, allow a good three inches of brine on top, and allow some headspace for the inevitable ‘bubble-up’. If you haven’t allowed room, the liquid will spill over the sides of your container – wasting it. Whatever you choose will probably not be enough, but then you’ll learn for next time, right?

5) Take one of the outer leaves you’ve set aside, fold to fit into the jar, and place on top of the sauerkraut. This will help keep small pieces from floating to the surface and causing your grief later.

placing a tiny jar inside the wide mouth of your sauerkraut jar helps to keep the cabbage cover down, and cabbage submerged in brine

6) Put your weight on top. For a glass jar, consider using a rock (in a plastic bag) or marbles (in a plastic bag), or a small empty jar. For a crock, use a plate with a rock on top (in a plastic bag of course). In a large crock, we filled a plastic bag with water and placed on top to keep everything down. It worked well.

7) Cover with cloth to protect, and allow airflow. Secure.

It is important to keep everything clean throughout the process. Taste frequently over the next few days for a couple of weeks. Never return a used utensil back into the sauerkraut. When you decide its as sour as you want it, simply refrigerate. It should keep fine for three or four months in the fridge, ESPECIALLY as you ensure it stays clean. Never put a fork into your mouth and then back into the jar.

Kimchi Recipe

1 head nappa cabbage
2 Tbsp grated ginger (peeled)
5 cloves garlic minced
2 Tbsp salt
1 Tbsp sugar
1 – 2 tsp red pepper flakes – you choose
2 Tbsp paprika
1 medium carrot julienned
2-3 sliced green onions

smaller amount for 1 quart
1 pound cabbage
1 Tbsp fresh ginger
2 cloves garlic
1 Tbsp coarse salt
1/2 Tbsp sugar
1/2 tsp red pepper flakes
1 Tbsp paprika
1-2 sliced green onions
1 medium carrot julienned

Combine everything in bowl and begin tossing to coat the cabbage well. Add a little distilled water if it doesn’t create enough brine on it own.
Scoop into jar and compress, covering with brine. Add a weight to keep vegetables submerged. Fermentation of kimchi can vary from a few days to several weeks. You’re the boss of when it tastes right to you. I generally let it sit for at least two weeks before it is fermented enough for me. It’s all about personal taste and preference (and the warmth of your kitchen).

Sauerkraut Soup

Sharp and flavourful, comforting. Can be ready in an hour, or simmer longer if you choose.
With meat or without – your choice. If using meat, you can gently simmer stewing beef or pork ribs (your choice(, for an hour. Or you can use prepared broth and later add precooked (leftover ground beef or shredded pork or … again your choice) meat in bite sized pieces.

1 large onion chopped
3 large cloves garlic minced
2 Tablespoons vegetable oil (your choice)
2 large carrots chopped
4 large potatoes chopped
1 teaspoon black pepper
3 bay leaves
10-12 cups beef or vegetable broth – either from cooking meat, or separate
3 cups sauerkraut
fresh sour cream and fresh dill for serving.

Sauté onions and garlic in oil till onions are translucent. Add carrots, potatoes, and black pepper. and toss till coated in oil and lightly toasted.
Add 10 cups of broth (with meat if meat was cooked in it) and 3 bay leaves. Bring to a boil, then reduce heat and lightly simmer till vegetables are tender. If using precooked meat, add while vegetables are simmering.
When all is tender, remove from heat and add sauerkraut. Stir in. You can simmer with sauerkraut in it for about 10 minutes if you want; I prefer not to cook sauerkraut because heat will hurt much of the nutrition. Regardless of whether you cook it or not, let the soup sit for at least 10 minutes before serving.

If desired, serve with dollop of sour cream and a tablespoon of fresh dill in each bowl.
Fresh bread on the side.

Enjoy.

I’d love to hear your sauerkraut experiences, and ways you use it.

Cindy Suelzle

the peace of mind that comes with preparedness

The beginning of March 2020, we were in Mexico. While we were on the beach soaking up the vitamin D, the world at home tipped a little on its axis. We had heard about Covid before we left – from a distance. But it seemed to explode the week that we were gone. We arrived home March 11, and went through the usual immigration check points at the airport with nothing unusual. No one said anything to us about covid related precautions. Dan went back to work the next day, as per usual. My sister insisted we isolate ourselves, but I reasoned that the Canada border officer didn’t say a word about any such necessity. We had little reason to go out anyway, so we didn’t do a whole lot. Listening to the radio over the next few days we started to absorb some of the vibes, and on Saturday I told Mom that perhaps the responsible thing for us to do, was to lay low for awhile. After all, we had recently spent 6 hours in a plane breathing the same air as 200 other people. . . .

Truth be told, we didn’t need groceries anyway, even though we had very little in the fridge. I had picked up some perishables a couple of days after we got home, simply because I could, but I felt no urgency, nor compulsion to do so. I knew that we had in our pantry and home store, anything we could want or need for an extended period of time. And just as important, those pantry foods were ‘normal’ to our way of eating anyway. We hadn’t shopped in a grocery store for a couple of weeks before our trip, trying to clear out perishables. Rather than feel any of the stress that comes with the panic-buying we witnessed on news reports, we felt none. We hunkered down in our warm house. Mom sewed and I worked on some rugs. Dan still went to work every day.

We missed the kids of course, who normally would have all been over to say hello in the days after we returned. We missed our friends at church of course. But worry? There was none of that. Shortages? They didn’t seem to affect us. We wondered just like everyone else, how long it would go on. We were sad to read and hear reports of job loss, retail panic, even outright fear. But at home, life was pretty much what it always had been.

Without expecting a pandemic, we realized we had been preparing for this all our lives. Our home-store, (in no small way thanks to THRIVE LIFE freeze dried foods), had contributed greatly to our feelings of comfort, security, normalcy, and above all, peace of mind. We were grateful for the counsel we’d adhered to for decades, to have a food storage on hand, and to “STORE WHAT YOU EAT” and “EAT WHAT YOU STORE”. Of all the benefits we’d enjoyed over those years, the greatest was the current peace-of-mind we were then experiencing. There is no price on peace-of-mind.

So almost two years later, our society has learned a few things, we’ve developed a vaccine and many people have taken advantage of it. The vaccine is a very devisive subject, and has become a major source of contention among friends, families and society in general, with not too many people walking down the middle of the road. We’ve seen unbelievable upheaval in our society due to this pandemic – and not just our society, but the world over. Economical, emotional, physical, familial, educational, . . . everybody’s been affected. We became familiar with terms we’d never used before, like “supply chain” – which still affects us almost two years later, not just food, but in every other area we deal with: retail items of all sorts, construction, vehicle manufacturing and maintenance, medical supplies, . . . . areas that our affluent society previously believed we were immune to. So much for that.

It is late fall 2021, and in our province, we are leveling off our fourth wave. Who knew we’d still be here 21 months later?
Yes, we are well aware of the world around us, and yes, we’ve been affected in our own way too. Life goes on and we’re all adjusting, and mourning some losses, and reaching out to serve and assist in the best ways we know how. There’s nothing convenient about a pandemic. Everything and every one has been affected. Its been hard. Hard enough without having to worry about food and debt. One of the biggest blessings in our home, is the peace-of-mind that came from being prepared for an unexpected interruption we couldn’t forecast. The peace-of-mind of not needing things we didn’t have on hand already. The peace-of-mind of living within our means, and of avoiding the frustration of debt.

When it comes specifically to food, we are grateful for the lifelong habit of having a food storage, and it is THRIVE LIFE freeze dried foods that we are most appreciative for. Nutritious fruits and vegetables, dairy and protein – always here, always ready, always nutritious, always convenient. And that’s all I have to say about that here. It’s been a blessing. A tremendous blessing. Thank-you THRIVE LIFE. You were there when we needed you.

Was there anything specific that helped you get over the uncertainty of this long covid season? I want to hear about it.

Warmly,

Cindy Suelzle

Zucchini for the Win

So I’m a big fan of zucchini, but not such a big fan of it when it becomes monster zucchini. I like it when its small and tender and you don’t have to peel it. But no matter how diligent a gardener thinks she is, there’s always a few zucchinis that hide out and grow too big while you were hanging clothes on the line. (and that’s almost as long as it seems to take) What to do? There’s really only so much zucchini cake anyone should make in a lifetime.

WHO KNEW? Some interesting facts about zucchini . . . .

*While we think of, and use it as a vegetable, like the tomato zucchini is technically a fruit.

*Zucchini, and all other squash are native to Central America and Mexico, and started making an appearance in European kitchens in the 1600’s. From Europe, it spread to the rest of North America. The scenic route.

*We generally eat zucchini when it is young and immature, while the rind is tender and the seeds are undeveloped, . . . . or at least that’s the goal.

*Zucchini is a surprising source of calcium, making it valuable in maintaining good bone and teeth health. Calcium also helps your nervous system function properly.

*Zucchini contains the carotenoid known as Beta-carotene, which is converted to vitamin A, making it important to a healthy immune system and good eye health. That, in combination with the other antioxidants present, such as lutein and zeaxanthin, protect the eye’s cells and are helpful in preventing macular degeneration.

*Because of a good amount of potassium and magnesium, zucchini is good for regulating your blood pressure and keeping your heartbeat at a normal rate. Moderate levels of folate in zucchini contribute to good heart health by breaking down amino acids like homocysteine, which would increase our chances of heart disease and stroke.

*Zucchini is a good source of zinc which helps with immune function and healthy hair growth. Being rich in fiber, zucchini aids in digestion.

*Zucchini is a good source of vitamin C, so eating it fresh and uncooked as much as possible is extremely beneficial. Good thing its so delicious straight from the garden. The anti-inflammatory properties that come from the beta-carotene and vitamin C in zucchini, address symptoms of osteoarthritis, as well as asthma and other respiratory ailments.

*Since it is packed with so much goodness, and not very many calories, it only makes sense that eating zucchini will promote good health and help prevent disease. It should be a welcome guest at your dinner table.

preparing monster zucchini for the dehydrator

Best way to eat zucchini? Straight outta the garden. Preferably while you’re still standing IN the garden. Snap it off its stem and enjoy the crispness as you bite into it. It’s flavour is so mild that it cannot possibly offend anyone, and it has a slight sweetness to it. The peel is very tender, and adds to the body and texture (and nutrition), so don’t ever peel it when its young. I love the experience of picking a nice tender zucchini with a grandchild in tow so that we can share the experience. I hope they remember those garden moments.

But what do you do with those ripened zucchini’s that are as big as a child’s torso? Well, you can scoop out the seeds, fill it with a stuffing and bake it for supper. I don’t mind doing that once a year, but usually Dan just eats the stuffing and not the zucchini anyway. You can shred it and make zucchini cake, but that’s another once-a-year thing for me too. Seriously – how much zucchini cake do you or all your friends want? In its shredded form, you can add it to stir fries, add it to spaghetti sauce (it disappears and no one will be the wiser), soups, and omelettes. This appeals to me a lot more, and I love putting it to good use in dishes that are made more nutritious because of it. But still, . . . . you have a LOT of zucchini.

DEHYDRATE it!

What on earth would you do with dehydrated zucchini later? Well, you could throw them into those same soups, stews, stir fries, cakes and sauces of course. Yes, I know you can shred it and freeze it, but my freezer space is limited at the best of times, and even more so at the end of summer. One of my favourite ways to use dehydrated zucchini is in a seasoning mix that I call “Taste of the Mediterranean“. See recipe below.

To dehydrate:
Peel large zucchini, cut in half and scrape out the seeds.
Cube the white flesh into pieces about an inch square.
I also shred some.
Spread out in your dehydrator in a single layer. Over night should be sufficient time to dehydrate, but test it by pinching and tasting. The shredded zucchini takes a lot less time than the cubed. I recommend not leaving it for more than an hour or two without checking. You don’t have to babysit it, just don’t go to bed.
When it is good a dry, store in a glass jar in your pantry out of direct light.

zucchini dehydrated and in the jar

recipe: TASTE OF THE MEDITERRANEAN

This taste of the Mediterranean is a valuable part of my kitchen. Add it to your meatballs or meatloaf. Add it to your spaghetti sauce, or your lasagna. Add it to a thick cream sauce for pizza. Add it to your alfredo sauce to go on pasta. Add it to your cream soup, or your Italian Wedding Soup. Make a hearty vegetable dip, buttermilk salad dressing, or a cheese spread. . . . . . . be creative, the sky’s the limit.

ingredients layered in before I mix it all together

1 cup dehydrated zucchini or 2 cups freeze dried zucchini
(I often find myself running out of this mix mid year, when I don’t have any dried zucchini left. No problem, when I have another can of THRIVE LIFE freeze dried Zucchini on hand. )
1 cup dehydrated mixed bell peppers, or 1 cup freeze dried green pepper + 1/2 cup freeze dried red peppers
Blend the above into a coarse powder using the pulse option on your blender. Only a few seconds, so that you still have a little texture but mostly powder.
Add 1 cup freeze dried chopped Spinach
Pulse it in the blender a few more seconds.
Add:
1 cup freeze dried chopped onions
1/3 cup Tomato powder (I use THRIVE LIFE Tomato Powder, but if you have dehydrated tomatoes, powder your own)
1-2 Tablespoons garlic powder (I usually use freeze dried, crushed in a mortar & pestle)
1/2 cup mixed dried Italian herbs: oregano, thyme, rosemary and basil (or your favourite Italian or Greek Seasoning mix) hand crumbled
1/2+ cup dried parmesan cheese (I use THRIVE LIFE freeze dried Parmesan)

Stir with a fork to fully incorporate all the colours. Pour into a clean quart jar with a tight fitting lid. If you’re not using freeze dried cheese, you might want to store it in the fridge, or simply leave the cheese out so that you can add it separately whenever you use the mix later.

Mediterranean Meatloaf or meatballs : add 1/2 – 1 cup to your favourite ground meat mixture, and form as usual.
Mediterranean White Pasta Sauce : add 1/2 cup to your favourite alfredo sauce. You might need to add a little bit more liquid to compensate for rehydration.
Mediterranean Tomato Pasta Sauce: same thing – just add to your favourite tomato sauce. Adjust liquid if necessary.
Mediterranean Omelotte: add to beaten eggs, allow two or three minutes to refresh. Cook eggs as usual.
Mediterranean Vegetable Spread: Cream mixture into cream cheese. Start with 2 tablespoons, and then add more if desired. Stir in a little mayo and sour cream, creaming with mixer or spoon after each addition. Let it sit for 15 minutes to ensure all is rehydrated. Test for desired consistency, adding more liquid if necessary. For spreading on crackers, serving with fresh bread, or using as a sandwich base.
Mediterranean Vegetable Dip: Same method as above, but use mayo and sour cream. Maybe a little cream cheese for body and richness.
Mediterranean Buttermilk Salad Dressing: Same method for Dip, but stir in buttermilk to desired consistency.

I’d love to hear your ideas for eating zucchini – especially when it gets too big.
If you decide to try this recipe – I’d love to hear ways you incorporated it into your meals. Its great to learn from each other.

Warmly,

Cindy

Fruit Leather

Fruit leather! Apple leather – rhubarb leather – any kind of fruit leather. Mix it up. Apple pear. Rhubarb raspberry. Plum! Whatever you’ve got on hand that needs to be used up, turn it into a delicious, nutritious snack to grab all winter long.

Rhubarb-raspberry-cranberry leather. Adding cranberries to fruit sauce makes the colour gorgeous! Apple leather behind it. Apple sauce for leather is so dependable in the late summer because they’re usually so plentiful. Its wonderful to use by itself, or as a base with pears, plums, rhubarb, berries, or whatever you might have on hand.

I first learned about Fruit Leather when my oldest was just a baby. I never tried it or even saw it, just read about it. In a library book. I loved the idea of it, and that very week, made some of my own, using our oven. I dried it at the lowest temperature I could get on my oven, and was hooked from that day on. Over time, I’ve progressed to the convenience of the counter top dehydrator I use today, but seriously, one doesn’t need a dehydrator. This is something people have made for many many years before dehydrators made everything easy

When you have access to your own fruit trees or a friend’s, you often have a lot of fruit that needs to be used or preserved – RIGHT NOW. We wait all summer long for fruits to ripen, and then when they do, every hour counts as we eat, juice, can, freeze, dehydrate, make jams or jellies, flavour vinegars, pickle, ferment, bake, and do anything else we can think of to continue to enjoy them for months to come.

It is a fun goal of mine to make valuable use of everything the Lord has blessed me with, or to pass it on to someone else who will, but just because I said it was a ‘fun’ goal, doesn’t mean its not without a lotta work. Usually it means many hours of hard work. Fruit leather is one of those results. It’s where excess fruit goes to find purpose and meaning to its existence. Fruit leather isn’t prejudiced against fruit that isn’t pretty enough to make it to the produce department, or the glass canning jars. Perhaps it wasn’t the ‘prettiest’ peach in the box, or perhaps the apples hit the ground and receive bruises, fruit leather is non-discriminatory.

Taking advantage of fruit that would otherwise go to waste.
Apple pie, apple crisp, apple muffins, apple juice, apple jelly, apple sauce, apple butter, apple leather, . . . . . Apple is the base for so many late summer edibles, and the perfect fruit to preserve for all winter long.

In fact, sometimes it even takes biproducts from other projects and makes them valuable again. For instance, apple pulp left over from steam juicing, can be strained to separate the apple sauce. And apple sauce makes wonderful fruit leather all by itself, and a beautiful base for many other mixes.

I think its impossible to have an exact recipe when you’re true the ‘spirit of fruit leather’. When you are using excess, you just don’t measure in ounces or cups. So the ‘recipe’ below is only a guideline to begin with. You can vary it depending on whatever happens to be in season and accessible.

I like to at least heat the fruit through for a few minutes to arrest any alteration in colour or flavour, and also to kill any bacteria. Lightly simmering the fruit, softens it and makes it easier to smooth. Either mash the softened fruit with a potato masher, or puree it in a blender, of half and half to have a more interesting texture.

Sour cherries make amazing fruit leather, alone or in combination with other fruits. They are also terrific dehydrated by themselves. Pitted of course.

Often times a combination of fruits, using the apple sauce first, opens up to a whole new world of textures and flavours. Starting with a base of apple sauce, consider these variations:
* apple sauce – straight, all by itself, only sweetened if necessary, and nothing else
* apple sauce with pear sauce mashed, skins removed, (trust me on this, pear skins when really ripe are tough and unpleasant). If you puree it, then you can leave the skins on.
* apple berry blend – your choice. Whatever’s in season. I love using raspberries,
* apple plum blend
* apple peach blend
* apple pie – apples with cinnamon for apple-pie fruit leather
* apple grape – puree the grapes if they have seed in them.


* Sour cherries. Pureed or mashed for added texture, sweetened to taste. By themselves, or in combination with other fruits, always a winner.
* Plums. In my climate, there are many varieties of plums that grow well. And they’re not only delicious to eat straight off the tree, but great for canning, dehydrating, making into jams or plum sauce, and of course fruit leather alone or in combination with other fruits. Their sweetness is the perfect companion to the tartness of rhubarb.
* Peaches – alone, or mixed with anything you like are always an all time favourite of mine. However, peaches don’t grow in my climate so I always have to buy them, and mashing up fruit I purchased hurts my feelings. So the only time I would ever make peach jam or peach leather is when I got a steal of a deal, or they got away from me, past their prime, and I would otherwise lose them. That’s what makes fruit leather so great – it prevents waste.
* Apricots. I don’t often have a lotta fresh apricots that I wouldn’t mind cooking up. Kinda in the same category as peaches. But in the rare instance that I have had access to some, I’d make a TON of apricot leather. I LOVE the flavour and unique ‘tart sweetness’ of apricots, and they’re a powerhouse of nutrition.

alone, or in combination with the tartness of rhubarb, the beautiful colour and natural sweetness of plums is a perfect choice for fruit leather

*Be brave and experiment. If it sounds good, and it tastes good together, then it might be the perfect marriage. Its all about making use of what you have on hand.

* Rhubarb is the perfect base for fruit leather. Beautifully tart, it is great alone, or mixed with berries or apple sauce. And its ever-plentiful, hardy in our climate. That’s hard to beat. If I’m looking for a beautiful red colour, I’ll add frozen or freeze dried cranberries. Sweeten only to taste, being careful not to loose the tartness that sets rhubarb apart.

Additional ingredients and what they’re used for:

Sugar or other sweetener: to personal taste. I am not normally a white sugar girl, but for fruit leather I find it is preferable to other sweeteners like stevia or brown sugars. Besides, sugar has preservative benefits too. Just be responsible with ‘how much’. Honey is great, but it adds its unique flavour to the fruit sauce, so make sure you like that flavour blend before you decide to use it.

rhubarb, the northern gardener’s best friend

Water or other liquid: to give it enough liquid to steam itself. Just enough, not too much. Remember, you’re dehydrating this. The more liquid to add, the more you need to dry out.

Lemon juice: to retain vibrant colour, and to add some tartness. I love the taste of lemon, and the tartness of it. It is perfect in so many combinations, especially those where flavours are being combined.

Recipe (remember there are no real, hard defined measurements). The recipe below is ONLY A GUIDE. I’m gonna use RHUBARB as my example. You can personally adjust for any other fruit, according to your own tastes and preferences.

Rhubarb Leather

1. freshly picked rhubarb, washed, chopped, and lightly simmered over low heat, till its soft enough to mash. Use water only to keep it from scorching (maybe 1/2 cup for every 4 cups of fruit), and keep the heat low.
2. sprinkle sugar over top to taste.
3. add enough lemon juice to keep colours vibrant. Could be a couple of tablespoons to a full cup – depending on how big your pot of rhubarb is. Lemon juice will keep the integrity of the colour, and will add a little zing to your flavour, but is NOT necessary.
4. mash cooked rhubarb with a potato masher to a nice consistency. I prefer this to puree’ing in the blender, because the texture is more interesting.
5. If you feel like the colour is lacking, add some red raspberries if you have them.
6. For colour: I keep on hand a good supply of frozen and/or freeze dried cranberries for the purpose of adding a gorgeous stable RED colour to my red jams and even fruit leathers. If you want your rhubarb a nicer, pinker to reddish colour, add a cup or two cranberries, and simmer with rhubarb till tender. Mash or puree (your choice), to incorporate well.

Now to dry:
If you have a dehydrator, that’s my preference. If you do not, use the oven on VERY low, as low as your oven will allow. I’ll start with my first experience which was an oven.

OVEN –
You need a flat surface, like a cookie sheet. Spread the sheet with a layer of plastic wrap, like saran wrap (NOT waxed paper – you’ll be sorry), or parchment paper. The saran wrap likes to stick together and its very annoying to lay it flat, but do it anyway. If you rush the job, you’ll only get more frustrated. If you have a flat silicone sheet, all the better. Its reusable and lays flat. Pour your prepared fruit sauce over top of your lined surface, and gently spread it out with the back of a spoon. Spread to about an inch from the edges. How thin? Just thick enough that you cannot see through it, about 1/8-1/4 inch.

Place in a warm oven that is set to the lowest temperature you can – which will probably be between 150-200 degrees. You’re wanting to dry the fruit sauce for as long as it takes to become a leathery, slightly tacky finished product. There are so many variables that will determine how long that should take. Check every hour or two, moving the pan slightly to promote even heat distribution. Be patient. You can’t rush this stage. My guess is anywhere from 9-12 hours. Personally, I don’t recommend leaving it over night because you’re not able to monitor sufficiently. Turn the oven off when you go to bed, and start the process over again in the morning. It doesn’t have to be babysat, just don’t leave it unattended for too many hours.

When you see that it is drying, gently touch it to see how soft or tacky it is. You don’t want any soft spots. When you think that its almost done, I recommend peeling it off the plastic, parchment or silicone sheet and flipping it upside down on the oven rack itself, for another hour or so. This lets air get all around it, and allows it to more evenly dry.

HOMEMADE DEHYDRATOR –
In the height of my dehydrating days, when I had all the kids at home, Dan built me a large wooden dehydrator, almost as big as our freezer. He and our good friend Kevin Lamont worked together, as Kevin was also building one for his wife Diana. They heated them with in-car heaters which worked beautifully, moving just enough air and at a very suitable temperature. I used that dehydrator for many years, drying mostly fruits, fruit leather and herbs, but also experimenting with various vegetables. It was also a good place to make yogurt. By the time we moved to our present house, I was running our Bookstore fulltime and very busy in the early fall, getting ready for Christmas. I dehydrated less, and couldn’t justify the large floor space that my faithful dehydrator took. We found it another happy home, and moved on.

On a screened frame, lay out your plastic wrap, or parchment and pour your sauce over top spreading it with the back of a spoon. The nice thing about a big dehydrator is that you can do LOTS of fruit leather at one time. Check the progress every few hours, rotating racks to keep the heat and air more evenly distributed. My estimate is probably a good 12 – 24 hours, but again – so many variables. How full is the dehydrator? How wet and thick was your sauce? Heat and air flow? Be patient and don’t rush it. Just like with the oven, when you think its pretty much done, peel off the plastic wrap and flip it upside down on the screen for the last hour or so.

COUNTER TOP DEHYDRATOR –
You can have as few as two or three racks in a counter top dehydrator, or as many as you want. That means you can easily dehydrate a small batch, or a huge batch of whatever you’re doing, and the foot print stays the same. Nice. In August or September, my dehydrator lives in my kitchen, and is often running for days at a time. I have about a dozen racks so I often dehydrate more than one type of food at a time, being careful to monitor the different time requirements. *hint: don’t put fruit and herbs in the drier at the same time unless you want oregano tinted fruit leather. But herbs and zucchini in the dehydrator at the same time are good companions.

There are some beautiful counter top dehydrators nowadays, that are easy to use, easy to regulate temperature, and easy to keep clean. Those are winning features in my books. You can also purchase plastic fruit-leather liners and screens for berries and herbs. I love that flexibility. I have six or eight reusable fruit leather liners, perfect for my use this time of year. Using the same method, I simply pour my sauce onto the liner, spreading out with the back of a spoon to the desired thickness.

fold or roll the finished fruit leather and store in an airtight bag or container

I can expect it to take about 24 hours, but again so many variables. How many racks? How wet is the sauce? And how thickly did I spread it out? Even, how humid is the air? If I put the fruit sauce into the dehydrator at night, I have no problem going to sleep with it on, but if I start the process in the morning, I wouldn’t risk it leaving it unattended overnight. I’d turn the dehydrator off when I went to bed, and start it again the next morning, so that I can keep an eye on the progress. As with the other two methods, when the leather is almost ready in my opinion, I’ll peel it from the liner and return to the rack upside down, for another hour or two or three, finishing the drying process to my satisfaction.
*hint: when peeling the fruit leather from the plastic liner, it may be a little tricky. I use a firm plastic spatula to gently scrape the edges to get a good start.

Whichever method you use, the results will be very similar.

To store:

Do a final touch test to ensure the leather is dry enough – no sticky spots.
Fold or roll up, and place in an airtight bag or container.
Store in your pantry to have handy for regular use. Some store it in the fridge or freezer, but I’ve never done that. For one, my space is limited. And I am much more likely to lose it, and forget about it in the bottom of my freezer. LOL

packed away to store in the pantry within reach of little grandkid hands

When properly dried and package, you can expect your fruit leather to be optimum in your pantry for about a year. Preservation depends on their low moisture content of less than 25%, the natural acidity of the fruit and the sugar content. Don’t push it too long past a year though. It may appear the same, but the nutritional value will have been steadily diminishing from the time you made it. Though dehydrating may slow down the nutritional loss, it cannot prevent it. (Not even in the freezer)

I’ve known lots of people who cut their fruit leather into convenient strips to store. I think that’s great; I’ve just never done it. Mine is usually stored in the original size, and we just rip a piece off when we eat it.

The principle of food storage is sound and I wholely subscribe to it. I live by it. BUT the rule is simple: store what you eat, and eat what you store. Keeping your food storage rotated, means keeping it fresh, and that means keeping it nutritionally sound, and that should be important to us. So EAT the fruit leather you make. Give it to the kids as a healthy snack. Send it in their lunches. Bring it in the car for road trips. Don’t protect it in your pantry like some kind of rare treasure you’ll only bring to the light during some future zombie apocalypse. This is REAL life. And it tastes GOOD.

I hope this is of help to you. If you have yet to try your hand at making your own fruit leather, I really hope you’ll give it a try. You don’t need any special tools to begin, just an oven. The first time I made it (all those many years ago), I was excited to tell my sister about my new discovery. She asked how she’d be able to tell it was done, and I told her “when its dry, you just have to be your own judge”. She made it and then phoned and complained to me that it was terrible. It was like shoe leather. Who wanted to eat that? LOL *hint: stop drying it before it gets to the point of being so dry its like shoe leather. But its an experiment. You’re never gonna know till you try it yourself.

Have fun. I’d love to hear your experiences, your favourite ways of making fruit leather, and your favourite combinations.

Warmly,

Cindy Suelzle

What’s it gonna take? SERIOUSLY!

We’ve all seen things this year, we thought we’d never see.  We can no longer say “it’s never gonna happen”. It already has. It still is. It will again. And again! Stores running out of necessities. Supply chain issues that backlog commodities for weeks or even months, or in some cases – remove them completely.  Panic buying which leads to even more shortages, and finally rationing. Not that long before, we couldn’t even imagine it. Now most of us have seen it with our own two eyes. The year 2020. Never to be forgotten. A year full of uncertainty and constant upheaval, where nobody had 20/20 vision.

During much of 2020, empty shelves became common place all over the world.

All of us were affected. All of us were at least inconvenienced, by not being able to get the things we wanted or needed in a reasonable time – if at all. Some of us lost income. Some lost jobs. Some lost businesses. Some lost lots more. The businesses who survived, had to figure out how to reinvent themselves. Some did it really well. Some thrived. Some were so well suited to the new way consumers had to buy, that they had a stellar year. Every one of them adjusted in some way. If they didn’t, they probably didn’t survive. Most will never be the same again.

The question is: “if 2020 didn’t wake us up, what’s it gonna take?” What’s it gonna take to convince us that being prepared could make a repeat of that whole experience so much easier? Look at it as the best dress rehearsal ever! The whole world joined in. It revealed to us our weak spots – things we can improve on. I hope we learned some valuable lessons.

As we strive to care for ourselves and our families, one of our greatest challenges is to find peace in the midst of an uncertain future. Never has our future been as uncertain as it is now. Though we may have the basic necessities of life today, what about tomorrow? Psychologists explain hoarding and panic buying as expressions of the need for “taking back control in a world where one feels out of control”. It leads to “me-before-you” thinking, and disregards the basic needs of everyone else.   Experts say that when people are stressed, their ability to reason is often hampered, and they look at what others are doing for guidance. They will likely follow the crowd – engaging in the same behaviour.  The great toilet paper shortage in 2020 is the perfect example of this, and has become the “icon” of mass panic buying.

The sad truth is, that none of it was necessary. And it still isn’t. Not because I don’t believe shortages will happen again, but because with a little bit of foresight and planning, we can all be prepared. With preparation comes peace of mind, and there is no price on “peace of mind”.

For over a century the Church of Jesus Christ of Latter-day Saints has counselled its members to be prepared in all things. “If ye are prepared, ye shall not fear” is a basic tenet in the religion. Preparation in all things, not just food. In 1977, then leader of the Church – Spencer W. Kimball said “We have placed considerable emphasis on personal and family preparedness. I hope that each member of the Church is responding appropriately to this direction. . . . This implies the [prudent managing] of our resources, the wise planning of financial matters, full provision for personal health, and adequate preparation for education and career development, giving appropriate attention to home [food] production and storage as well as the development of emotional resiliency.” These were strong words to the members of the Church at the time, and many took them very seriously. The wise counsel was considered “Direction”, and it certainly shaped the direction I took as a young adult, influencing many choices I made then, and in my future: primarily my choice to establish a serious FOOD STORAGE. I guess you could say some of us were “preppers” long before prepping was cool. LOL.

We don’t have to wear a long pony tail and live in a mountain cabin to be prepared. The term “prepper” may be a fairly current term, but there is nothing new about the concept of preparedness. So how does an urbanite prepare themselves and their family for the inevitable empty shelves and high prices of the future? I’ll tell you how. They begin by storing a modest supply of food. And they go from there.

HOW do you start a serious Food Storage?

It is actually really simple. Embarrassingly simple, however, don’t confuse the word “Simple” with easy, it’s about DOING. But with a clear mind and a good plan, we can move forward, beginning right here, where we are today. Below is counsel the Church’s governing body gave to its members worldwide in 2007.

Note that there is no incitement of panic in this loving counsel. It is reminiscent of the counsel a kind and wise parent might give to a child. And therein lies the simplicity of it. While worldwide circumstances and laws may alter drastically, the direction is still clear: to “store as much as circumstances allow“. What members do with that direction of course, is up to them – but if society as a whole followed it, we would never again have to live through the panic buying of 2020.

WHAT TO STORE?

Advice from the Church of Jesus Christ of Latter-day Saints, – long recognized as experts in the area of preparation says: “It is important to remember that you should not go to extremes when establishing your food storage. For example, it is not wise to go into debt to establish your food storage all at once. Develop it gradually so that it will not become a financial burden.

hymn: Come Ye Thankful People
by Henry Alford

There are three main components of food storage: *short term, *long term, and *water. Taking on the project of establishing a full year’s supply of food and necessities is huge, and for many – price prohibitive. But breaking it up into bite size, manageable pieces, removes the overwhelming immensity of it, making it feel less daunting, and more realistic; making it Do-able.

Start by setting a goal to store a THREE month supply, and divide that into months, beginning with ONE week: seven days of breakfast, lunch and supper. You know what is normal for your household. Start there. It is very important that you “STORE WHAT YOU EAT, AND EAT WHAT YOU STORE“.

  1. Think of seven family favourite recipes for main dish meals. Write them down, with a list of ingredients for each. Begin your journey by buying what you need for those seven meals.
  2. Now think of seven breakfast meals that are not dependent on fresh ingredients. Write them down, with a list of ingredients for each.
  3. Fill the week’s menu in, with a list of seven lunch ideas, and write them down with a list of ingredients.

    This exercise becomes a little more elaborate as you go through it, and it requires serious contemplation to make sure your choices are manageable for YOUR particular circumstances, especially if you have children in the home. Remember, it MUST be liveable. People say to me all the time “if I’m starving, I’ll eat anything“. Okay, I get that, and I might not even disagree with it in theory, but framing it with such extreme adjectives as “starving” is what panic thrives on. Calm down, and try to reframe your preparation in terms of “normal”. In times of stress, you want as much to remain comfortable and normal as possible. THIS is a huge step in the “peace-of-mind” department. An adequate food storage is not simply for some future ‘zombie apocalypse’, it is for those times when life throws you curveballs and you cannot get out to shop; it is for times of illness, disruption in employment, or – as we all saw in 2020, when the stores themselves cannot supply the general public. An adequate food storage removes the feeling of losing control over one’s own environment.

Once you have your week’s menu written down, go out and begin purchasing the ingredients for it – as you can. Make it a priority, pushing less important things to the side for now. Then, when you have those supplies firmly in-hand, repeat it. Or better yet, create another week’s menu.

Think of seven MORE family favourite meals.
Repeat all the steps above.
And then repeat again. And repeat again.

Now comes a new way of thinking, that is key to making this whole thing work. Avoid the scarcity mentality that “food storage” is food storage and “groceries” are groceries and never the twain shall meet. Don’t buy into that idea of “protecting” your food storage from yourself. That is where the scarcity mentality comes in and starts to mess with you. I have friends who absolutely will NOT touch their food storage. They’ve developed such a mental block against using it because of their belief that it is for emergencies only. But what constitutes an emergency? And when is it big enough? Some of them tell me they’ve got freeze dried food in their storage, and knowing that it has a shelf life of 25 years, they can just forget about it, knowing they’ve done due diligence.

The problem with this thinking is multifaceted. Firstly, they never learn how to use it, so the learning curve never goes away – making using the food seem more intimidating than it ought to be. And nothing ever gets resolved. Secondly, time slips by – and pretty soon 25 years has come and gone. Some of my friends admitted they’ve had their food storage well in the excess of 30 years! The natural question should be “So, WHEN were you gonna get around to using it?” They spent thousands of dollars, on this food insurance – only to have it now, decades past the expiry date. What a waste of a LOTTA money!

I am not speaking against long shelf-life foods. I am speaking against wasting them.
Spencer W. Kimball emphasized – and I can hear his gravely voice even still say “We encourage families to have on hand this year’s supply; and we say it over and over and over and repeat over and over the scripture of the Lord where He says, “Why call ye me, Lord, Lord, and do not the things which I say?” [Luke 6:46.]”

This image has an empty alt attribute; its file name is blog-food-storage-bottles.jpg

USE the food you’re acquiring, and replenish continuously.
This prevents food getting stale and outdated, and saves you money.
The key to making the whole FOOD STORAGE thing work, is to normalize it. This is food that you EAT, remember? So eat it. These are your family’s favourite meals right? They’re comfort foods. You’re used to buying these groceries. So keep buying for them.

Put USING it, into your plan. As you work toward your goal of acquiring ingredients for a week’s meals, . . . . simply add more. You should be in a constant state of replenishment: replenishing more than what you’re consuming. As you can afford it! Never, ever, ever go into debt to buy food storage. That is flawed thinking, and completely polar to the whole principle of self sufficiency behind it. Perhaps you’re replenishing with a little bit more than what you’re eating, perhaps with a lot more. Follow the good advice to “store what your circumstances allow”. In the example of my friends with the expired food: they could have saved a whole lotta money if they had been regularly using and regularly replenishing their food storage. You don’t have to worry about buying two sets of groceries every month: one for the kitchen pantry, and the other for your “food storage”.

SHOP THE SALES
We all look for bargains when we go into grocery stores. When something we like is on sale, we try to pick up extra. With the food storage mentality, pick up a little MORE than extra. Gradually your week’s supply will expand to a month’s supply, and eventually to three months. This is where you start enjoying the sense of peace that comes with preparation.

NORMALIZE
It is critical that the meals you are planning, are as ‘normal’ as possible, because it is also critical that you rotate them: first in, first out. Doing so keeps your food items current, avoiding spoilage. When my family was young, I had an added motivation to ‘normalizing’ our food storage. I didn’t want my kids to ever feel ‘hard-done-by’, if and when we ever relied on our food storage (which we did for short spurts from time to time). No matter how difficult things might be for us, I wanted life to be as ‘normal’ as possible for our kids. That meant that we couldn’t be eating completely one way in the good times, and completely another way when things got hard. That simply meant we stored what we ate, and we ate what we stored.

*hint: You should also have a short-term supply of medications, hygiene items, and any other necessities of your family.

There are lots of resources about storing food, and quite simply – there isn’t ONE way to do it. We all have circumstances unique to us that make our stories a little different. But there is lots we can learn from our own experience and the experiences of others. I intend to create future posts answering questions I have heard, that may hopefully give you some suggestions for how you can work things out in your own home.

Watch for future posts on:
what to store, including personal recommendations
*where to store it – including to freeze or not to freeze
*home canning and other skills for food storage
*how to use
*water storage
*seed storage
– and more . . . .

In the meantime, I’d love to hear your comments about what works for you.

Warmly,

Cindy Suelzle

footnotes:
read President Kimball’s April 1976 talk here – https://www.churchofjesuschrist.org/study/manual/teachings-spencer-w-kimball/chapter-11?lang=eng

read Vaughn J. Featherstone’s talk about Food Storage from the same General Conference, April 1976 – https://www.churchofjesuschrist.org/study/ensign/1976/05/food-storage?lang=eng

Food Storage – where to store it when space is an issue?

In our goal to care for ourselves and our families, there are many challenges. Some more practical and some more emotional. But one of those practical challenges is to find ROOM!

Room to store food that will be accessible enough to our day-to-day living, so as to allow us to not only “Store-what-we-eat“, but to actually “EAT-what-we-store“. When I was a child, it seemed that most houses were built with a cold room. Ours was for sure. And it was COLD, all year round. All our non-frozen food went in there, the boxes of fruit my mother bought, and everything else that needed to be kept cold but not frozen. Twenty years later, by the time Dan and I were looking at houses to buy, the fashion was very different. There were fewer cupboards in kitchens, no (or very small) pantries and zero additional space to store food – especially if you wanted it cold. What the heck? Another twenty years later, with the homes my kids have purchased, I am noticing some common trends. The newer homes have fairly nice sized pantries, but virtually NO available space for additional storage. It seems that for the last several decades, storing more than a few week’s worth of food requires considerable creativity. And being creative is important, because where we store our food storage is a big factor in *how long we can expect it to last, *the quality that it will retain, and more importantly *how accessible it is to us to be able to USE.
Types of containers, and conditions in the space we store it will impact its shelf life.

FINDING SPACE WHEN YOU’RE PRETTY SURE THERE ISN’T ANY

After we bought the house we are currently in, it took us a few years of trying this and that before we settled on not one area that worked for food storage, but a combination of three areas. A little over a decade ago, we made some big changes in what we were storing, which influenced of course, how we stored it. Although I still do home canning and I still dehydrate when its suitable, and yes, we still have a freezer, about ten years ago we began to incorporate FREEZE DRIED Food into our food storage. The exceptionally long shelf life was the initial attraction – twenty five years, as opposed to the suggested two years of canned food (whether home canned or commercially canned), and the one year or less recommended for frozen food. That’s a BIG Plus! But it was also the variety that appealed to me. Everyone knows that the weak spot of any food storage program is VEGETABLES. Eating canned fruit isn’t bad, but who really likes canned vegetables? canned peas? or green beans or beets? When I was a child, Popeye tried to convince us that canned spinach was desirable. It would make you strong! he said. And although he did a good job convincing me it would make me strong, even Popeye couldn’t make canned spinach taste good. Suddenly with freeze dried food, one could have spinach, broccoli, cauliflower, green beans, celery, onions, and a whole lotta other vegetables – that tasted like they had just been picked, and which were FULL of important nutrients! And not just vegetables. Fruits, dairy products and even meats!

When considering where to store food storage, it is important that you find a place that is dry, dark and cool. Wouldn’t it be nice to have those cold rooms of yester-year? But even though most modern houses don’t plan for that sort of thing, those three factors of *dry, *dark, and *cool, must be our focus when looking for a suitable place. All other factors are secondary to moisture and temperature.

CONTAINERS

Common containers for food storage are:
*paper – such as sacks of flour and sugar, or cardboard pasta boxes – short term only.
*plastic or cellophane – such as pasta bags, raisin bags etc – short term only.
*plastic buckets with air tight lids – suitable to pour from, or place bagged foods into. Practical for holding large amounts of food while keeping smells in or out, air out, and light blocked. Shelf life is completely dependent on what you put into them.
*glass – mostly used by home canners, this is as effective as metal cans except for the obvious need to keep in the dark. Food exposed to light will react to it. Shelf life is recommended to be two years or less.
*metal cans – of wet food such as fruit, cans of soup etc – like jars, recommended shelf life is two years. Metal cans – of dried food extends the shelf life considerably. It is the absence of moisture and the absence of oxygen that is so beneficial, but of course, it depends what is in the can, and how dry it was when sealed.

In all cases, moisture in the #1 enemy, It is imperative that we protect food from moisture which creates a perfect environment for harmful micro-organisms to thrive in.
*hint: moisture doesn’t always mean liquid. Be mindful of moisture in the air that dry food will absorb when exposed to it.

CREATING ROOM

When you invest in food storage, “where am I gonna put this?” has got to be a question we ask ourselves. We can’t just keep buying food without a proper place to put it. We need shelves of one sort or another. And we need some kind of dedicated space.

underneath our stairs we created a spot that promised to work just fine. The shelves are deep enough to hold #10 cans three deep.

The space underneath stairs is often awkward and poorly used. Its generally an unfinished area, without heat, and If its in the basement, the cement floor helps it to be cool. The absence of a window keeps light to a minimum. Building some sturdy shelves can take best advantage of the space. Make sure the shelves are high enough for large #10 cans and deep enough for 3-4 of them or 4-6 quart jars.

SHELVING

https://thrivewithcindy.thrivelife.com/other.html#free-standing-units

The incorporation of freeze dried food into our family food storage meant that our storage situation needed to be adjusted. Frankly, it made it a lot easier. We had already invested in a shelf rotation unit. The company was then called SHELF RELIANCE (changed their name in 2013 to THRIVE LIFE). We opted initially, for the variety unit which held small cans like tuna sized, right up to the large number 10 sized cans, and everything in between. Seriously, it was one of the best investments we ever made in the area of food storage. It made rotating the cans so easy, and rotation is a major consideration when managing long term food storage. First in, first out. No more wasting food because it gets forgotten behind something else. The shelf rotation system was simple and brilliant.

For those like us, who needed some serious organization and to maximize storage space, this can-rotation system was the cat’s meow. It holds more cans than I could have imagined – up to 300 cans of varying sizes. No more stacking boxes and searching for what you’re pretty sure you have somewhere. And more importantly, no more forgetting about cans that remain tucked away until way past their expiry date. They are suitable to set up in a pantry, in a closet, in a food storage room, tucked into some corner in the basement, or in whatever available space you have – it keeps food uncluttered, visible and accessible.

In time, we bought another unit to accommodate some of our growing supply of large family sized cans of freeze dried food. But still, where to put them? and where to create more storage space? When we first got them, we kept them both in the laundry room which wasn’t ideal for a number of reasons, so we kept our minds open to other possibilities.

two rotation units side by side. One is for larger cans only, the other is for a variety of sizes.

At the time, we had an exceptionally long family room in our basement. We measured off a few feet at the back and Dan built a wall, instantly creating a new room, narrow but sufficient for our needs. We put our rotation units into it, adding additional shelves as were appropriate. Having two rooms for food storage might not have been our initial preference, but one must make the best of one’s situation right? It does allow us to diversify and organize better. And it allows for easy access.

TEMPERATURE

When dealing with food that has such an exceptionally long shelf life as freeze dried food, it is tempting to assume that shelf life is unconditional, Make no mistake – there is no such thing as unconditional. Fluctuating temperatures of summer highs and winter lows undermine the integrity of any food, no matter how dry it is stays. That 25 year shelf life is dependent upon ideal conditions.
Q: What is the ideal temperature condition?
A: Consistent temperatures below 70 degrees Fahrenheit (or 20 degrees Celsius) with the most important part being “CONSISTENT”.

Yes, we all know people who store their food in an unheated garage, but in that condition (at least in the climate I live in) it is impossible to avoid drastic fluctuation of temperature. However, if that is your only option, all you can do is make the best of it. Do you best to keep the temperature as consistent as possible, and know that your 25 year expectation should unavoidably be adjusted. I have even known some who store their freeze dried food in an outdoor shed! Though it may offer shelter from the rain, shed, temperatures can easily dip below -40 C in winter and rise to almost +40 C in the summer, with everything in between. This is extremely undesirable, and will most assuredly affect the stability of your food. It is not necessarily cold or heat that causes the damage, as much as the continuous fluctuation between the two extremes.

In the end, all we can do is the best we can do. I am of the firm belief that FOOD STORAGE is very important. I believe it should be food of the highest quality possible, and that all precautions should be taken to ensure it stays healthy. Where to start? That is a discussion for another time, but it is critical to start somewhere. Better to have some than none. Better to start! Don’t wait for a location to suddenly appear. Take charge and carve out a spot that is dark, dry and maintains a temperature as consistent as possible. Build or buy some shelves to store it, and GO FOR IT. You’ll never regret it.

Where have you found the best place to store your food storage? I’d love to hear your creative solutions when space was limited.

Warmly,

Cindy Suelzle

Common Herbs in your House and Yard: part 7 – Rosemary to St John’s Wort

Part 7 – R,S includes Rosemary, Sage, Savoury, Sorrel, Stevia and St. John’s Wort

ROSEMARY – culinary, aromatic herb

Rosemary is a native of the Mediterranean region where it grows as an evergreen shrub. In Canada it is considered a tender perennial, which is a joke in the Edmonton region because it will NEVER make it through the winter. It is an aromatic herb with fragrant, green, needle-like leaves and white, pink, purple, or blue flowers.

a young Rosemary in the garden surrounded by her garden friends Marigold on the right, parsley bottom right, borage bottom left, red orach on the top and a poppy top left

growing and harvesting

Rosemary grows best in well-drained, loamy soil in full sun. Water plants evenly throughout the growing season, but be careful it doesn’t sit in soggy soil. Other than that, its a pretty easy plant to have a good experience with.

In the Edmonton region, consider Rosemary as an annual, but it can be brought indoors at the end of the season with a fairly high success rate if you have a nice sunny window. Even indirect sunlight will keep it reasonably healthy. Nothing will ever be quite the same as being outside in the heat and sunlight of summer, so don’t expect that, but it will still be okay. During its sojourn in the house during the winter months, make sure it gets enough to drink; if you’re going to lose it, that will be why. They drink a LOT. To bring it into the house and not bring any potential freeloading bugs with it, dig the plant when it is still very healthy, before the cold has caused it distress. Gently shake all the dirt from the roots, and gently trim if necessary. Prune the plant by 1/3 and then pot it into a clean pot with clean potting soil. Set in a nice sunny window for its temporary winter home.

I buy two or three rosemary plants every spring to plant in my herb garden. You can get a trailing rosemary or a plant that grows upright. I like to get different kinds if I can find them – just for variety. Prune regularly so that plants won’t get lanky. I keep one in a pot on the patio that I bring inside in the winter. It’s just easier that way for me to transport in and out, but you can also just dig a plant up at the end of August as described above, and then replant it outside in the spring after ALL danger of cold nights is it the past.

To use throughout the summer, simply snip a branch as needed and bring it in for dinner. If you’re pruning regularly anyway, you’ll always have fresh rosemary on hand. At the end of the season, cut your rosemary right off at the ground. Swish in water to clean and shake off excess or strain in a salad spinner. You can dry them in the dehydrator but I’ve found that the leaves go too dark and I don’t like that. I usually just lay the cleaned branches out on a clean tea towel and leave in the open air for about a week till they’re completely dry. Fluff up once or twice throughout each day to ensure they’re drying evenly. When completely dry, pick up a branch by the stem in one hand, and gently strip all the needles/leaves with your thumb and forefinger of the other. Store in an airtight jar in a nice dark cupboard. Label with date.

using Rosemary in the kitchen

Rosemary can be used fresh or dry, with the needles removed and minced or as whole sprigs, to infuse flavor into a larger dish like a stew or roast. To strip fresh leaves from the stem, pull the needles in the opposite direction from which they grow and they should easily slide off the stalk. Fresh rosemary is easiest to use because the leaves are soft and pliable, but if you don’t have a plant in the winter, then it’s easy to use the leaves dried.

Use rosemary with chicken and other poultry, pork, steaks, and fish. It also goes well with grains, mushrooms, onions, peas, potatoes and spinach. These are my favourite ways to use it:
*Roasted potatoes: cubed potatoes in baking dish, drizzle with olive oil and sprinkle liberally with chopped rosemary, coarse salt and cracked pepper. Bake in open dish at 400 degrees till nicely browned and tender to the fork. Timing depends on how big your potato pieces are – I use bite size pieces and it generally takes 45-60 minutes. Toss every 10-15 minutes to ensure they’re evenly coated with oil as they roast.
*Rosemary bread: add chopped rosemary to bread dough, especially sourdough.
*Rosemary in olive oil and balsamic vinegar to use as a dip for freshly baked bread. Serve along side a fresh green salad.

SAGE – a culinary herb

Sage has a long European history as a medicinal plant, but is most commonly used nowadays in the kitchen. It has greyish green elongated leaves, with a soft, downy surface, and its pretty flowers are shy little spikes of purple, blue, white or pink.

growing and harvesting:

Sage is an easy to grow, hardy ‘semi perennial‘ with uniquely shaped and coloured leaves, that looks good in every garden, and is as much at home in your flower bed, and your vegetable garden, as your herb garden. When I say ‘semi perennial’, I mean in the Edmonton area – zone 3A/B – sometimes it comes back in the spring, but sadly – you cannot count on it from one year to the next. I generally plan to buy one or two greenhouse sage plants in the spring, and if what I had growing last season come back, then lucky me, I’ll have more. If they don’t then I’m still covered. Welcome to Alberta. Frankly, for the average household, a single sage plant is probably sufficient for all your needs anyway. A few years ago, my son introduced me to sage ‘tea’ (really an infusion), and I really like it, so since then, I grow more, to have enough for tea throughout the winter.

Plant in full sun, well draining soil. Sage likes to be near rosemary and carrots, but they do not like cucumbers so keep them separate. Be sure to water young plants regularly till they get established.

To use continually throughout the summer, simply pinch off leaves or snip off small sprigs from the plant. Don’t harvest too aggressively too early. Once your plants are established, especially if they’re in their second year, you can harvest two or three times during the season. The flavour is best when fresh, but it is easily dried or frozen to store. s

sage at the beginning of July in herb garden 2020

drying:
You can hang sprigs of the leaves in a shady, well ventilated area. I do not. I’ve never really had a convenient spot to do that in the quantity of herbs I dry all summer long. I wash, shake off excess moisture and pat dry. I pinch off individual leaves and scatter loosely onto a clean tea towel – leave for up to a week, maybe more if the weather is humid. Every day when I think about it, I’ll fluff the leaves up with my hand to ensure they get enough air and are drying evenly.
If you have a dehydrator, you can do in a couple of hours what might take a week to do in the open air. Make sure they are COMPLETELY dry before storing in an airtight container.

freezing:
Apparently sage keeps its flavour well when frozen. I have never done this, but I can see the value for some people. Freeze loosely on a tray, then transfer into a labelled and dated freezer bag. Keep your bags handy in the fridge freezer in the kitchen so they don’t get lost in the bigger freezer.

Personally, I choose to dehydrate, mostly for convenience. I suppose how you choose to preserve it, depends on what you plan to use your sage for.

using in the kitchen:

sage tea steeping

*The most common use of sage in the North American kitchen is in traditional stuffing for roast meats like pork or turkey. Thanksgiving and Christmas dinner just wouldn’t be the same without that comforting smell of roasting turkey with sage in air. But! Don’t limit sage to only twice a year. Be experimental.
*Add the crumbled dried leaves to tomato sauce.
*During the summer, a sprig of fresh sage is a lovely, edible garnish on any dish.
*Fresh sage in a jug of chilled water, makes for a nice light, refreshing drink.
*Fresh or dried sage steeped in boiled water makes a nice infusion tea that is said to have have a calming effect.
*Fresh or dried sage (chopped or crumbled) creamed into butter and left to sit for a few hours, makes a nice lightly flavoured butter. Use the butter for fresh biscuits, to top mashed potatoes, or to fry eggs or omelette.

non culinary use

Sage is known as an “aromatic” herb which means simply that it has a noticeable fragrant smell. This aromatic quality makes it a good addition to potpourris.
Sage has astringent properties which tighten the skin. Dab a cold, strong sage infusion tea onto your face with a cotton swab. Keep it in the fridge.
Sage has expectorant properties, which can be helpful for throat and chest disorders, promoting a productive cough to clear phlegm from the airways. Drink as a strong infusion tea.

SAVORY – culinary

Summer Savory is an aromatic plant related to rosemary and thyme, native to North Africa, southeastern Europe, the Middle East and Asia. As with so many foods, it was introduced to North America with European settlers. Although a perennial in some parts of the world, it rarely makes it through the winter, so be prepared to rebuy next spring if you love it. It can grow up to 20 inches high and has a white to pale pinkish flower. The flavour is intense, but milder than the almost bitter, stronger taste of winter savory.

growing and harvesting:

Savory is easy to grow, but since I only want one plant, it’s not worth my time to plant indoors by seed, so I buy it from a local nursery – which is sufficient for our needs. Best place is a well drained, sunny spot. If you want several, you might want to plant by seed in the house by the beginning of March, but definitely its gotta go into the garden as a plant, not a seed. Once it gets established, you can pretty much leave it alone. Don’t worry, it knows what to do.

By mid summer, your Savory is ready to pick. I pick all the bigger stalks, leaving some smaller ones to mature for a later picking. Wash by swishing around in clean water, flick off the excise and place the herb onto a clean white kitchen towel to dry. Plan to leave it at least a week. When thoroughly dry, pull the leaves from the stock (the tines of a fork are handy for this) and after removing any small stick-branches, place into a clean dry canning jar, storing out of the light.

using in the kitchen:

Savory resembles the flavour profile of sage and thyme, and smells like good down-home cooking to me. I think of roast turkey or chicken and stuffing, and gravy, so of course its means Thanksgiving Dinner to me. But good ol’ down-home cooking means a lot of other things too, like hearty bean soup.

who doesn’t like a nice hot thick bowl of ‘hearty’, on a cold fall or winter day?
Savory White Bean Soup
1 lb white beans, sorted and rinsed
12 cups vegetable stock or chicken stock
2 bay leaves
1/4 oil (I prefer olive oil)
2 cloves garlic minced
2 lg onions chopped
3-4 lg carrots peeled and chopped
6+ stalks celery chopped
1 can tomatoes – whole (sliced), diced, stewed, your choice
1 teaspoon – 1 Tablespoon (how strong do you like it?) SAVORY, crushed leaves but not powdered please
2 teaspoon salt + 1 teaspoon pepper (if you’re using prepared bouillon for stock, its likely already salted. Taste test and adjust accordingly later.)
Rinse beans, then cover them with stock water. No salt at this point. Add bay leaves and bring to a boil. Turn the heat down to a slow rolling boil and simmer steadily covered for about 2 hours (till beans are beginning to tender). At this point, in separate pot saute in oil – garlic, onions over medium high flame, for one or two minutes till aromatic. Add remaining vegetables and saute 3-4 minutes max, then pour the vegetable mixture into the pot of beans.
Add the can of tomatoes , savory and salt and pepper (tasting to adjust seasoning)
Simmer slowly for another 30 minutes or so till all are tender and starting to thicken. Remove from heat and allow to sit for another 5 or 10 minutes before serving.
*optional: corn is wonderful in this end of summer meal. I use freeze dried. Add 2-3 cups.
Serve with nice crusty piece of whole wheat sour dough bread.

* the age of your beans will influence the length of time they need to be cook. Older beans need longer time. Keep this in mind earlier in the day so you don’t rush the soup if your beans are older.

non culinary use

With its intensity, Savory has long been used to treat a variety of ailments such as a gargle for a sore throat. It is also used to enhance appetite, as a remedy for stomach and digestive disorders, and to help alleviate symptoms of asthma and colic. Personally, I am only interested in this wonderfully flavourful herb for its culinary benefits, although I am intrigued about that gargle idea for a sore throat.

SORREL

A hardy perennial, reliable to come back every year, will thrive on little attention, and is among the first plants to provide fresh green leaves in the spring; by early to mid May you can be picking some nice tender leaves as one of the first garden offerings. I don’t know about you, but that is a winning combination in my books. Lemony taste with a strong flavour, can be lightly steamed, sautéed or added to salads, it’s a versatile leafy green that can be enjoyed both raw and cooked.  Because of it’s strong flavour, I personally wouldn’t choose to have it AS a salad, but I sure like it IN a salad to add some nice flavourful bites with it’s lemony tang.

growing and harvesting

Sorrel grows best in full sun, but will tolerate a little shade, and will even last longer into the summer before seeding. It has a very deep and persistent tap root which helps it do well with little attention, but don’t ignore it completely. Sorrel should have a minimum of one inch of water a week, so if it doesn’t rain regularly, give it a drink now and again. I’ve read that sorrel can be invasive, but I’ve had a single sorrel plant for years and have never had it make any attempt to take over. It can be divided into two plants, which I intend to do this spring, as I am ready for more of it.

It is a substantial plant, growing up to 18 inches high, so the leaves are nice and big too. To harvest, simply pinch off young leaves from the base. More tender when its young during the spring, so don’t waste those early weeks by forgetting about it. Careful, rabbits love sorrel too.

using in the kitchen

Lemons and limes aren’t the only foods that have a tart, acidic flavour, sorrel has got a lotta PUNCH. Surprising for a green leafy vegetable, as other leafy greens like spinach, lambs quarters, orach and swiss chard have a comparatively mild flavour. I’ve heard it described as lemonade in a leaf and I think that’s a perfect description. Long before citrus fruits ever reached Europe, people used it to add a sour flavour to the dishes. It is very popular in many parts of the world, but quite under used in North America, probably because we haven’t figured out what to do with it. Be adventurous. Be part of the movement that is helping bring this forgotten herb back to the table.

Sorrel leaves are tender in spring, but as the season wears on, they get a tougher. Don’t let that dissuade you though, they can still be used in soups and stew, and even pureed to add their wonderfully distinctive flavour. In Nigeria, it is steamed and added to onion and tomatoes with salt and pepper. In India, it is used in soups and curries with yellow lentils and peanuts. In eastern Europe, it is used to make sour soups, and stewed with vegetables. In Greece it is used with other greens in spanakopita. In the middle east, it is simmered lightly and served cold, marinated in olive oil, or stewed with onions, potatoes, garlic and bulgur wheat or lentils. It is even dried and then used as a dried herb in the winter, to flavour dishes. You really can’t expect it to be more versatile than that!

Great in a mixed green salad or as a garnish. All sorrel is incredibly sour with a lemony flavour, and you probably won’t want to eat straight in large quantities. Just as well, because just like spinach, beets and their greens, swiss chard, rhubarb, and other vitamin rich foods, it contains high amounts of oxalic acid. This doesn’t mean don’t eat it, it means that moderation is the key. Studies show that lemon juice has a neutralizing effect on oxalic acid, so sprinkle some more on your salad.

Use sauteed sorrel in omelette, fritatta, or as a pizza topping with pizzaz!
Whether you decide to use it fresh and finely chopped, sprinkling over top, or lightly steamed, strained and then chopped and sprinkled over top – it up to you. Both would be excellent.

If you’ve never tried sorrel, TRY IT! It’s potent astringency and a lemony, citrus-like flavour will take you by surprise.

My Recommended Tips for Incorporating Sorrel in ways that your kids will love it!

Use it sparingly, especially at first while you’re getting used to it. It has a strong flavour and over doing it in the beginning may be too much.  

freshly picked from the community garden herb plot, the sorrel is already going to seed, and its only the first week of June! No worries, I cut a couple of handfuls off at the ground, removed the leaves, (cutting up the stocks to add to the compost), and then washed and drained them to use tomorrow.

Remove leaves from stems and wash thoroughly to remove any garden dirt or grit. Drain well and remove surface moisture, wrap in a clean tea towel. Pack into a plastic bag until you are ready to use it.

Discard the stems into the compost as they’re not flavourful.

Cook gently! As with all tender greens, Sorrel cooks down quickly, so there is no need for excessive heat or time. Don’t cook the guts out of it. be careful not to overcook it, especially in soups.  I always add my greens to the soup as the very last step. Just before serving, throw in the clean and lightly chopped sorrel leave.

* Adding cream, sour cream or yogurt, tempers the acidity to smooth out the flavour.  

Using it Raw:

Salads: Add raw sorrel leaves to mixed green salads for a bright, citrusy bite.  Coarsely chop or tear into pieces to toss into your salad greens, bumping up the acidic quality of your salad and lifting the intensity of flavour to new heights. Emphasis on “intensity of flavour”. Gone are the boring, tasteless greens that need a dressing to give them taste. When making a dressing just use less vinegar or lemon juice.

Pesto:  I love all kinds of pesto, and usually add lemon juice when making it. Not necessary with Sorrel. Just proceed as for any other pesto recipe, and prepare to be wowed. Pesto Recipes to check out and adjust for sorrel – links included:
basil pesto
oregano pesto
nasturtium pesto
radish green pesto
I hope you’ll go check them out, and make up a batch or two in the summer when all is fresh and green.

Dip:  Finely chop sorrel and add it to mixture of yogurt (or sour cream) and mayonnaise for a refreshing dip or sandwich spread. 

Sandwiches: Use young sorrel leaves as a leafy green on sandwiches. 

Using it Cooked:

Soups: Sorrel is a classic ingredient in soups, often paired with leeks, potatoes, carrots and other mild vegetables.  Use it in a mild chicken and rice soup with carrots and peppers; use it instead of kale in ITALIAN WEDDING SOUP; as a green in a traditional potato chowder.
You be YOU!

Other dishes: Sorrel can be used in casseroles, stir-fries, and other dishes where its flavor and texture can be a good addition. 

Sauces: Sorrel can be cooked down to make a sauce, often paired with butter, cream, or yogurt. 

Palek Paneer: This traditional Indian dish generally uses mild flavoured spinach with several Indian spices. It’s a favourite of mine, but I haven’t used sorrel in instead. I am very intrigued and will incorporate it as soon as possible in the next time I make this dish.

Fish dishes: Sorrel sauce is a popular accompaniment to baked or poached fish, particularly – salmon.  Lemon flavour without the lemon.

Omelets: Sorrel can be incorporated into omelets for a lemony twist. 

recipe for Sorrel Sauce
2/3 cup heavy cream
1/4 cup butter
about a dozen sorrel leaves, stems removed
1/4 cup chicken or vegetable stock – maybe
salt and pepper to taste
Slice the sorrel leaves very thin. That is easier to do when you roll them up tightly. Bring the cream to a simmer in small pot – this will prevent it from curdling when you add the sorrel later. Not kidding. In another pot, melt the butter and add sorrel to saute and cook down. The colour will loose its brilliance. Stir in the hot cream, stirring while you bring it back to a slow simmer. If the sauce is thicker than you prefer, thin it out with the stock, adding slowly and stirring till you get it to the consistency you prefer.
Salt and pepper to taste.
Pour over fish, chicken breast or even roasted potatoes.

STEVIA

A super sweet, natural substitute for sugar that is calorie free. Almost too good to be true, but it really is. Once you’ve grown stevia and are used to having it around, you’ll grow it every year.
Native to the tropics of Central America, the stevia plant produces leaves packed with super-sweet compounds that remain stable even after the leaves have been dried. So that means you’ve got your FRESH natural sweetener available in your garden for snipping all summer long, and dried natural sweetener available in your kitchen for the rest of the year. Its been a common sweetener among the indigenous of Meso America for centuries, and is gaining in popularity in North America recently too. Popular and important to diabetics, dieters, those who want to reduce their sugar intake, and those who simply want to eat healthier. It is especially well-suited for sweetening drinks, salad dressings and yogurt.

There are many derivatives of stevia that are commonly used in in our food industry, but I am only talking about the plant that we grow in our gardens. That is the only way I use it.

growing and harvesting:

Stevia in the herb garden

Growing stevia is easy in well-drained garden beds or large containers, and the leaves can be dried for winter use like any other herb. It grows best in warm conditions similar to that of its native Central America, and in the ideal climate with grow up to 2 feet high. In the Edmonton area where I live, you can expect full gown plants to grow nearly that high. I grow 1-3 stevia plants in my herb garden. They need full sun.

Stevia can be started from seed indoors around February to March, but germination is spotty at best and they’re pretty picky in their infancy. As I only ever intend to buy 2 or 3 plants, it’s simply easier pick them up at a local greenhouse. And frankly a couple of plants will give me more stevia than I will use all year long. Choose a well-drained site in full sun for your plants, and set them out after all risk of frost. Don’t worry, once they’re big enough for the garden, they become very low maintenance.

when?
You can pick leaves anytime during the year as you need to use it, but for a bigger picking, watch for when it looks like your stevia is starting to bloom. You want to harvest before the buds flower. If you’re away and miss it by a few days, remove the flower heads and go ahead and harvest. If you let it go to seed, the leaves will grow smaller and energy will go to the production of seed.

With my garden clippers, I cut the stalk off, leaving 3-4 inches at the bottom, MAKING SURE THERE ARE AT LEAST A FEW LEAVES at the bottom. This is so that the plant has a chance to regrow if the season and weather allows, hoping of course that I’ll have a chance for one more smaller picking at the end of August. Make sure you pick it before the first frost. If it freezes, you’ll lose it.

Rinse leaves, lay out onto a clean kitchen towel to air dry for a few days. Might take up to a week depending on quantity and humidity in the air. Every day fluff it up to ensure good air flow.

using in the kitchen

Throughout the summer, I will use stevia for the odd sweetening job straight from the garden. The amount required to sufficiently sweeten a cup of tea for example, is surprisingly small. Like 1/4 of a leaf (if its not too big). Seriously. Taste test stevia to become familiar with it. It is shockingly sweet. If I am making a morning smoothie with sour cherries or tart raspberries, I might want to sweeten it up a little. Instead of sugar, honey is of course a lovely sweetener. But try something new. A single leaf of stevia from the garden is probably enough to take the sour edge out of your smoothie. Taste test using one leaf at a time. Too many will make it sickeningly sweet, and you’ll be surprised at how few it takes.

Remember to use dried stevia sugar in small proportions, as it is nearly 30 times sweeter than cane sugar. Roughly, one teaspoonful of dried leaves powder is equivalent to one cup of sugar; therefore, use it in small quantities adjusting the amount to achieve your desired levels of sweetness. Stevia ‘sugar’ is processed into a white crystalline powder, approximately 300 times sweeter than regular cane sugar.

recipe for Stevia Syrup:
add a cup of hot water to 1/4 cup of fresh, finely crushed leaves. Allow to settle down for 24 hours, strain, then refrigerate.

Use stevia to sweeten tea or lemonade. Can be added in jam, yogurt, ice creams & sherbets, smoothies, desserts etc.

ST JOHNS WORT – insomnia and depression

St. John’s wort – know as a mood elevator – is most commonly used for conditions that sometimes go along with depression such as anxiety, tiredness, loss of appetite and trouble sleeping. There is strong evidence that it is effective for mild to moderate depression. Also used for symptoms of PMS and menopause, attention deficit-hyperactivity disorder ADHD, obsessive-compulsive disorder OCD, and seasonal affective disorder SAD.  

SHOULD NEVER BE USED IN CONJUNCTION WITH DRUGS FOR THE SAME PURPOSE, as there is a high possibility of poor interaction. Can be purchased from a health food store in capsule or tincture. From the home garden, most often used as an infusion tea.

Odd name I know. The word “wort” is an Old English suffix for “plant” and is frequently found in other common plant names. In this case it means – St. John’s Plant, and refers to the fact that the flowers were traditionally harvested on the Catholic Saint’s Day honoring the nativity of St. John the Baptist, June 24. After harvesting the flowers, the believer would hang them over a painting or statue of St. John in the home, which was thought to protect the believer from evil spirits.

growing and harvesting

Native to Europe, St John’s Wort was so valued for for its medicinal qualities, that it was introduced to North America when Europeans first began colonizing here. It escaped cultivation in the United States and spread throughout and into Canada, and is now listed as a noxious weed in many states and provinces.

It is a short woody, perineal shrub that grows about 2-3 feet tall, and has fragrant yellow flowers from mid to late summer. It grows well in all kinds of soil: sand, clay, rocky or loam, and tolerates acidic to slightly alkaline pH conditions. It adapts to both moist and dry soil, and even tolerates occasional flooding or drought. It spreads easily through roots and seeds, and is considered invasive.

St John’s wort in glass jar for storage. Keep sealed in dark cupboard.

It is loved by bees and other pollinators, and is still valued as a medicinal plant. To harvest, pick the fresh flowers and buds, or a quicker method is to simply cut the top 2 – 3 inches of the plant when it is full bloom in late June/early July. I swish in water to rinse any dust off, spin in my salad spinner to remove excess moisture, and then lay loosely on a clean tea towel on my table. Fluff up with my fingers a few times a day to ensure even drying, and let it sit for at least a week. More time if weather is humid. When completely dry, put into an airtight container, label and keep in a dark cupboard.

using

The leaves and flowers of this plant are all edible and can be used in garnishes and in salads. It is most commonly brewed to make an infusion tea. When consumed in large doses it can cause skin reactions to sun exposure.

St John’s Wort is credited with so many of curative properties, some of them based heavily on superstition, that it is hard to know what is accurate. I lean toward believing the mood elevation properties, simply because they seem to have a little more science behind them. I grow it for this reason, and harvest the flowers for this reason. There are some toxic attributes too however, when taken to excess, so as in all things, moderation is the key. If I was going to use it medicinally, I’d want to do considerably more research than what you have available here.

I’d love to hear your thoughts on any of these valuable garden herbs.

Warmly,

Cindy Suelzle

Lemons anyone? Good for more than just lemonade.

Lemons are one of the most popular fruits in the world, and probably the most versatile.  I can’t think of too many other fruits or vegetables you eat, then wash your windows with. They are highly acidic and are used in every part of a meal: main dish, sides, salads and desserts. They are used to tenderize meat and in salad dressings. They are used in baking, drinks, sauces and dips.  My favourite yogurt flavour is lemon.
They bring a fresh, delightful ZIP to everything they’re added to.

But did you know they’re also your best friend when it comes to cleaning your house? 

They are clean and green, non toxic and relatively common.  They cut grease and leave a pleasant smell behind, instead of the heavy antiseptic smell of normal household cleaners. 

Recently I’ve been on a lemon-kick. I asked a lot of people what they use lemons for, and was surprised to find that very few people actually USE them outside of cooking or baking, and truth be told, not even a whole lot of that.   Unfortunate. I suppose perhaps, most of us just don’t know their tremendous value. I readily admit, that lemons can be pretty pricey up here (in Alberta) for most of the year, but I thought: “if I had a house in Arizona and had a lemon tree, I’d probably use lemons for everything.” So I phoned my friend in Arizona who has a lemon tree, . . . . . Guess what? She doesn’t use them for anything more than I do LOL.  Except that she puts them down her garburator because they help clean it out, and make it smell better. I don’t have a garburator anyway.

On the internet, I came across a TON of sensational claims for lemons!  Apparently, they can do everything short of drive your kid to school. Who knew? It was tricky sifting through the ridiculous claims to extract reasonable tidbits of truth because there were SO MANY claims.  It seems every thing on the internet has to be miraculous to get any attention.  So I made it a matter of personal study. I bought some lemons and did a lot of experimenting, and I learned a lot of things.

The truth is – lemons are pretty amazing in the house and they don’t need us to exaggerate their usefulness, or try to make them look better than they really are. Admittedly, a lot of what they do well, vinegar also does – which is considerably cheaper in my world.  Nevertheless, I think its worth taking note of some things, and I certainly think we should use them more than we do.

So I’ll tell you what I learned about lemons. 
Fresh – Dehydrated – Powder concentrate – Oil

in the kitchen: cooking and baking

Add them to baking: breads, muffins and cakes; as well as lemon soups and other dishes. Who doesn’t like lemon poppy seed muffins? Lemon blueberry muffins? Lemon coffee cake, lemon sugar cookies, lemon cheese cake . . . . the list is endless of things lemons made better.

Lemon marinade for shrimp
Dan uses lemon to marinade shrimp (that he grills on the BBQ). Very delicious. Lime would have been equally delicious.
– drizzle lemon juice over fish or chicken while grilling
Lemon Chicken* See recipe below
Ricotta Cheese* See recipe below
Not kidding. Use lemon juice to make homemade Ricotta Cheese*. Oh my goodness, so easy. You’ll never buy ricotta again.
Lemon Sauce* See recipe below
Use to pour over fresh gingerbread and as a lemon drizzle for cookies, muffins or coffee cakes.

lemons and limes in the dehydrator fall of 2020

Dehydrated
I dehydrate lemons and limes when I have excess.  A couple of years ago, I came across a great deal, and dehydrated about 10-15 pounds. Sliced and laid single layer in the dehydrator, they took about 24 hours when the dehydrator was full. They’re Beautiful, and very handy to use the rest of the year.

dehydrated lemons in water

One thing I love about having them on hand is lemon water. I use them dried to flavour cold drinking water all year long, when ‘fresh’ lemons are not readily available. I keep it in the fridge and serve it daily. I top up the water whenever we drink it down, keeping it going for a couple of weeks at least. When the lemons seem to have lost most of their flavour, I dump them into the dish washing water* (see below) and get a few new slices for the next jug of water.

Lemons as a natural alternative for cleaning 

in the KITCHEN

CLEANING PRODUCE
claim:
fruits and vegetables from the store often have pesticides and other contaminants on them.  The disinfectant quality of lemons make them a natural to remove toxins.  Use 1/4 cup in 2 cups water.  Soak your other and vegetables fruits for five minutes in the lemon water, then rinse and dry.  Store as usual.
my experience:
seem to be fine

PREVENTING OXIDATION IN FRUIT AND VEGETABLES
claim: Fruits such as apples, pears, peaches and avocados begin to ‘brown’ when exposed to air. This is called oxidizing. Squeezing lemon juice over top with prevent of at least slow this natural process down.
my experience: ABSOLUTELY!! Who hasn’t used this age old kitchen hack?

CANNING ACID FRUITS AND TOMATOES
claim: Adding a tablespoon of lemon juice to a quart of tomatoes, increases the acid level needed for safe hot water processing.
my experience: ABSOLUTELY! Anything that is preserved in boiling water bath, MUST have a high acid content. The heat of boiling water is sufficient to kill off the micro organisms that cause spoilage, mold and fermentation, but not enough to kill botulism spores. Botulism can only develop in low acid, oxygen free conditions, which is why acid fruits like peaches and tomatoes are canned in hot water baths, but low acid foods like most vegetables, legumes and meat – must be canned at the much higher heat that pressure canning can offer. Acid is critical because it inhibits the germination of botulism spores. Adding a tablespoon of lemon juice (or vinegar) will give you an added level of safety to already acid rich fruits. I have ALWAYS added that little bit extra acid when home canning with the hot water bath method.

REPEL BUGS
claim:

to repel bugs
my experience:
I put some lemon wedges in a couple of house plants that were problematic for me with little types of fruit flies. Disappointingly, after several weeks, I didn’t find it helped at all. No effect worth reporting.

CUTTING BOARDS
claim:
Because of their antibacterial and antiseptic qualities, lemons are valuable for cleaning cutting boards, pizza stones and that sorta thing.
my experience:
I was happy with the results. It looked cleaner, felt cleaner, smelled cleaner, all of which gave me confidence that it actually did ‘good’.

REMOVING ODOURS 
claim:
will remove unpleasant odours on surfaces like cutting boards and garlicky fingers.
my experience:
I rubbed half a lemon cut side down over the cleaned cutting board. Rubbed lemon juice or lemon oil onto my finger tips after peeling and mincing garlic. I was happy with the results. Smell gone from my hands completely. The board – pretty good, although I have used it to chop garlic and onions for years, so I don’t think anything is gonna bring it back to newness.

lemon oil

REMOVING ‘STICKY’ GLUE
claim:
will take away the stickiness on surfaces left from labels etc
my experience:
For label residue on book covers or other surfaces, just drop a couple drops lemon oil and rub gently around with your finger tips. Wipe away with clean cotton swab or tissue. Works GREAT!

NATURAL AIR FRESHENER
claim:

the oil in the skin of a lemon or lime is where the fresh scent is. Simmer uncovered gently in water for an hour on the back of the stove.
my experience:
pretty good

CLEANING STAINLESS STEEL, COUNTER TOPS, STOVE TOPS
claim:

to clean all that stuff
my experience:
dip half a lemon cut side down into coarse salt, and rub onto stove tops, counter tops, and stainless steel pots. Rinse and dry with dry cloth. I was happy with it.

okay, this is orange vinegar, admittedly not lemon. But don’t discount the value of other citrus fruits. Made with orange peel steeped in white vinegar for a couple of weeks. I dilute in the spray bottle slightly with water, and I use it as an all purpose cleaner. Cuts grease like nobody’s business.

SINKS, TAPS AND FAUCETTS
claim:
to clean, degrease and shine those things
my experience:
I used a lemon half with course salt or baking soda to scrub my sink and taps etc, in the kitchen and bathroom. I liked it.

CLEAN MICROWAVE
claim:
half a lemon in bowl of water in the microwave – power on for 5 minutes then let it sit for 5 more minutes to let the steam loosen the baked on nastiness, then simply wipe out with moist micro fiber cloth.
my experience:
I tried it and it seemed to work great, but I don’t have and never have had a really dirty microwave. I have talked to several people who’ve used lemons to clean them and they swear by it.

REMOVE HARD WATER SCALE AND DEPOSITS
claim:

boil water with a half lemon in your kettle for a five minutes then let it cool. Wipe out with a dry cloth to remove hard water deposits. Scrub with half a lemon if the stain is pretty set it. Soak your faucet head in lemon juice or vinegar overnight. Wipe down or scrub with with a brush. Rinse and wipe.
my experience:
I did exactly that and IT ROCKS!

CUTS GREASE
claim:

throw a leftover half lemon into your dish washer for a cycle.
my experience:
I don’t have a dish washer so I throw it in my sink of hot soapy water when washing dishes. I love how squeaky clean it makes every thing. Shinier metal pots, clearer glasses, streak free counters.

GLASS CLEANER: 3 T lemon juice + 1 cup of water in spray bottle. Spray onto windows and wipe with dry micro fibre cloth.

GENERAL CLEANSER: fill clean jar with clean lemon peel. Top up with white vinegar and let sit for a minimum of two weeks. Strain and put into glass spray bottle. See the image above for orange vinegar. Another excellent all purpose cleaner.

DEGREASER: 3 T lemon juice + 2 cups water + 1 T baking soda + 1 t dish soap. Spray onto surface, let sit for a few minutes, then wipe off with clean damp cloth.

LAUNDRY

claim: that they make your whites even whiter – no bleach required
my experience: Yes they do. Slice up a few lemons and add to a pot of water. How many? One, two, three: depends how big your pot is and how much water you’re using. Bring the water to a boil. Turn off heat, add your white tea towels, napkins, pillow cases or whatever, into the water and let them soak for an hour or so. Remove, wring out by hand, and launder them as you usually would – with other whites of course.
Will lemons replace bleach in getting out stains? I doubt it. The citric acid breaks down stains that make whites seem dingy after a while, and it IS a gentler alternative to bleach. But for the bad stains, bleach is still here to stay.
On a side note however, I find that sunshine also does a great job of keeping whites white. I use a clothesline in the warm months, and in the hot sun of summer, I’ll sometimes leave my whites on the line for two full sunny days. Back when I was using cloth diapers (yes, I used cloth diapers for all five kids), I found that by the end of winter, my diapers were getting a little dingy. Over the course of summer, they became noticeably brighter and whiter.
Clean whites soaked in strong lemon water and then hung on a sunny clothesline is a total winner!

BATHROOM

– Use half a lemon with baking soda on all your taps and faucets, scrub then rinse and wipe off with clean dry cloth
– plunge the water out of the toilet, then use half a lemon with baking soda to scrub the inside bowl. Dispose of lemon immediately.
– clean anything in your bathroom the same way – then rinse and wipe.
– soak your toothbrush in lemon juice and baking soda for 30 minutes then rinse.
– do the same thing with your hair brush.

SKIN CARE

Lemon juice as a :
– natural toner and cleanser, 
– natural astringent, lemons will help decrease inflammation
– decrease oil that may contribute to acne and other blemishes
– breaks down dead skin cells for better removal, which also helps with acne
– Vitamin C is a natural antioxidant that helps reduce skin damage and premature aging
– mixing with aloe vera may help with any irritation caused by the acidity of it
– lemon oil dissolves sticky wax residue when waxing your skin

Lemons are *ANTIBACTERIAL, * ANTIMICROBIAL, * ANTISEPTIC. 
The enzymes help with digestion, the rich vitamin content helps with our immune and respiratory systems, and “we” have discovered they help with kidney stones. 

our experience:
My Dan is a professional kidney stone maker.  He can produce them like nobody’s business, but if you’ve ever had a kidney stone, you know this isn’t a good thing.  He’s done everything and taken everything, that we’ve ever heard of or read about, that even had the slightest chance of helping. We set all prejudice aside in the name of being open minded.   So hard to say if most of those things helped or not, because after a while there was always another kidney stone.  Until over 10 years ago. . . . We heard that the natural acid in lemon juice prevents the formation of kidney stones – something about dissolving the calcium they’re made of.  I don’t pretend to be an expert, or even to understand the science behind it, but Dan started drinking lemon juice in his water faithfully every day.  Its a pretty strong sour taste – but he acquired a taste for it. And for more than a decade, no more kidney stones!  Yup, you could say we’re converted.  Longest stretch in his adult life without kidney stones. Kinda hard to turn your back on that little wonderful fact. However, that much lemon juice in your water everyday is not without its underside. It is absolutely brutal on the enamel of your teeth! Dan hardly has any enamel left, and he’s in the process of getting lots of crowns.  Truthfully, we cannot blame lemon juice entirely for all of that.  I suspect a life time of drinking coke contributed, but the lemon juice sure didn’t help.  Would we recommend it? Yes! Would we do it again? You betcha. But we’d pay more attention to the problem of acid on the teeth.
The Moral to that story? Lemon juice is good for you. But rinse your mouth out after drinking it.   

PRICE

Winter is CITRUS SEASON. You should find prices will be best between November – April, especially December – February.

My TAKEAWAY from all my lemon experimenting –
Would I buy lemons just for cleaning? Living in Edmonton, probably not.  Unless I got them for a pretty good price.  I use vinegar for much of the same things.  If I lived in Arizona however, I’d use lemons a LOT.  For now, it would depend on price and availability. But – I’d sure second-use every piece of lemon that was in my house before I threw it into the compost.
I use lemons for everything I mention above and I REALLY like the results.  I like the squeaky clean (literally ‘squeaks’) feel, and the scent. I like that it cuts through grease and stickiness.

words to define:
*ANTIBACTERIAL – prevents the growth of, or outright destroys bacteria.
*ANTIMICROBIAL – resists or destroys pathogenic micro organisms.
*ANTISEPTIC – destroys and prevents the development of microbes.
*PATHOGENIC – means capable of producing disease MICROBE – germs

Recipes:

*LEMON CHICKEN: Dan’s version (4 servings):
3 or 4 pounds chicken pieces – evenly sized
zest from 2 lemons + juice from one, slice the other lemon to use as garnish
2 cloves garlic crushed
fresh garden herbs in the summer: thyme and rosemary chopped OR
dried garden herbs in the winter: thyme and rosemary (crumbled)
1 teaspoon each of salt and pepper
2 Tablespoons melted butter
Marinade the chicken in lemon juice and seasonings for about two hours. After marinading, place chicken in baking dish (reserving the lemon juice mixture in the fridge), brush liberally all over with butter and bake at 425 for about 40 minutes. About 20 minutes into cooking, remove from oven and baste the chicken with ALL of the reserved marinade. Be generous. Return to oven and continue to bake till chicken is cooked through. Chicken is cooked when the juice runs clear and the skin is brown and crispy. Remove from oven. Don’t over cook.
Cover with tin foil and let rest for 15 minutes.
Serve with remaining juices in a saucer on the side.
* Not including marinade time, expect this dish to take about an hour. While its baking, prepare some rice or noodles to serve it with.

Thrive Life lemonade powder, while in a base of non GMO cane sugar, is for all intents and purposes, unsweetened. Strong natural lemon flavour from lemon oil, used to make lemonade of course (add your own sweetener), and in place of lemon juice in most recipes.

LEMON CHICKEN: Cindy’s version (4 servings):
I don’t cook meat, so I use freeze dried chicken pieces.
Using the same recipe as above, I would take the larger pieces of FD seasoned chicken strips (about 2 1/2 cups), and refresh / marinade them in the same mixture as above, for about twenty minutes to ensure all the wonderfulness of the lemon was absorbed fully.

In a hot skillet, I would saute Freeze Dried sliced onions, (just a minute or two until aromatic) in the melted butter, then add the seasoned chicken pieces and the remaining marinade liquid. I would probably add some FD red and green peppers because I could, and maybe some FD broccoli too. Maybe even some FD asparagus at the very end. Depending on the additional vegetables I ‘might’ add, its possible I might have to add a bit more water if necessary. Not too much. 1/2 cup to 1 cup (?)
When all is heated thoroughly, remove from heat and let it sit covered for 5 minutes.
* Not including marinade time, expect this version of the dish to take less than 15 minutes. You better have your side dishes ready.
Serve over rice or noodles or mashed potatoes – exactly the same as Dan’s recipe above.

*Lemon Sauce
1 cup white sugar
1 tablespoon white flour
1/4 cup butter
1 cup boiling water
Stir together over low heat till sugar is dissolved and sauce is beginning to thicken.
Add juice of 1 lemon (or 1 tablespoon of THRIVE lemonade powder). Stir till incorporated. Add a little more water if necessary. Pour over Ginger Cake, Christmas pudding, English trifle, or wherever you want it.
see the recipe for Ginger Cake 1

* Homemade Ricotta Cheese
What is RICOTTA CHEESE? Italian ricotta is a fresh, soft, white cheese made whole milk It is heated near a boil, which causes it to coagulate and form a soft cheese. Like paneer, and cottage cheese, and other fresh cheeses, ricotta can be heated without melting. This makes it perfect for filled pastas like ravioli, and baked good like cheesecake.

2 litres WHOLE milk
1 teaspoon of salt – optional
1/3 cup fresh lemon juice (or 1 T Thrive Life Lemonade)
large pot, wooden spoon or silicone spatula, thermometer, something to keep the thermometer off the bottom of the pan, colander and some cheese cloth to strain the cheese, large bowl to strain into

Pour milk into a large pot and begin heating over medium low heat. Slowly bring to 180 degrees Fahrenheit. Expect it to take up to 30 minutes, stir frequently to prevent scorching on the bottom. Increase the heat and cook, watching closely until the surface begins to lightly bubble, but doe NOT boil. Keep a watchful eye on it, stirring regularly. This should be approx 200 degrees F (up or down a few degrees). Add lemon juice (or lemon powder), stir to incorporate. You will see the milk immediately begin to curdle.

Remove from heat and let the pot sit for 15 minutes. Line a colander with cheese cloth, and place over large enough bowl to catch the whey. Spoon the curds from pot to cloth lined colander, and let it strain for half an hour. When cheese is cooled squeeze gently to form ball. Use immediately, or store in fridge up to 3 or 4 days.

Have fun using your lemons!

Warmly,

Cindy Suelzle


  1. recipe for Ginger Cake : https://backyardcityhomestead.com/2025/11/05/carrot-ginger-cake/ ↩︎